Get PSL Live streaming links for mobile and desktop users.
A new edition of Pakistan’s premier T20 competition, Pakistan Super League (PSL), begins this weekend. The seventh edition is poised to be the biggest yet. All the action from the PSL can be watched on various platforms in Pakistan and around the world. Various live streaming platforms and major TV channels have been used by the Pakistan Cricket Board to broadcast PSL 7. It will be broadcast around the world through several platforms, including live streaming on mobile devices, streaming on the web, and live broadcasts on TV.
PSL 2022 Mobile Streaming live:
PSL is streaming live on daraz app that is available on the play store as well as the apple store.
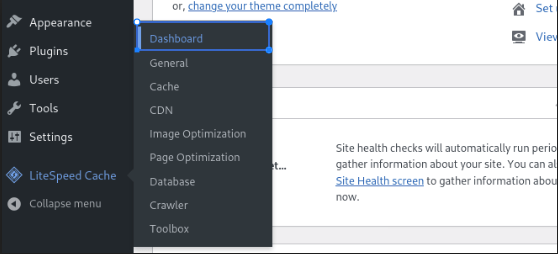
In some cases you need to exclude some pages from being cached from Litespeed. in this article, we are going to discuss How to exclude a specific page from LiteSpeed Cache?
Login to the Word Press dashboard, click on Lite Speed cache, and then click the Dashboard button.
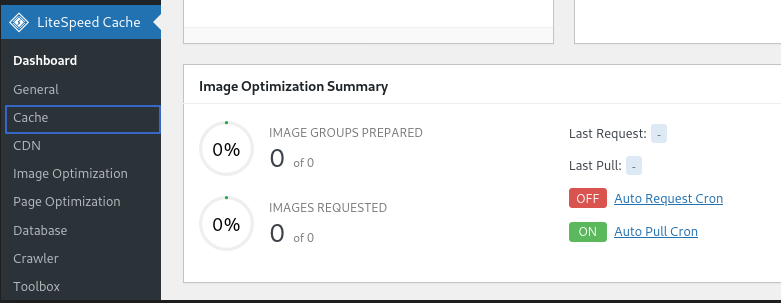
After clicking the Dashboard button select the cache option.
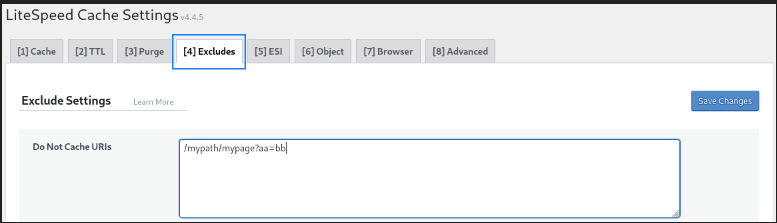
When you click on the cache, you will see LiteSpeed Cache Settings. Select the Excludes button and paste the URL for the page you want to exclude.
In this article, we are going to give some basic server-side errors details. We have added some basic errors that occur on the server-side and we also give some details about these server-side errors.
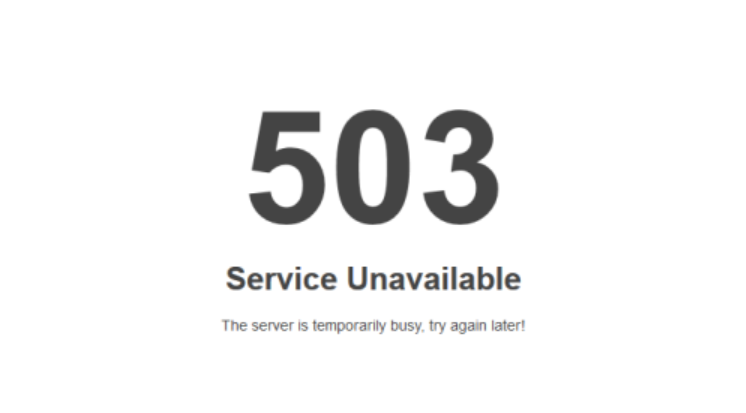
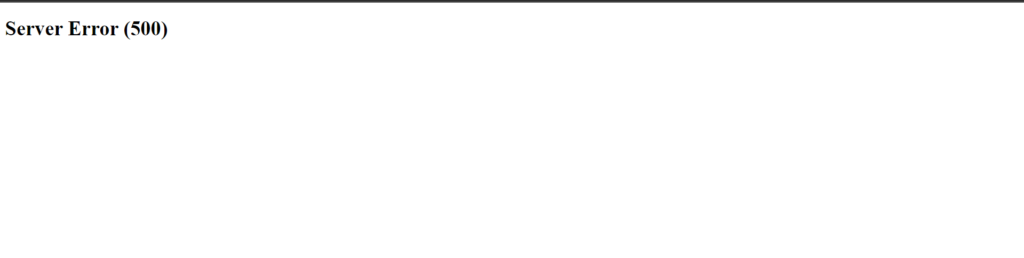
Common Types of Server Side Errors
503 – Service Unavailable:
The 503 error usually occurs when the back-end service is overloaded, under maintenance, or there are network-related problems. For more information, please contact the hosting provider.
500 Internal Server Error:
The 500 error means there’s a problem with your server, but the server doesn’t exactly know what. Please contact your web host immediately to resolve this issue.
502 Bad Gateway:
A 502 Bad Gateway server error indicates that the server while acting as a gateway or proxy, received an invalid response from the upstream server.
504 Gateway Timed Out:
server not receiving a response within the specified time. the error could be due to the below issue a. a network connection between servers is weak. b. The Back-end server that is fulfilling the request is too slow due to poor performance. c. timeout duration set is too short.
In this article, we are going to write how you can install CyberPanel, how you can access CyberPanel, what are the features of CyberPanel and all. This is a CyberPanel Complete Tutorial.
How to install CyberPanel:
First of all, we make the server and copy the server IP, and go to the terminal and write in terminal ssh root@ and paste the IP address.
Write CyberPanel installation command, CyberPanel installation command given below. (I) wget -O installer.sh https://cyberpanel.net/install.sh Then you run tp this script following the next command: (ii) chmod 755 installer.sh (iii) sh installer.sh Finally, you have to choose the right option to complete the installation: CyberPanel Installer
(1) Install CyberPanel.
(2) Exit. Please enter the number[1-2]:
(1) Install CyberPanel with OpenLiteSpeed.
(2) Install Cyberpanel with LiteSpeed Enterprise.
(3) Exit. Please enter the number[1-3]:
You can easily install CyberPanel on your system by selecting option 1.
(2) How to Access CyberPanel:
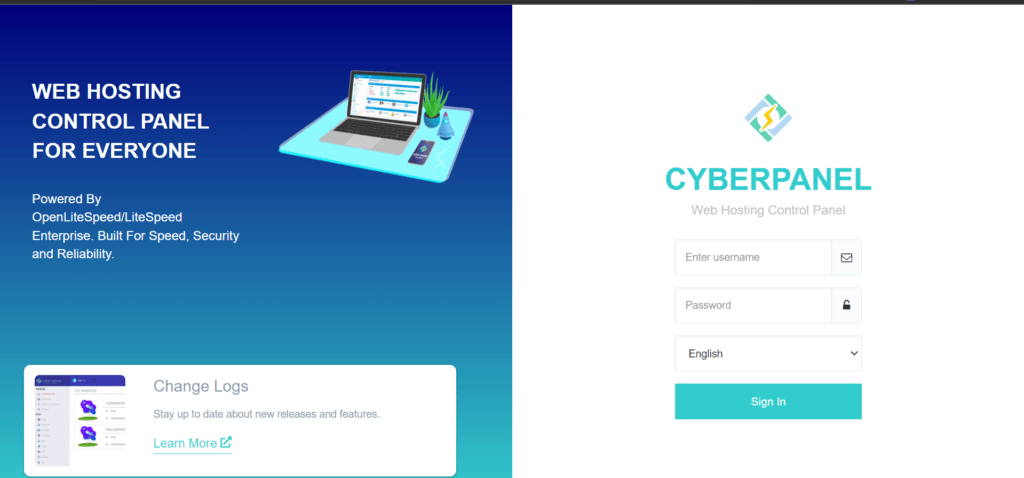
After you have successfully installed CyberPanel on your system. You can access your server’s IP address on port 8090.For example https://YourIPAddress:8090. Then show this image.
After showing this image you can log in with your user name and password:
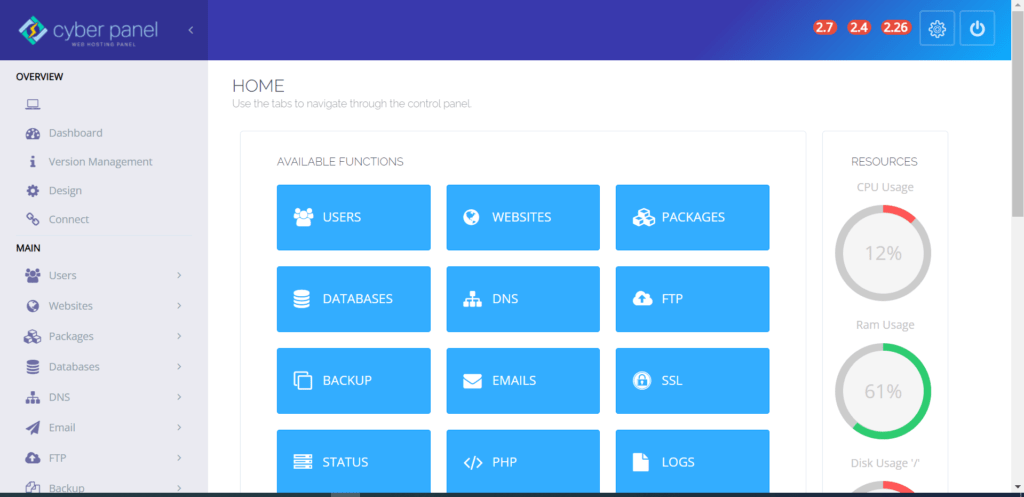
After Browsing shows the front dashboard of CyberPanel and shows this image.
How to use CyberPanel Complete Tutorial
After entering the dashboard, We discuss overview features.
there are five features in the overview menu:
we discuss one by one feature in an overview.
1. Ip Address
In the overview, the first item is the IP address of the server
Using this server IP address, we access the CyberPanel.
On this page, you can manage versions and or upgrade to the latest version of CyberPanel.
CyberPanel Complete Tutorial:
Current Version2.1 <–> Build2 = Latest Version2.1 <–> Latest Build2
4. Design
The fourth thing of the CyberPanel overview is design.
CUSTOM CSS
Any CSS added here will apply to the whole dashboard design.
5. Connect
The fifth thing of the CyberPanel overview is to connect.
The CaberPanel cloud is accessible through Connect.
2. Main:
A second thing that CyberPanel shows in the dashboard is the main:
The first thing is users in the main.
(I) View Profile.
ACCOUNT DETAILS:
List the account details for the currently logged-in user.
(ii) Create User:
The second thing of the CyberPanel Users is to Create user:
CREATE NEW USER
Create root, reseller, or normal users on this page.
(iii) List users:
The Third thing of the CyberPanel Users is to list users:
LIST USERS List Users that you own.
We can also make users create a user list.
(iv) Modify users:
The fourth thing of the CyberPanel Users is to modify users:
In this section, we discuss how to modify users in CyberPanel.
Modify existing user settings on this page.
(v) RESELLER CENTER:
The fifth thing of the CyberPanel Users is to reseller centers:
A reseller center allows us to change the owner of the center:
Change the owner of users and change websites limits.
Reseller center picture is given below in which see how to change owner and websites limit.
(vi)CREATE NEW ACL:
The sixth thing of the CyberPanel Users is to create a new acl:
Create a new Access Control definition, that specifies what CyberPanel users can do.
How to create a new ACL picture is given below:
(vii) Delete ACL:
The seventh thing of the CyberPanel Users is to create a delete ACL:
This page can be used to delete ACL.
Delete ACL method picture is given below:
(viii) MODIFY AN ACL:
The eighth thing of the CyberPanel Users is to create a modified ACL:
In this section, we learn how to modify ACL in CyberPanel.
On this page, you can modify an existing ACL.
(IX) API ACCESS:
The ninth thing of the CyberPanel Users to how to access the API of CyberPanel:
Allow/Remove API access for the account, this affects Cloud Platform Connection and Third-Party Modules.
In this section, we learn how to access APIs and enable and disable API.
(2) Websites:
The second thing is websites in the main.
(I) Create websites:
In this section we learn how to create a website in CyberPanel:
On this page, you can launch, list, modify and delete websites from your server.
(ii) LIST WEBSITES:
List of website section we can create a website and we can show already created a website lists;
(iii) CREATE CHILD DOMAIN:
In this section, we learn how to create a child domain and child domains are owned by a master website.
The child domain creation method picture is given below.
(iv) LIST CHILD DOMAINS:
On this page, you can launch, list, modify and delete child domains from your server.
in this section, we can open the file manager and manage our websites and open our website to the child domain name.
list of child domain if I click manage button we go this file picture is given below.
(v) MODIFY WEBSITE:
modify website option we can modify the website.
Packages define resources for your websites, you need to add packages before creating a website.
Modify website method image is given below:
(vi) SUSPEND/UNSUSPEND WEBSITE:
This page can be used to suspend/unsuspend websites.
(vii) DELETE WEBSITE:
This page can be used to delete a website, once deleted it can not be recovered.
(3) Packages:
The third thing is packages in the main section:
(I) Create packages:
Packages define resources for your websites, you need to add packages before creating a website.
First of all, we make package admin then we proceed next.
After assigning the package name then we ask how you need to Diskspace, Bandwidth, Email Accounts, Database, FTPs, Child Domain, and allow FQDN as child Action delete and edit.
(ii) LIST PACKAGES:
List Packages and delete or edit them.
Make packages and see how many things you should assign in packages.
(iii) Delete Packages:
Packages define resources for your websites, you need to add packages before creating a website.
The packages can be deleted if needed.
(iv) MODIFY PACKAGE:
We can modify the packages if we need to
(4) Databases:
The fourth thing is Databases in the main section:
(I) CREATE DATABASE:
Create a new database on this page.
The database creation picture is given below.
(ii) LIST DATABASES:
Listed Databases or their passwords can be changed or a password can be generated In CyberPanel generates.
Database lists are given below in this picture.
(iii) DELETE DATABASE:
Delete an existing database on this page.
(iv) Phpmyadmin:
PHPMyadmin gives you access to your database.
(5) DNS:
The Domain Name System (DNS) is the phonebook of the Internet. When users type domain names such as ‘google.com’ or ‘nytimes.com’ into web browsers, DNS is responsible for finding the correct IP address for those sites. Browsers then use those addresses to communicate with origin servers or CDN edge servers to access website information. This all happens thanks to DNS servers: machines dedicated to answering DNS queries.
(I) CREATE NAMESERVER:
You can use this page to setup nameservers using which people on the internet can resolve websites hosted on this server.
(ii) CONFIGURE DEFAULT NAMESERVER :
If any server is created by default we can configure the default server.
(iii) Create DNS Zone:
Zones begin at a domain and can extend down into subdomains so that multiple subdomains can be managed by one entity.
(iv) DELETE DNS ZONE :
we can delete the DNS zone. This page can be used to delete DNS Zone. Deleting the DNS zone will remove all its related records as well.
(v) ADD/MODIFY DNS ZONE:
On this page, you can add/modify DNS records for domains whose DNS zone is already created.
(vi) Cloudflare:
On this page, we can add Cloudflare records.
(6) Email:
The sixth thing is email in the main section;
(I) Create Email:
Select a website from the list, to create an email account.
(ii) LIST EMAIL ACCOUNTS:
List Emails Accounts. Change their passwords or delete them.
After creating emails, we can see the list of emails and we can delete or edit their password.
(iii) DELETE EMAIL ACCOUNT:
Select a website from the list, to delete an email account.
(iv) SETUP EMAIL FORWARDING:
This page helps you set up email forwarding for your emails.
On this page, we can forward the email to the destination or path.
(v) CHANGE EMAIL PASSWORD:
You can change the password by selecting an email address and adding the website to the list.
(vi) DKIM MANAGER:
This page can be used to generate and view DKIM keys for Domains.
on this page, we select a website and DKIM generates two keys one key is a public key and another key is the private key and then we can use these keys.
(vii) Web Email:
on this page, we can access web email.
(7) FTP:
FTP means “File Transfer Protocol” and refers to a group of rules that govern how computers transfer files from one system to another over the internet. Businesses use FTP to send files between computers, while websites use FTP for the uploading and downloading of files from their website’s servers.
(i) Create FTP account:
Select the website from the list, and its home directory will be set as the path to the FTP account.
(ii) DELETE FTP ACCOUNT:
Select the domain and delete its related FTP accounts.
(iii) LIST FTP ACCOUNTS:
List FTP Accounts or change their passwords.
A list of FTP account method pictures is given below.
(8) Backups:
(i) CREATE BACKUPS:
This page can be used to Backup your websites.
The Backup method picture is given below.
(ii) Restore BACKUPS:
This page can be used to restore your websites, Backup should be generated from the CyberPanel Backup generation tool, it will detect all Backups under /home/backup.
(iii) ADD AND DELETE DESTINATION:
On this page, you can set up your Backup destinations. (SFTP)
Set up Backup Destinations are two methods local and SFTP.
(iv) SCHEDULE BACKUP:
On this page, you can schedule Backups to localhost or remote server (If you have added one). You can create a new backup schedule. You can create a daily weekly and never frequency schedule.
(v) SET UP GOOGLE DRIVE BACKUPS:
On this page, you can set up and manage Google Drive Backups.
(vi) REMOTE BACKUPS:
This feature can import website(s) from a remote server.
(9) Incremental Backups:
An incremental backup scenario requires one full backup and then subsequent increments over a period of time. For example, if a full backup was performed on Monday, Tuesday’s incremental will take a snapshot and back up all new or changed files since Monday’s backup.
(I) CREATE/RESTORES BACKUPS:
This page can be used to create incremental backups for your websites.
(ii) ADD/REMOVE DESTINATION:
On this page, you can set up your Backup destinations. (SFTP and AWS)
ADD/remove destination method picture is given below.
(iii) SCHEDULE BACKUP:
On this page, you can schedule Backups to localhost or remote server (If you have added one).
(iv) RESTORE REMOTE INCREMENTAL BACKUPS:
This page can be used to restore remote incremental backups for your websites.
Restore remote incremental backups method image is given below.
(10) SSL:
One common example is when SSL is used to secure communication between a web browser and a web server. This turns a website’s address from HTTP to HTTPS, the ‘S’ standing for ‘secure’. … When data is sent or posted through a browser using HTTPS, SSL ensures that such information is encrypted and secure from interception.
(i) MANAGE SSL:
This page can be used to issue Let’s Encrypt SSL for existing websites on the server.
we can manage SSL.
(ii) HOSTNAME SSL:
Let’s Encrypt SSL for a hostname to access CyberPanel on verified SSL.
(iii) MAIL SERVER SSL:
Let’s Encrypt SSL for MailServer (Postfix/Dovecot).
(3) SERVER:
A server is a computer or system that provides resources, data, services, or programs to other computers, known as clients, over a network. In theory, whenever computers share resources with client machines they are considered servers.
(i) WEB TERMINAL:
Execute your terminal commands.
(ii) CLOUDLINUX:
What Is Linux Cloud Hosting? Linux cloud hosting is all about hosting a website on the cloud hosting platform, using the Linux operating system as the platform. From our definition, we can see that two things are paramount for Linux cloud hosting, and that is the cloud hosting server with the Linux operating software.
(i) CREATE CLOUDLINUX:
CloudLinux and CageFS are available with CyberPanel v.1.8.6, but before using any of its features, you need to convert your operating system to CloudLinux OS. Use the commands below to convert your server to CloudLinux OS.