Warning: Redis::get(): php_network_getaddresses: getaddrinfo for localhost failed: Name or service not known in /home/solveddoc.com/public_html/wp-content/plugins/litespeed-cache/src/object-cache.cls.php on line 674 Digital Ocean Archives - Solveddoc
How to get Digital Ocean login for sSH?
A lot of users dont know how to get the Digital Ocean Login for SSH user from their Digital Ocean account, so this will be a very quick point-to-point guide to tell you how to get SSH access for your root user from Digital Ocean.
Get Digital Ocean login for SSH:
To get Digital Ocean login for the SSH user, you just need to follow these steps:
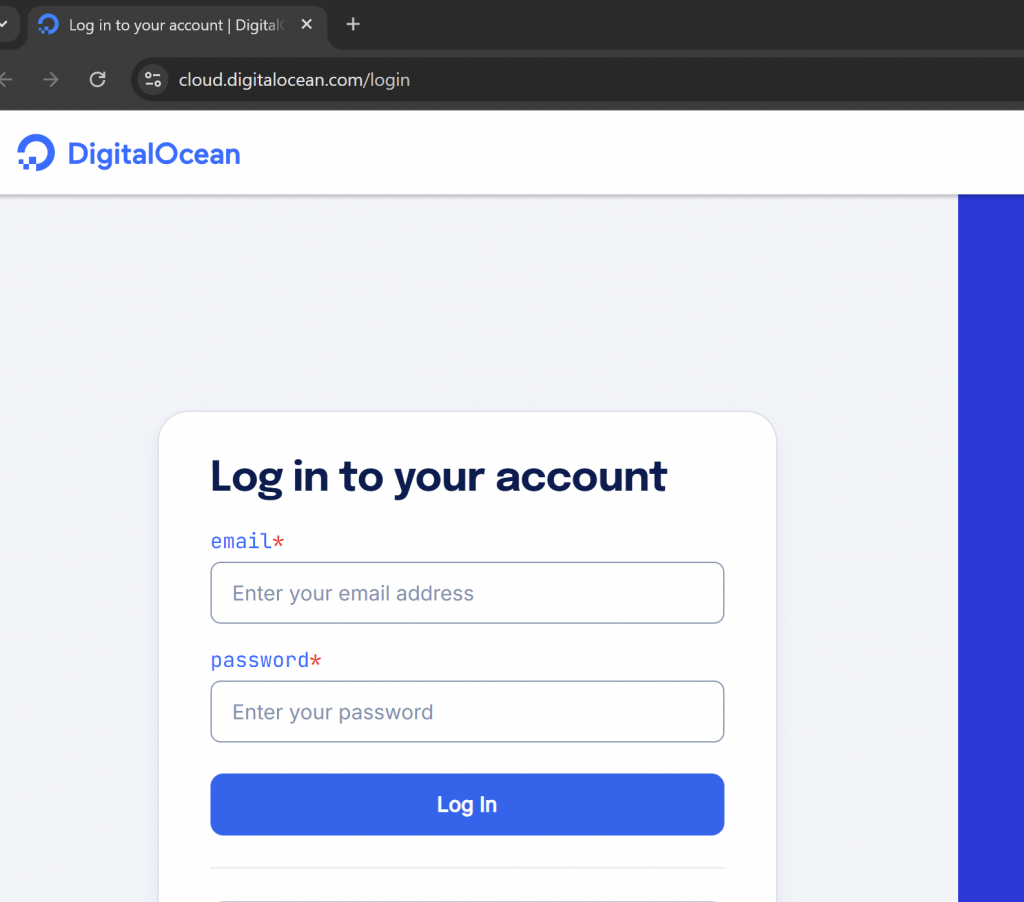
Log in to your DigitalOcean account using your credentials
2. Once logged in, you’ll see a list of all the servers (Droplets) you’ve created.
3. Click on the Droplet you want SSH access for. This will take you to the server’s dashboard.
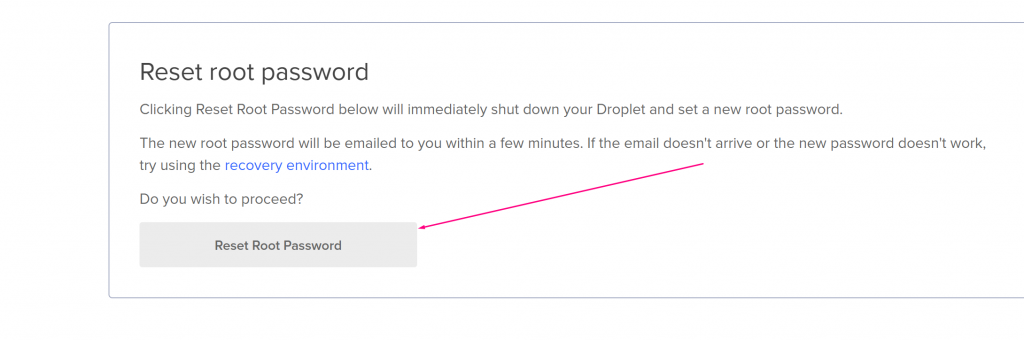
4. On the left sidebar, click on “Access” (second option in the menu).
You’ll see various options like Launch Recovery Console, Reset Root Password, and more. Scroll down and click on “Reset Root Password”.
Click this button now, your password will be sent to your email as displayed here as well. Copy that and access your Digital Ocean server using SSH using these Digital Ocean login access for SSH.
Connect to Your Server Using Bitvise SSH Client
Download and install Bitvise SSH Client from bitvise.com.
Open Bitvise and enter the following details:
Host: Your server’s IP address (from DigitalOcean).
Port: 22 (default SSH port)
Username: root
Initial Method: Password
Password: The one you received via email
Click “Login”.
The first time you connect, you’ll be asked to accept the server’s host key. Click “Accept and Save”.
Once connected, you’ll have access to your server’s terminal and file system.
Conclusion
Accessing your DigitalOcean server via SSH is straightforward, especially when using a user-friendly tool like Bitvise SSH Client. By resetting your root password through the DigitalOcean dashboard and entering it in Bitvise, you can securely and efficiently manage your server. Whether you’re a beginner or a seasoned developer, this method gives you full control of your server in just a few clicks.
Make sure to change your root password after first login for better security, and consider switching to SSH key authentication for long-term use.
How to force redirect HTTP to HTTPS website in CyberPanel?
In this article we will tell you how to force redirect HTTP to HTTPS website in CyberPanel?
What is HTTP?
HTTP stand foe Hypertext Transport Protocol. When you enter http:// in your address bar in front of domain, it tells the browser to connect over HTTP. HTTP use TCP(Transmission control protocol), generally over port 80, to send and receive data packets over ther web.
What is HTTPS?
HTTPS stands for Hypertext Transfer Protocol Secure (also referred to as HTTP over TLS or HTTP over SSL). When you enterhttps://in your address bar in front of the domain, it tells the browser to connect over HTTPS. Generally sites running over HTTPS will have a redirect in place so even if you type inhttp:// it will redirect to deliver over a secured connection. HTTPS also uses TCP (Transmission Control Protocol) to send and receive data packets, but it does so over port 443, within a connection encrypted by Transport Layer Security (TLS).
Redirect from HTTP to HTTPS
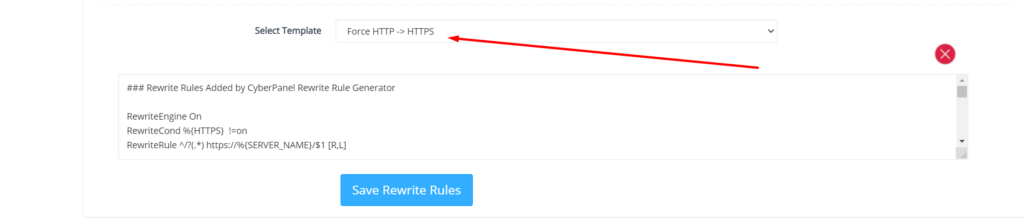
if you forcefully redirect your website HTTP to HTTPS in Cyberpanel, you will need to add a rewrite rule to that website in order to have it automatically forward to HTTPS instead of HTTP.
In CyberPanel you can forcefully redirect HTTP to HTTPS website using rewrite rules.
To add this:
Force redirect HTTP to HTTPS website in CyberPanel:
Select Websites on the left menu
2. Choose the SSL enabled website from the list
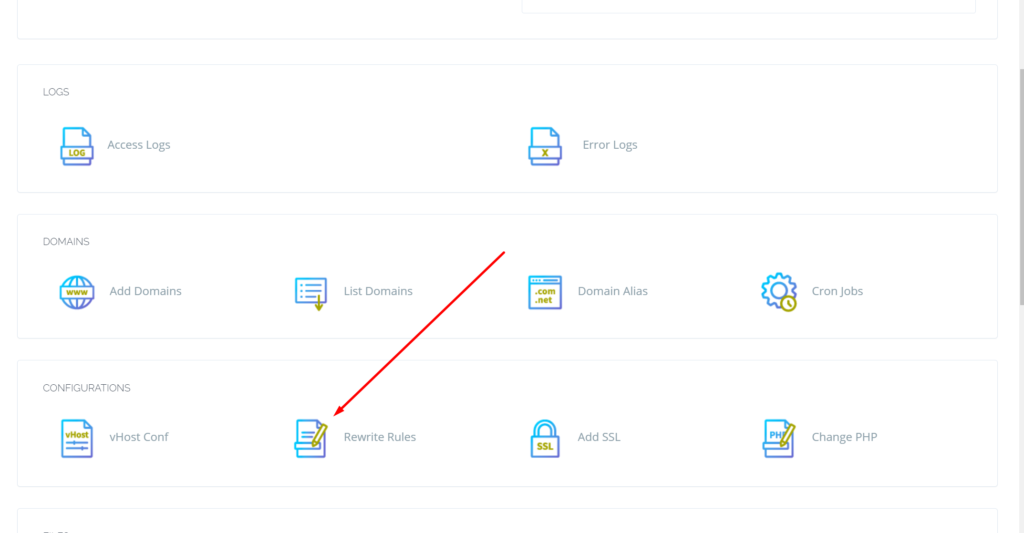
3. Select “Rewrite Rules” in the Configuration section
How to solve the can’t upload the file on file manager issue in CyberPanel?
if you are uploading a file on file manager in CyberPanel. and getting some error there. Follow this short solution for can’t upload the file on CyberPanel file manager.
Solution
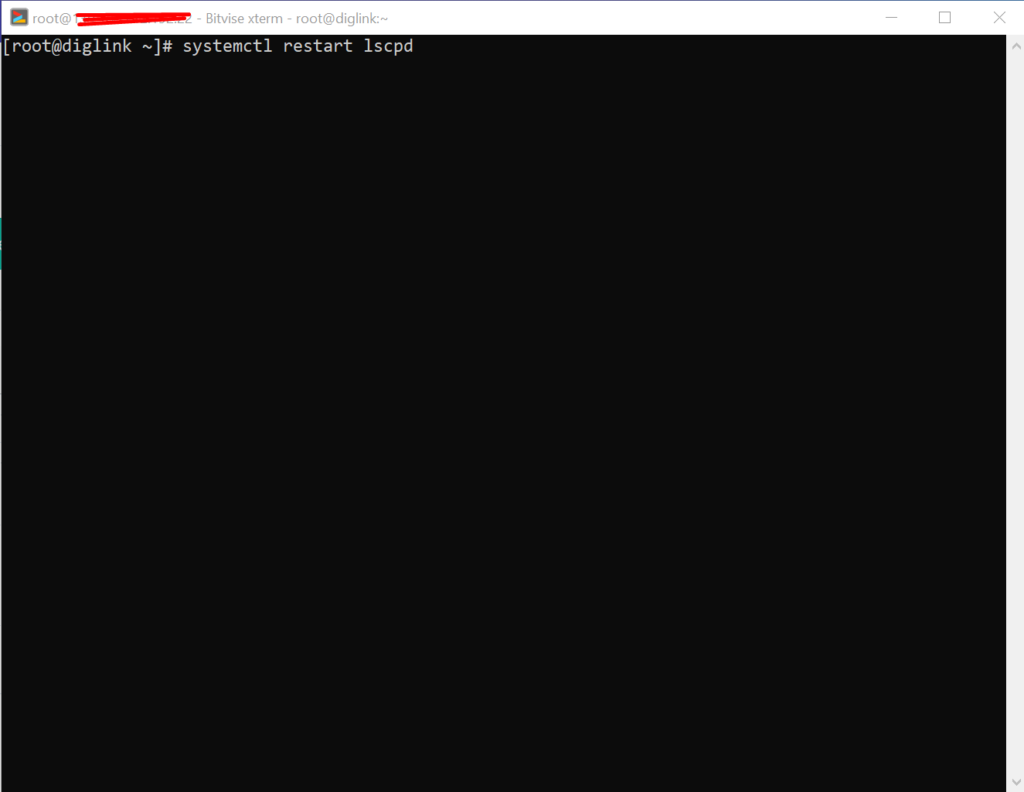
There is very easy and short solution for this issue. Access your root through Bitvise or putty open your terminal(CLI) and run this Command
Systemctl restart lscpd
This simple command will restart all of your CyberPanel services and now if you can try you can easily upload any file but there may be upload limit issue if so you can follow this tutorial to solve that Link below.