The process to add Child domain or subdomain in CyberPanel is very easy and short. Here i will tell you how to add subdomain in CyberPanel under any main domain or website.
How to Create Child Domain under main website?
To create child domain for a main or master domain you just need to go to.
Websites->List Websites->Manage
Manage of that website for which you want to create the subdomain.
Websites->List Websites->Manage
And click the Manage button you can also follow this URL:
https://<YOUR IP>:8090/websites/example.com
When you click the manage button you can see the website manager screen. This screen has a a lot of option. Like LOGS, DOMIANS, FILES, CONFIGRATIONS, ETC.
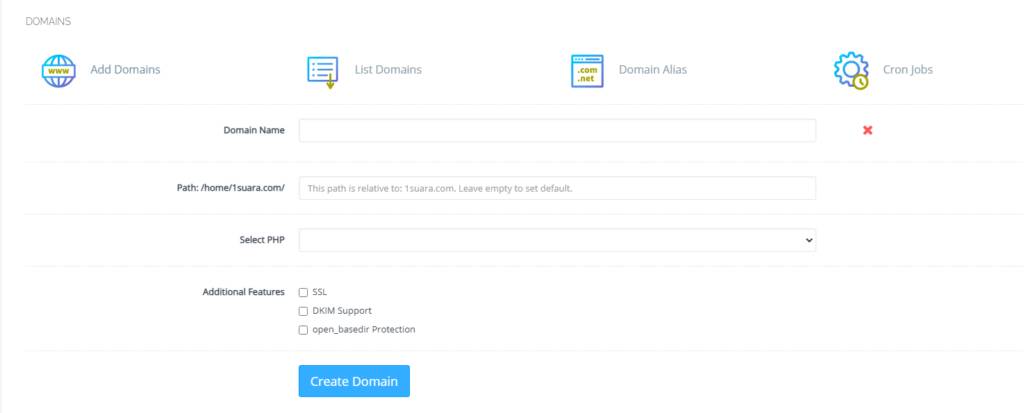
Got to the Domains part and click the Add Domains button.
Add Domains
When you click on this option you are asked to provide the details for the subdomain you want to add.
Details for the subdomain you want to add
After providing the details like:
Domain name
Path (Leave it empty)
Select PHP version
In additional features (Select SSL, DKIM, Open_basedir Protection)
Click the Create Domain button and you will receive a success massage from the panel.
Create Domain
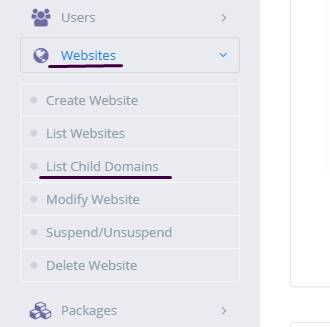
Once child domain is created from here. Now you can list child domain from two ways.
Go to website-> List child Domain
website-> List child Domain
2. From the Websites-> List Websites -> Manage-> List Domains
How to create and access email account on CyberPanel?
In this article i am going to explain a simple way to create email account on CyberPanel and access your email on CyberPanel.
So basically here we only discuss how to create and access email on CyberPanel. We do not going in to any other details like setup the whole procedure.
This article has following steps:
Create New Email account on CyberPanel
Access through rainloop desk
Change password for email
This guide is for basic user so if you are an expert you can comment if we miss any thing in article.
Create New Email account on CyberPanel:
To create a new email account in CyberPanel log into your CyberPanel account using credentials.
Visit this your CyberPanel URL looks like:
https://<server ip>:8090
CyberPanel
Now go to the EMAIL-> CREATE NEW EMAIL option in side menu.
EMAIL-> CREATE NEW EMAIL
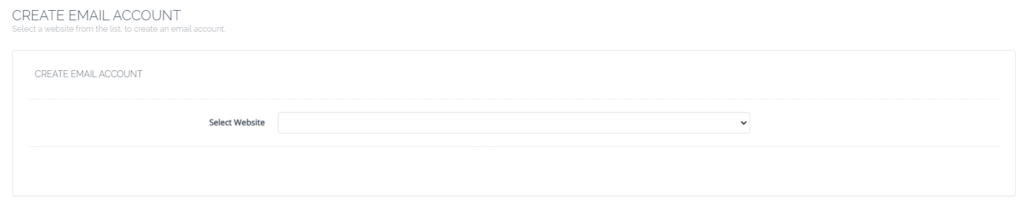
On the Create new email screen you need to select the Website for which you want to create email account.
select the Website
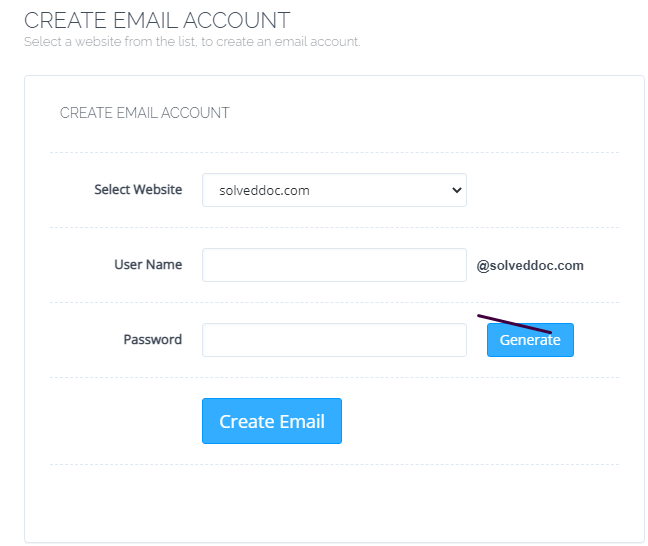
Now add the required details. like:
User Name
Password (better to generate random password from button)
Provide Information
Provide details and Press Create Email button you can see the massage.
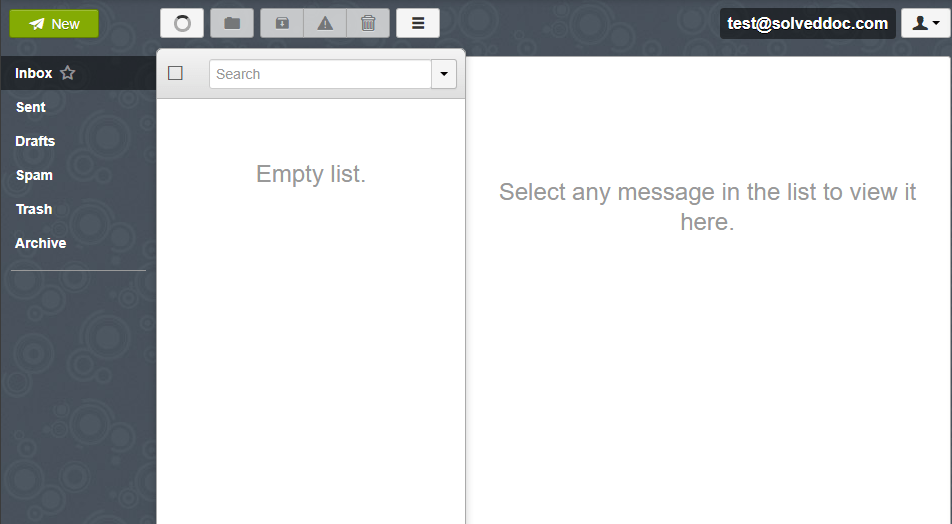
Email with id : test@solveddoc.com is successfully created.
Access through rainloop desk:
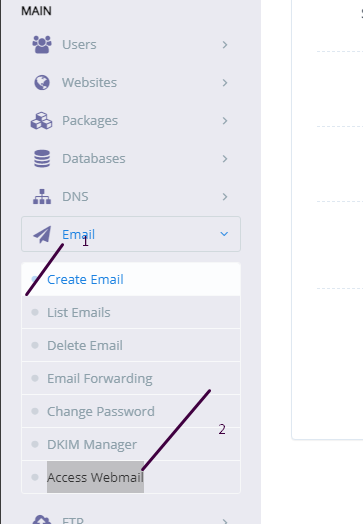
To access your email account you need to got to the:
Email-> Access Webmail
Access Webmail
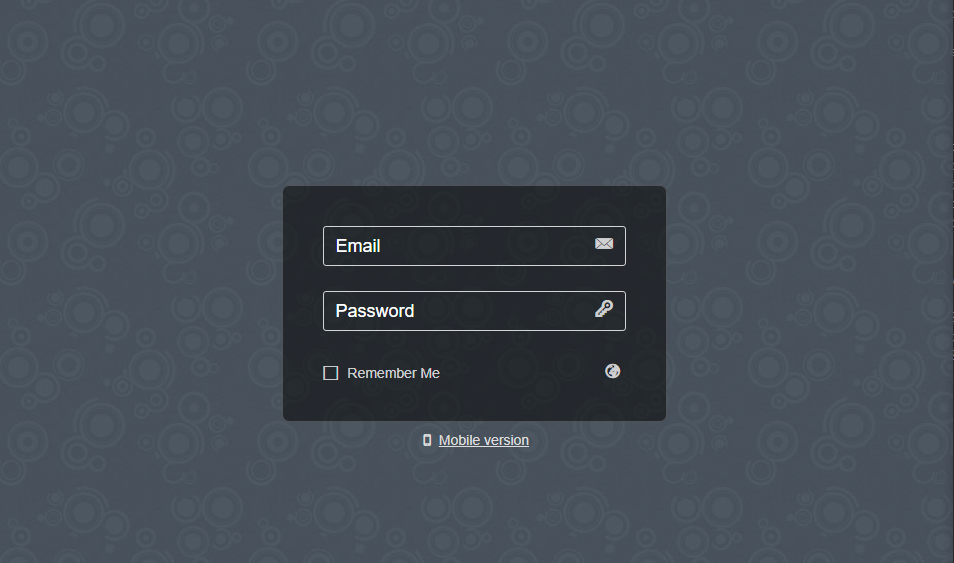
When you click on Access webmail it will navigate you to the:
https://<server ip>:8090/rainloop/index.php
Here you can see this screen.
RainLoop
Provide the required details and get login. Here is the dashboard you see once login.
RainLoop DashBoard
This is a tutorial to create and login not the whole setup is included in it.
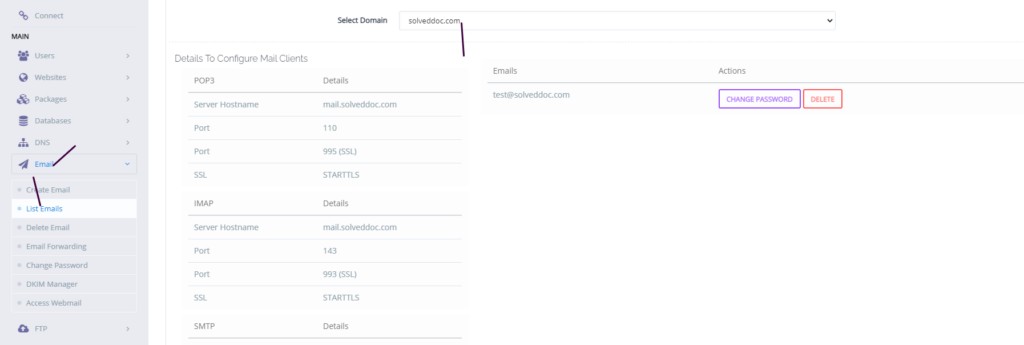
Change password for email:
If you want to change the password of any existing mail this is very easy using CyberPanel.
Go to the EMAIL->LIST EMAIL select the website for which the email password you want to change.
Email Password
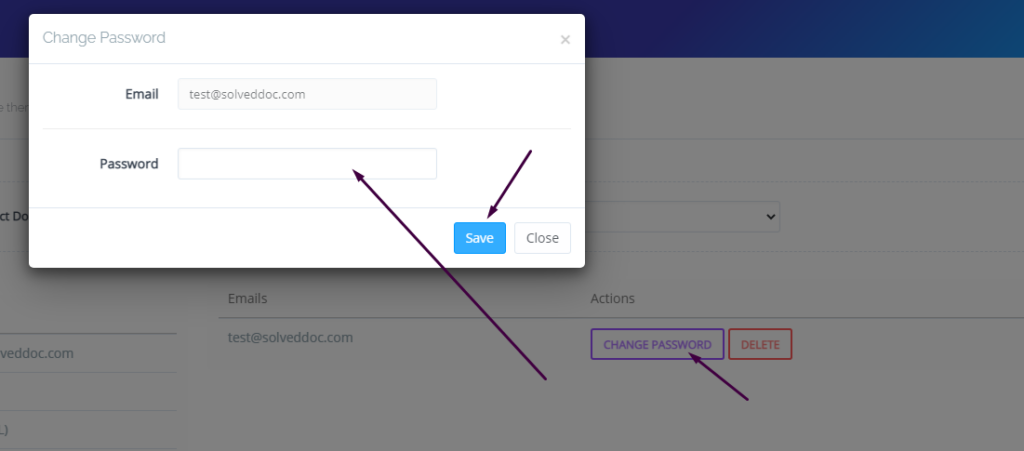
You can see the change password button IN front of the the mail press that. When you press a prompt appears and ask for new password provide new password and click save.
New Password
This is a basic tutorial for email creation and access. Please leave your comment below if we need to change any thing in this article.
CyberPanel has a great feature to add Google Drive backups. They added this feature in their 2.0.2 version.
This G-Drive backup option makes the backup process easy and more reliable. The method to set up Google drive Backup is also so easy. there is nothing typical or complex.
You can follow this guide to add Google drive backup through CyberPanel.
Table Of Contents:
Login to your CyberPanel Account
Set up Google Drive Backup
Set Up New Account
Add Sites For Backup
Login To CyberPanel:
To initiate this process you must have to log in to the CyberPanel. So use your CyberPanel credentials to log in.
Set Up Google Drive Backup:
Now go to Back Up->Setup Google Drive to set up google drive backup for your site.
Set Up new Account
Here you can see the SETUP NEW ACCOUNT click that button to add a google drive account for backup.
You can see a Pop up asking for the name of the account you want to set up for your g-drive backup.
Enter your name here and then click the Save button. This will migrate you to a new screen for Google account setup.
Select any account if you are logged in or add a new one here
Now click the Allow button to processed.
Once it’s done now you will get back to the backup page. and you can select that account you just added.
Add Sites For Backup:
Now you can add backups for your sites from this screen. Select account from here.
Now provide the details and Press the Add button then you can see the Site added below.
Access Cyberpanel Via Hostname with SSL- Issue SSL for Hostname
DO you want to access CyberPanel via a hostname with valid SSL ?
By default, you can access your cyber panel using the IP of your server and Port 8090. But For a valid SSL certificate, you must need a valid domain to access cyber panel with a valid SSL.
In this article, we will discuss how you can select a hostname and then issue SSL for that. So follow all steps along to access Cyberpanel Via Hostname with SSL.
Table of Content:
Select a Valid Domain
Create a Website on CyberPanel
Issue SSL for HostName
Access Cyberpanel
Select a Valid Domain
To access CyberPanel through a hostname and valid SSL first you need a domain through which you want to access CyberPanel. Like you want to use https://domian.com:8090 to access your CyberPanel you need to add domain.com to your CyberPanel.
Before creating a domain make sure that your DNS A records are point this server where you want to add a domain.
Create a Website on CyberPanel
To do so login to your CyberPanel using your Credentials then go to Websites->Create Website :
Now provide all the required details and press Create Website button.
Now your required website is created. SSL may be working for this domain But we need to issue for the Hostname and select this domain as the hostname.
Issue SSL for HostName:
Go to the SLL->Hostname SSL
Now select that domain you want to use for the Hostname. Then Press the Issue SSL.
This domain has now SSL for hostname you can use this to access cyberpanel
Access Cyberpanel:
Now it’s time to check that is this domain is working to access the CyberPanel. Go to your brewers and visit the Link https://your-domain.com:8090 it should work for your Hostname now you can access CyberPanel using this link.
How to change Upload Limit on CyberPanel? Increase or decrease Upload Size through CyberPanel?
CyberPanel is a Webhosting control panel. If you want to upload a file of large size and you are unable to do so. So here I will tell you how to change the Maximum upload file size.
Sometimes you want to import a database of large size or you want to upload an image or file on your size of large size and then you receive an error that you cant upload a file more than 2M (2M is the default size for the post in CyberPanel).
Here I will tell you how you can increase the Max upload limit for post and file. You can also change different things like maximum execution time, max input time, etc.
Follow all the steps to change Upload Limit.
Login to your CyberPanel using your credentials.
2. Now go to the PHP->Edit PHP Configs
3. You can see the Basic and Advanced buttons here. Remain on Basic and Select your required PHP version from here.
4. Once you select the required version you can see the different option here
Here you can update the values for all fields according to your requirements. You can update values here Like Max uploads size, max execution time, Post size, etc.
After updating values you need to click the save button to save all changes .
In the last steps, you need to restart PHP in the latest version of CyberPanel they give the option of restart in the Panel. Below the configuration. But if you are on the old version you have to restart PHP.
Without restarting PHP the changes will never applied.
How to create a staging or clone of the WordPress site from CyberPanel?
Sometime you may need to create a clone or staging site of your WordPress site to make changes and test them. CyberPanel allows to create staging or clone site easily.
In this article, I will tell you how you can create a staging or clone of your WordPress site from CyberPanel.
You can create a staging site from CyberPanel and after doing that you can merge it back to the Original or master site.
Always keep backup before doing anything. So if you lost anything you can restore. The process of creating a staging site is very easy to follow along to do so.
Create a Clone or create a Staging for your site:
Step 1: Log in to CyberPanel and Go to Manage Website
Create a clone or staging site in cyberpanel is very easy. I will write the steps below to do so.
The first thing to do is login to your cyberpaner using your credentials on port 8090.
Then go to the Websites->List Websites->Manage
Step 2: Create a clone or Staging site
In the manage Dashboard, you can see the CLONE/STAGING button press that to process.
Add the Domain name which you want to use as staging or clone.
It will take some time and once staging is done it will show you this screen.
Now you must have to set A records for the staging domain you create Like staging.yourdomain.com. Visit your DNS manager and add A record for this staging site. No need to add any other records. A record is enough for staging.
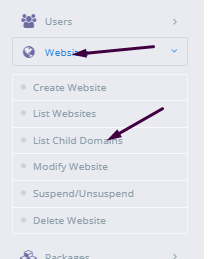
In cyberpanel got to Websites->List Child Domains you can check the staging site.
Push back, Copy or sync site to Master:
Once you did all changes to staging and now you want to sync the staging back with the master site CyberPanel allows to do this very easy to do so follow steps:
Go to the Websites-> List Child Domains:
Now on this page, you can see your staging site press the Manage button in front of your site.
Now you are in the management dashboard of the staging site. You can see COPY/SYNC TO MASTER from here you can push back your staging to the original.
Here you can chose the options:
Copy complete Data
Sync Database
Copy Changed Files
Chose any option from them according to your requirement. Once the process of sync or coping is done now go back to your original site and check the changes if you have any cache plugin clear cache and then check the changes.
CyberPanel is next generation hosting control panel. CyberPanel is powered by LiteSpeed Technologies.
In CyberPanel you can create new users easily and allow them access so they can manage their website settings there.
CyberPanel allow three types of user access ADMIN, USER, and RESALLER. You can easily create new account of any type according to the requirement of user.
How to create a new user account in CyberPanel:
The process of creating user, admin and reseller account is same i will tell you where the difference is during creation steps.
Login to your cyberpanel using port 8090.
Step 1:
In left menu go to Users-> CREATE NEW USER or navigate to this URL
https://<Yourip>:8090/users/createUser
Step 2:
Now Provide the information that need to create new user:
First Name
Last Name
Email
Select ACL ( admin, reseller, user)
Websites Limit (Put 0 for unlimited)
Username
Password (Press Generate for strong)
Security Level (High or Low)
Here in Select ACL you can create the admin, user or reseller permissions. Admin has access for every thing, reseller has less access then admin and at last user has some specific access.
Step 3:
After providing these required information press create a user and user is created successfully now you can see your user by navigating to USERS->LIST USERS. Or visit this URL
How to Transfer the whole Website From one CyberPanel to Other CyberPanel using a backup method?
If you want to transfer your web site from one cyberpanel to any other cyberpanel without losing any data, you are on right place follow this article step by step.
If you are thinking to transfer your site from any other CyberPanel. Maybe you Changed your server. In this article, I will tell you how you can transfer your site from one Cyberpanel to another Cyberpanel. I will use the backup method to transfer the whole website from one CyberPanel to the second Cyberpanel.
Table of Contents:
Create a Backup
Set Permissions or Move Public_html
Download to local Computer or Download on a remote server
Move to the backup folder
Restore Backup
Check through the Host file.
Create a Backup:
To tranfer your website from CyberPanel to CyberPanel this methode is one of the simple and easy method. Follow along with me to setup:
Login to your CyberPanel through your cyberpanel link like https://<your-ip>:8090: Provide credentials and press login.
2. Now in the left menu bar Go to the Backup->Create Backup section. You can also navigate to this link. https://<your-ip>:8090/backup/backupSite
Click on create back up button here.
3. Now cyberPanle asks you to select a site and the destination where the backup will store. The site for which you want to create a backup. Select your website, and leave the path as empty. And press Create back up button to start the backup creation process.
4. Now you can see the process of backup creation is running and in process.
wait until it will give you the massage Done. After creation you can see the massage of completed and can see a backup with its id on screen.
Done for backup process go to next step.
Set Permissions or Move Public_html:
If you are going to download files from cyber panel to a local computer then skip this step. Now in this step, you need to login to your SSH terminal. Using any software like putty or Bitvise. For this article, I am going to use Bitvise.
Login to Bitvise SSH you must have credentials:
Your server IP
Username (root)
Port number (22)
Password
After providing all details press the Login button. Now open STFP to check and confirm the backup.
2. Now go to this path in sfpt
/home/yoursite/backup
Here you can use two method one is to change permissions and download this file directly from this path on the remote server and other is move it into the public_html and then download. Second one is recommended.
Change Permission:
Click on the file and the go to Properties->Permissions :
Change the permission to 777 as shown in picture. And press OK
Download to local Computer or Download on a remote server:
Now its time to download the file to the local pc or on another server in order to restore the backup. Make sure that the cyber panel is installed on this server.
Download to local computer and then upload:
This way is time taking way but if you dont have credentials fo SSH then go for this.
Go to the Websites->List website
Press Manage button on the right side of website
Press Manage button on the right side of website
Go to the backup folder and Click the file and then click download you can see the file while downloading
Download Remotely using command:
Login to your SSH terminal and type this command if backupfile is in public_html folder:
wget yourdomain.com/backupfilename
If backup files are in back folder then type:
wget yourdomain.com/backup/backupfilename
Move to backup folder:
Now in order to restore Backup, you have to create a directory backup at home. use these commands to create a backup directory
cd /home
mkdir backup
Restore Backup:
Now its ite to restore backup for this log in to the new cyberpane.
Go to the Backup->Restore backup:
Select the backup file that you placed inside the backup folder
2. Click start backup I will take some time to restore wait until backup is completed.
Check through Host file:
At last step confirm that the backup is restored properly foe this open host file from your local computer.
Write Notepad in search bar of window.
Open Notepad as administrator
Now open the file host place in
C:\Windows\System32\drivers\etc
Write your new ip and then press TAB then write your site
Go to your browser and visit your site is working or not.
How to Setup Two Factor Authentication in CyberPanel?
Here i will tell you how you can setup Two Factor Authentication in cyberpanel?
In the latest version of cyberpanel they introduced the 2FA for login to cyberpanel. In the resent released version 2.0.3 this two factor authentication setup is introduced.
Now cyberpanel provide an extra layer of security for cyberpanel user. In this article I will tell you step by step how to setup 2FA in CyberPanel.
Table of contents:
Setup 2FA in CyberPanel
Test two factor Authentication by login
Setup 2FA in CyberPanel:
To setup 2FA in cyberpanel login to CyberPanel on port 8090 using your credentials.
Then navigate to Users-> Modify User:
Press modify user and use can see screen that ask you to select a user for modification. Select any user from this page.
Click themodify user and use can see screen that ask you to select a user for modification.
You can see the authenticator
Now go to download any two-factor authentication application and scan this code. For me, I used Google Authenticator. You can download it from here.
Now scan this code in your application and you will see a code on your screen.
After this press to Modify and save the settings.
Test two factor Authentication by login:
To test the two factor authentication what you need to do is log out from your account you enabled two factor authentication.
Now you can see the login page provide the login details and press Sign in button:
Now it will ask you Enter code from Google Authenticator. provide the code that you saved in google authenticator app and press Sign In.