Warning: Redis::get(): php_network_getaddresses: getaddrinfo for localhost failed: Name or service not known in /home/solveddoc.com/public_html/wp-content/plugins/litespeed-cache/src/object-cache.cls.php on line 674 server techniques Archives - Page 3 of 3 - Solveddoc
Get 15$ Free on Digital Ocean, $15 Free Promo Code on Digital Ocean 2021
Are you looking for Promo Code on Digital Ocean? Get 15$ free credit on digital ocean using this Promo code.
Use this Promo code and get 15$ free on Digital ocean.
You can use these Free 15$ for your Droplet and get a 1CPU basic plan free for three months.
Free $15 Coupon Code for Digital Ocean:
Use this Code to get 15$ Free Code
DOPRODUCT15
Here is another one you can get free digital ocean credits using this also.
LOWENDBOX
Sign Up Now
Digital Ocean is also giving $100 for 60-days on signup. Go here and get it.
This is a basic tutorial in this i will tell you how to create FTP account on CyberPanel. To create and access FTP account using CyberPanel is very easy you just need to follow the few steps.
Access CyberPanel
Create FTP account
Access FTP account
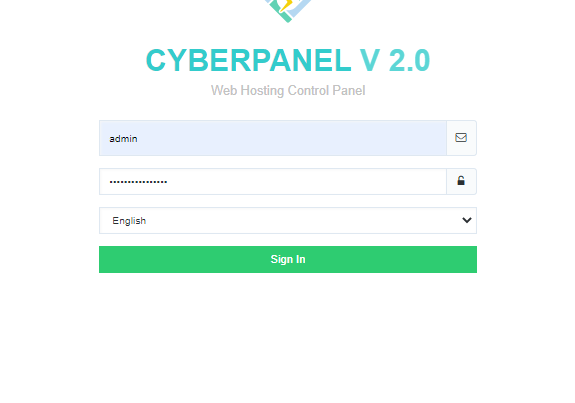
Access CyberPanel:
To access Cyberpanel go to the :
https://<your ip>:8090
You can also access through the host name. Provide the login username and password to access the page and click the lo0gin in.
Access CyberPanel
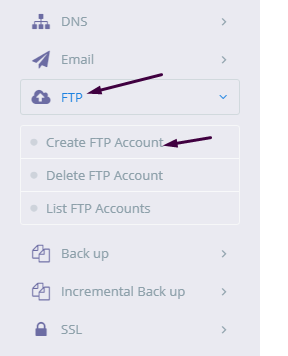
Create an FTP account on CyberPanel:
To create FTP account you need to go to the:
FTP-> Create FTP account.
Create FTP account
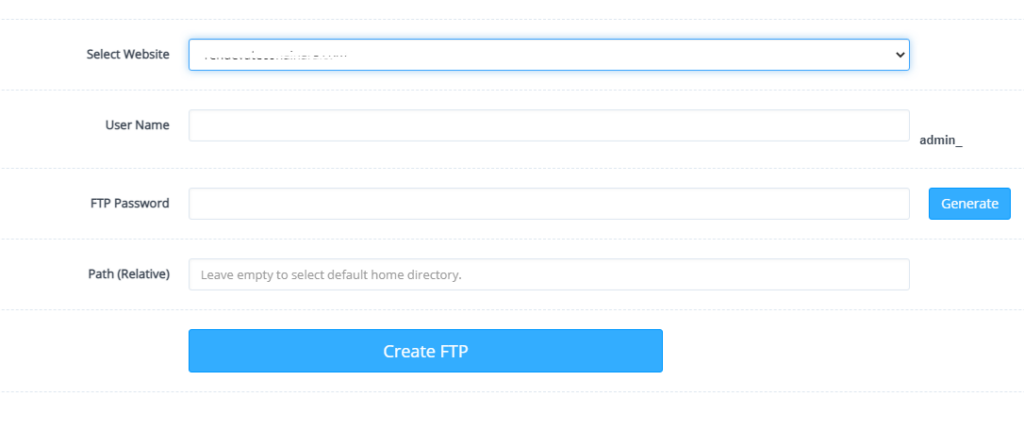
Now Select a website for which you want to create a FTP account and provide the required details.
Select a website
After adding information press Create button.
Create button
Access FTP account:
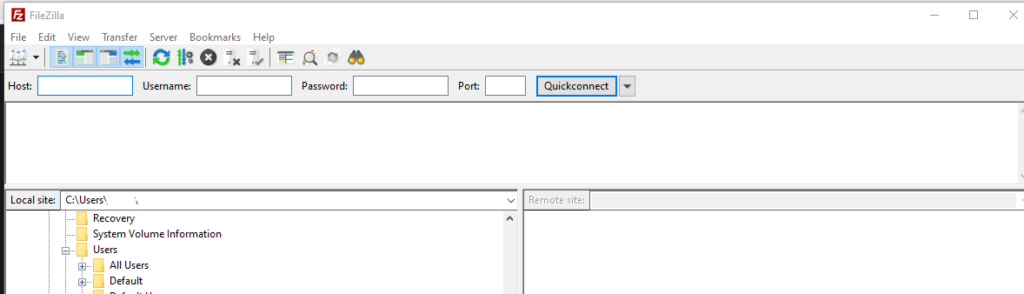
Once you successfully created a FTP account on CyberPanel now you can access the FTP account easily using FileZilla program.
You can easily download FileZilla program for your computer from there official site. Click Here to download.
Access FTP account
To access FTP account using filezilla you need following information like:
Username
Password
Port number
Host
User name and password are the once you set during the creation of account on CyberPanel. You can use port 21 for FTP and your IP address as Host.
This is just a basic tutorial about creating and access your FTP account.
How to create and access email account on CyberPanel?
In this article i am going to explain a simple way to create email account on CyberPanel and access your email on CyberPanel.
So basically here we only discuss how to create and access email on CyberPanel. We do not going in to any other details like setup the whole procedure.
This article has following steps:
Create New Email account on CyberPanel
Access through rainloop desk
Change password for email
This guide is for basic user so if you are an expert you can comment if we miss any thing in article.
Create New Email account on CyberPanel:
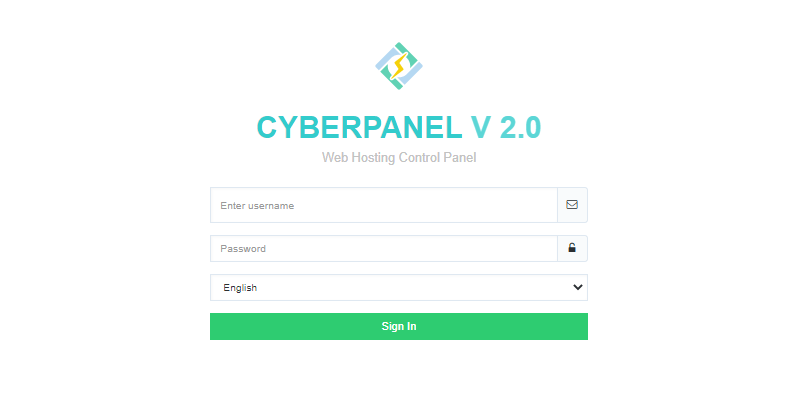
To create a new email account in CyberPanel log into your CyberPanel account using credentials.
Visit this your CyberPanel URL looks like:
https://<server ip>:8090
CyberPanel
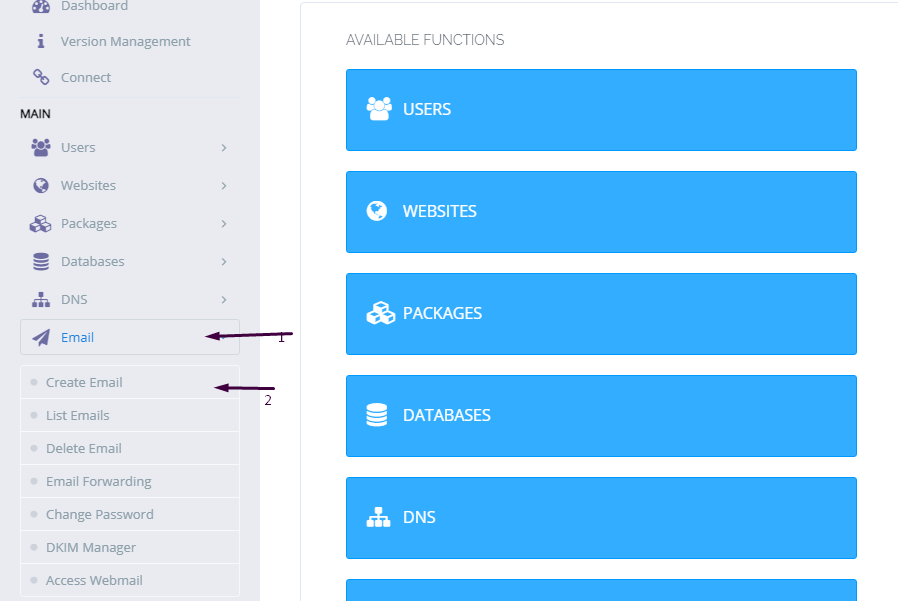
Now go to the EMAIL-> CREATE NEW EMAIL option in side menu.
EMAIL-> CREATE NEW EMAIL
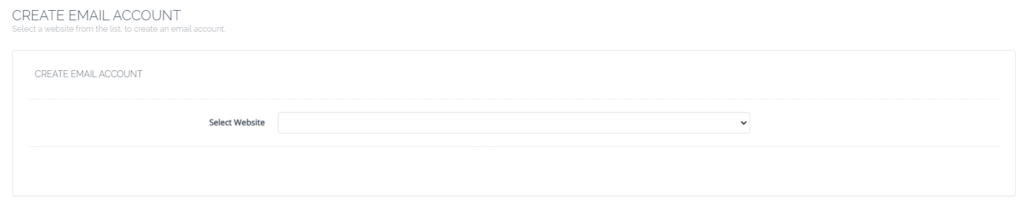
On the Create new email screen you need to select the Website for which you want to create email account.
select the Website
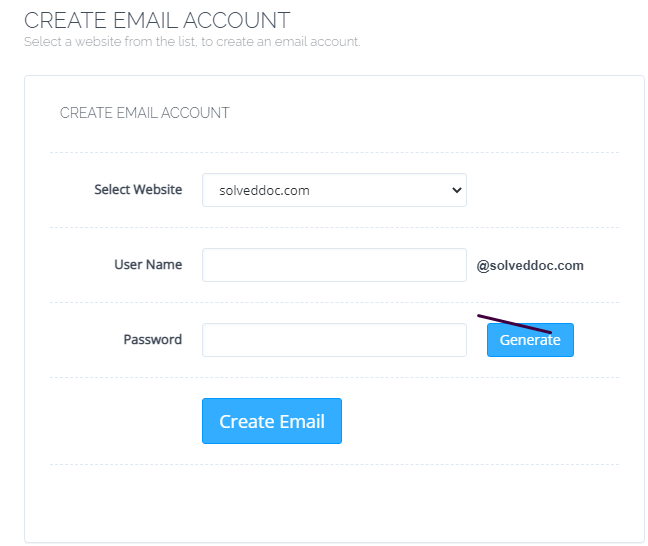
Now add the required details. like:
User Name
Password (better to generate random password from button)
Provide Information
Provide details and Press Create Email button you can see the massage.
Email with id : test@solveddoc.com is successfully created.
Access through rainloop desk:
To access your email account you need to got to the:
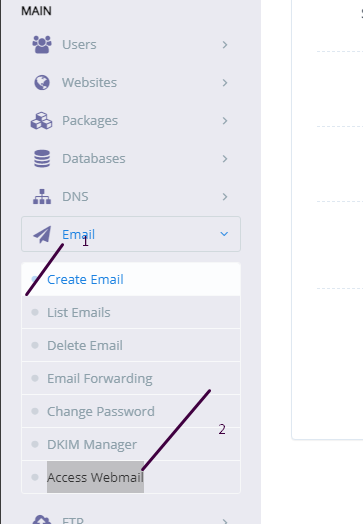
Email-> Access Webmail
Access Webmail
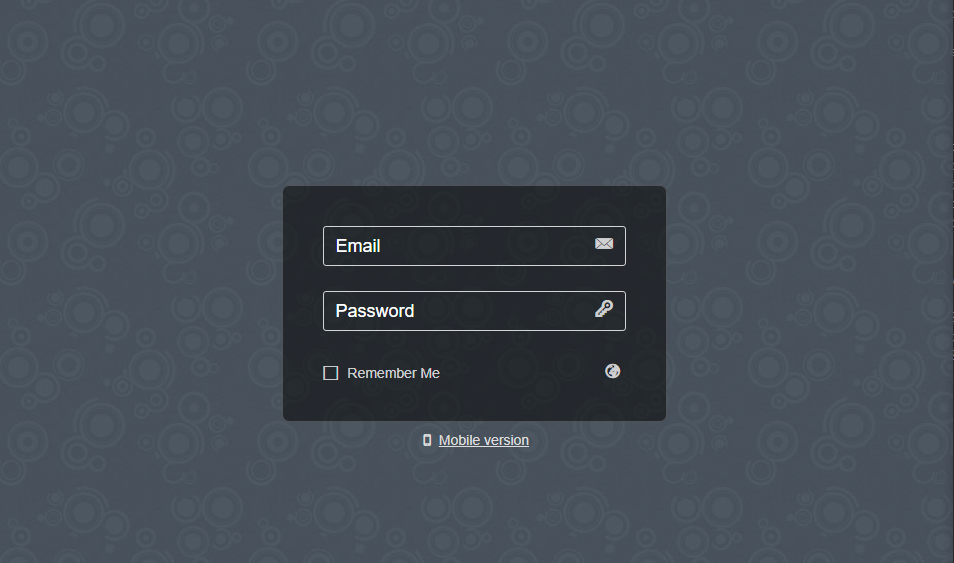
When you click on Access webmail it will navigate you to the:
https://<server ip>:8090/rainloop/index.php
Here you can see this screen.
RainLoop
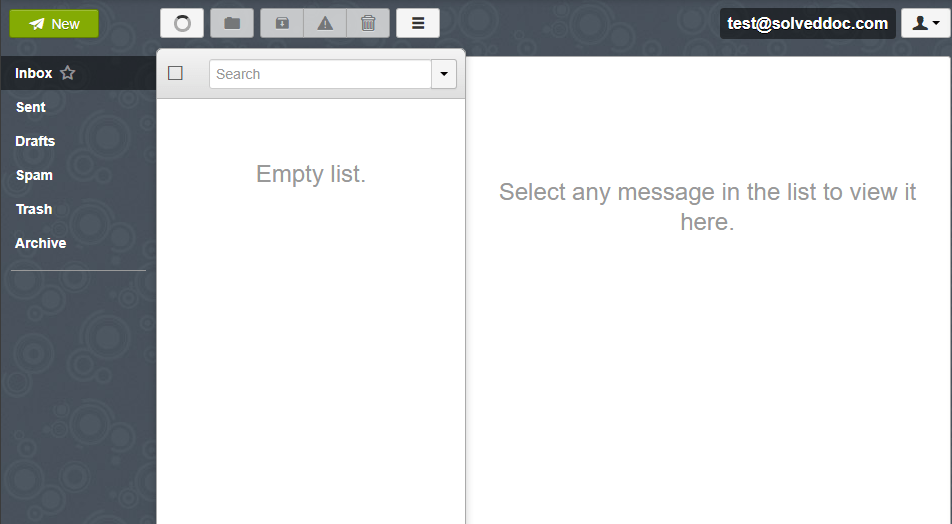
Provide the required details and get login. Here is the dashboard you see once login.
RainLoop DashBoard
This is a tutorial to create and login not the whole setup is included in it.
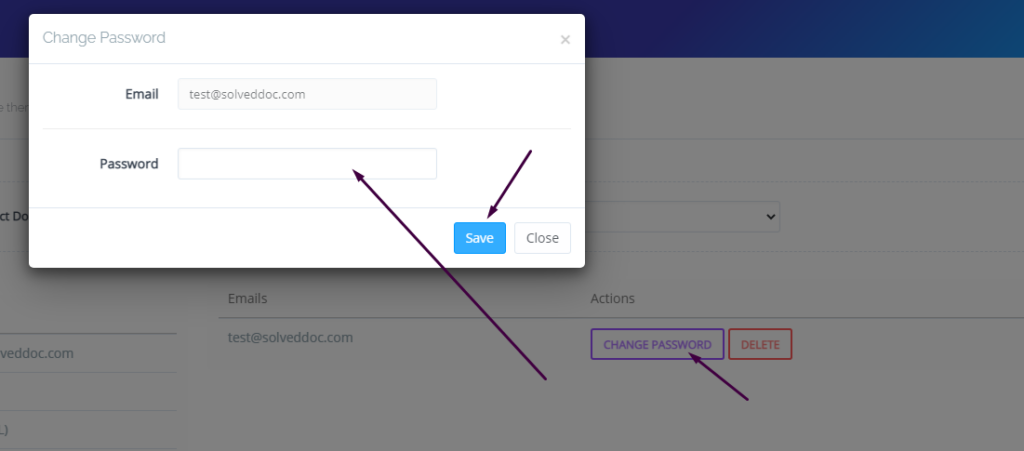
Change password for email:
If you want to change the password of any existing mail this is very easy using CyberPanel.
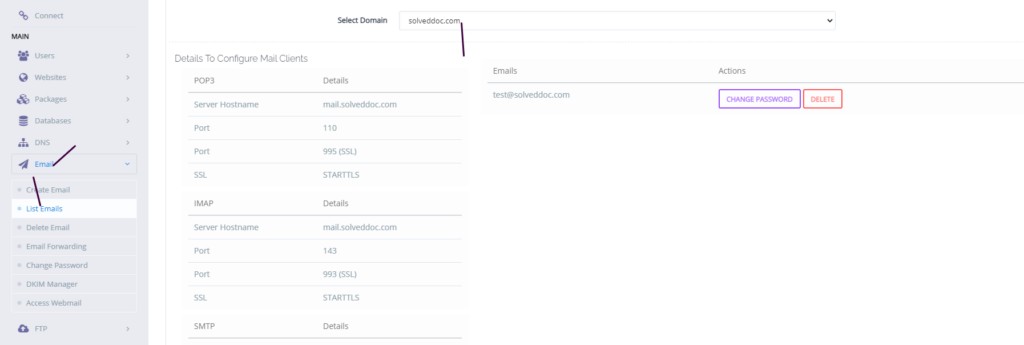
Go to the EMAIL->LIST EMAIL select the website for which the email password you want to change.
Email Password
You can see the change password button IN front of the the mail press that. When you press a prompt appears and ask for new password provide new password and click save.
New Password
This is a basic tutorial for email creation and access. Please leave your comment below if we need to change any thing in this article.
Do you want to catch-all emails in postfix? Does missing emails due to misspelling addresses bothered you? Then this article is for you.
A catch-all email account is used to get all emails sent from every email account of your domain. No matter that email account exists or someone misspelled that email. Catch-all is usually used when you do not want to lose any email due to the wrong email address or email that did not exist.
Here we discuss all steps that are needed to set up a catch-all email account in Postfix.
Follow along so you can easily setup and never miss any Email.
Create Catch All Account:
The first step is to create a catch-all account where you will receive all emails. Which are lost due to misspelling or non existing email?
To do so you have to add a virtual alias to the Postfix server. The path of file where you have to add the alias is /etc/postfix/virtual.
You have to edit this file in your favorite Editor I chose vi editor. Use this command to edit the file.
vi /etc/postfix/virtual
Now add the address for catch-all at the end of this file. Add the address like:
@yourdomain.com username
You can also specify any email account where you want to catch-all emails. You can specify different email account for this operation also. like:
If you didn’t specify the valid account then your valid account’s email will also go to that specific email you specify for catch-all. This account helps to Catch-all email that you miss due to non existing account or misspelled email addresses.
After adding these Alias to /etc/postfix/virtual save and exit.
After this we have to run a command to execute this file again.
postmap /etc/postfix/virtual
Now your updated file is loaded shift to next step.
Setup Postfix Configuration:
After editing the virtual file now its time to do some configurations in the postfix configuration file. In order to do this go to the file etc/postfix/main.cf. Edit this file in vi or any other editor you like. for vi use this command:
vi /etc/postfix/main.cf
you have to add virtual_alias_maps in this file add this line at the end of this main.cf file:
virtual_alias_maps = hash:/etc/postfix/virtual
Reload Postfix for new settings:
Now Postfix needs to reload so it can fetch the new settings. To reload postfix run the command: