Warning: Redis::get(): php_network_getaddresses: getaddrinfo for localhost failed: Name or service not known in /home/solveddoc.com/public_html/wp-content/plugins/litespeed-cache/src/object-cache.cls.php on line 674 cyberpanel Archives - Page 5 of 6 - Solveddoc
How to Change Upload Limit on CyberPanel?
if you want to upload a file from the file manager on CyberPanel and the size of the file is large according to the upload limit. Then you need to change (Mostly increase) the default setting. In this article, we show how to change the upload limit on cyberpanel step by step.
Change Upload limit On CyberPanel
Login to your CyberPanel using the link:
https://<your-ip>:8090
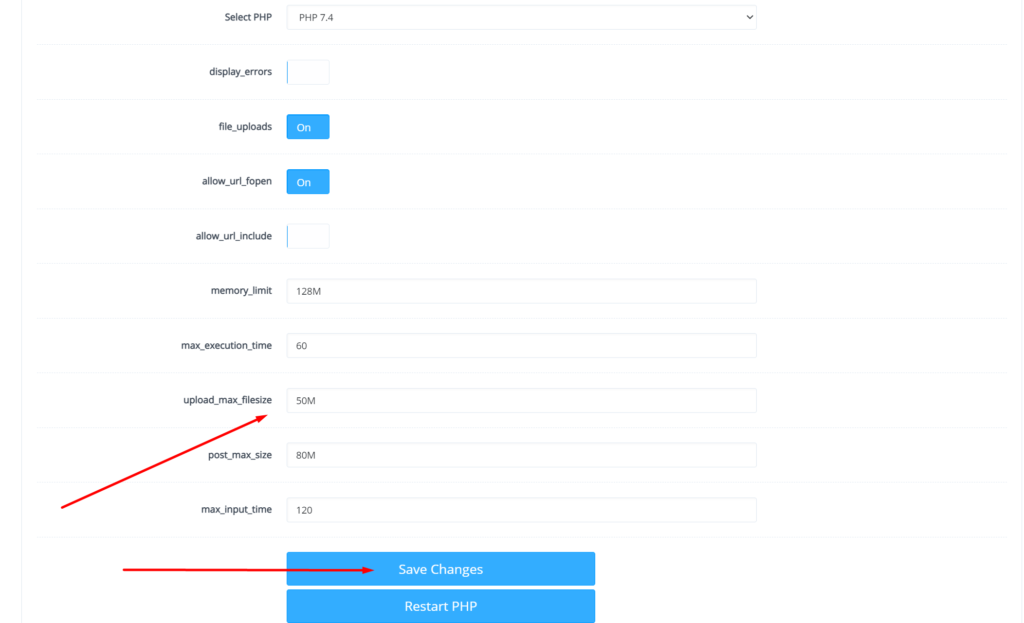
Go to PHP → Eidt PHP Configs → Basic, and select the version of PHP on which you want to change the upload limit.
Set the limit in upload_max_filesize according to your choice and then click on Save Changes
After doing that also press the Restart PHP button this thing will apply all changes on the server level and you can now be good to go with it.
You can also read about child domains and more in the next article.
How to fix Fix WordPress 404 permalink OpenLiteSpeed- 404 error on OpenLiteSpeed
If you host your WordPress websites with OpenLiteSpeed you may get a 404 error on the permalink of your website. here in this article, I will explain how you can fix ix WordPress 404 permalink OpenLiteSpeed.
OpenLiteSpeed is the free version of LiteSpeed Enterprise and this free version is not as stable as the paid version. Not OpenLiteSpeed WordPress permalink often gives 404 error. When you move site from one server to another or made any change this error comes up. Here i will discuss few methods to solve this issue.
Methods to fix WordPress 404 permalink OpenLiteSpeed:
Method 1 Fix Permissions:
If you are using CyberPanel and you did any change of website after that 404 error come to the site you can fix it by doing few thing.
Fix permissions from the file manager
Restart OLS
Fix Permissions from the file manager:
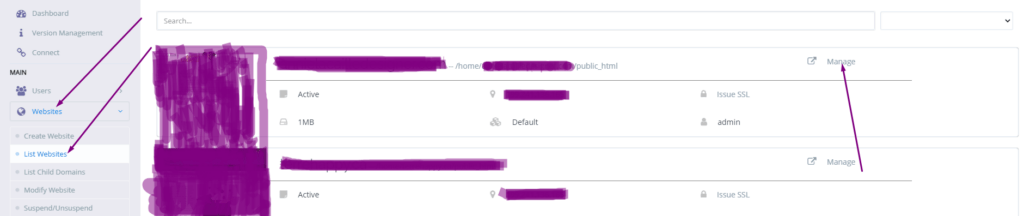
To fix permission you have to log in to your cyber panel then go to the Websites-> List website select the domain for which you have to fix the issue then press the Manage button present in front of the website.
Manage Website
On the Website Dashboard you can see File Manager press to access the file manager.
File Manager
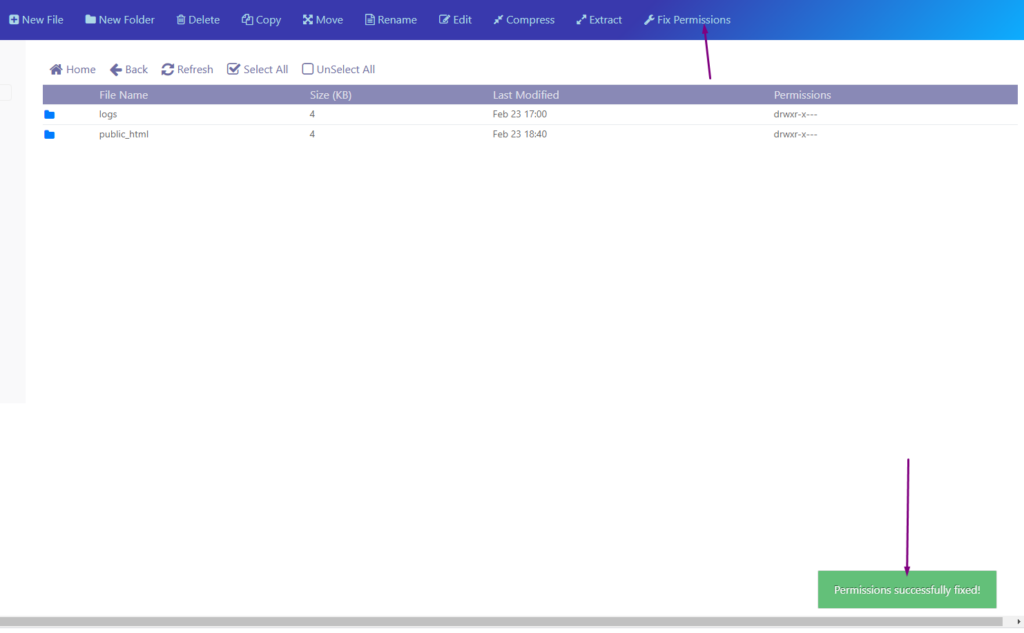
In file manager click Fix Permission button and you can see the success massage in green color.
Fix Permission
After doing all now its time to restart OLS.
Restart OpenLiteSpeed:
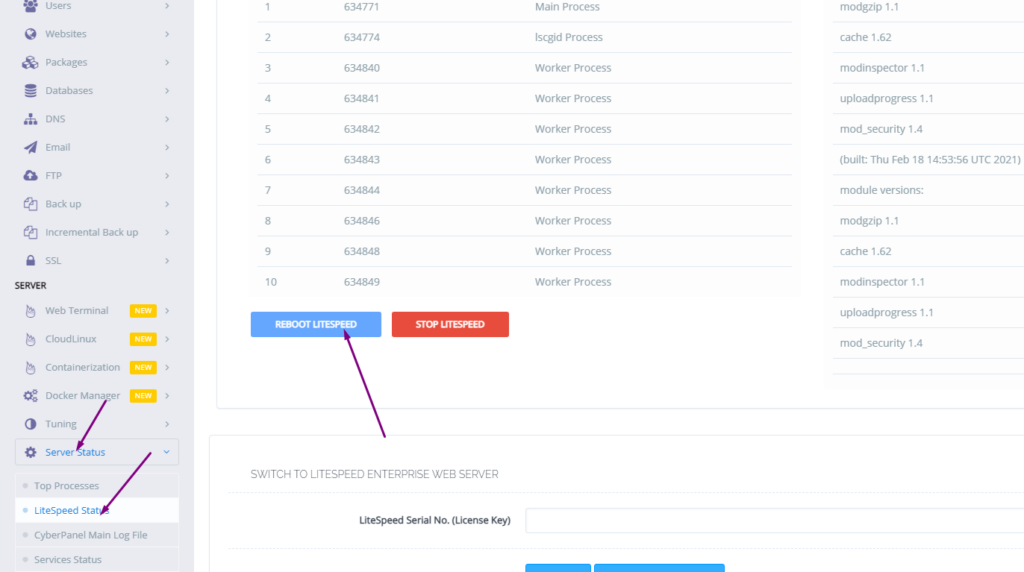
To restart OLS from CyberPanel you have to go on Server Status ->LiteSpeed Status and then you see two-button shutdown and reboot. Press the Reboot button and you can see a success message.
Restart OpenLiteSpeed:
Method 2 htaccess:
An other reason is the missing rules in htaccess for WordPress. To check htaccess rules. Go to the Public_html folder of the website. If you have CyberPanel go to the Website->List Websites then press Manage button.
Then go to the file manager from the Website Dashboard.
File Manager
In file manager open and open .htaccess file and see if there is rules or if the file is empty.
If you want to create a Database in CyberPanel. And do not know how to do this you are on right place read this article to know how you can create a new DataBase on CyberPanel for your Website.
Table of Contents:
Login to CyberPanel
Create New Database
Access Database
Login to CyberPanel:
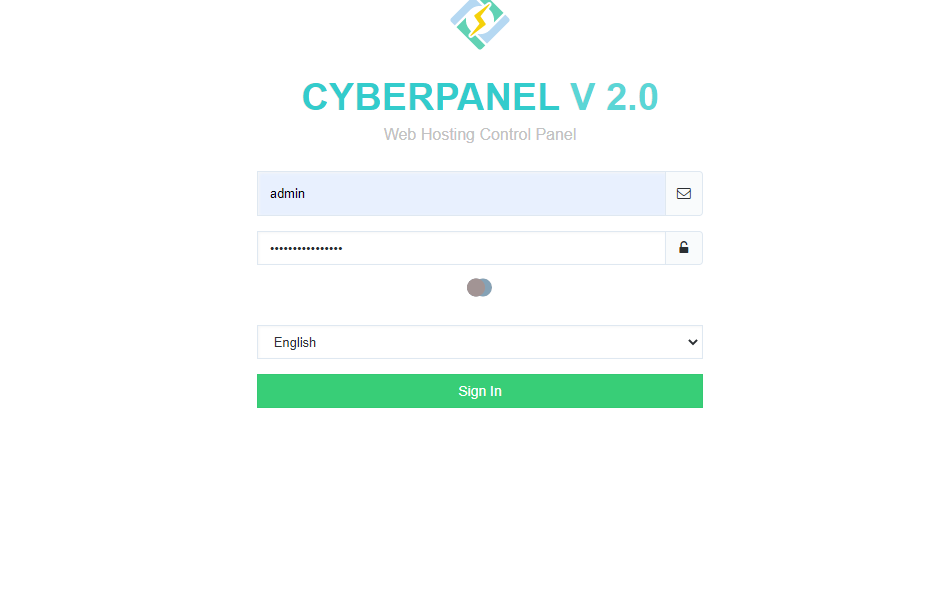
First of all visi the CyberPanel login URL to login to your CyberPanel it must be with port 8090, Look like:
https://<somainname/IP>:8090
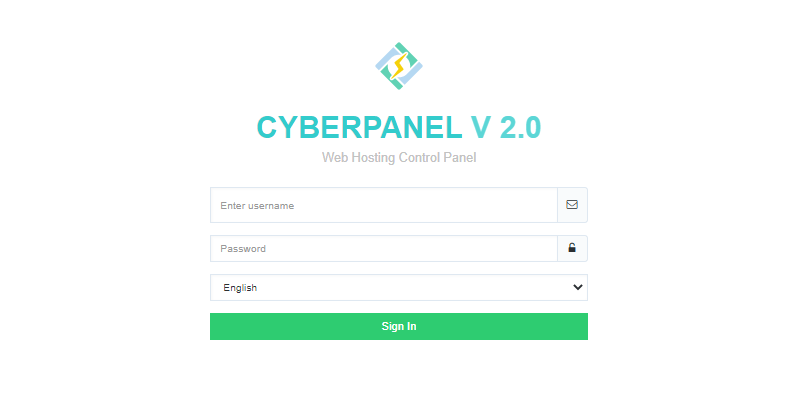
Provide username and password and login to your CyberPanel dashboard.
CyberPanel Login
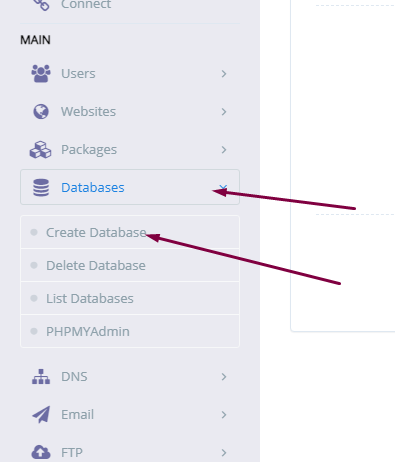
Create New Database:
Once you logged in go to the Database->Create Database: in the left menu.
Create New Database
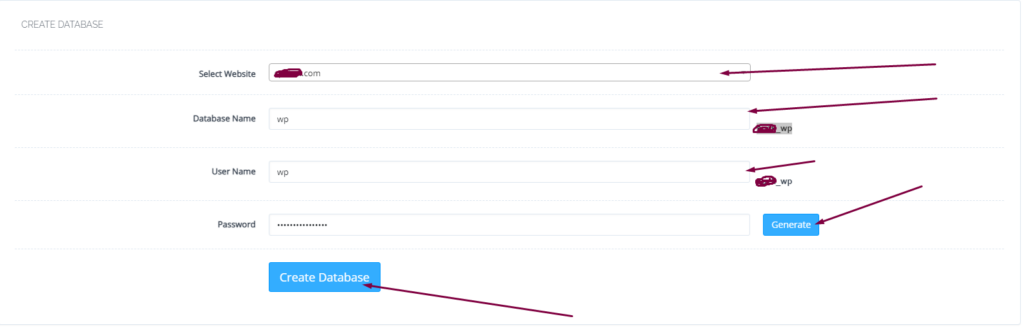
On this create database page you have to select the domain for which you want to create a new database.
select domain
Now screen ask you to provide the details for database.
Username
Database name
Password
Provide the Details for Database
When you press Create Database button this will create a new one for you on your server.
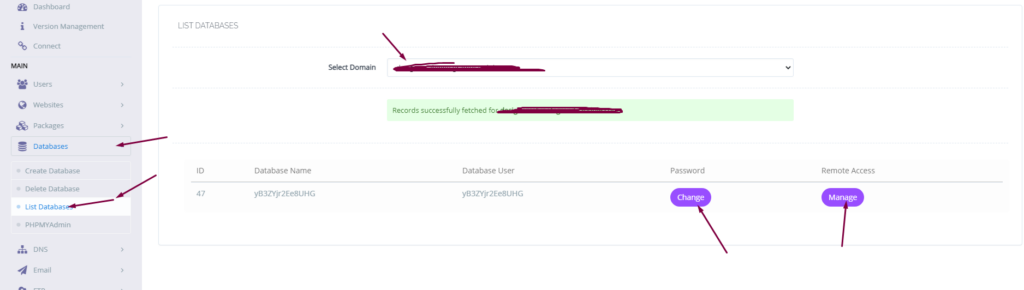
you can also list the database for any of your site on sever from Database-> List Database then select the domain and you can see the list.
list database
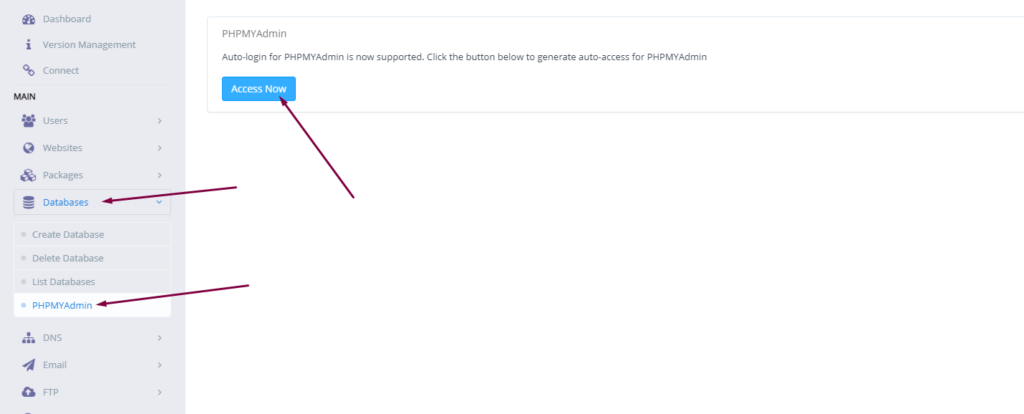
Access Database:
To access your database you created you have to go to Database-> PHPMYADMIN. Then press Access Now button.
You can see the PHPMyAdmin screen now. Where you can see all database for all domains. You can check the database your created and do any operation you want to do on this database.
Do you know now from CyberPanel version 2.0.3 you can install Redis on your server using one click? Here we will tell you one-click Redis install through CyberPanel.
Now CyberPanel made the installation and use of Redis cache on your server very easy.
Redis is an open-source cache used to cache databases, and is used as a message broker. Nowadays it is very important to use cache and boost your website. CyberPanel helps you to do this.
One-Click Redis install Through CyberPanel:
Follow these steps to setup Redis on your server.
Login to CyberPanel
One-Click Redis Install
Install Redis PHP extension
Setup Redis on WordPress using LS Cache
Login to CyberPanel:
Login to your CyberPanel using the credentials. Follow the link with port 8090.
https://<Your_IP>:8090
CyberPanel
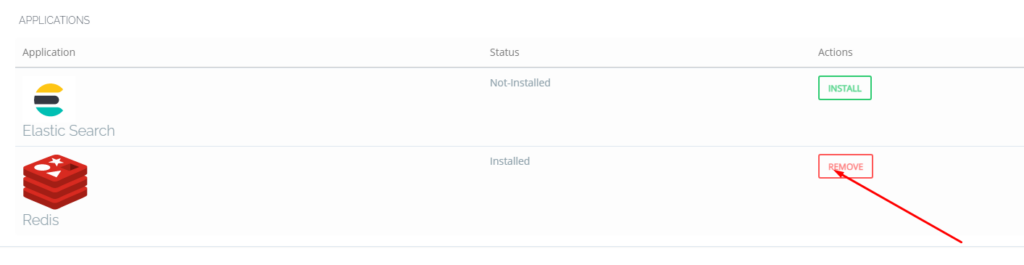
One-Click Redis Install:
To install Redis on your server you have to go to the Manage Services->Application -> Redis then you can see the install button there. Click that and your Redis installed.
Now your Redis is installed and you have to install PHP extension to run properly.
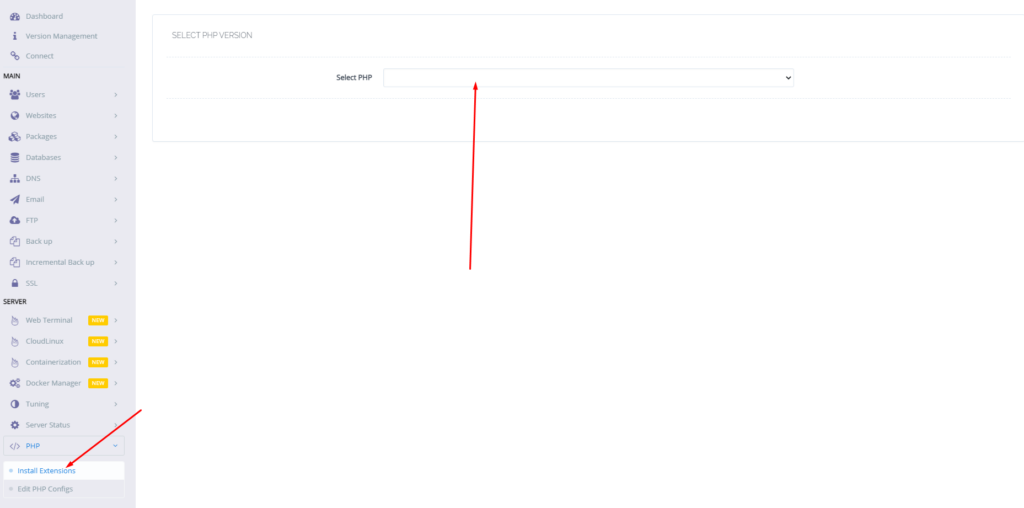
Install Redis PHP extension:
Now go to the PHP-> Install Extension Then you have to select PHP version for which you want to install Redis Extension. You can also follow this link.
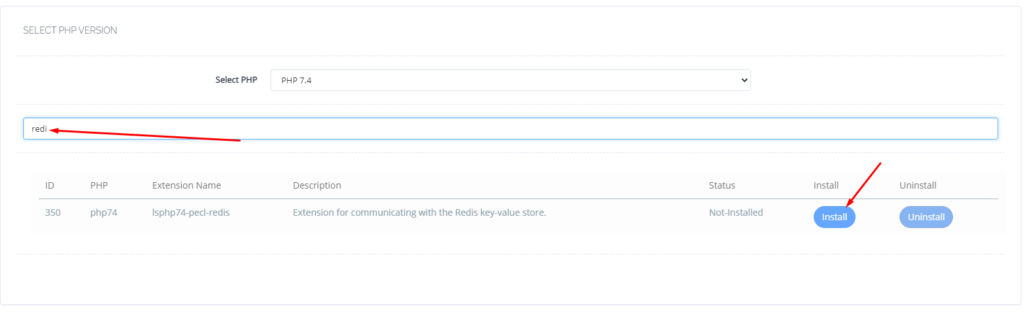
Now search redis on the search bar and you can see redis PHP extension press the Install button and everything is good to go.
Redis
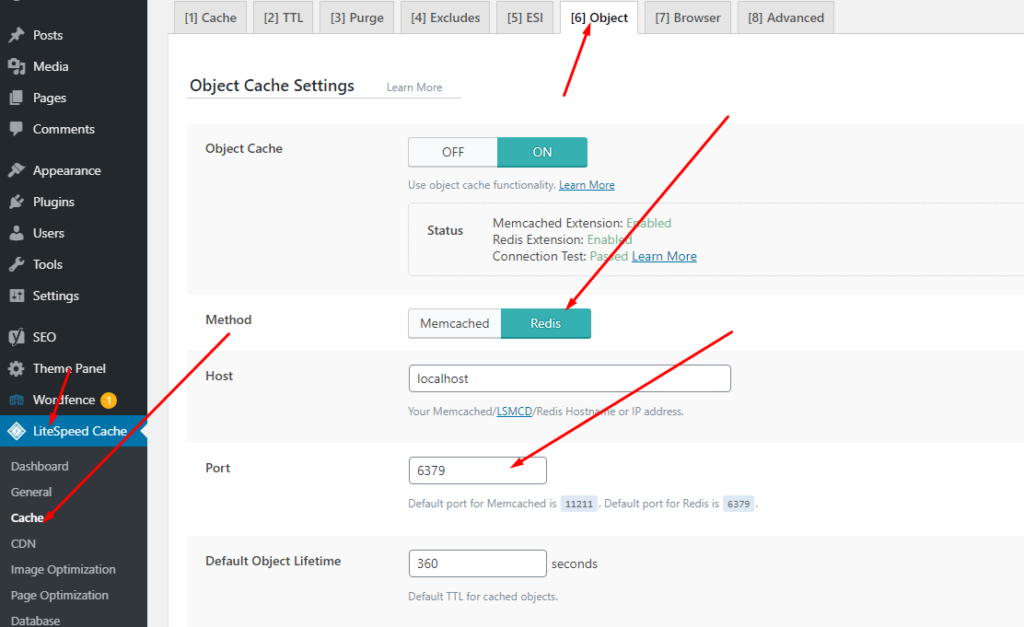
Setup Redis on WordPress using LS Cache:
Now it’s time to setup Redis on your WordPress site. We will tell you here how you can setup Redis on your WordPress site without any extra plugin. Ls cache plugin will all do for you. Let’s begin how to do.
Do you know how to change CyberPanel Admin Password? Read this short article to check and know how to change or reset the admin password on CyberPanel.
Methods to Change or reset CyberPanel Password:
Reset Cyberpanel Password using Command line.
Change Password From CyberPanel
Reset CyberPanel Password using Command line
Mostly you use this method when you don’t have your CyberPnael Credentials are forgotten your CyberPanel password. And you have root SSH access to your system.
To change the Cyberpanel password from the command line you just need to run a simple command.
adminPass Your_New_Password
This command helps you to reset your password easily without having any CyberPanel access.
Reset CyberPanel Password using Command line
Change Password From CyberPanel:
If you have your CyberPanel admin account access and you want to change it you just need to follow these easy steps.
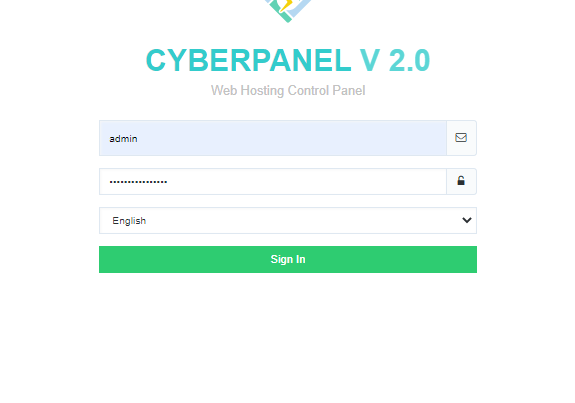
Login to your cyberpanel account using your credentials on port 8090.
https://<your_ip>:8090
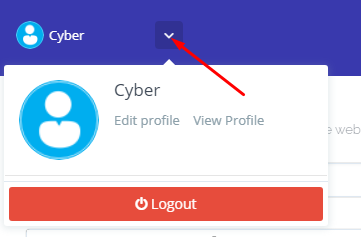
Once you login into your account clicks on the arrow on the top of your cyber panel account.
CyberPanel Profile
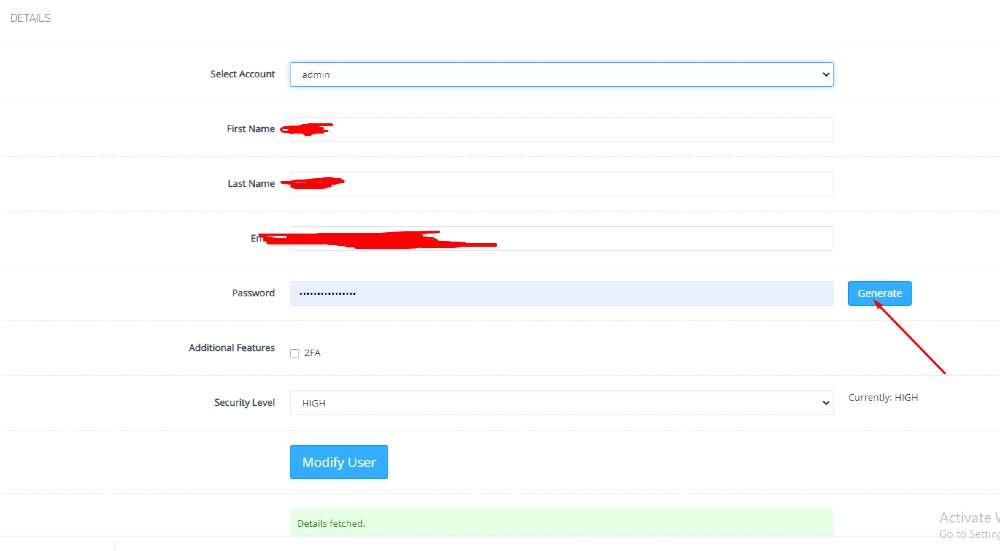
Then click the Edit Profile button. You can see a screen that ask you to select the account for which you want to change the password of CyberPanel.
Edit Profile
On this page, you can see you can change the password for your account and you can easily generate a password by clicking the generate password button.
Generating a password is a good move because CyberPanel auto-generate password will always generate a strong password.
This is a basic tutorial in this i will tell you how to create FTP account on CyberPanel. To create and access FTP account using CyberPanel is very easy you just need to follow the few steps.
Access CyberPanel
Create FTP account
Access FTP account
Access CyberPanel:
To access Cyberpanel go to the :
https://<your ip>:8090
You can also access through the host name. Provide the login username and password to access the page and click the lo0gin in.
Access CyberPanel
Create an FTP account on CyberPanel:
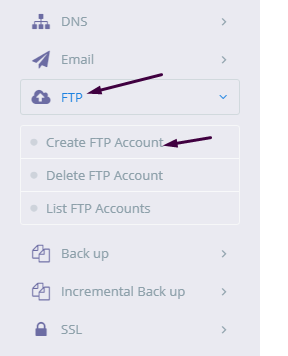
To create FTP account you need to go to the:
FTP-> Create FTP account.
Create FTP account
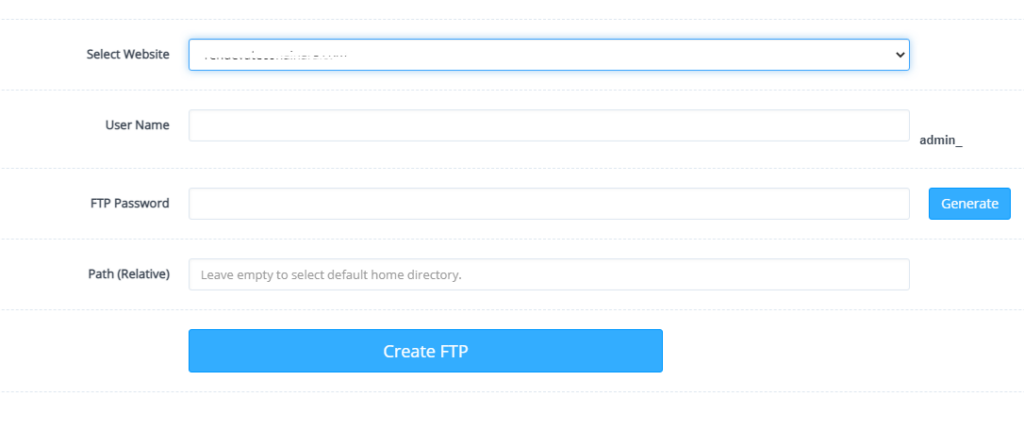
Now Select a website for which you want to create a FTP account and provide the required details.
Select a website
After adding information press Create button.
Create button
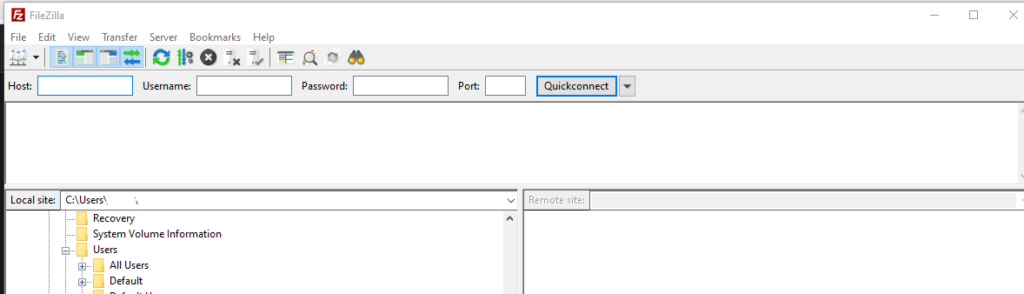
Access FTP account:
Once you successfully created a FTP account on CyberPanel now you can access the FTP account easily using FileZilla program.
You can easily download FileZilla program for your computer from there official site. Click Here to download.
Access FTP account
To access FTP account using filezilla you need following information like:
Username
Password
Port number
Host
User name and password are the once you set during the creation of account on CyberPanel. You can use port 21 for FTP and your IP address as Host.
This is just a basic tutorial about creating and access your FTP account.
The process to add Child domain or subdomain in CyberPanel is very easy and short. Here i will tell you how to add subdomain in CyberPanel under any main domain or website.
How to Create Child Domain under main website?
To create child domain for a main or master domain you just need to go to.
Websites->List Websites->Manage
Manage of that website for which you want to create the subdomain.
Websites->List Websites->Manage
And click the Manage button you can also follow this URL:
https://<YOUR IP>:8090/websites/example.com
When you click the manage button you can see the website manager screen. This screen has a a lot of option. Like LOGS, DOMIANS, FILES, CONFIGRATIONS, ETC.
Got to the Domains part and click the Add Domains button.
Add Domains
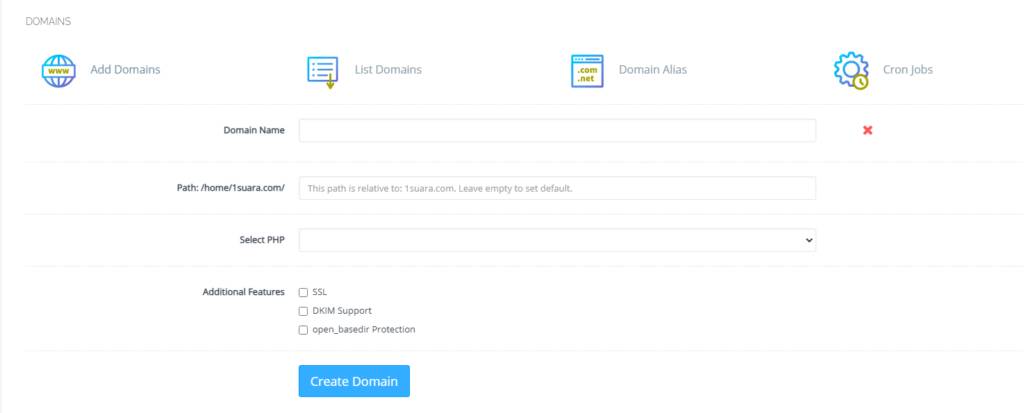
When you click on this option you are asked to provide the details for the subdomain you want to add.
Details for the subdomain you want to add
After providing the details like:
Domain name
Path (Leave it empty)
Select PHP version
In additional features (Select SSL, DKIM, Open_basedir Protection)
Click the Create Domain button and you will receive a success massage from the panel.
Create Domain
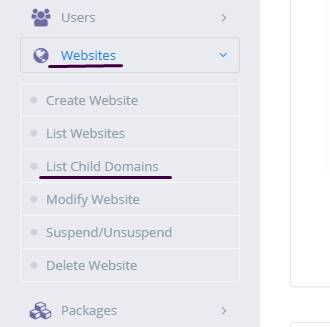
Once child domain is created from here. Now you can list child domain from two ways.
Go to website-> List child Domain
website-> List child Domain
2. From the Websites-> List Websites -> Manage-> List Domains
How to create and access email account on CyberPanel?
In this article i am going to explain a simple way to create email account on CyberPanel and access your email on CyberPanel.
So basically here we only discuss how to create and access email on CyberPanel. We do not going in to any other details like setup the whole procedure.
This article has following steps:
Create New Email account on CyberPanel
Access through rainloop desk
Change password for email
This guide is for basic user so if you are an expert you can comment if we miss any thing in article.
Create New Email account on CyberPanel:
To create a new email account in CyberPanel log into your CyberPanel account using credentials.
Visit this your CyberPanel URL looks like:
https://<server ip>:8090
CyberPanel
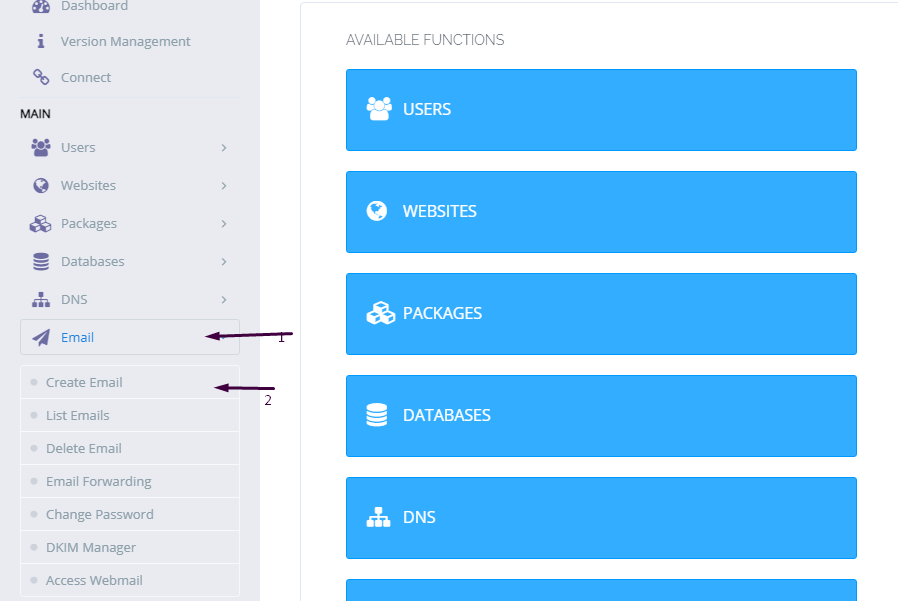
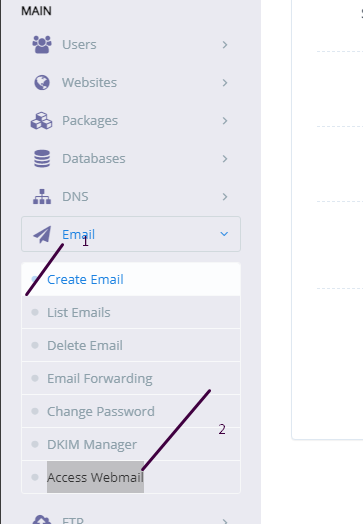
Now go to the EMAIL-> CREATE NEW EMAIL option in side menu.
EMAIL-> CREATE NEW EMAIL
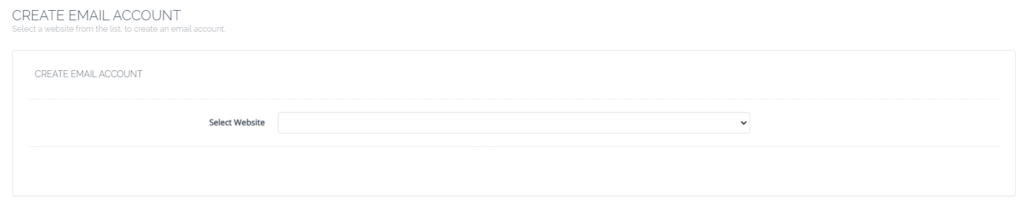
On the Create new email screen you need to select the Website for which you want to create email account.
select the Website
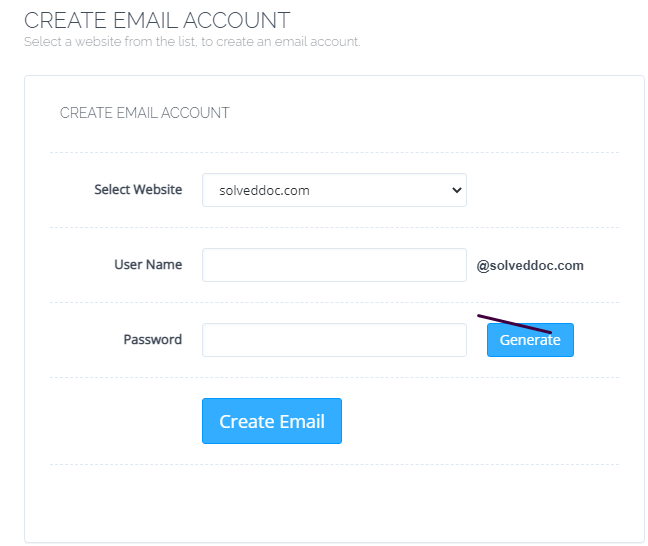
Now add the required details. like:
User Name
Password (better to generate random password from button)
Provide Information
Provide details and Press Create Email button you can see the massage.
Email with id : test@solveddoc.com is successfully created.
Access through rainloop desk:
To access your email account you need to got to the:
Email-> Access Webmail
Access Webmail
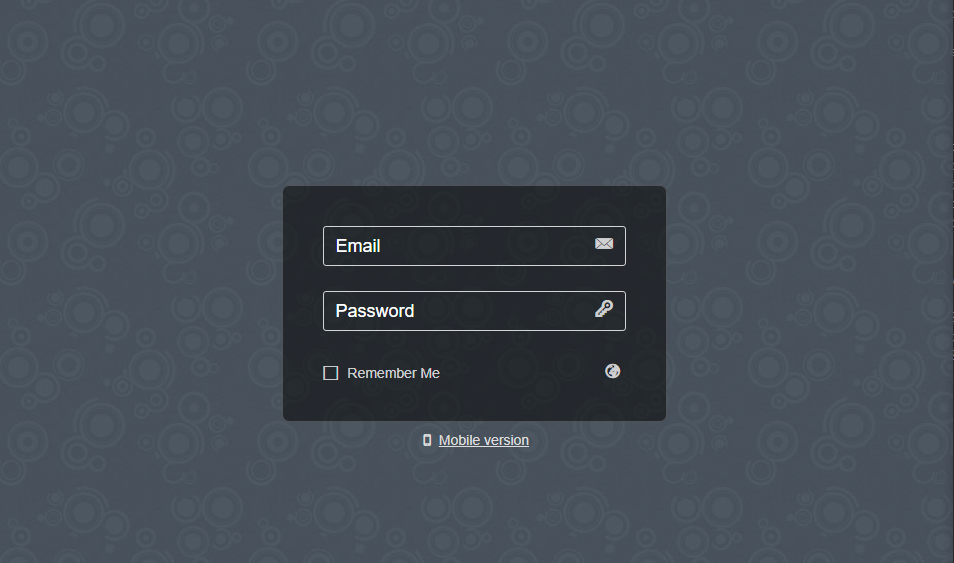
When you click on Access webmail it will navigate you to the:
https://<server ip>:8090/rainloop/index.php
Here you can see this screen.
RainLoop
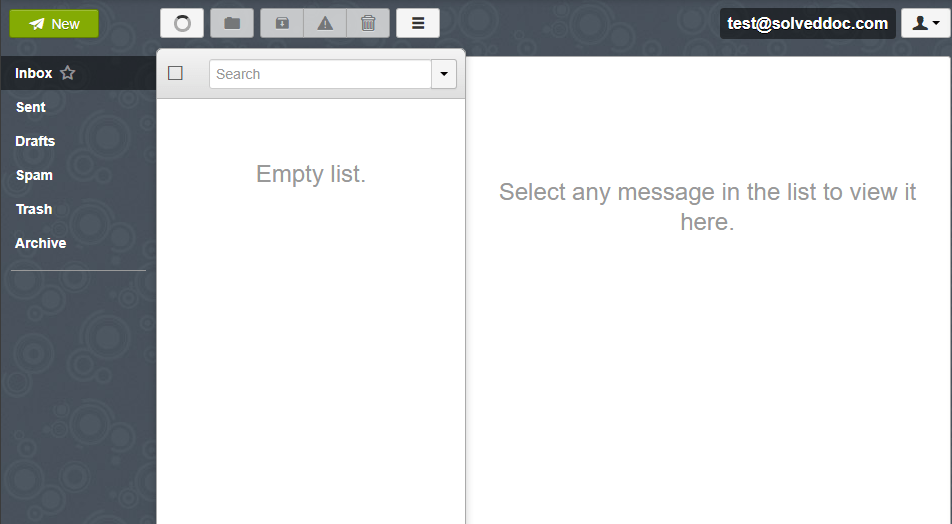
Provide the required details and get login. Here is the dashboard you see once login.
RainLoop DashBoard
This is a tutorial to create and login not the whole setup is included in it.
Change password for email:
If you want to change the password of any existing mail this is very easy using CyberPanel.
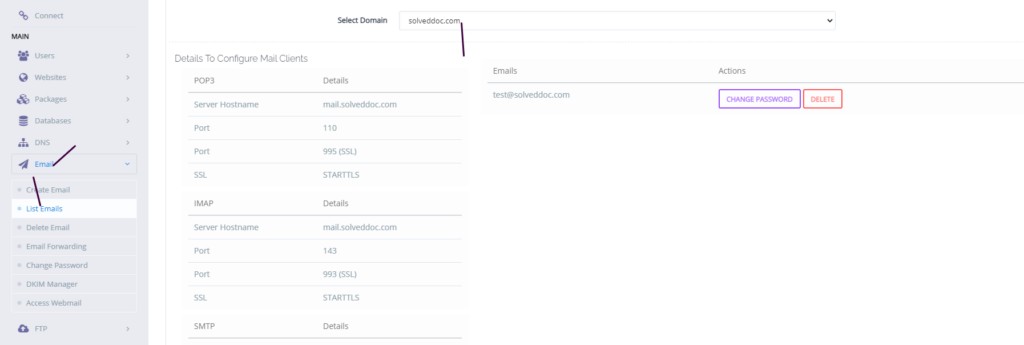
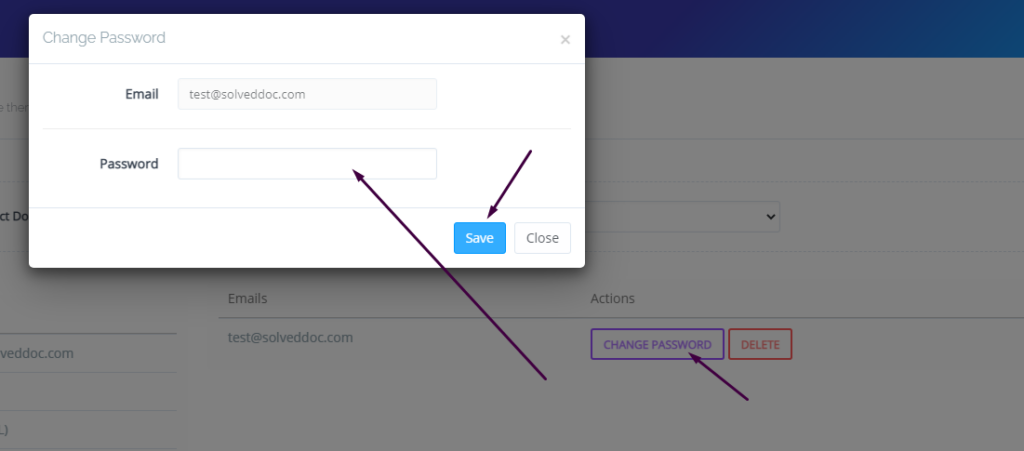
Go to the EMAIL->LIST EMAIL select the website for which the email password you want to change.
Email Password
You can see the change password button IN front of the the mail press that. When you press a prompt appears and ask for new password provide new password and click save.
New Password
This is a basic tutorial for email creation and access. Please leave your comment below if we need to change any thing in this article.
CyberPanel has a great feature to add Google Drive backups. They added this feature in their 2.0.2 version.
This G-Drive backup option makes the backup process easy and more reliable. The method to set up Google drive Backup is also so easy. there is nothing typical or complex.
You can follow this guide to add Google drive backup through CyberPanel.
Table Of Contents:
Login to your CyberPanel Account
Set up Google Drive Backup
Set Up New Account
Add Sites For Backup
Login To CyberPanel:
To initiate this process you must have to log in to the CyberPanel. So use your CyberPanel credentials to log in.
Set Up Google Drive Backup:
Now go to Back Up->Setup Google Drive to set up google drive backup for your site.
Set Up new Account
Here you can see the SETUP NEW ACCOUNT click that button to add a google drive account for backup.
You can see a Pop up asking for the name of the account you want to set up for your g-drive backup.
Enter your name here and then click the Save button. This will migrate you to a new screen for Google account setup.
Select any account if you are logged in or add a new one here
Now click the Allow button to processed.
Once it’s done now you will get back to the backup page. and you can select that account you just added.
Add Sites For Backup:
Now you can add backups for your sites from this screen. Select account from here.
Now provide the details and Press the Add button then you can see the Site added below.