Warning: Redis::get(): php_network_getaddresses: getaddrinfo for localhost failed: Name or service not known in /home/solveddoc.com/public_html/wp-content/plugins/litespeed-cache/src/object-cache.cls.php on line 674 December 2020 - Solveddoc
How to Enable Developer Mode and Enable USB Debugging on Android Phone?
As a normal Android user you do not need the to enable developer mode and enable USB debugging on you device.
But If you are an android developer and want to run the Andriod app directly on your phone you need to enable developer mode and enable USB debugging on your device.
To turn on the Developer option on your android phone you just need to follow some easy steps.
Enable Developer Option From Settings
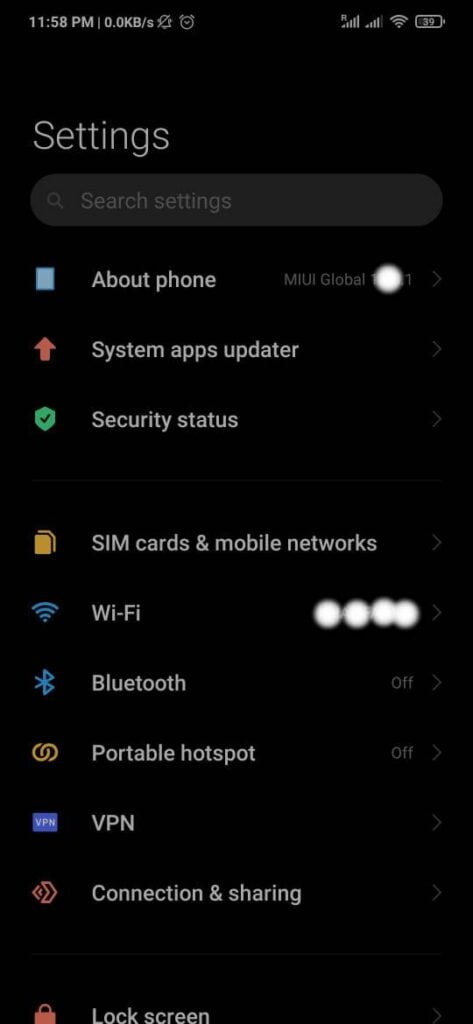
Go to the Settings option of your Phone.
You can see the About Phone option in your settings.
About Phone
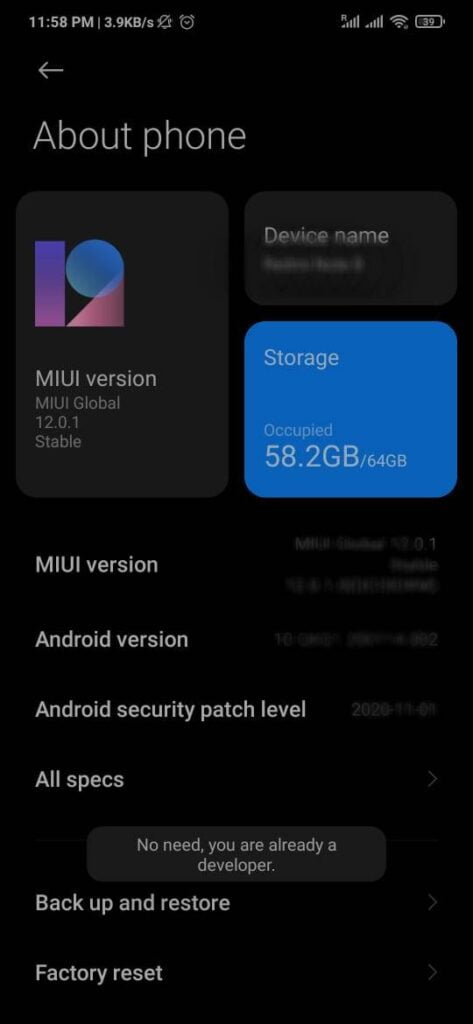
3. Now click on this About Phone option and you will see a Build Version in the case of my device it’s MIUI Version.
Click again and again on this option until this massage came, You are already on the developer mode.
Developer mode
Once you see this massage its mean developer mode is already enabled.
Enable USB dubbuing from Developer Option:
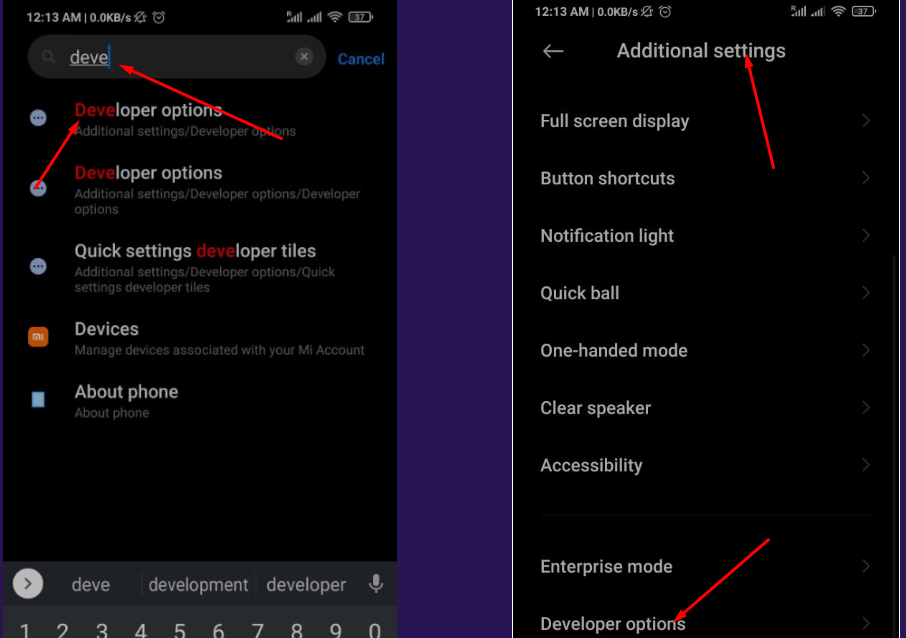
Once you completed all steps stated above now go to the Settings and Additional Features (In some cases it is on the main settings page). Here you will find the Developer Option if you scroll down.
You can also search for Developer Options in the search bar of the settings page.
Additional Features
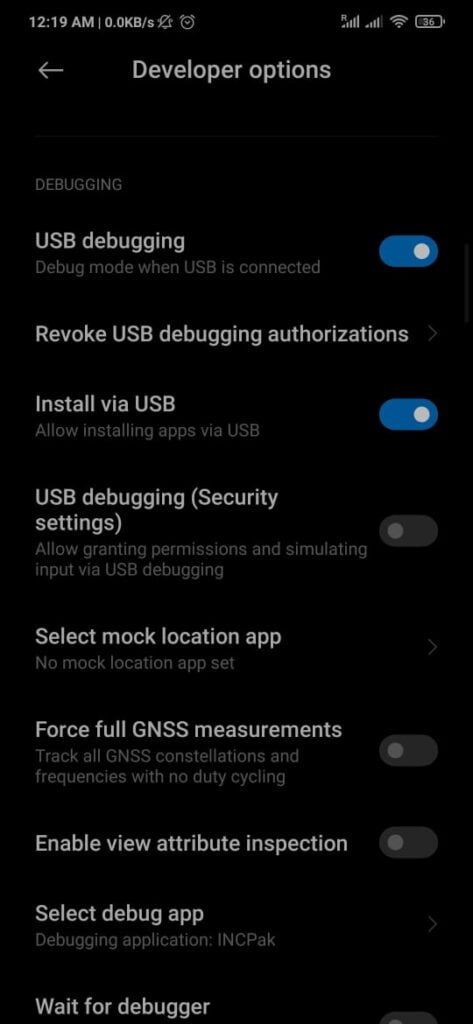
3. Go to the Developer Options and scroll down you will see the Debugging part on this screen.
4. You need to enable Both USB Debugging and Intall VIA USB.
USB Debugging and Intall VIA USB
All done for this and now you can easily use your android phone to test your Application in debugging phase.
This is a basic tutorial in this i will tell you how to create FTP account on CyberPanel. To create and access FTP account using CyberPanel is very easy you just need to follow the few steps.
Access CyberPanel
Create FTP account
Access FTP account
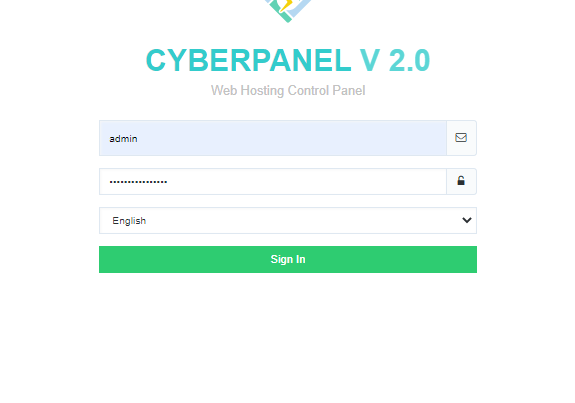
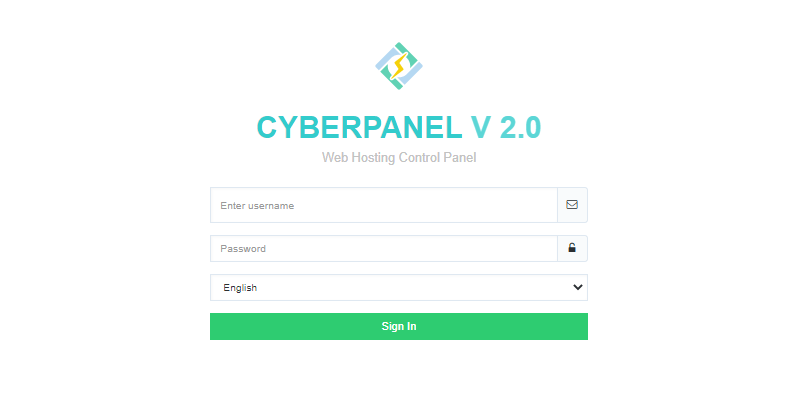
Access CyberPanel:
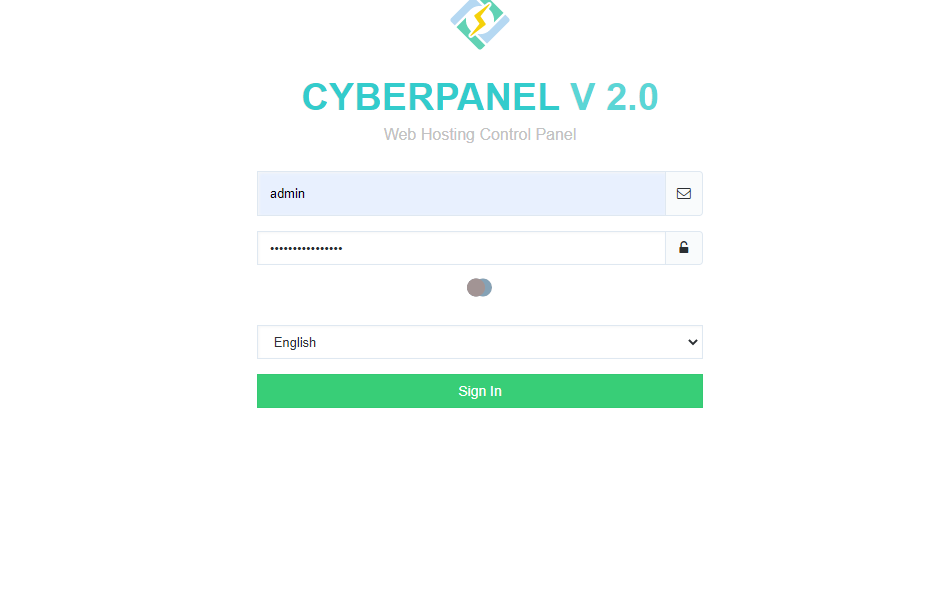
To access Cyberpanel go to the :
https://<your ip>:8090
You can also access through the host name. Provide the login username and password to access the page and click the lo0gin in.
Access CyberPanel
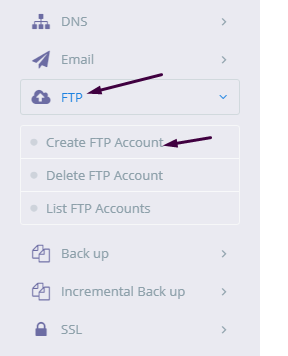
Create an FTP account on CyberPanel:
To create FTP account you need to go to the:
FTP-> Create FTP account.
Create FTP account
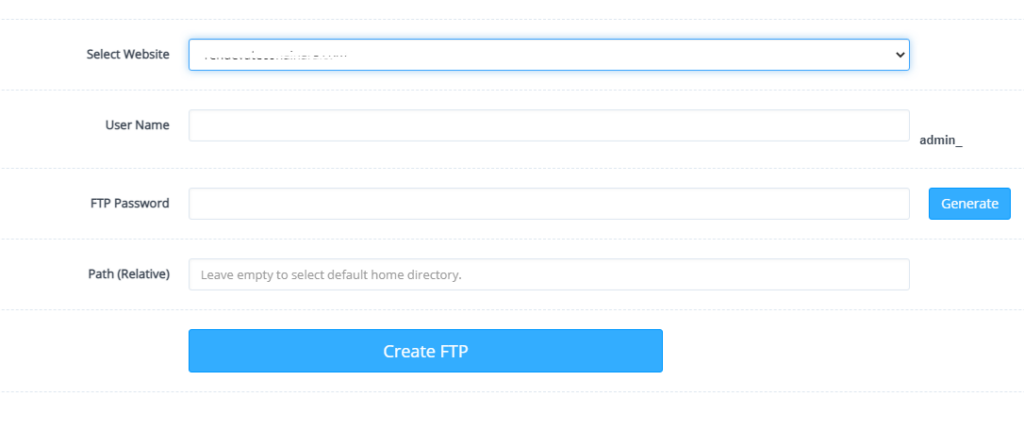
Now Select a website for which you want to create a FTP account and provide the required details.
Select a website
After adding information press Create button.
Create button
Access FTP account:
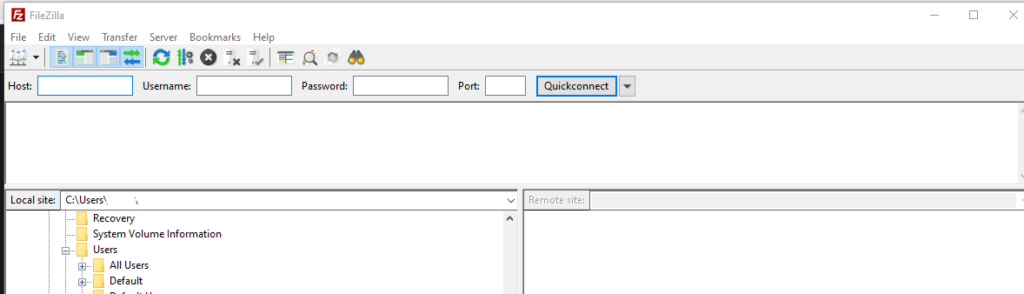
Once you successfully created a FTP account on CyberPanel now you can access the FTP account easily using FileZilla program.
You can easily download FileZilla program for your computer from there official site. Click Here to download.
Access FTP account
To access FTP account using filezilla you need following information like:
Username
Password
Port number
Host
User name and password are the once you set during the creation of account on CyberPanel. You can use port 21 for FTP and your IP address as Host.
This is just a basic tutorial about creating and access your FTP account.
The process to add Child domain or subdomain in CyberPanel is very easy and short. Here i will tell you how to add subdomain in CyberPanel under any main domain or website.
How to Create Child Domain under main website?
To create child domain for a main or master domain you just need to go to.
Websites->List Websites->Manage
Manage of that website for which you want to create the subdomain.
Websites->List Websites->Manage
And click the Manage button you can also follow this URL:
https://<YOUR IP>:8090/websites/example.com
When you click the manage button you can see the website manager screen. This screen has a a lot of option. Like LOGS, DOMIANS, FILES, CONFIGRATIONS, ETC.
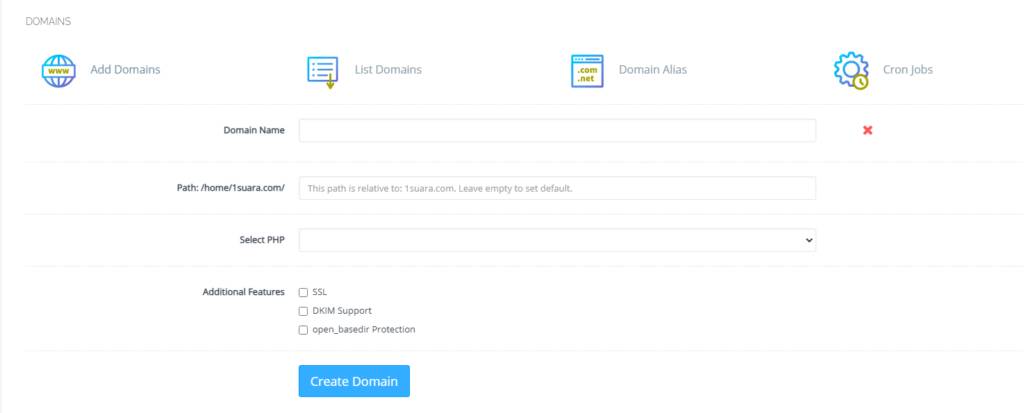
Got to the Domains part and click the Add Domains button.
Add Domains
When you click on this option you are asked to provide the details for the subdomain you want to add.
Details for the subdomain you want to add
After providing the details like:
Domain name
Path (Leave it empty)
Select PHP version
In additional features (Select SSL, DKIM, Open_basedir Protection)
Click the Create Domain button and you will receive a success massage from the panel.
Create Domain
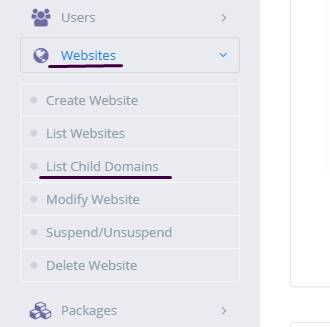
Once child domain is created from here. Now you can list child domain from two ways.
Go to website-> List child Domain
website-> List child Domain
2. From the Websites-> List Websites -> Manage-> List Domains
How to create and access email account on CyberPanel?
In this article i am going to explain a simple way to create email account on CyberPanel and access your email on CyberPanel.
So basically here we only discuss how to create and access email on CyberPanel. We do not going in to any other details like setup the whole procedure.
This article has following steps:
Create New Email account on CyberPanel
Access through rainloop desk
Change password for email
This guide is for basic user so if you are an expert you can comment if we miss any thing in article.
Create New Email account on CyberPanel:
To create a new email account in CyberPanel log into your CyberPanel account using credentials.
Visit this your CyberPanel URL looks like:
https://<server ip>:8090
CyberPanel
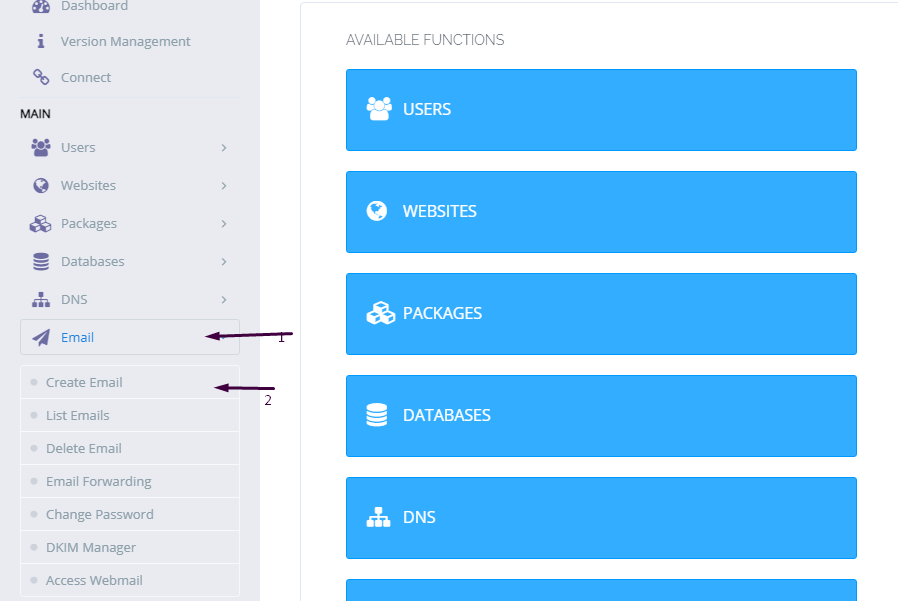
Now go to the EMAIL-> CREATE NEW EMAIL option in side menu.
EMAIL-> CREATE NEW EMAIL
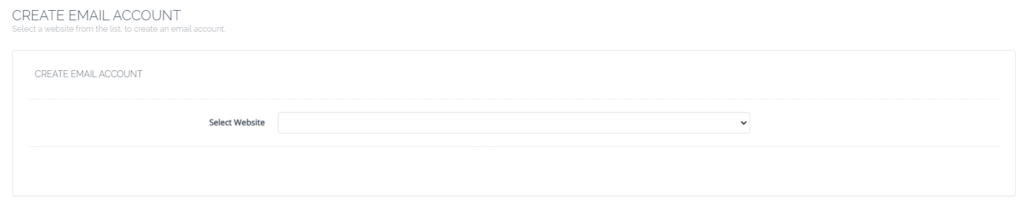
On the Create new email screen you need to select the Website for which you want to create email account.
select the Website
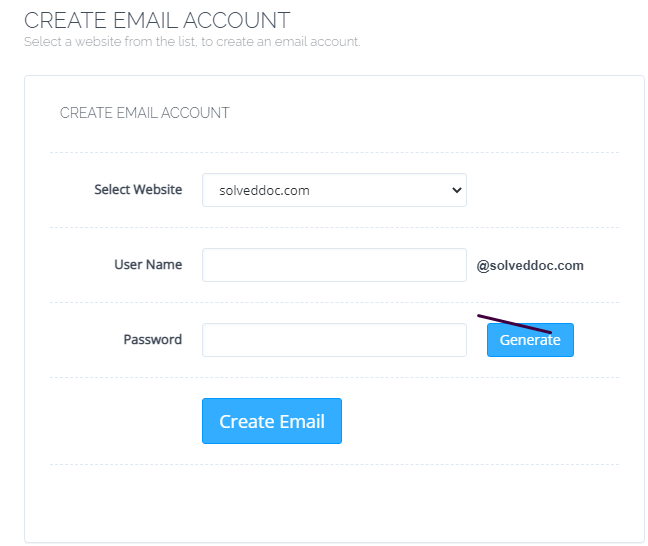
Now add the required details. like:
User Name
Password (better to generate random password from button)
Provide Information
Provide details and Press Create Email button you can see the massage.
Email with id : test@solveddoc.com is successfully created.
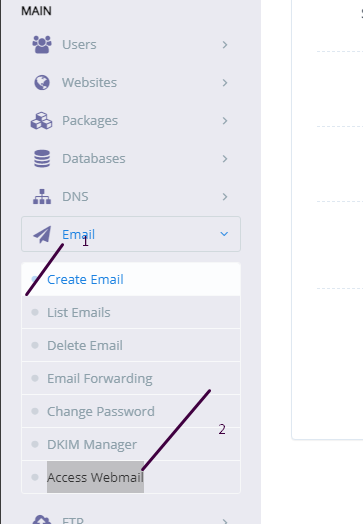
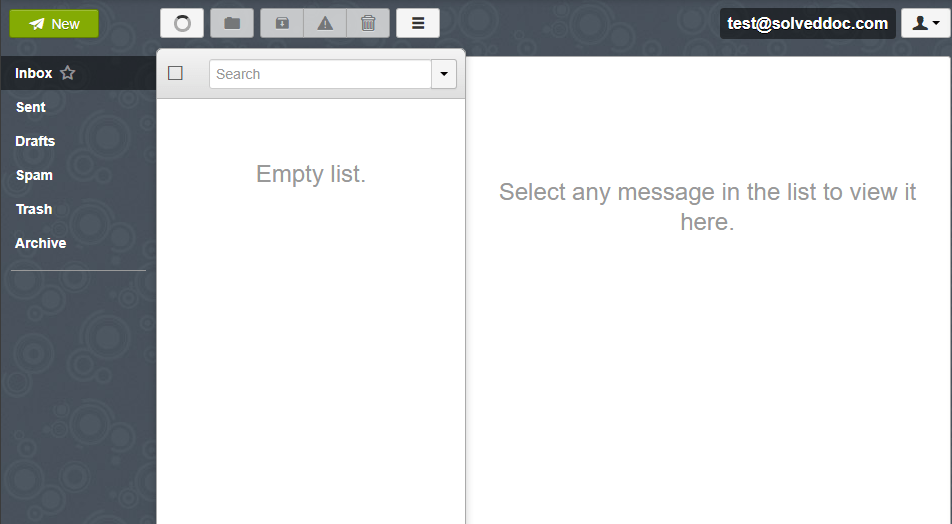
Access through rainloop desk:
To access your email account you need to got to the:
Email-> Access Webmail
Access Webmail
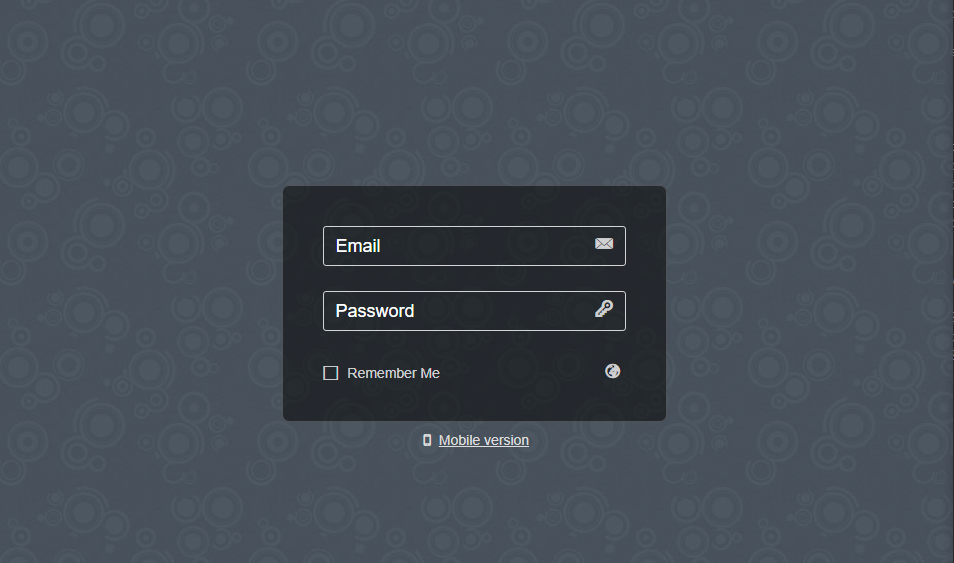
When you click on Access webmail it will navigate you to the:
https://<server ip>:8090/rainloop/index.php
Here you can see this screen.
RainLoop
Provide the required details and get login. Here is the dashboard you see once login.
RainLoop DashBoard
This is a tutorial to create and login not the whole setup is included in it.
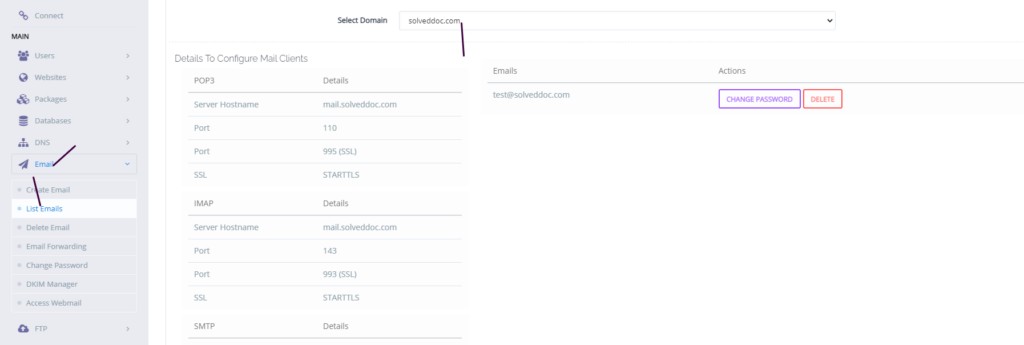
Change password for email:
If you want to change the password of any existing mail this is very easy using CyberPanel.
Go to the EMAIL->LIST EMAIL select the website for which the email password you want to change.
Email Password
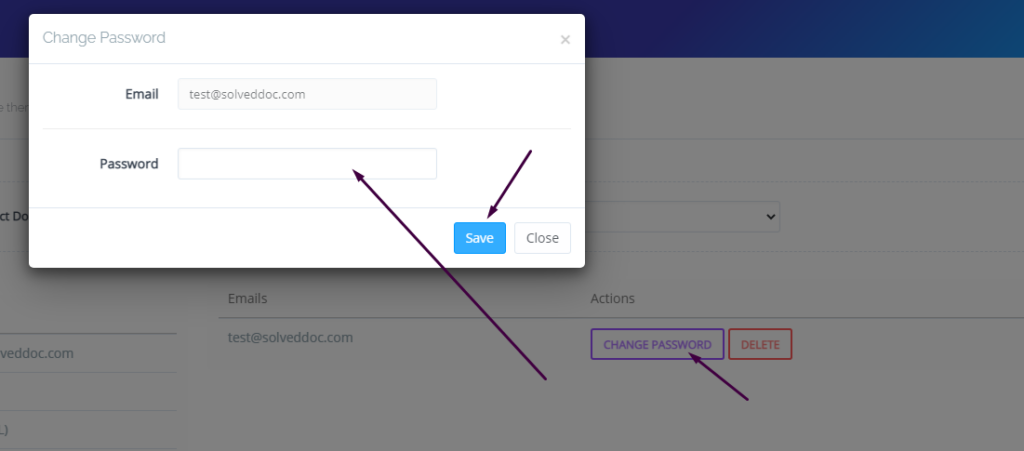
You can see the change password button IN front of the the mail press that. When you press a prompt appears and ask for new password provide new password and click save.
New Password
This is a basic tutorial for email creation and access. Please leave your comment below if we need to change any thing in this article.
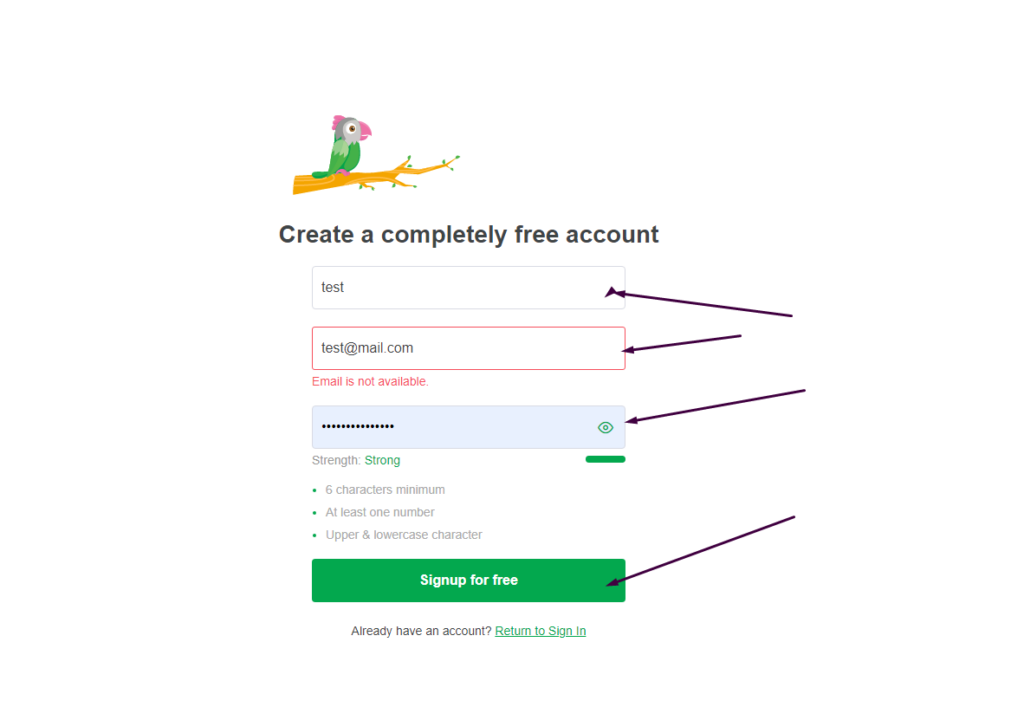
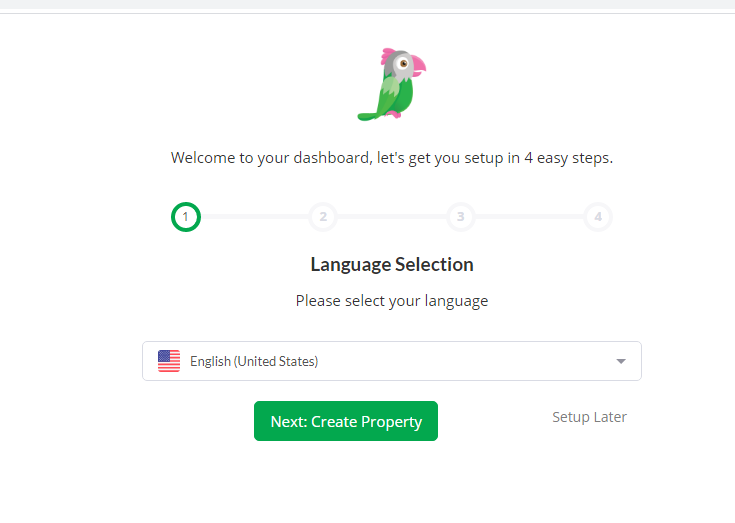
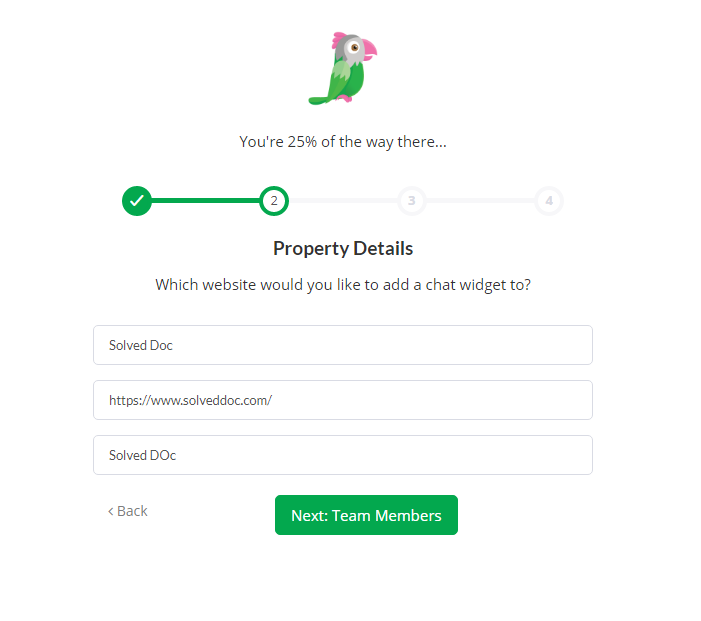
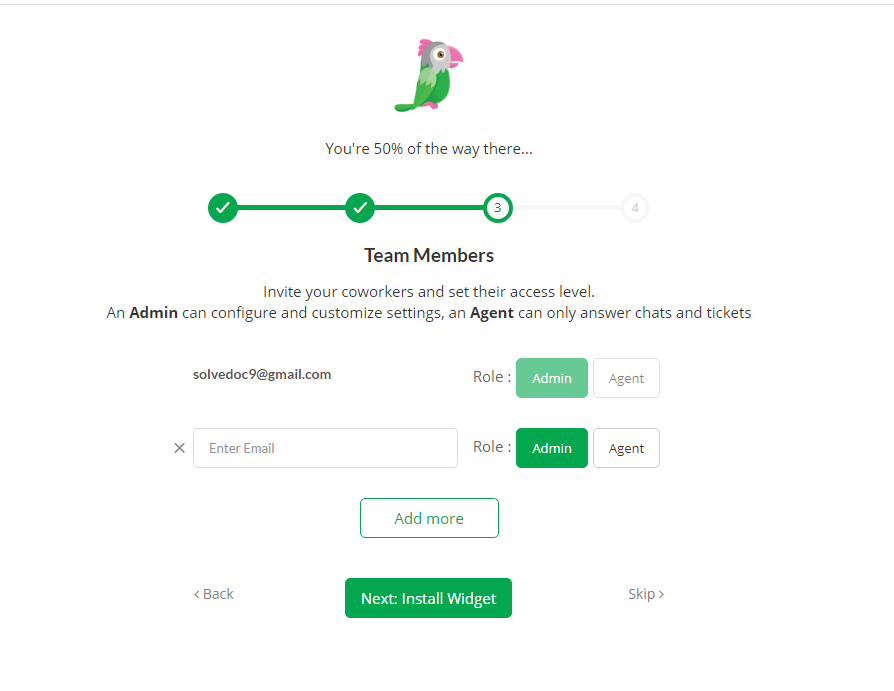
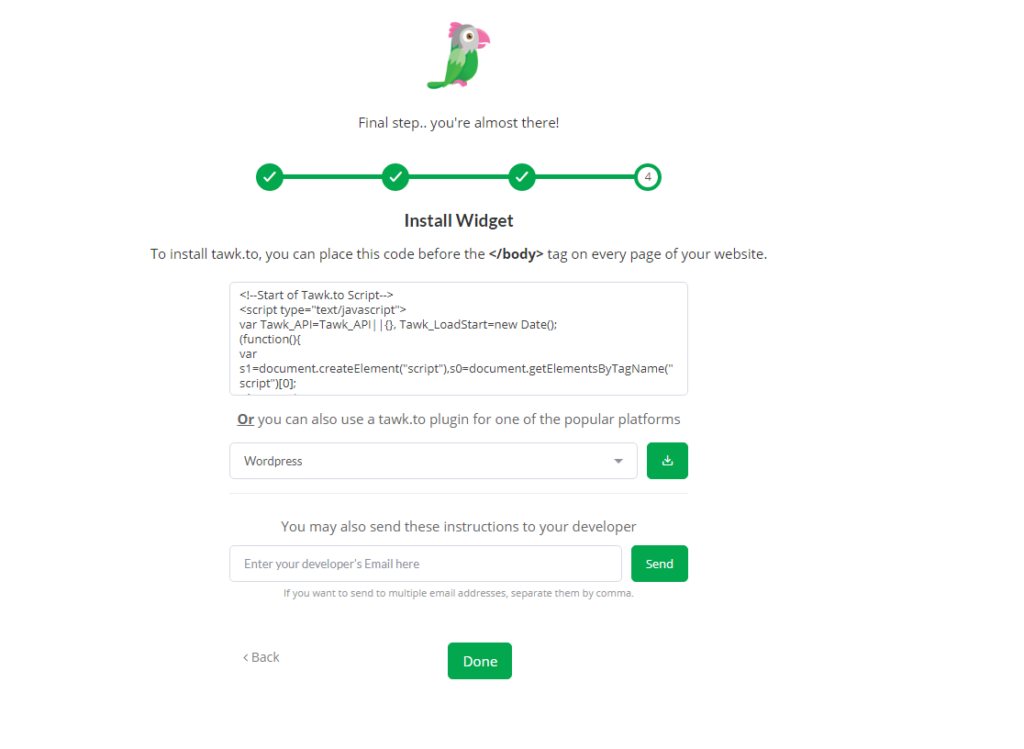
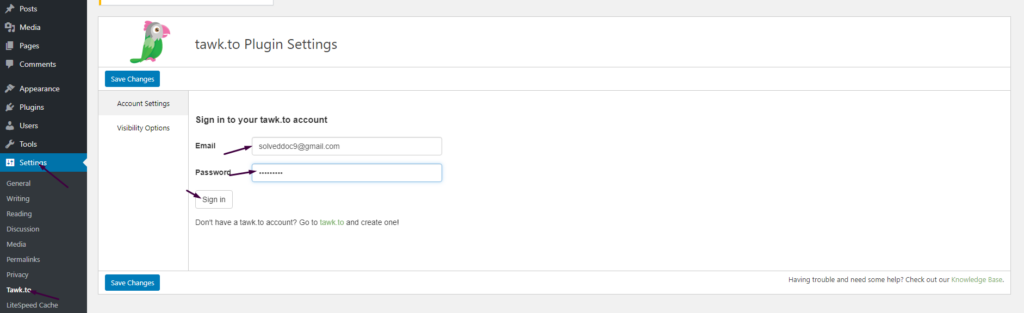
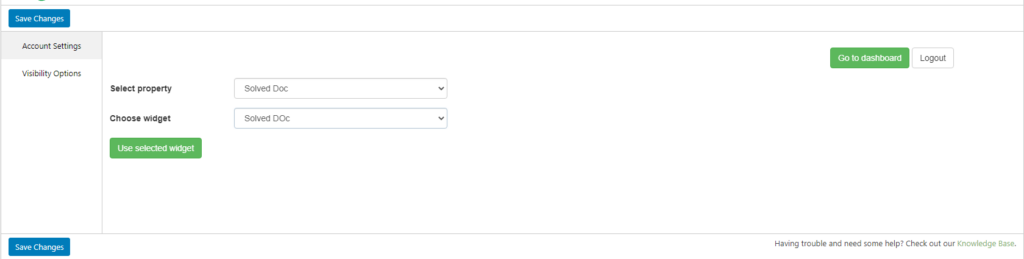
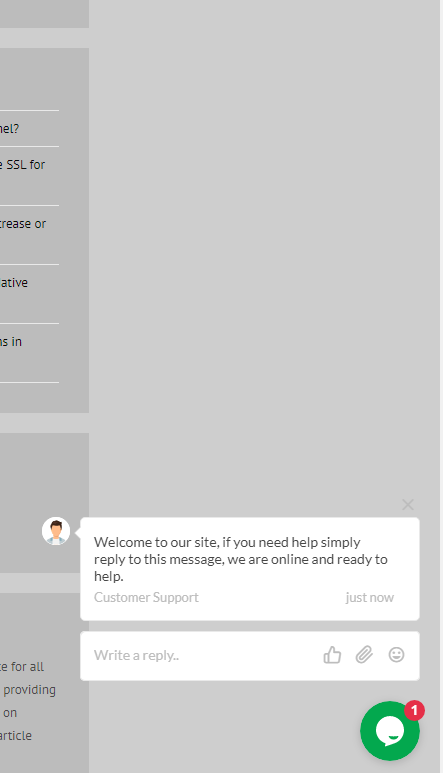
How to add live chat on WordPress Website – Integrate Tawk.To Live Chat to WordPress
In this Article I am going to share my personal experience that how i added the Twak.to Live Chat in my WordPress Site. After reading you come to know how to add live chat on WordPress Website.
This tutorial is basically my personal experience that how I integrate live chat on my WordPress Website. So without wasting time lets start tutorial.