How to access MySql root user using the command line?
Often in the case of big databases or lack of user interfaces you need to do MySQL functions using the command line on your server. In this article, we will discuss How to access MySql root users using the command line?
We try to minimize this article as we can.
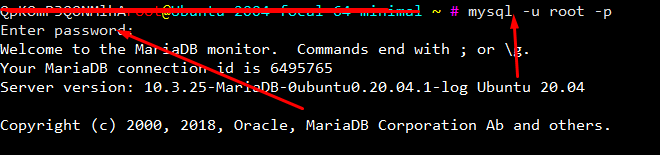
Login to SSH using your credetial vis putty/bitvise etc.
Now copy this comand and paste on your ssh terminal.
mysql -u root -p
After this terminal will ask for the root MySQL password provide a password to be processed.
In the case of cyberpanel Mysql root password location is. /etc/cyberpanel/mysqlPassword. use cmd to show.
This article will discuss the CyberPanel features list. All the features discussed in detail. This CyberPanel features list has all the features CyberPanel has.
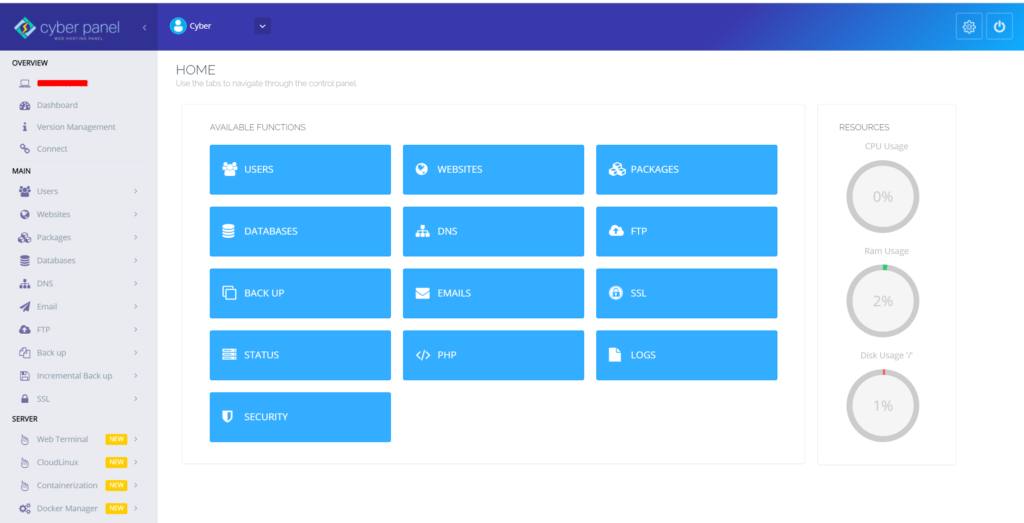
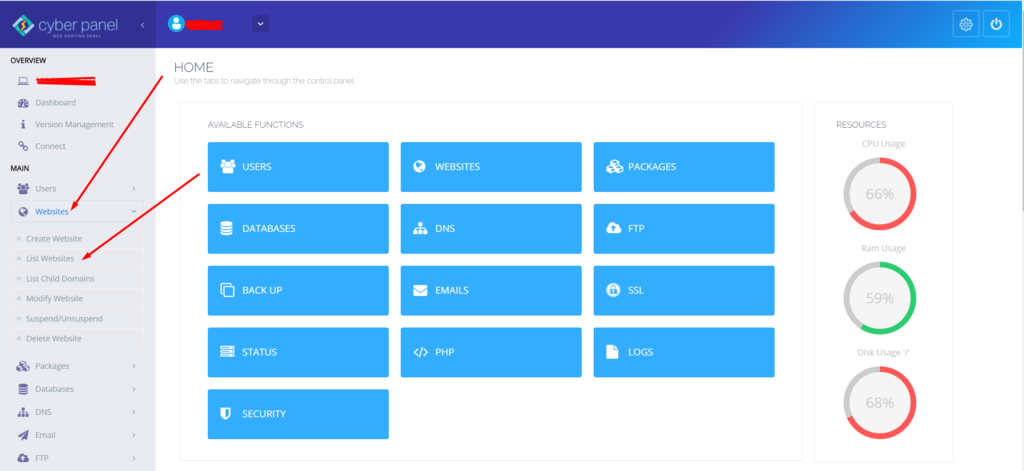
CyberPanel Dasboard:
After login, you come to the base page, which is the CyberPanel dashboard. On the dashboard, you can see a sidebar on the left side, in this sidebar you can almost the feature of CyberPanel. In the center of the page you see those feature buttons you can access these feature from the sidebar lists or you can access through these buttons. On the right, you can see the Resources bar here you can see CPU usage, Ram usage, and Disk usage in percentage, how much you used the resources.
This is the all I discuss above are belong to the base/dashboard page of CyberPanel. now I’m discussing the sidebar feature list one by one.
CyberPanel Features List details
Sidebar in CyberPanel Dashboard:
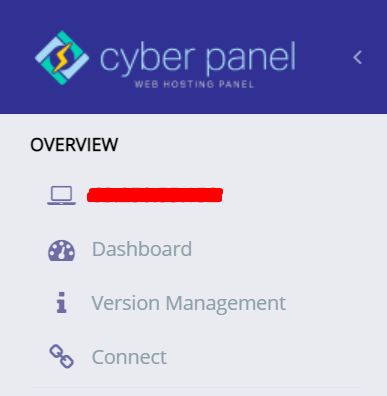
here is the whole sidebar or CyberPanel Dashboard, the Sidebar is divided into three section that is Overview, Main, and Server.
Overview
In the Overview section, there is the general information of your server, On the Top, you can see the IP address(255.255.255.255) that IP is your server IP address. The next button is the Dashboard button, after clicking on this button go to the dashboard. The next button is version management, if you want to know about your CyberPanel version click on this button. The last button in this section is Connect if you want to connect your server to the CyberPanel Cloud then click on this button
On the second section of the CyberPanel dashboard sidebar, you can see a lot of feature dropdown lists,
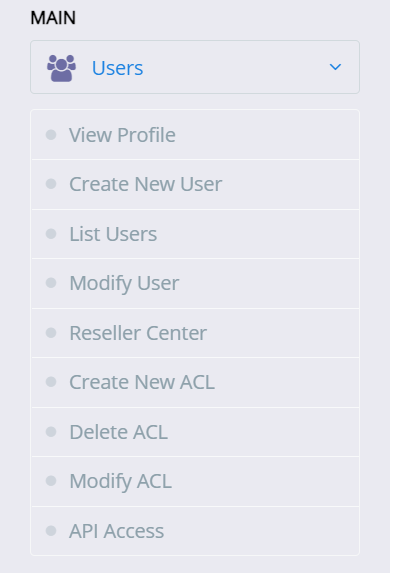
Users
This first feature is Users when you click on Users a dropdown list shown on your sidebar that has a lot more features. View Profile, this feature shows your account details e.g Username, Account ACL, Email, etc. Create New User, if you want to create a new user click on this button. List Users, if you want to list all users of CyberPanel click on this button the all use show on your screen. Modify Users, as the name shows, this button is for update/modify your user’s information. Reseller Center, This feature issue the Reseller account. Create New ACL, This feature is for Creating a new ACL (Access Control List) Delete ACL, if you want to Delete ACL (Access Control List) this feature is for deleting. Modify ACL, if you want to modify or update ACL (Access Control List) click on this. API Access, Enable or disable via this button.
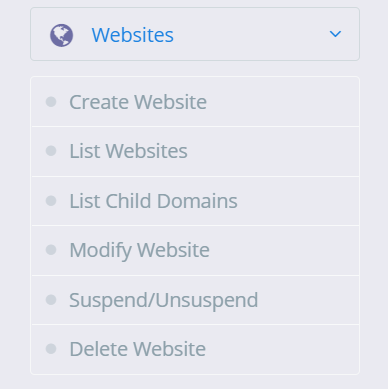
Websites
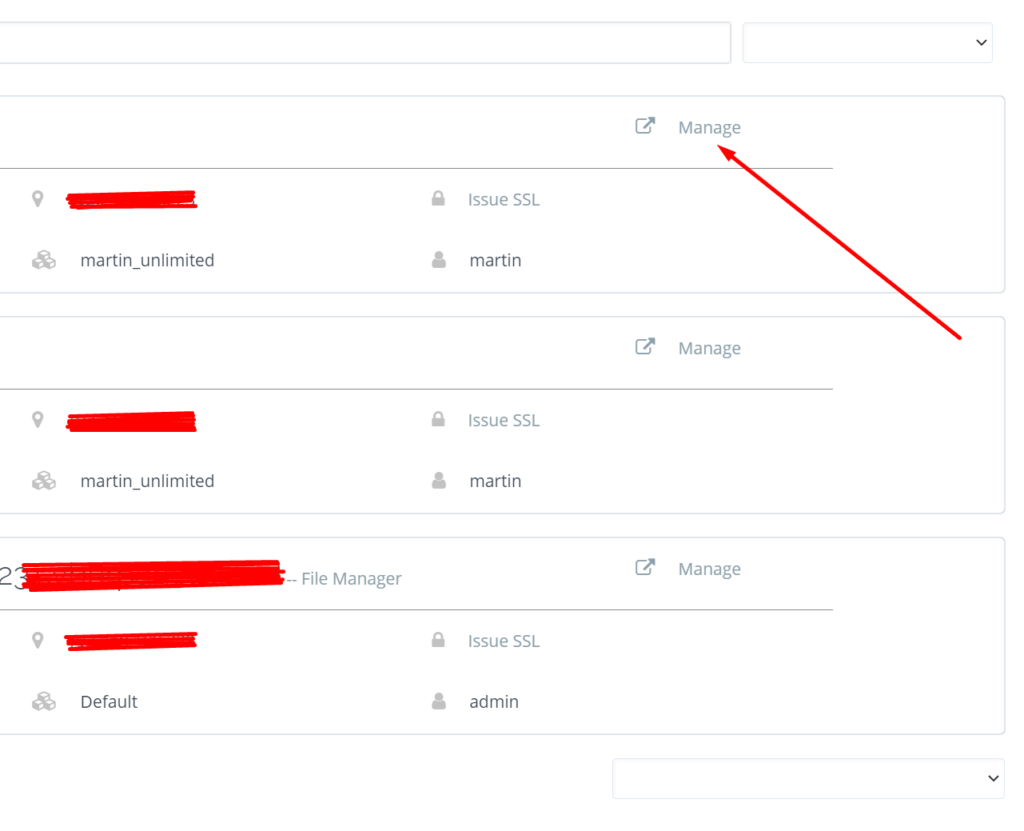
On the Section, the whole information about your websites that you are deployed on this server. Create Website, You can create a new website by clicking on the button List Website, You can list you all website that are deployed on your this server List Child Domains, if you want to List all Child domain you can view all by clicking on this button Modify Website, if you want to update/Modify your website click on this button Suspend/Unsuspend, Delete Website, if you want to delete your website click on this button.
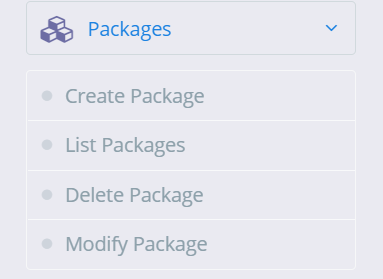
Packages
Packages on CyberPanel help you assign resources to an individual website, you must create at least one package before you start creating websites. Create Packages, You can create a package according to your requirement. List Packages, List all Packages. Delete Package, Delete the packages you won’t need anymore. Modify Package, If you feel the need to modify the parameters for the existing package you can do so via modify package page.
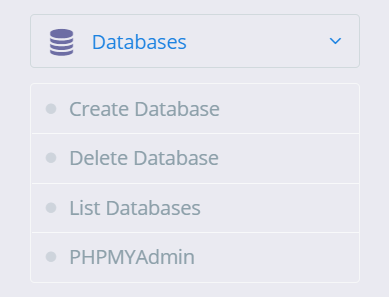
Database
On the Database, you can create, delete, list, and access your database Create Database, if you want to create a new database click on this button Delete Database, On this button, it will delete the database List Database, On this button it will list the database after selecting the website PHPMyAdmin, if you want to access your PHPMyAdmin click on this button.
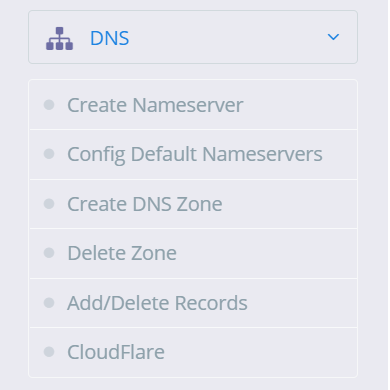
DNS
On this Button the whole informationabout DNS(Domain Name Server) Create Nameserver, You can create a NameServer according to your requirement via this button. Config Default Nameservers, Configure Nameserver via this Button Create DNS Zone, Before you can use the “ADD/MODIFY DNS Records” page you have to create a DNS zone first, this is the first step to start using the DNS server. Delete Zone, Once the DNS zone is created you can delete the zone using this button. Add/Delete Records, Once the DNS zone is created you can add or delete records using this button. Cloudflare, In version v2.0.0, CyberPanel has added the ability to synchronize DNS entries between Cloudflare and CyberPanel DNS on your own server
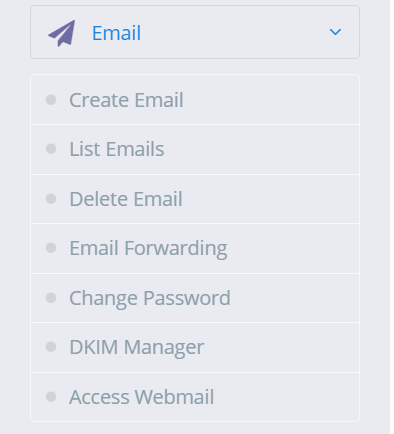
Email
In this section, you can create, list, delete email, etc, Create Email, if you want to create a new email then click on this List Email, This button is for List all Email created on the website. Delete Email, if you want to delete Email click on this button Email Forwarding, ChangePassword, if you want to update or change the password of your email click on its button DKIM Manager, access DKIM manager through this button Access Webmail, access Webmail(Rainloop) through this button
FTP
Create FTP Account, click on this button to create a new FPT account Delete FTP Account, if you want to delete an FPT account click on this button List FTP Accounts, This button is for List all FTP account
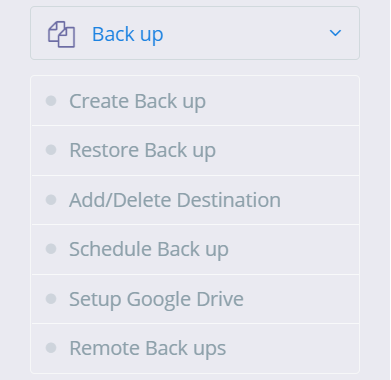
Backup
Taking complete backup of a website account is simple. Create Back up, If you want to create a backup click on this. Restore Back up, Backup restore only works with backups generated through the backup generation tool in CyberPanel. Add/Delete Destination, if you want to Add or Delete Back up Destination click on this Schedule Back up, if you want to schedule your website’s backup then click and produce. Setup Google Drive, This feature is for Google drive one-click backup Remote Backups, this feature is for Remote backup
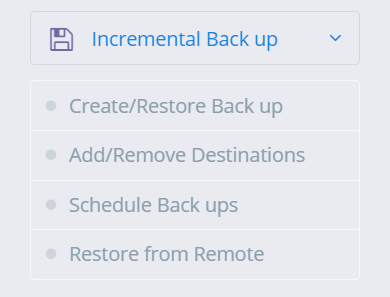
Incremental Back up
CyberPanel version v1.9.1 adds supports for incremental backups, Local, SFTP, S3 backup Create/Restore Back up, you can create a local or remote incremental backup. Add/Remove Destinations, From this button, you can directly go to backup destinations. Schedule Backups, if you want to schedule your website’s backup then click and produce. Restore from Remote this feature is for Incremental Remote backup
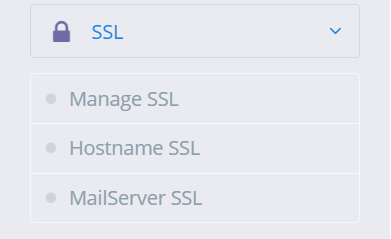
SSL
Manage SSL, If you want to Manage SSL click on this button and manage Hostname SSL, If you want to issue Hostname SSL you can issue it via this button MailServer SSL, this button is for Mailserver SSl
Server
The third and last section of CyberPanel sidebae is server.
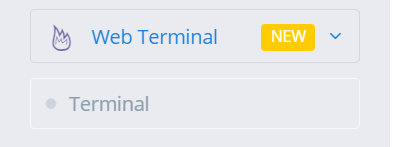
Web Terminal:
CyberPanel v1.9.2 onwards has a web terminal (to access your server SSH). However, in some browsers, you might not be able to use Web Terminal with default self-signed SSL. In that case, just set up CyberPanel on SSL. Now access CyberPanel using that domain.
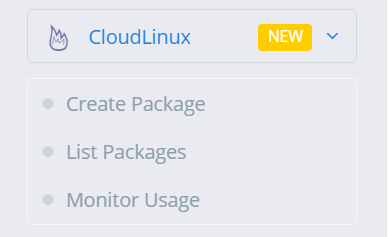
Cloudlinux
CloudLinux and CageFS is available with CyberPanel v.1.8.6, but before using any of its features, you need to convert your operating system to CloudLinux OS. Use the commands below to convert your server to CloudLinux OS. Create Package, List Packages, Monitor Usage,
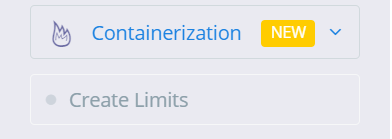
Containerization
Containerization feature (v1.8.0 and above required, currently only CentOS is supported) offers to limit website resources and have no link to our Docker Manager feature. With containerization you can limit various system resources for a website, groups are used on the back end to enforce these limits. You can limit:
CPU Usage.
Memory Usage.
Network Usage.
Disk Usage (IO and IOPS)
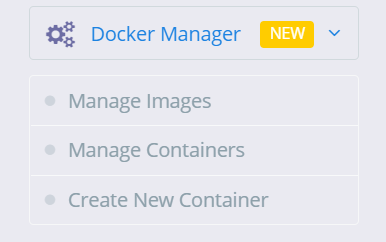
Docker Manager
CyberPanel gives you the ability to manage your Docker container and images the easy way. Some of the exciting features of CyberPanel Docker Manager:
Search and pull images from Docker Hub (Along with tags).
Prune the system.
Create Container from available/pulled images.
List and manage container that includes:
Start/Stop Containers.
View Logs.
Export the file.
View Processes inside the container.
Delete Containers.
Re-create containers.
Manage Images, Manage Containers, Create New Container,
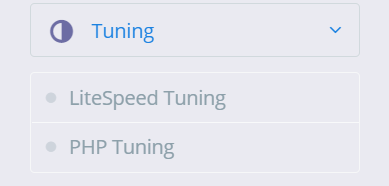
Tuning LiteSpeed Tuning, PHP Tuning,
Server Status
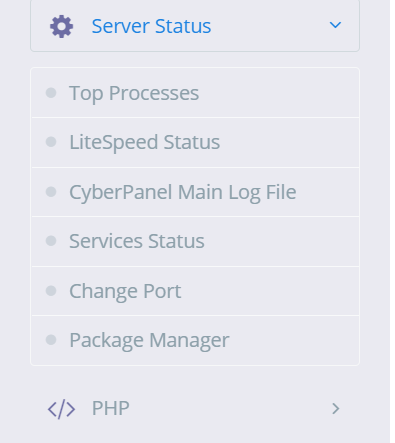
This feature is for check your server status and maintains it. Top Processes, from this feature you can check Top process. LiteSpeed Status, from this feature you can LiteSpeed status CyberPanel Main Log File, from this feature you can check CyberPanel Mail log files Services Status, from this feature you can check your servers Status Change Port, if you want to change your port then this feature is for that Package Manager, from this feature you can access your package manager
PHP
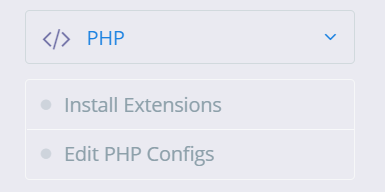
Install Extensions, if you want to install extensions e.g. redis etc extension you can install via this option Eidt PHP Configes if you want to change or configure your PHP version or anything else then you can change from this option
Logs
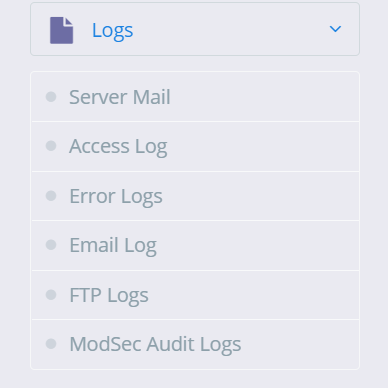
This is main featuer of CyberPanel. if you want see your server log you can watch from the option you can see: Server Mail, Access Log, Error Logs, Email Log, FTP Logs, ModSec Audit Logs,
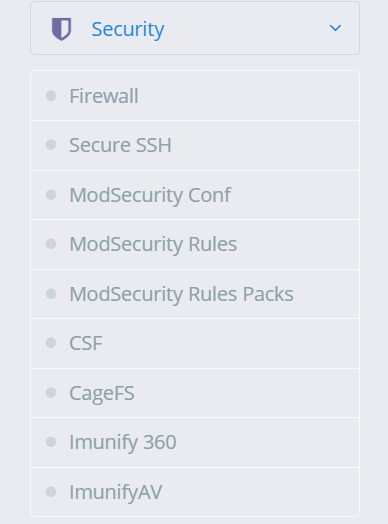
Security
This feature is for your server security. there is a lot of more feature in this. Firewall, you can stop, start, reload, and add/delete firewall through his option Secure SSH, Securing SSH is one of the most important tasks of a system administrator. CyberPanel allows you to change SSH port, disable root login and save your SSH keys. ModSecurity Conf, this feature is for ModSecurity configuration. The ModSecurity Rules, if you want to add/remove update or anything else with ModSecurity Rule you can from this option For the ModSecurity Rules Packs, you can check the ModSecurity Rule pack from this option. CSF, You can configure CSF(ConfigServer Security & Firewall) from this button CageFS, you can enable/disable CageFS from this button Immunity 360, you can enable/disable Imunify 360 from this. ImunifyAV, you can enable/disable ImunifyAV from this.
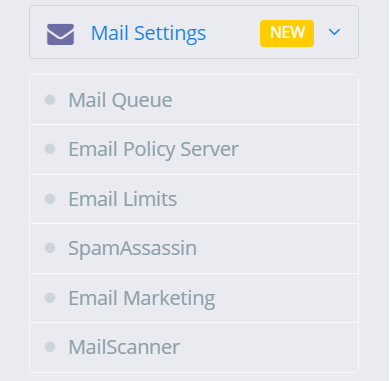
Mail Settings
This feature is related to your emails. Mail Queue, If you want to see your mail Queue(pending mails) you can see. Email Policy Server, this feature s for Email policy. Email Limits, this feature is for email limits SpamAssassin, you can Install SpamAssassin through this feature. Email Marketing, this feature is for Email Marketing MailScanner, If you want to install or remove MailScanner you can from this feature.
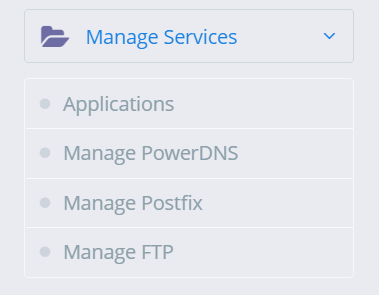
Manage Services
This feature is related to your server Service and application that you can install and check status. Applications, you can install and uninstall applications from this feature. Manage PowerDNS, PowerDNS is the service you can check this form this option And Manage Postfix, you can check postfix service form this option Manage FTP, you can check FTP form this option
Plugins
You can install new plugin and uninstall installed plugin from this feature.
A lot of CyberPanel user uses Rainloop to handle their email. Rainloop is an internal email solution with CyberPanel. Here in this article, we will discuss how you can access Rainloop webmail in CyberPanel?
Rainloop is an efficient memory webmail solution. it is a fast, simple, and modern web-based client email client. Rainloop is the email solution that comes with CyberPanel. It has an amazing user interface. Not only the interface also works great as any other email services.
This article is specifically about access rain loop webmail in CyberPanel.
Follow these steps Access Rainloop Webmail in CyberPanel:
Login you CyberPanel:
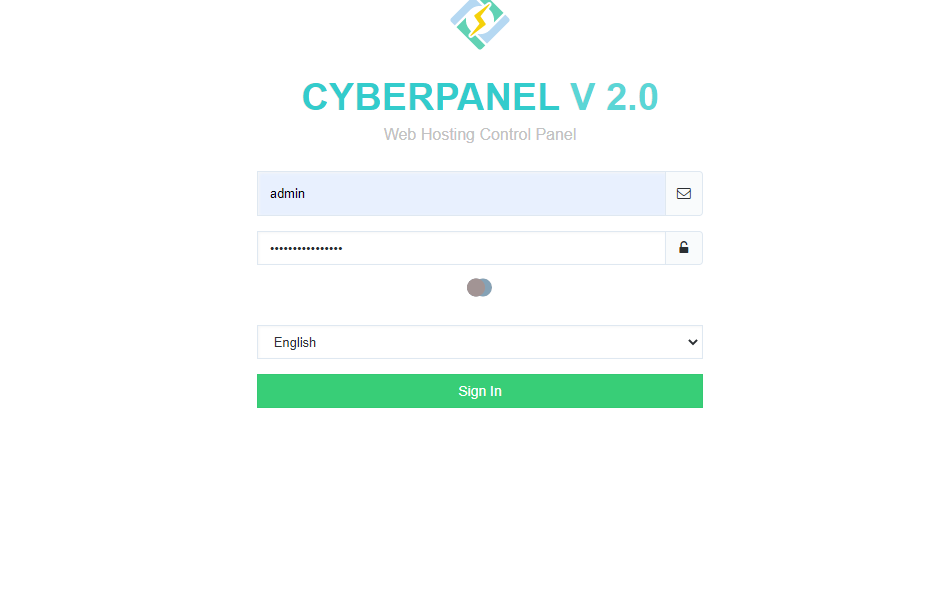
First of all, you need to log in to the CyberPanel dashboard. For this, you must have a username and password (admin or non-admin). Visit your the server IP or hostname with port 8090 to login to cyberpanel.
https://<ip/hostname>:8090
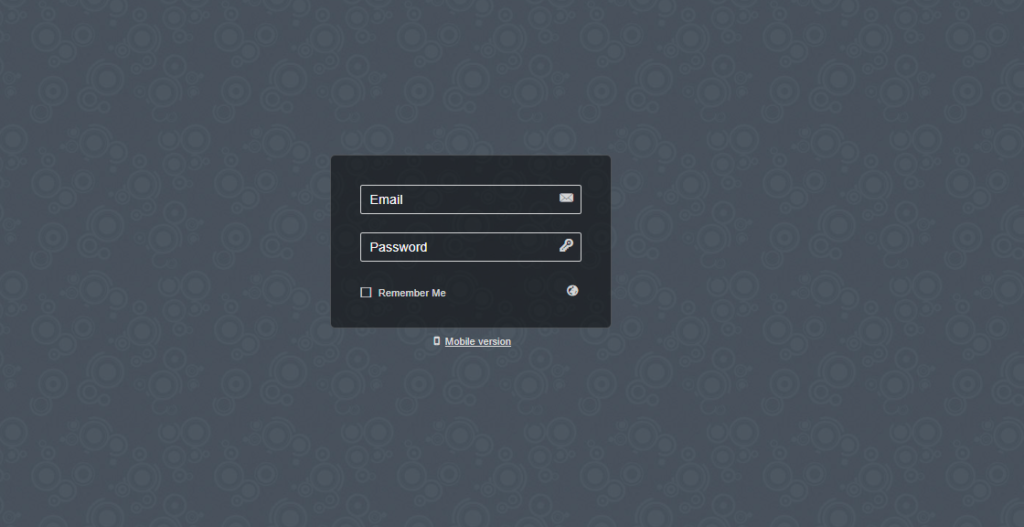
CyberPanel Login
2. Create and Email to Login:
Here you can read How to create email account. After creating mail keep these records so you can use to login.
3. Access WebMail:
To access webmail simple go to the Email->Access WebMail. you will be redirected to the link:
if you want to change Language, Layout, Default Text Editor, Message on Page, Notifications, etc settings. Login into rainloop admin dashboard and change there.
Sometimes we need to log in to the rainloop dashboard to do some configurations. Here in this article, we will tell you how to log in to rainloop admin dashboard?
Rainloop is an efficient memory webmail solution. it is a fast, simple, and modern web-based client email client. Rainloop is the email solution that comes with CyberPanel. It has an amazing user interface. Not only the interface also works great as any other email service.
RainLoop Admin Dashboard access address:
To access rainloop dashboard you just need to go to.
How to force redirect HTTP to HTTPS website in CyberPanel?
In this article we will tell you how to force redirect HTTP to HTTPS website in CyberPanel?
What is HTTP?
HTTP stand foe Hypertext Transport Protocol. When you enter http:// in your address bar in front of domain, it tells the browser to connect over HTTP. HTTP use TCP(Transmission control protocol), generally over port 80, to send and receive data packets over ther web.
What is HTTPS?
HTTPS stands for Hypertext Transfer Protocol Secure (also referred to as HTTP over TLS or HTTP over SSL). When you enterhttps://in your address bar in front of the domain, it tells the browser to connect over HTTPS. Generally sites running over HTTPS will have a redirect in place so even if you type inhttp:// it will redirect to deliver over a secured connection. HTTPS also uses TCP (Transmission Control Protocol) to send and receive data packets, but it does so over port 443, within a connection encrypted by Transport Layer Security (TLS).
Redirect from HTTP to HTTPS
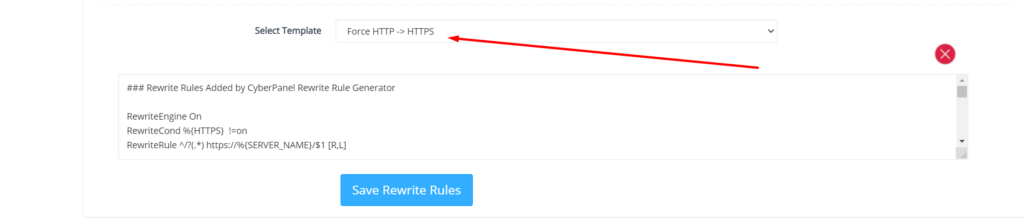
if you forcefully redirect your website HTTP to HTTPS in Cyberpanel, you will need to add a rewrite rule to that website in order to have it automatically forward to HTTPS instead of HTTP.
In CyberPanel you can forcefully redirect HTTP to HTTPS website using rewrite rules.
To add this:
Force redirect HTTP to HTTPS website in CyberPanel:
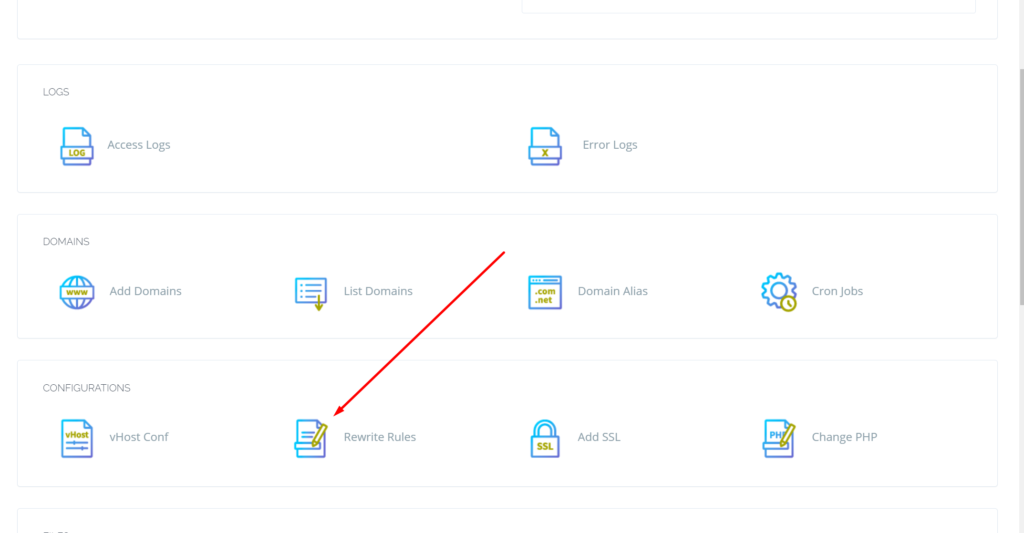
Select Websites on the left menu
2. Choose the SSL enabled website from the list
3. Select “Rewrite Rules” in the Configuration section
How to add ZeroSSL on your site? Free SSL for your website
You always need a secure URL for your website. Secure means your website will be accessible with SSL(Secure Sockets Layer). It’s very important to access your site on HTTPS instant of HTTP. Today I will tell you how you can add ZeroSSL to your website. ZeroSSL is totally free for your website.
ZeroSSL allows the free start of three domains. You can add free-of-cost SSL to your first three sites after those you have to buy if you want to issue SSL for more sites.
Create ZeroSSL account:
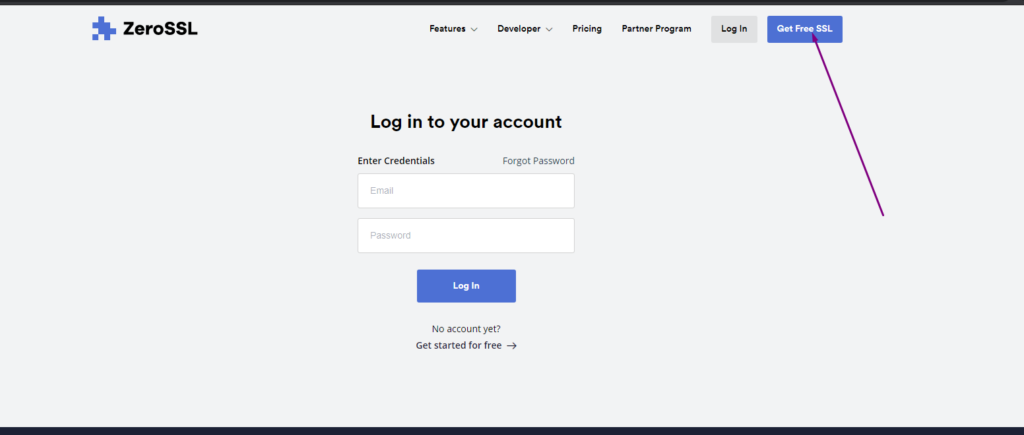
In first step you have to create an account on ZeroSSL website. For this go Here.
Here on this page you can see the Get Free SSL button click on that and visit to registration button.
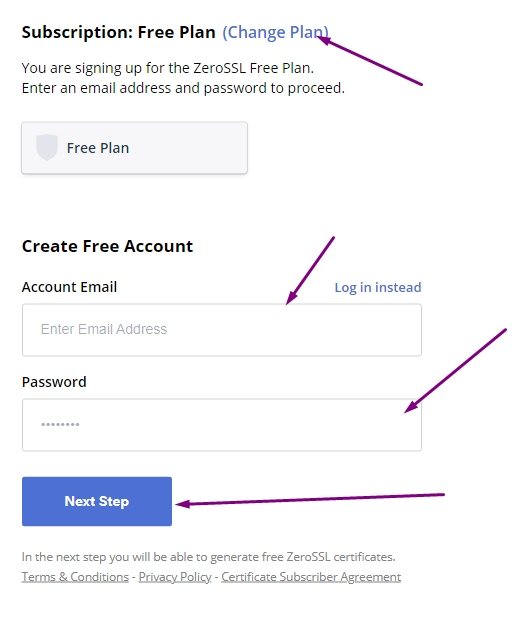
On this page you have to provide some information to signup.
Subscription Plan
Email Account
Password
After providing these all press to the Next Step button.
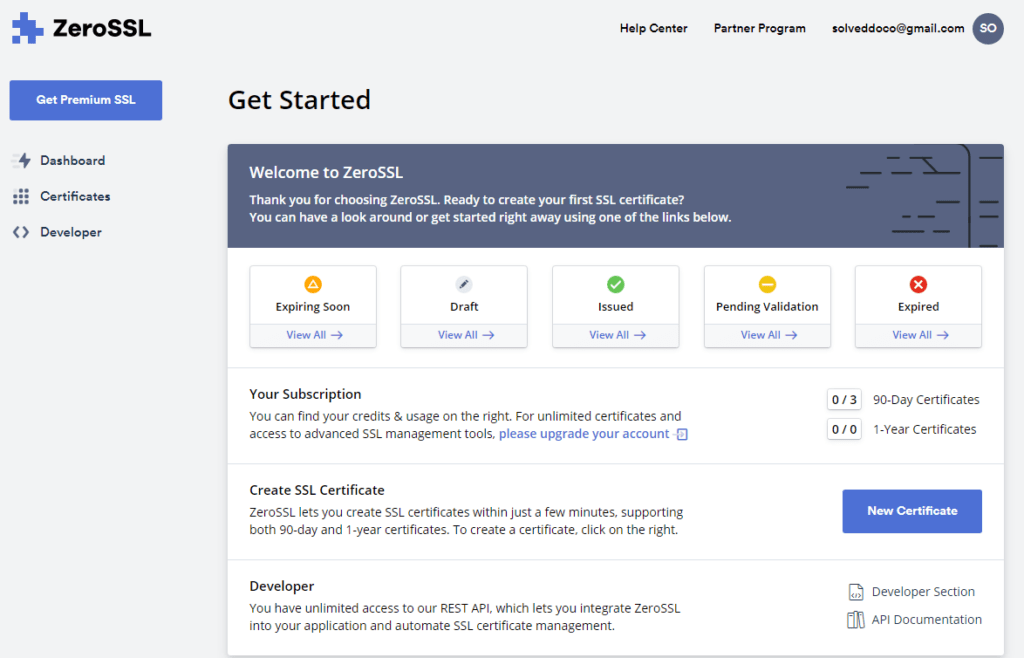
Once you press this button you can see the ZeroSSL dashboard.
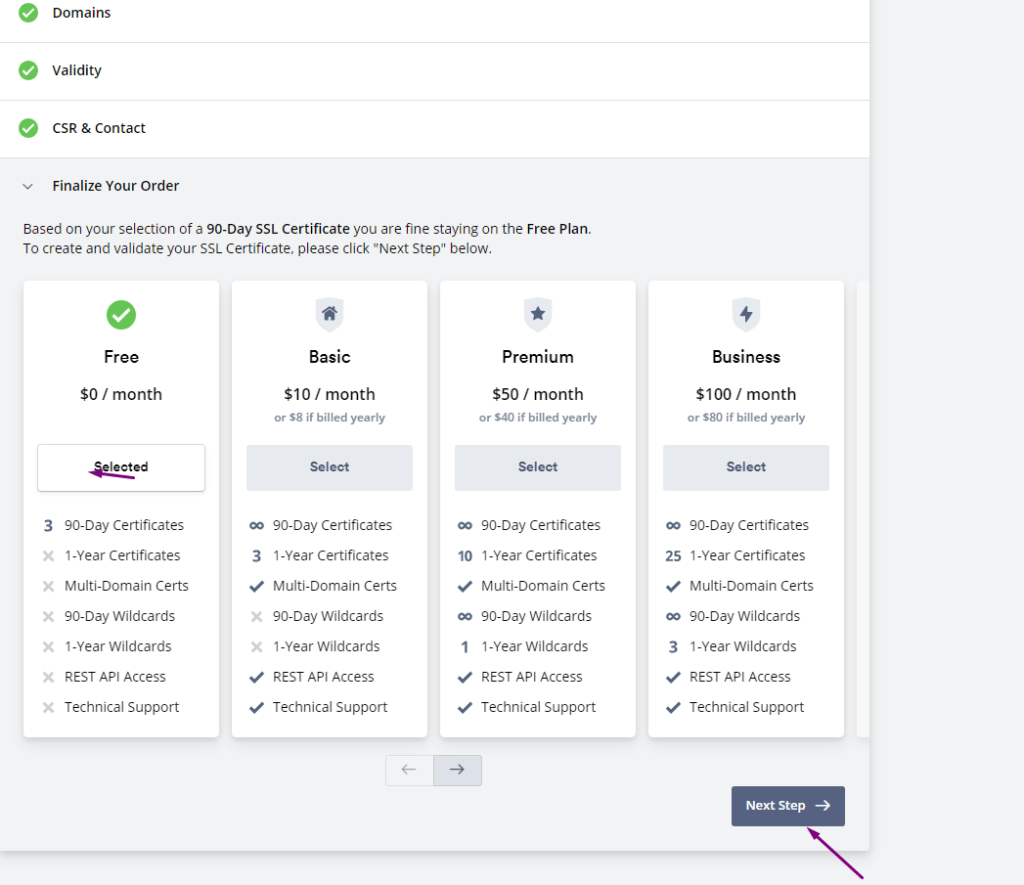
Create New SSL Certificate:
Here on Dashboard you can see New Certificate button press this button present in the above image.
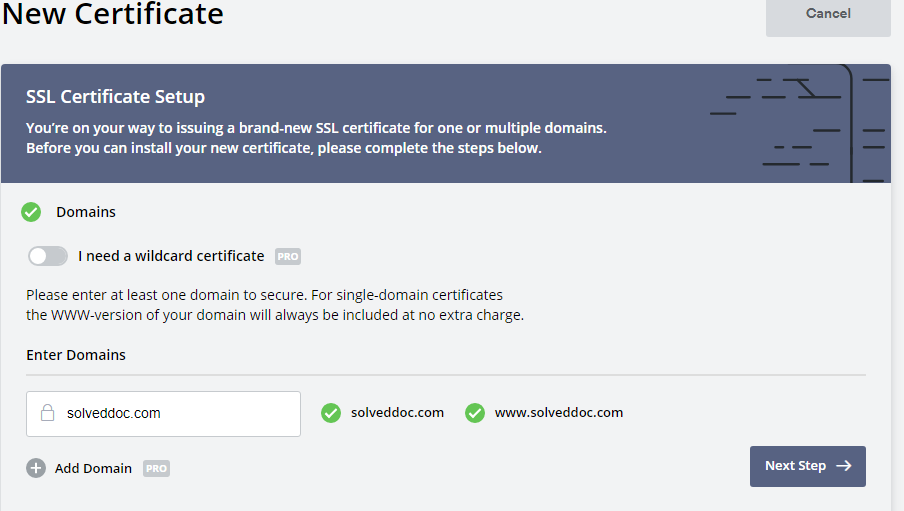
On the next page you have to provide following information:
Enter Domain (Enter your domain name for which you want to issue SSL)
You will see this Green ticks for a valid domain name.
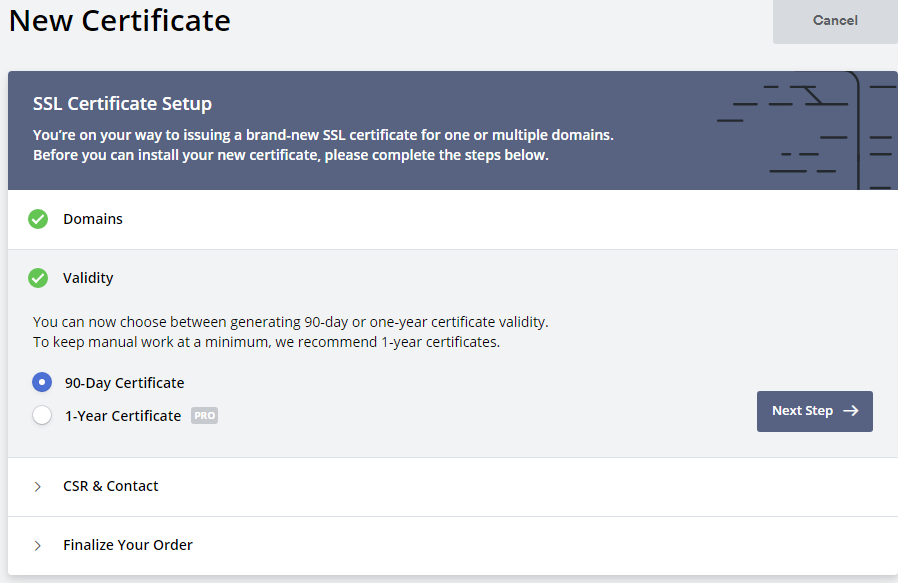
2. Validity (For how many time this ssl is valid )
Usually for 90 days its free and if you want for 1 year you have to buy.
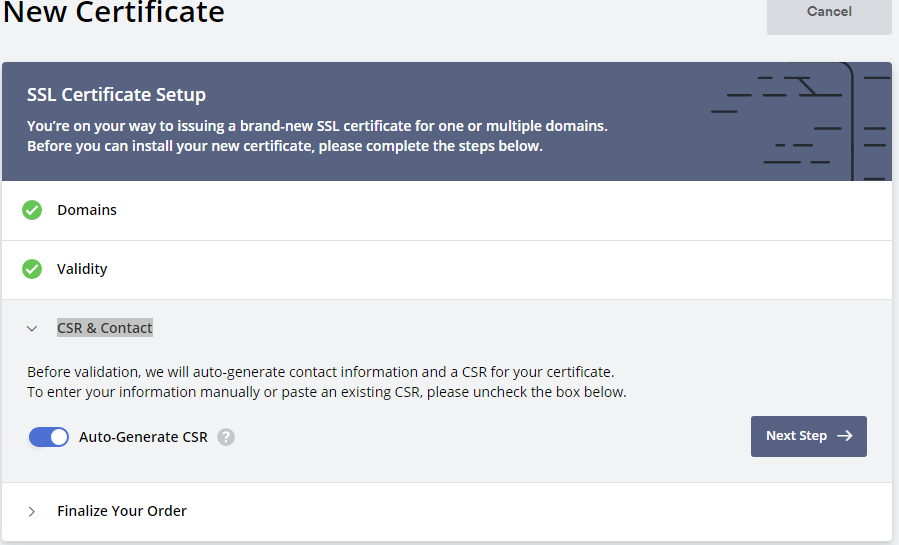
3. CSR & Contact
Finalize Your Order (you have to select )
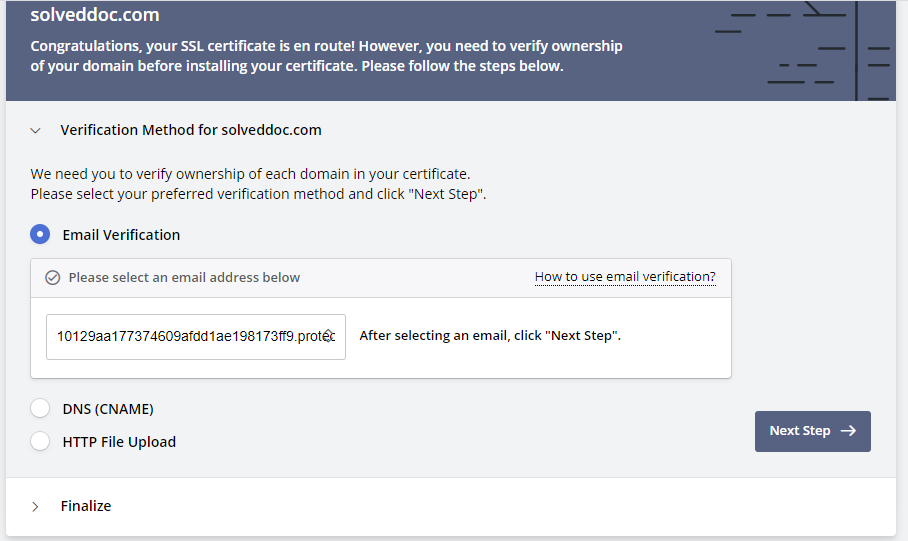
You have limit to issue three free ssl to your domain. Once the process of plan selection done now you have to verify your domain.
Verification Method:
ZeroSSL allow three types of verification:
Email Verification
DNS (CNAME) HTTP
File Upload
You can chose any one you are comfortable with. If you have this email then use it, or update DNS records according to the second or upload the file to dns.
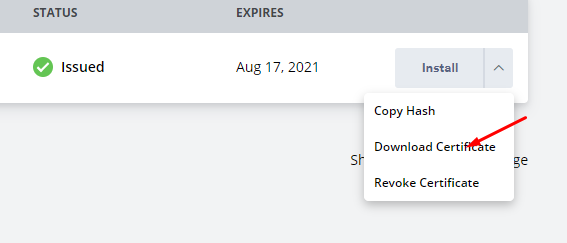
Verification Method:
After this you will get a option to download SSL. you can download crteficate.
download SSL
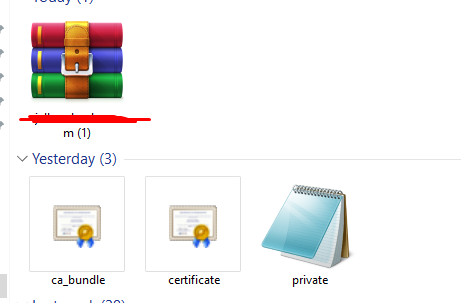
Add ZeroSSL to your Website?
When you got your SSL file there must be three files after extracting. ca_budle, certificate, private key
Add these files values according to the require mint on your site.
A lot of users install ImunifyAV but after some issue, if they want to uninstall they do not know how to do this. Here in this article, we will tell you How To Uninstall Or Stop ImunifyAV?
ImunifyAV – an intelligent antivirus and security monitoring tool for websites with one-click automatic malware cleanup, domain reputation monitoring, and blacklist status check. Read more about ImunifyAV
A lot of users install ImunifyAV but after some issue, if they want to uninstall they do not know how to do this. Here in this article, we will tell you How To Uninstall Or Stop ImunifyAV?
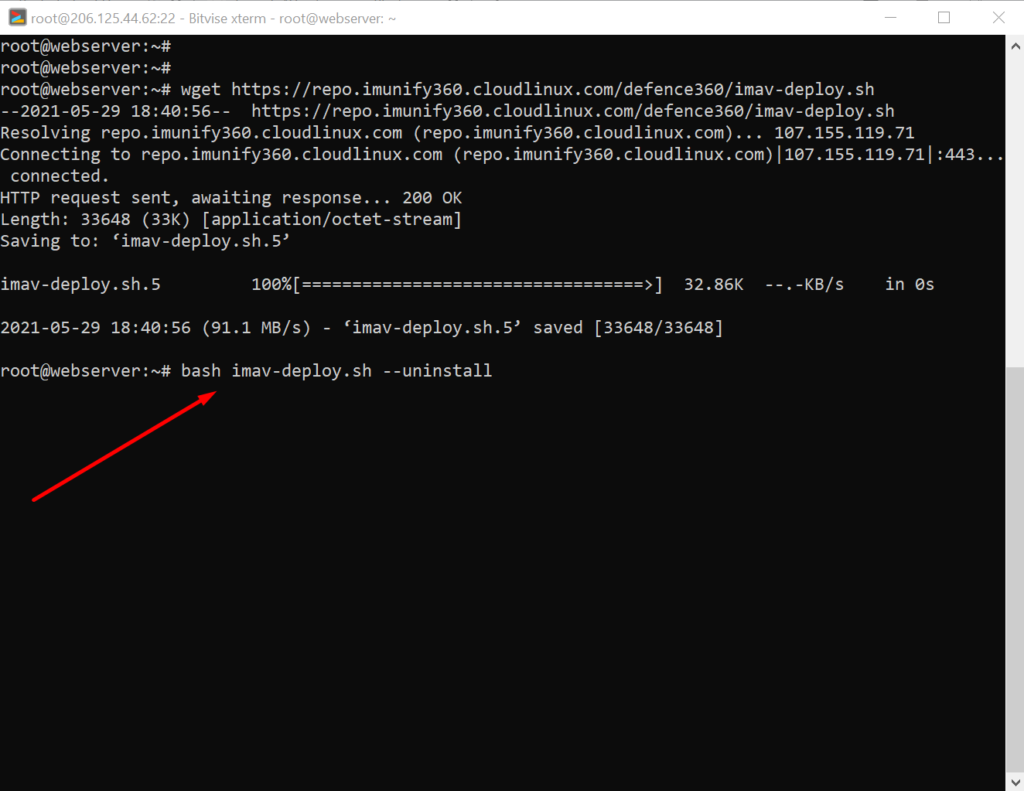
In this artical we provide the way where you can able to uninstall or Stop ImunifyAV.
Uninstall ImunifyAV:
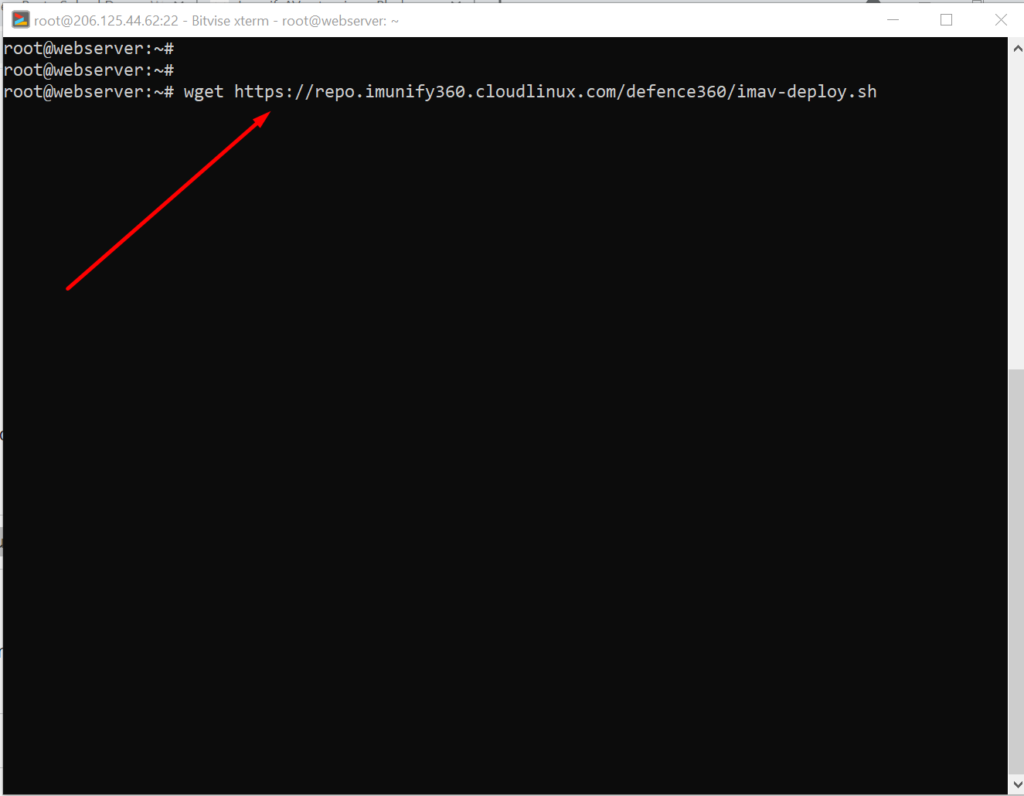
To uninstall ImunifyAV, you need to first download the imav-deploy.sh script with the following command:
How to solve the can’t upload the file on file manager issue in CyberPanel?
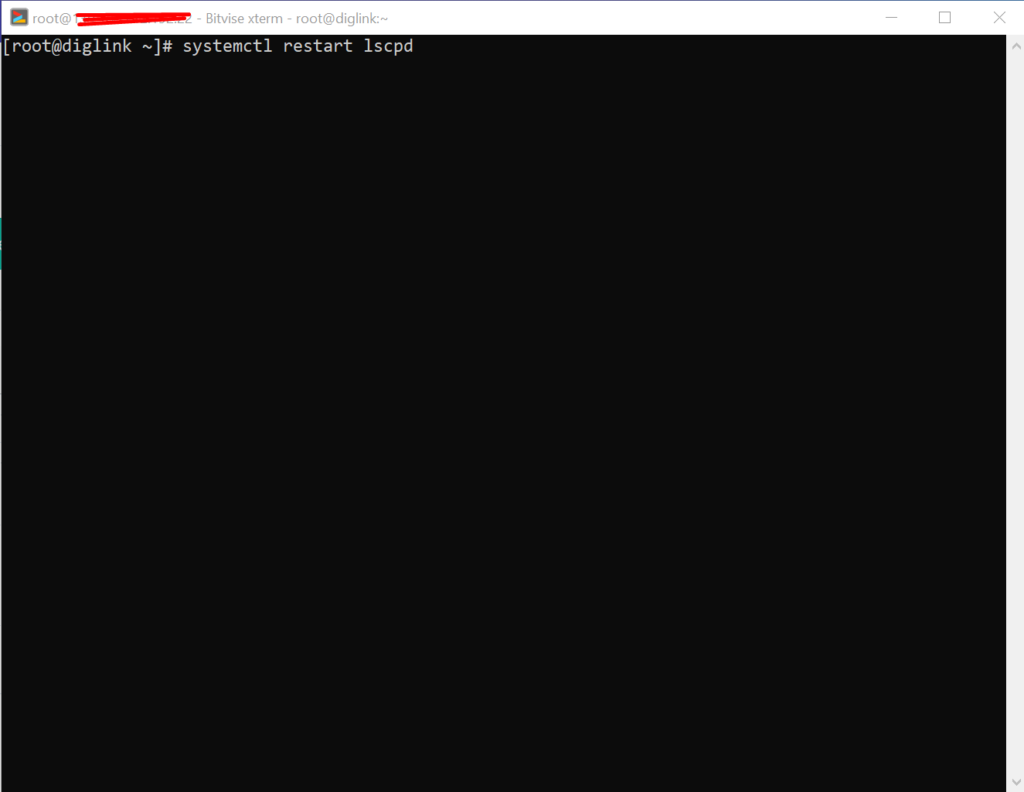
if you are uploading a file on file manager in CyberPanel. and getting some error there. Follow this short solution for can’t upload the file on CyberPanel file manager.
Solution
There is very easy and short solution for this issue. Access your root through Bitvise or putty open your terminal(CLI) and run this Command
Systemctl restart lscpd
This simple command will restart all of your CyberPanel services and now if you can try you can easily upload any file but there may be upload limit issue if so you can follow this tutorial to solve that Link below.
Do you know how to change CyberPanel Admin Password? Read this short article to check and know how to change or reset the admin password on CyberPanel.
Methods to Change or reset CyberPanel Password:
Reset Cyberpanel Password using Command line.
Change Password From CyberPanel
Reset CyberPanel Password using Command line
Mostly you use this method when you don’t have your CyberPnael Credentials are forgotten your CyberPanel password. And you have root SSH access to your system.
To change the Cyberpanel password from the command line you just need to run a simple command.
adminPass Your_New_Password
This command helps you to reset your password easily without having any CyberPanel access.
Reset CyberPanel Password using Command line
Change Password From CyberPanel:
If you have your CyberPanel admin account access and you want to change it you just need to follow these easy steps.
Login to your cyberpanel account using your credentials on port 8090.
https://<your_ip>:8090
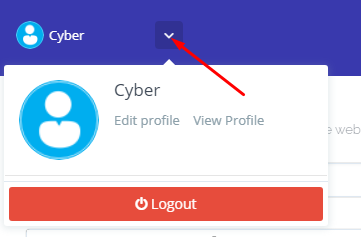
Once you login into your account clicks on the arrow on the top of your cyber panel account.
CyberPanel Profile
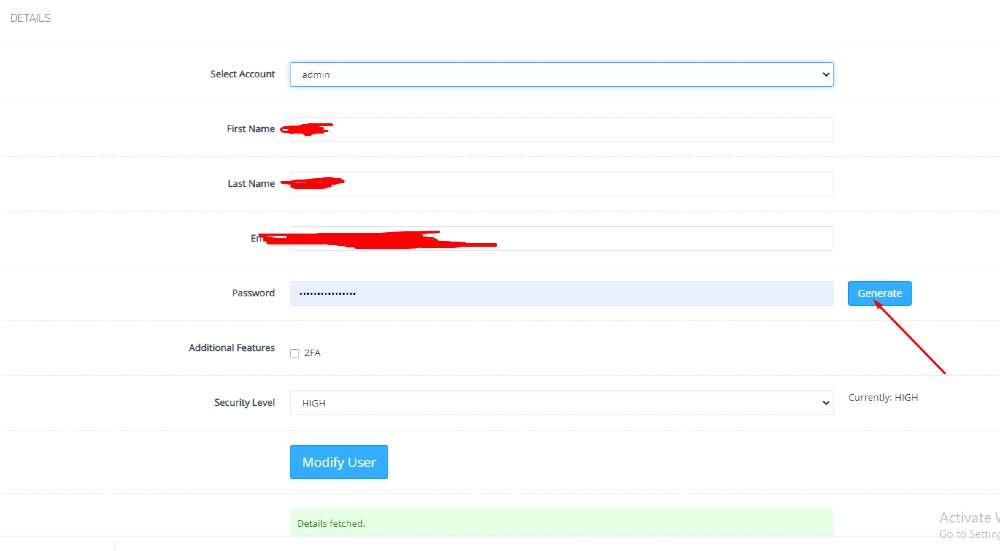
Then click the Edit Profile button. You can see a screen that ask you to select the account for which you want to change the password of CyberPanel.
Edit Profile
On this page, you can see you can change the password for your account and you can easily generate a password by clicking the generate password button.
Generating a password is a good move because CyberPanel auto-generate password will always generate a strong password.
How to Setup Two Factor Authentication in CyberPanel?
Here i will tell you how you can setup Two Factor Authentication in cyberpanel?
In the latest version of cyberpanel they introduced the 2FA for login to cyberpanel. In the resent released version 2.0.3 this two factor authentication setup is introduced.
Now cyberpanel provide an extra layer of security for cyberpanel user. In this article I will tell you step by step how to setup 2FA in CyberPanel.
Table of contents:
Setup 2FA in CyberPanel
Test two factor Authentication by login
Setup 2FA in CyberPanel:
To setup 2FA in cyberpanel login to CyberPanel on port 8090 using your credentials.
Then navigate to Users-> Modify User:
Press modify user and use can see screen that ask you to select a user for modification. Select any user from this page.
Click themodify user and use can see screen that ask you to select a user for modification.
You can see the authenticator
Now go to download any two-factor authentication application and scan this code. For me, I used Google Authenticator. You can download it from here.
Now scan this code in your application and you will see a code on your screen.
After this press to Modify and save the settings.
Test two factor Authentication by login:
To test the two factor authentication what you need to do is log out from your account you enabled two factor authentication.
Now you can see the login page provide the login details and press Sign in button:
Now it will ask you Enter code from Google Authenticator. provide the code that you saved in google authenticator app and press Sign In.