Warning: Redis::get(): php_network_getaddresses: getaddrinfo for localhost failed: Name or service not known in /home/solveddoc.com/public_html/wp-content/plugins/litespeed-cache/src/object-cache.cls.php on line 674 LiteSpeed Archives - Solveddoc
How to restart litespeed in cyberpanel | restart litespeed cyberpanel?
CyberPanel is the only panel that comes with the OpenLiteSpeed and LiteSpeed Enterprise, both as well. CyberPanel is the first panel that started offering a LiteSpeed webserver. In the case of OLS, you need to restart the web server many times. So this is about restarting LiteSpeed cyberpanel.
Read a complete details guide for CyberPanel here.
Cyberpanel provides a quick restart button for LiteSpeed whether you have the OLS or LSWS.
Login to your CyberPanel dashboard on port 8090 using your password and username.
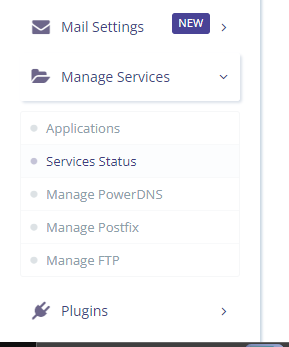
Now go to the Manage Services ->Services Status
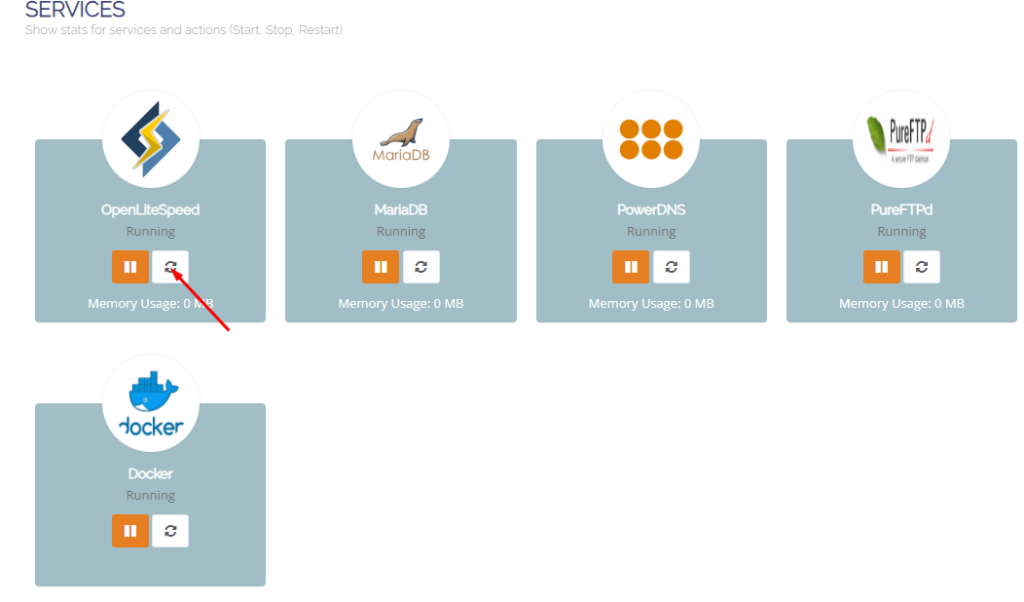
Here on the services page, you can see all of your active services you can now restart any service but in the first number, you can see LiteSpeed or open LiteSpeed and restart button in front of that just press that.
Methode 2: Restart LiteSpeed From Terminal:
LiteSpeed provides you with very short and easy commands to restart stop and restart. Litespeed has its own commands as well and you can do anything using systemctl or service command.
Start LiteSpeed: sudo service lsws start OR sudo systemctl start lsws
Stop LiteSpeed: sudo service lsws stop OR sudo systemctl stop lsws
Restart LiteSpeed: sudo service lsws restart OR sudo systemctl restart lsws
Graceful Restart: A graceful restart allows LiteSpeed to restart without dropping existing connections. sudo service lsws reload OR sudo systemctl reload lsws
Check LiteSpeed Status: sudo service lsws status OR sudo systemctl status lsws
Remember to adjust the paths accordingly based on your LiteSpeed installation directory. These commands assume a standard installation; however, it’s always a good idea to verify the specific paths on your system.
Sometimes you need to reset your LiteSpeed Cache plugin settings to the default settings for some reason. There may be an issue with the cache hit or anything. Here in this article, we will learn How to reset Litespeed cache default settings?
LiteSpeed Cache plugin
LiteSpeed Cache is a WordPress plugin that helps improve the performance of your website by caching pages and posts, reducing the load on your server, and speeding up your website for visitors. It is designed to work with the LiteSpeed Web Server, but it can also be used with other web servers such as Apache. The plugin offers a range of features, including browser and server-side caching, Gzip compression, and support for content delivery networks (CDNs). It also includes options for optimizing your website’s CSS, JavaScript, and HTML, as well as image optimization and lazy loading.
Key features of the LiteSpeed Cache plugin
Some of the key features of the LiteSpeed Cache plugin include:
Browser and server-side caching: LiteSpeed Cache can cache pages and posts on the browser and on the server, allowing for faster page load times and reduced server load.
Gzip compression: The plugin can compress your website’s files using Gzip, which can reduce their size and improve the speed at which they are delivered to visitors.
Support for CDNs: LiteSpeed Cache can integrate with content delivery networks (CDNs), which can help distribute your website’s content across multiple servers, improving its performance and reducing the load on your own server.
Optimization of CSS, JavaScript, and HTML: The plugin includes options for optimizing your website’s CSS, JavaScript, and HTML files, which can reduce their size and improve their performance.
Image optimization and lazy loading: LiteSpeed Cache can optimize your website’s images, reducing their file size and improving their loading times. It also includes lazy loading, which can improve the loading times of pages with many images by only loading images as they are needed.
Reset Litespeed cache default settings:
LS cache offers a reset to the default feature of settings. To do so follow these steps.
Login to your website WordPress admin dashboard using your credentials.
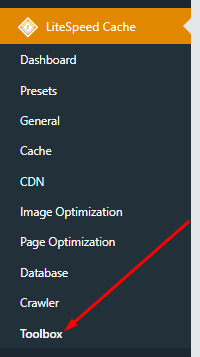
Go to the LiteSpeed Cache -> toolbox
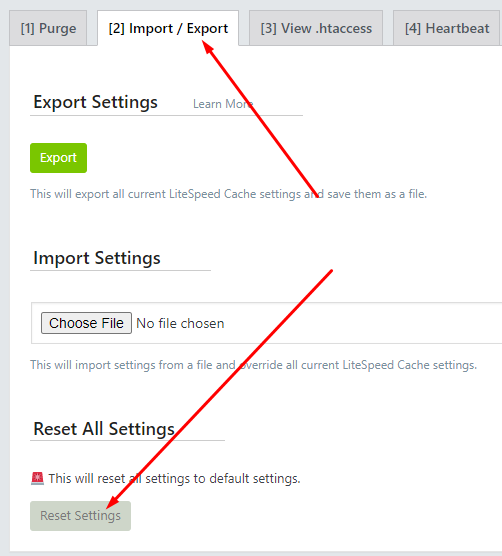
3. Now go to the Import/Export option you can see a reset button you can press that and all will be done.
How to change or reset LiteSpeed Webserver admin password?
Sometimes you can’t remember your LiteSpeed webserver admin password and you want to login as an admin what can you do? In this article, I will show you how to change or reset LiteSpeed Webserver admin password through the root SSH client, in this guide I will show you the step-by-step procedure.
Reset the LiteSpeed Webserver admin password from the SSH terminal is just a few commands processes.
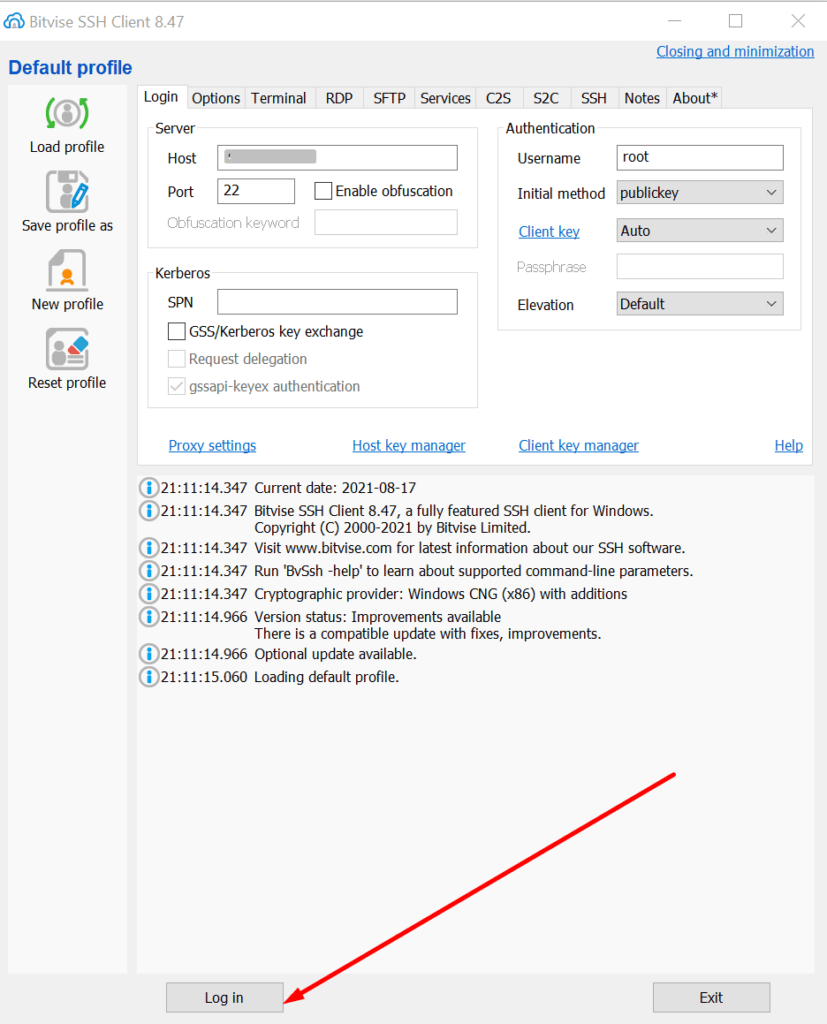
Step-1: Login to Root SSH
Open your root ssh client and log in then open the terminal
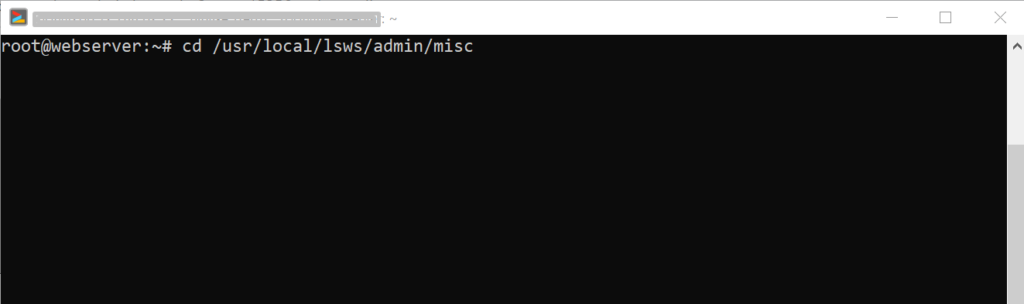
Step-2: Change Directory
To change or reset the password you have to go to this directory /usr/local/lsws/admin/misc, so change the directory using this command:
cd /usr/local/lsws/admin/misc
Step-3: Reset LiteSpeed Webserver admin password
Once you changed the directory you can change the password. to change the admin password run this command:
./admpass.sh
Once you run the command it will ask you the username type the username (must be admin) and then press enter then it will show you an input password option enter the new password and then press enter it also requires you to retype the password, re-enter the password, and press enter. it will show you “Administrator’s username/password is updated successfully!”.
Your password is changed now access webserver using these credentials at:
How to resolve 404 error from website internal pages on LiteSpeed/Cyberpanel?
Some time you face 404 error on all internal pages of your website. This often happened when you move your website from one server to any other or change any internal configurations. Here in this article we will tell you How to resolve 404 error from website internal pages on LiteSpeed Cyberpanel.
Without going deep let me tell you the reason for this. This happened due to the permissions or the rewrite rules. As after changes Open litespeed need a restart.
To resolve 404 error from website internal pages on LiteSpeed/Cyberpanel we just have to do 2 steps.
Steps to resolve 404 error from website:
1. Fix permissions.
Login to your cyberpanel on port 8090.
https://<YOURIP>:8090
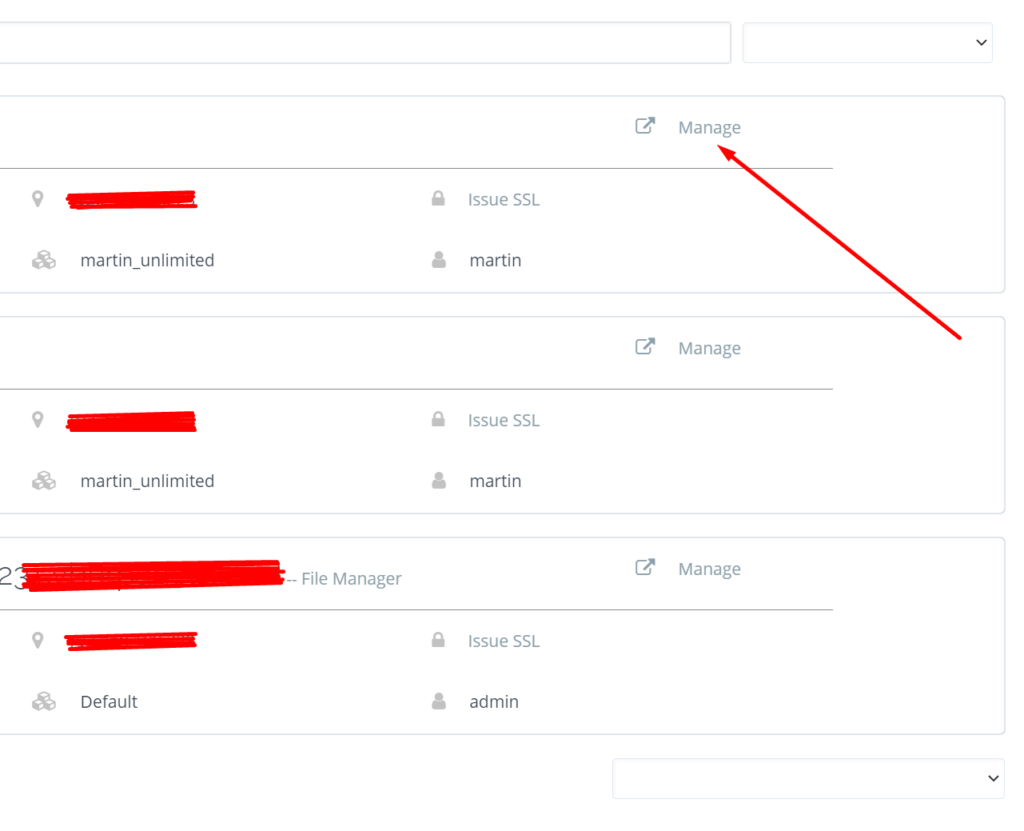
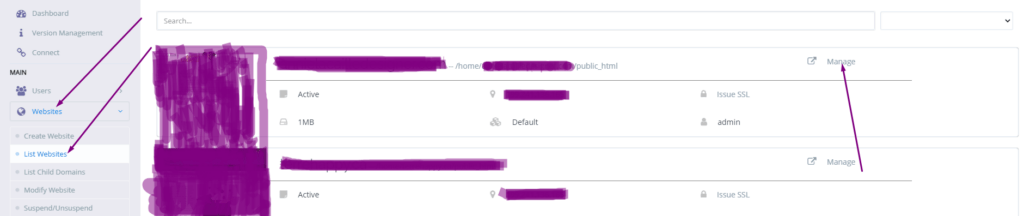
Got to the website->list websites then click on Manage button present in front of your domain which have issue.
Manage Website
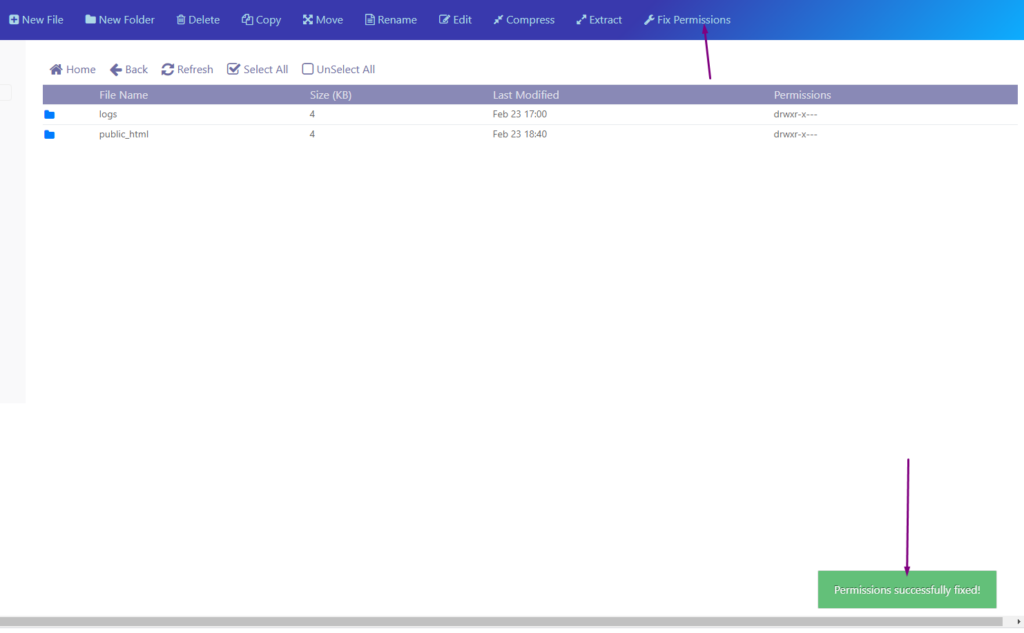
Scroll down and find file manager click on it and here you will find fix permissions button click that a green pop up appears.
fix permissions
2. Restart LiteSpeed Webserver
After doing all restart the Open liteSpeed webserver. You can do it two way one through command.
Systemctl restart lsws
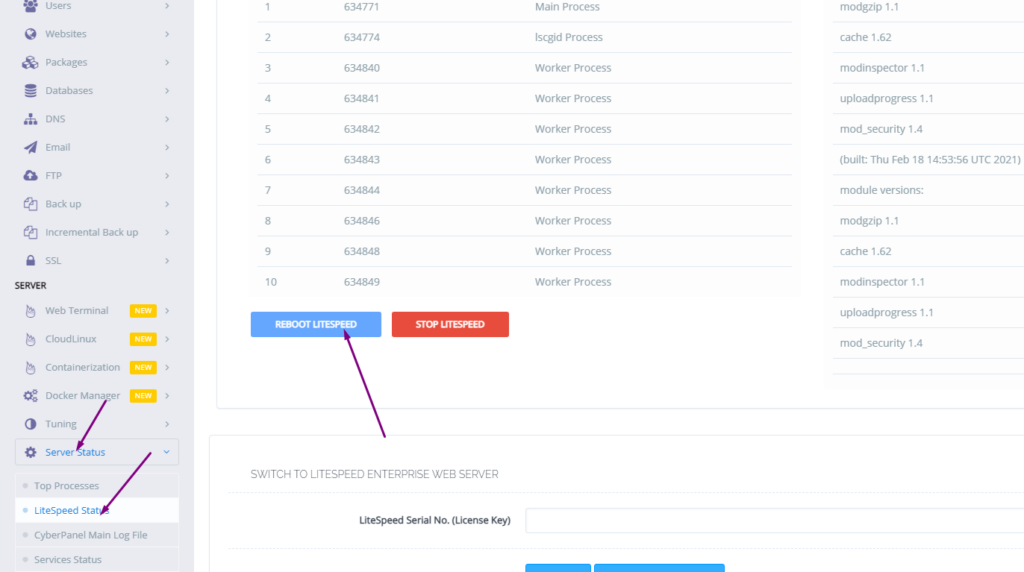
.Or go to the Server status-> LiteSpeed status and press restart.
How to force redirect HTTP to HTTPS website in CyberPanel?
In this article we will tell you how to force redirect HTTP to HTTPS website in CyberPanel?
What is HTTP?
HTTP stand foe Hypertext Transport Protocol. When you enter http:// in your address bar in front of domain, it tells the browser to connect over HTTP. HTTP use TCP(Transmission control protocol), generally over port 80, to send and receive data packets over ther web.
What is HTTPS?
HTTPS stands for Hypertext Transfer Protocol Secure (also referred to as HTTP over TLS or HTTP over SSL). When you enterhttps://in your address bar in front of the domain, it tells the browser to connect over HTTPS. Generally sites running over HTTPS will have a redirect in place so even if you type inhttp:// it will redirect to deliver over a secured connection. HTTPS also uses TCP (Transmission Control Protocol) to send and receive data packets, but it does so over port 443, within a connection encrypted by Transport Layer Security (TLS).
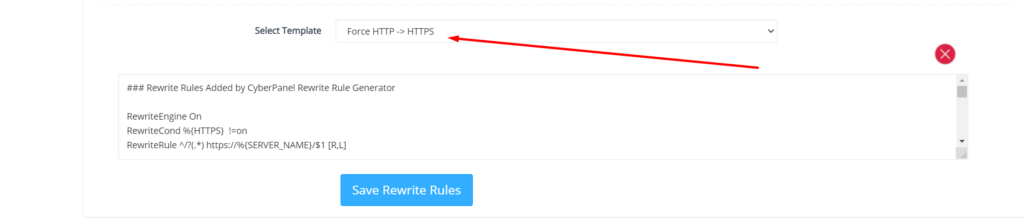
Redirect from HTTP to HTTPS
if you forcefully redirect your website HTTP to HTTPS in Cyberpanel, you will need to add a rewrite rule to that website in order to have it automatically forward to HTTPS instead of HTTP.
In CyberPanel you can forcefully redirect HTTP to HTTPS website using rewrite rules.
To add this:
Force redirect HTTP to HTTPS website in CyberPanel:
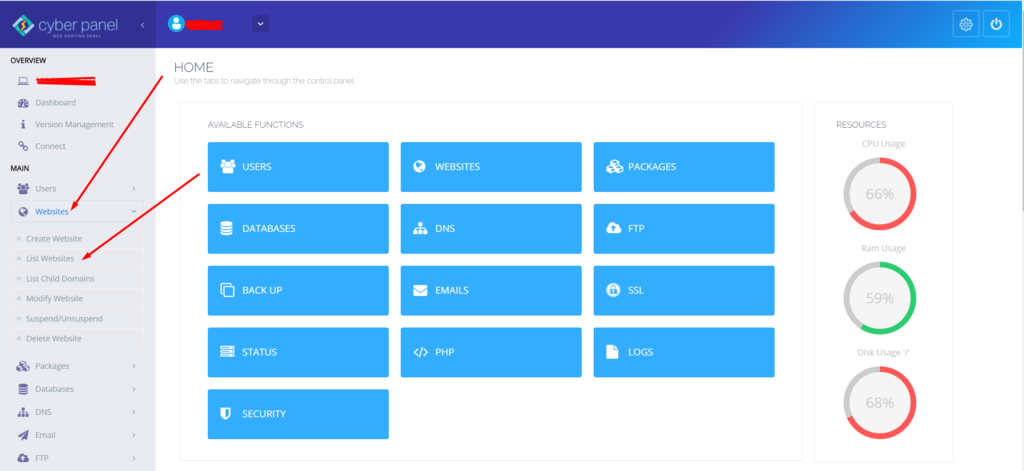
Select Websites on the left menu
2. Choose the SSL enabled website from the list
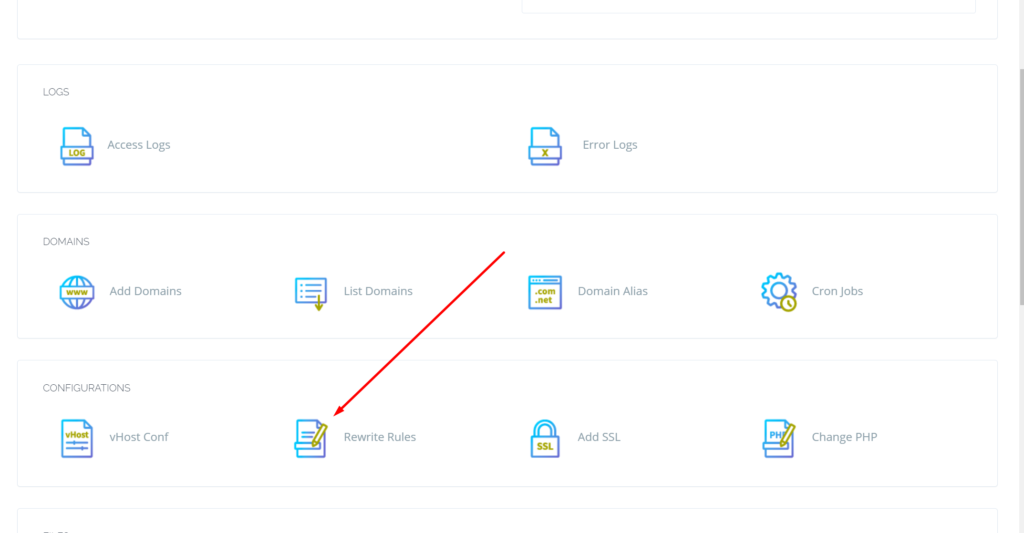
3. Select “Rewrite Rules” in the Configuration section
How to solve the can’t upload the file on file manager issue in CyberPanel?
if you are uploading a file on file manager in CyberPanel. and getting some error there. Follow this short solution for can’t upload the file on CyberPanel file manager.
Solution
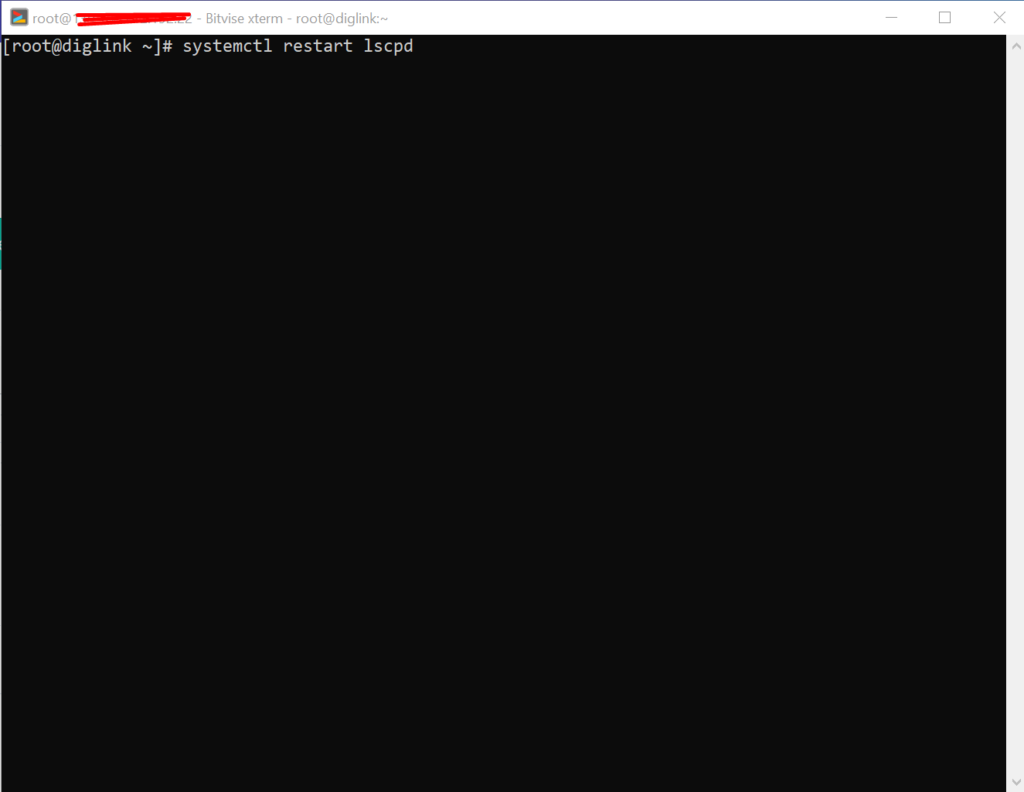
There is very easy and short solution for this issue. Access your root through Bitvise or putty open your terminal(CLI) and run this Command
Systemctl restart lscpd
This simple command will restart all of your CyberPanel services and now if you can try you can easily upload any file but there may be upload limit issue if so you can follow this tutorial to solve that Link below.
How to fix Fix WordPress 404 permalink OpenLiteSpeed- 404 error on OpenLiteSpeed
If you host your WordPress websites with OpenLiteSpeed you may get a 404 error on the permalink of your website. here in this article, I will explain how you can fix ix WordPress 404 permalink OpenLiteSpeed.
OpenLiteSpeed is the free version of LiteSpeed Enterprise and this free version is not as stable as the paid version. Not OpenLiteSpeed WordPress permalink often gives 404 error. When you move site from one server to another or made any change this error comes up. Here i will discuss few methods to solve this issue.
Methods to fix WordPress 404 permalink OpenLiteSpeed:
Method 1 Fix Permissions:
If you are using CyberPanel and you did any change of website after that 404 error come to the site you can fix it by doing few thing.
Fix permissions from the file manager
Restart OLS
Fix Permissions from the file manager:
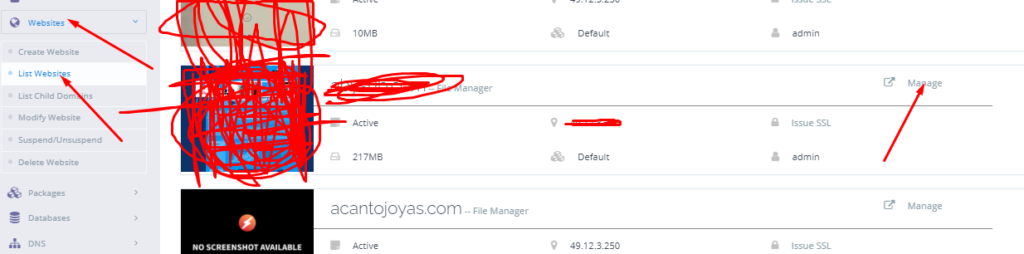
To fix permission you have to log in to your cyber panel then go to the Websites-> List website select the domain for which you have to fix the issue then press the Manage button present in front of the website.
Manage Website
On the Website Dashboard you can see File Manager press to access the file manager.
File Manager
In file manager click Fix Permission button and you can see the success massage in green color.
Fix Permission
After doing all now its time to restart OLS.
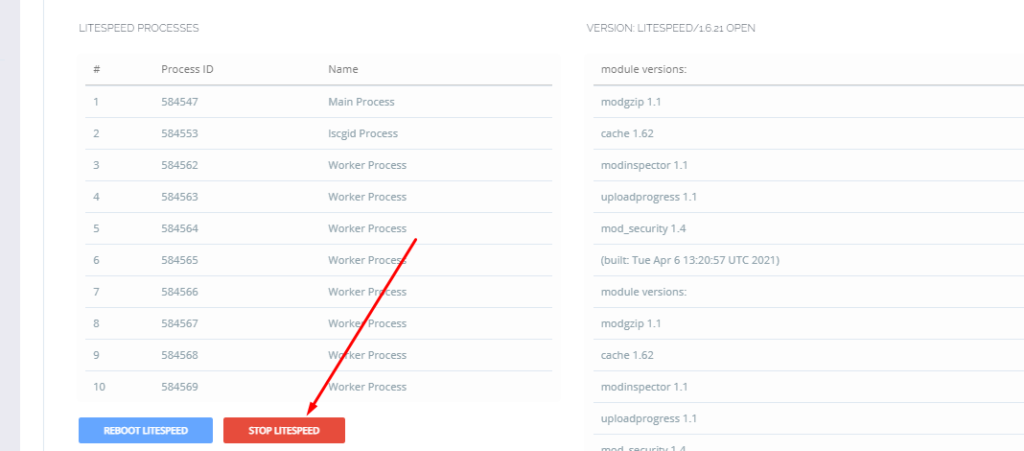
Restart OpenLiteSpeed:
To restart OLS from CyberPanel you have to go on Server Status ->LiteSpeed Status and then you see two-button shutdown and reboot. Press the Reboot button and you can see a success message.
Restart OpenLiteSpeed:
Method 2 htaccess:
An other reason is the missing rules in htaccess for WordPress. To check htaccess rules. Go to the Public_html folder of the website. If you have CyberPanel go to the Website->List Websites then press Manage button.
Then go to the file manager from the Website Dashboard.
File Manager
In file manager open and open .htaccess file and see if there is rules or if the file is empty.
Do you know now from CyberPanel version 2.0.3 you can install Redis on your server using one click? Here we will tell you one-click Redis install through CyberPanel.
Now CyberPanel made the installation and use of Redis cache on your server very easy.
Redis is an open-source cache used to cache databases, and is used as a message broker. Nowadays it is very important to use cache and boost your website. CyberPanel helps you to do this.
One-Click Redis install Through CyberPanel:
Follow these steps to setup Redis on your server.
Login to CyberPanel
One-Click Redis Install
Install Redis PHP extension
Setup Redis on WordPress using LS Cache
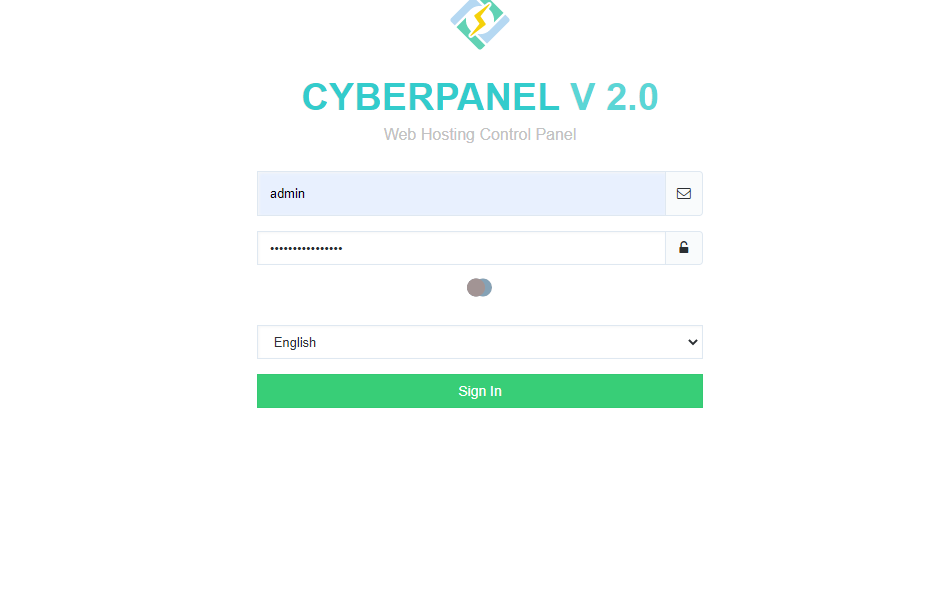
Login to CyberPanel:
Login to your CyberPanel using the credentials. Follow the link with port 8090.
https://<Your_IP>:8090
CyberPanel
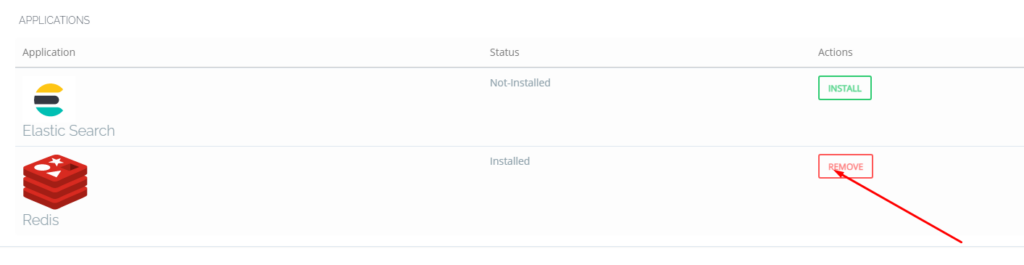
One-Click Redis Install:
To install Redis on your server you have to go to the Manage Services->Application -> Redis then you can see the install button there. Click that and your Redis installed.
Now your Redis is installed and you have to install PHP extension to run properly.
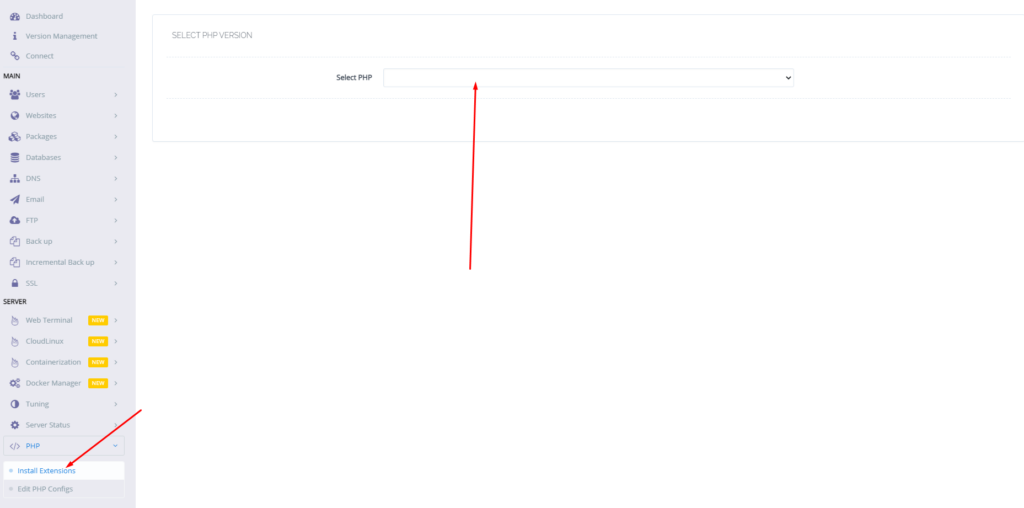
Install Redis PHP extension:
Now go to the PHP-> Install Extension Then you have to select PHP version for which you want to install Redis Extension. You can also follow this link.
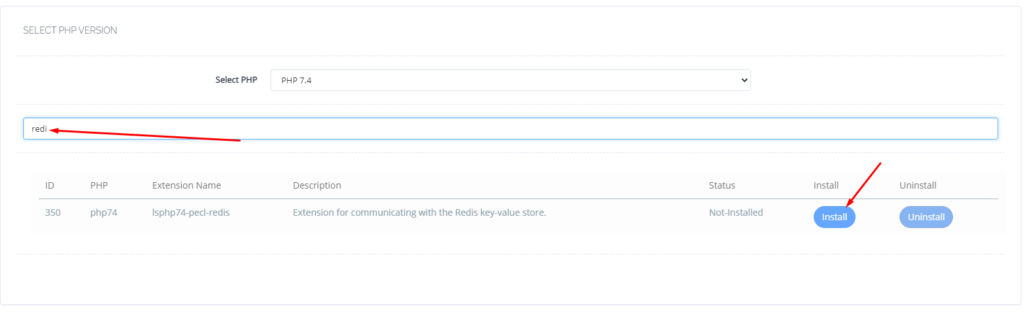
Now search redis on the search bar and you can see redis PHP extension press the Install button and everything is good to go.
Redis
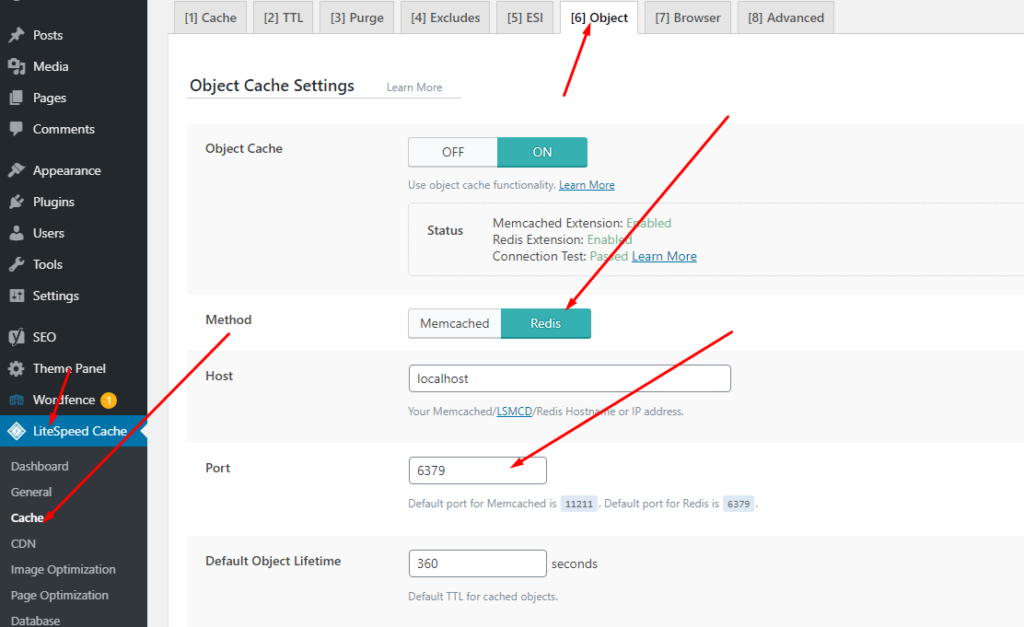
Setup Redis on WordPress using LS Cache:
Now it’s time to setup Redis on your WordPress site. We will tell you here how you can setup Redis on your WordPress site without any extra plugin. Ls cache plugin will all do for you. Let’s begin how to do.
CyberPanel is next generation hosting control panel. CyberPanel is powered by LiteSpeed Technologies.
In CyberPanel you can create new users easily and allow them access so they can manage their website settings there.
CyberPanel allow three types of user access ADMIN, USER, and RESALLER. You can easily create new account of any type according to the requirement of user.
How to create a new user account in CyberPanel:
The process of creating user, admin and reseller account is same i will tell you where the difference is during creation steps.
Login to your cyberpanel using port 8090.
Step 1:
In left menu go to Users-> CREATE NEW USER or navigate to this URL
https://<Yourip>:8090/users/createUser
Step 2:
Now Provide the information that need to create new user:
First Name
Last Name
Email
Select ACL ( admin, reseller, user)
Websites Limit (Put 0 for unlimited)
Username
Password (Press Generate for strong)
Security Level (High or Low)
Here in Select ACL you can create the admin, user or reseller permissions. Admin has access for every thing, reseller has less access then admin and at last user has some specific access.
Step 3:
After providing these required information press create a user and user is created successfully now you can see your user by navigating to USERS->LIST USERS. Or visit this URL
Do you know how to install OpenLiteSpeed on Centos?
First of all, I would like to tell you that what is OpenLiteSpeed? I know most of you know that what is OpenLiteSpeed but it’s my habit to discuss things before going to deep. So OpenLiteSpeed is the Open Source edition of LiteSpeed Web Server Enterprise.
In this article, we will discuss step by step how to install OpenLiteSpeed on Centos.
How To Install OpenLiteSpeed:
First of all, you need to add the LiteSpeed repository to your centos. You can do it by using the following command.
Once you added the repository now you can install the OpenLiteSpeed on your server easily. To do so you have to run the command:
yum install openlitespeed
Now what? if you want to install any specific version of OpenLiteSpeed. In that case you can use this command:
yum install openlitespeed-x.x.x
Replace the x value with your required version. Like 1.6.5 or something. You can access the web server on:
http://your_ip:7080
Setup Administrator Password:
Now your LiteSpeed web server is installed. You have to set a password for the OpenLiteSpeed web server in order to access it. You can set the password by using this command:
/usr/local/lsws/admin/misc/admpass.sh
Use sudo if you don’t have root rights. you can also use this to change the OpenLiteSpeed web server password. When you run this command this will ask you User name [admin]: put admin here
And after that, it will ask for a password add a password and confirm that.
Now your web server is go to go.
Some common commands for OpenLiteSpeed:
Here some common commands that you must need to know about the OpenLiteSpeed.
To check the status of OpenLiteSpeed you can use this command.
Systemctl status lsws
2. To stop the OpenLiteSpeed service use this command.
Systemctl stop lsws
3. To start the OpenLiteSpeed service use this command
Systemctl start lsws
4. To restart the OpenLiteSpeed service use this command
Systemctl restart lsws
Directories and Logs for OpenLiteSpeed:
Now I think it’s very important to tell you about directories and logs of OpenLiteSpeed. Maybe you want to do some testing on it. Joke apart never try to do tests on anything you have not enough knowledge.
The default OpenLiteSpeed installation directory is: /usr/local/lsws
You can also start OLS using this command:
/usr/local/lsws/bin/lswsctrl start
You can also stop OLS using this command:
/usr/local/lsws/bin/lswsctrl stop
If you faced any error on OLS and want to find what is that then you can check the error log in /usr/local/lsws/logs/error.log.
Some more information about OpenLiteSpeed:
Well, the free version of LiteSpeed web servers. Although both OpenLiteSpeed and LiteSpeed ENT. are developed by the same developers. But there must be some difference between them. You can imagine a price thing and a paid thing must be different from each other.
OpenLiteSpeed has almost all the features that LiteSpeed Ent have. But there must be some difference. The main difference is OpenLiteSpeed requires a restart to load any new .htaccess file. While LiteSpeed Ent does this Automatically.