Warning: Redis::get(): php_network_getaddresses: getaddrinfo for localhost failed: Name or service not known in /home/solveddoc.com/public_html/wp-content/plugins/litespeed-cache/src/object-cache.cls.php on line 674 Home - Page 9 of 15 - Solveddoc
Upgrade CyberPanel to any specific branch
Sometimes for some special patches and bug fixes, you need to upgrade Cyberpanel to any specific branch. Like you got any issue in the stable branch and the team announced that the issue is fixed in another CyberPanel branch then you have to move on that.
In this article, I will tell you the few commands to upgrade CyberPanel to any specific branch.
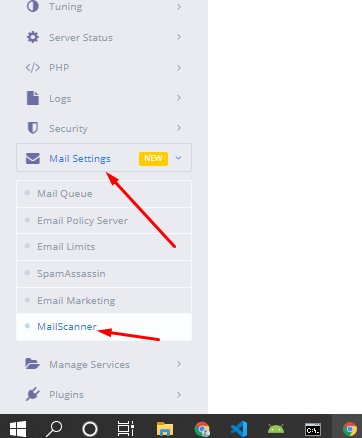
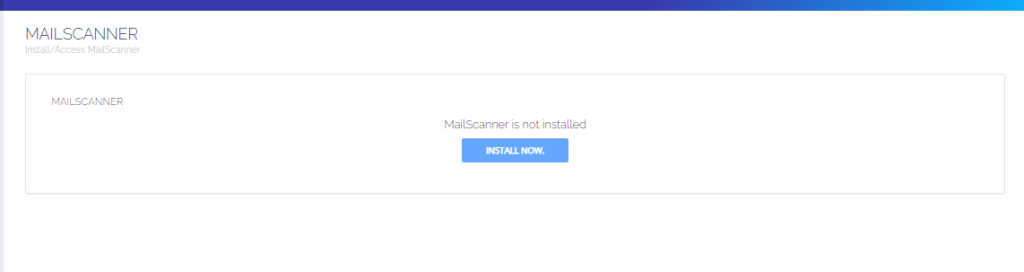
To install MailScanner on CyberPanel is very easy and a few click process. MailScanner is one of the core requirements for the email system now. And CyberPanel has a MailScanner which you can install from the CyberPanel dashboard.
In CyberPanel MailScanner is done by the community and this feature have a goof version but i am not sure that if it is 100% stable. So maybe MailScanner causes any issue in your mail server.
To install MailScanner on CyberPanel follow these steps.
ImunifyAV is not suitable for every server and maybe sometimes you need to uninstall ImunifyAV from your server to work properly.
In this short article, I will try to explain how to uninstall ImunifyAV from your server using few commands. So follow the process along with me to remove imunifyAV from your server.
Step 1:
Access the SSH client as root of your server using credentials to your server. Like bitwise or Putty,
Step 2:
Stop the imunifyAV services using the command given below.
systemctl stop imunify-antivirus
Step 3:
Now download the imunifyAV script to uninstall the imunifyAV from your server. To download that scrip use the command.
How to change or reset LiteSpeed Webserver admin password?
Sometimes you can’t remember your LiteSpeed webserver admin password and you want to login as an admin what can you do? In this article, I will show you how to change or reset LiteSpeed Webserver admin password through the root SSH client, in this guide I will show you the step-by-step procedure.
Reset the LiteSpeed Webserver admin password from the SSH terminal is just a few commands processes.
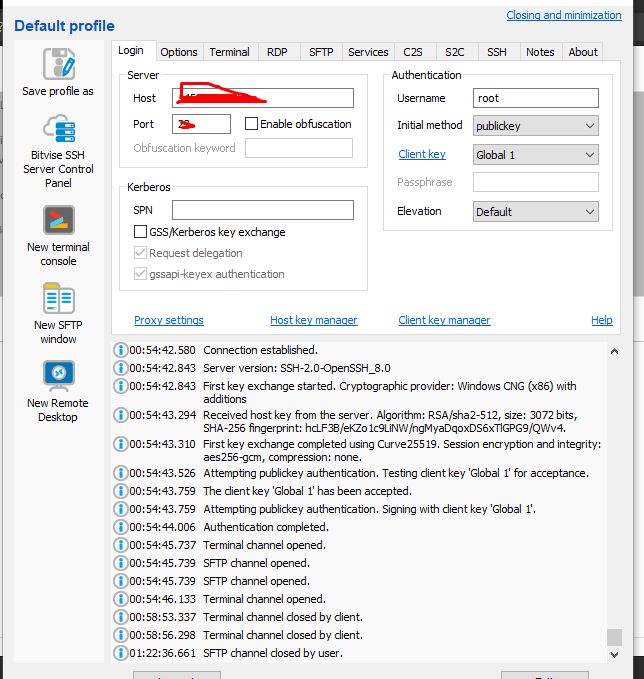
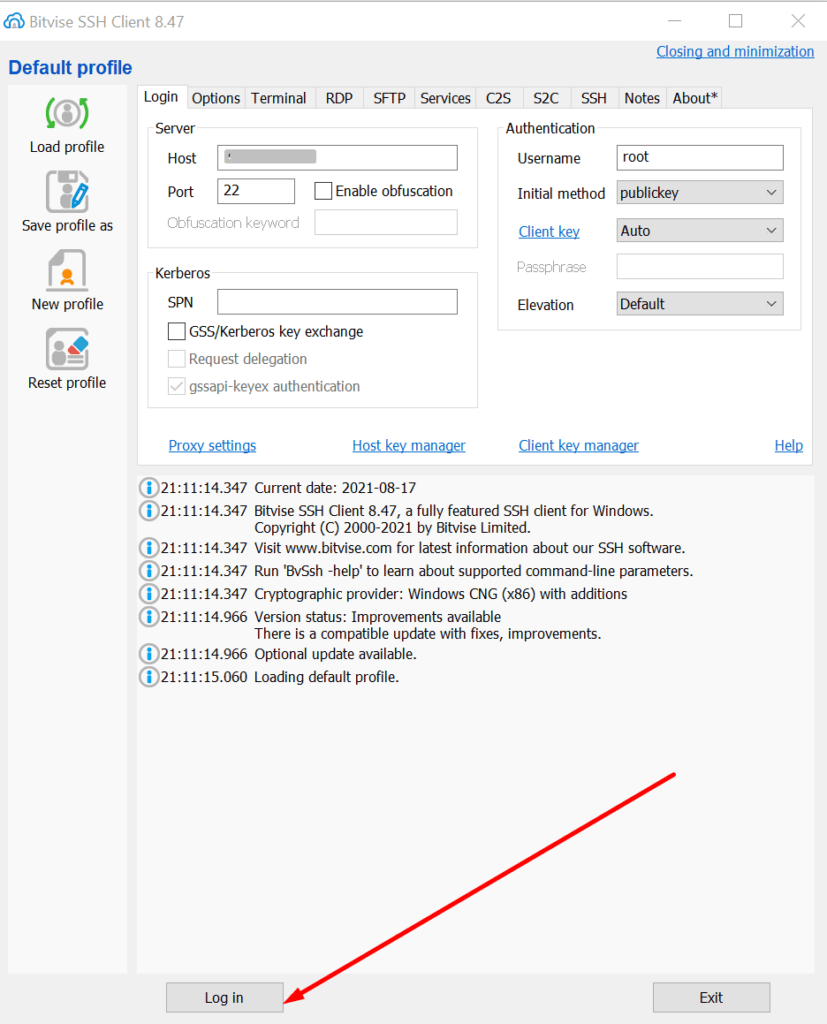
Open your root ssh client and log in then open the terminal
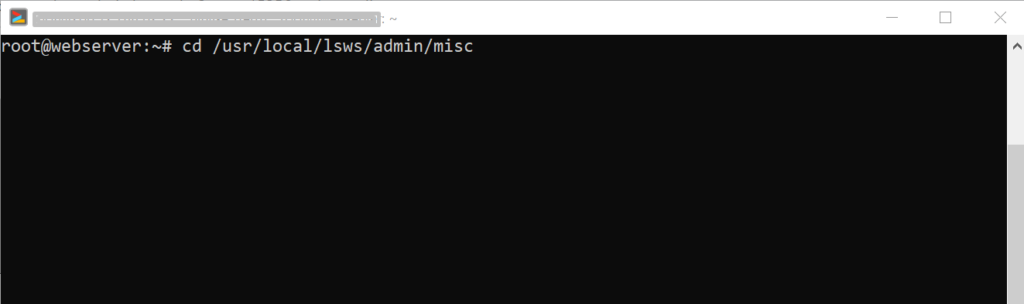
Step-2: Change Directory
To change or reset the password you have to go to this directory /usr/local/lsws/admin/misc, so change the directory using this command:
cd /usr/local/lsws/admin/misc
Step-3: Reset LiteSpeed Webserver admin password
Once you changed the directory you can change the password. to change the admin password run this command:
./admpass.sh
Once you run the command it will ask you the username type the username (must be admin) and then press enter then it will show you an input password option enter the new password and then press enter it also requires you to retype the password, re-enter the password, and press enter. it will show you “Administrator’s username/password is updated successfully!”.
Your password is changed now access webserver using these credentials at:
Free Download Full Android Course With 14 Real Apps – 42 Hours
If you want to learn Android development then this is the most comprehensive Android app development course. Enroll & learn Android development with hands-on examples. Free Download Full Android Course With 14 Real Apps – 42 Hours and enjoy.
This is a full Android Course with 14 real apps and 42 hours. You can download this course free from our website.
Free Download Full Android Course With 14 Real Apps – 42 Hours
In this course, you have a lot to learn from start to end. You will start from the basic learning from the setup to the complete development to a real-world example.
What you’ll learn
Learn the most used operating system on the planet
Learn the Most popular two version of Android. Here it is: Android Oreo and Android Pie
Learn Publishing Android App on Google Play
Start from scratch and become a Professional Android App Developer
In this course, we will build 14 different real Android Apps from scratch together
Android applications’ levels in this course are from easy to difficult
Learn how to develop modern Android Apps in the simplest way and improve your self-confidence
You will reinforce your existing Android information by applying
Using SQLite database, you will understand how to work with external databases
You will be able to develop Android applications with powerful architecture using Architecture Components (ViewModel, LiveData, Room).
With Firebase, you will be able to develop real-time applications
You will learn how to make a messaging app using Firebase
You will be able to develop user-friendly interfaces using Material Design principles and components
You will be able to develop modern Android apps
This course is built to help beginners to start making applications in Android
You will learn to develop games using Java Programming Language and Android Studio
You will learn to develop applications by getting real-time data from the Internet
You will have 14 different applications that you will publish on Google Play
You can enrol this course if you want to develop advanced Android Applications using web integrated, online database.
Requirements:
No prior knowledge is required
No coding knowledge required
To have basic Java programming knowledge
Having a working computer and internet
Watching the course videos completely, to the end and in order
Determination to learn and patience
Desire to learn Android Application Development
Nothing else! It’s just you, your computer and your ambition to get started today
Description:
Hi there,
Welcome to Full Android Course with 14 Real Apps – 42 Hours course.
Android is the most used operating system on the planet. In fact, it’s almost omnipresent in the mobile ecosystem. With millions of Android devices in use, and an incredible 500,000+ new Android devices activated daily, the popularity of Android applications is increasing exponentially – and with it, the demand for Android application developers is soaring.
If you’re interested in developing new and innovative applications for the world’s #1 mobile platform, this course is a perfect match for you.
This Full Android Course with 14 Real Apps – 42 Hours course will take you from beginner to advance level.
Our passion is to carry our experience with the right examples to anyone who will enroll in this course. In this course, you will learn Android app development step-by-step. While doing kind of show and tell in our lectures we are also explaining whys. During the lectures, we will be practicing with more than 10 examples and we will be learning to build and publish 14 major apps.
What’s important
This course is expertly designed to teach everyone from complete beginners, right through to professionals as a refresher.
In this course you will learn;
● Android Environment Setup – Download, install and configure the necessary software
● Creating a New Project
● Android Studio
● Android Components
● Components and Life Cycles
● Publishing Your App on Google Play and more
● You will reinforce your existing android information by applying.
● And You will learn to develop games using Android Studio
● You will learn to develop applications by getting real-time data from the Internet.
● Using SQLite database, you will understand how to work with external databases
● You will be able to develop applications with powerful architecture using Architecture Components (ViewModel, LiveData, Room).
● And You will learn how to make a messaging app using Firebase.
● With Firebase, you will be able to develop real-time applications
● You will be able to develop user-friendly interfaces using Material Design principles and components.
● You will be able to develop modern Android apps.
Why would you want to take this course?
Our answer is simple: The quality of teaching.
When you enroll, you will feel the OAK Academy’s seasoned instructors’ expertise.
This course will take you from a beginner to a more experienced level.
We will take you from beginner to advance level. You will learn step-by-step with hands-on demonstrations.
Fresh Content
It’s no secret how technology is advancing at a rapid rate. New tools are released every day, Google updates Android and it’s crucial to stay on top of the latest knowledge. With this course, you will always have a chance to follow the latest trends.
You’ll also get:
● Lifetime Access to The Course
● Fast & Friendly Support in the Q&A section
● Udemy Certificate of Completion Ready for Download
Dive in now Full Android Course with 14 Real Apps – 42 Hours course
We offer full support, answering any questions.
Who this course is for:
Those who want to develop an Android mobile application
Who wants to improve their existing android knowledge
Those who want to develop applications using the Java programming language
Learners who want to develop modern applications and applications with a user-friendly interface
Those who want to develop applications with Firebase Real-Time Database, Architectural Components (View Model, Live Data, Room) and SQLite
Leaners who are curious about the Android Mobile game World
Those who want to improve their application development skills using Android studio and java programming language
A total beginner, with a curious mind and wants to be an app developer
Anyone planning a job transformation and wants to become an Android developer
Details about the course:
Corse is completely in the English language. Course continual about 42 hours in which you can learn from basic to real-world development.
From this site, you can totally download this Udemy course for free. This course is very complete and comprehensive about the development of android applications. Some courses are just about basic learning and some development but here you will learn from basic to the advance and will develop real-world applications.
Full Android Course With 14 Real Apps Download Free click below.
In the field of digital marketing, you are always looking for LifeTime deals and offers from different APPSUMO is a very popular platform for lifetime deals and offers. here I will give some AppSumo coupon codes for the APPSUMO discount.
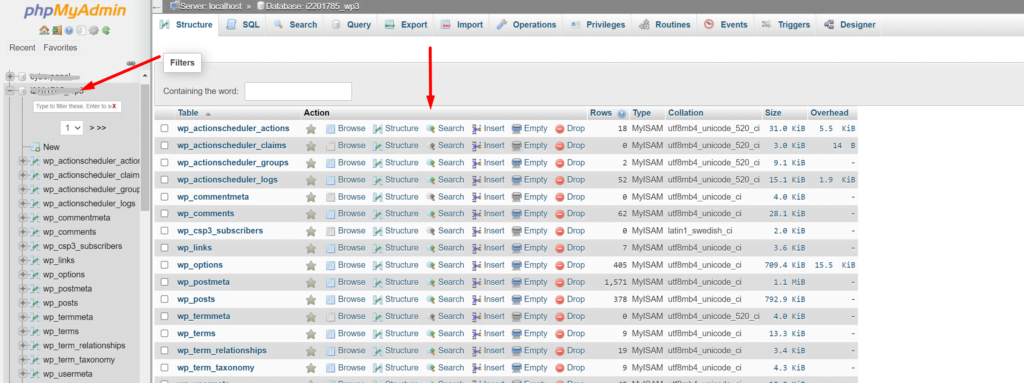
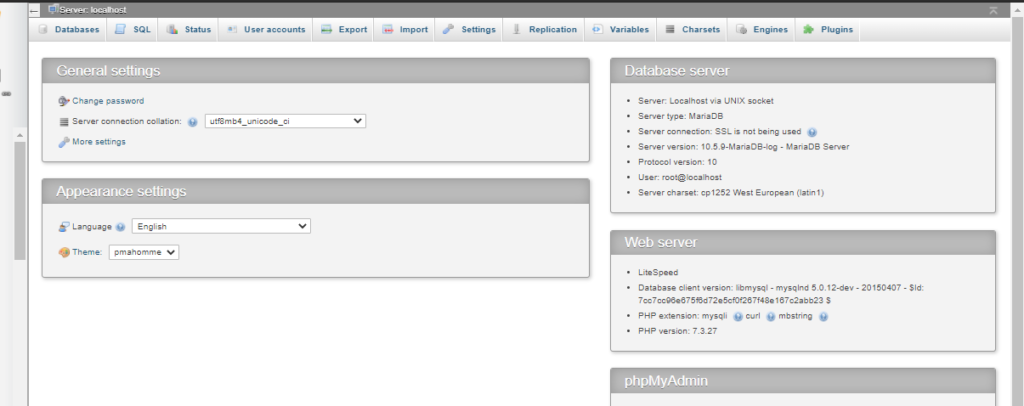
While transferring your website from one server to another you may need to export your database in some cases. In this article, I am going to show you how to export Database from PHPMyAdmin.
Exporting a database is just a few-click process. Just login to your PHPMyAdmin dashboard providing username and password. to export Database from PHPMyAdmin
You can see all the database you have created In your database is there.
Select the database you want to export. To select a database click on it. And you can see all the tables of your database on your screen.
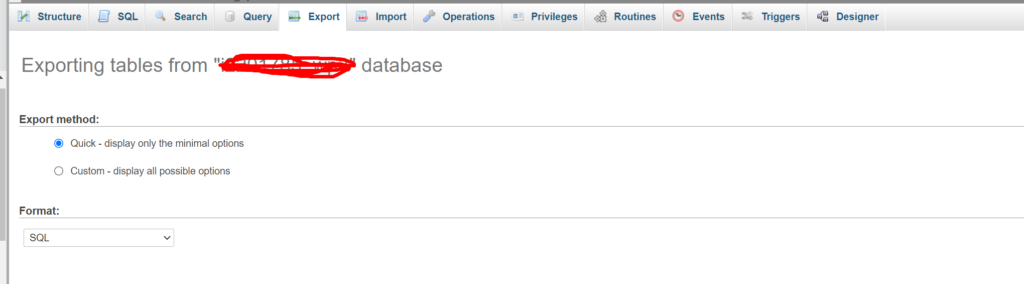
Now from the top bar click on the Export button to start theexport database.
Now you have to select the type of file in which you want to export your database. After selecting file type click on the Go button on the right bottom side.
on clicking the Go button process will start and you can see the download progress on your browser.
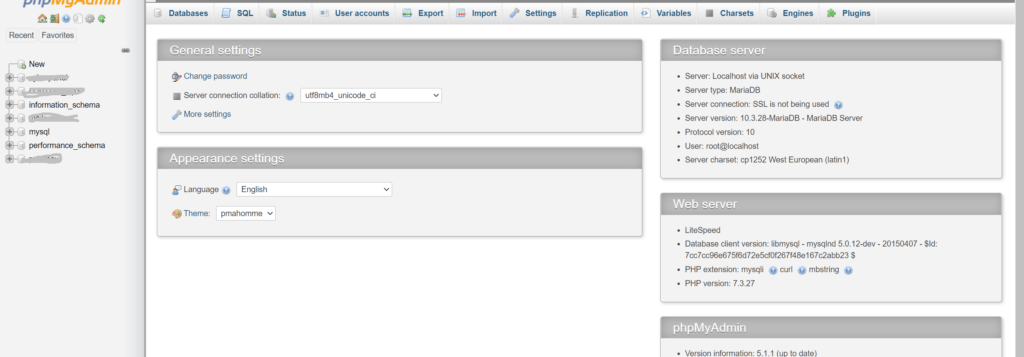
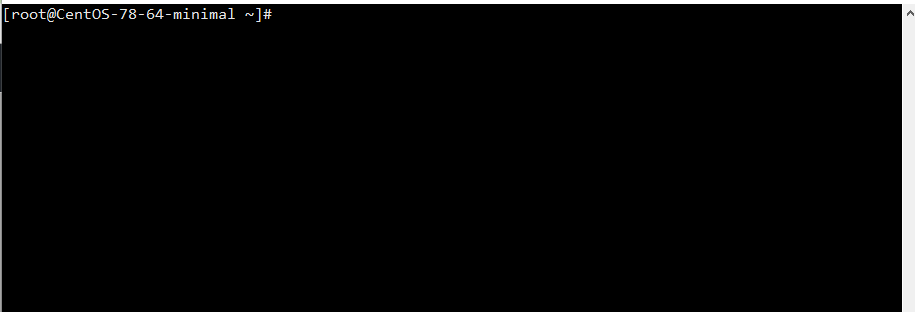
How to access MySql root user using the command line?
Often in the case of big databases or lack of user interfaces you need to do MySQL functions using the command line on your server. In this article, we will discuss How to access MySql root users using the command line?
We try to minimize this article as we can.
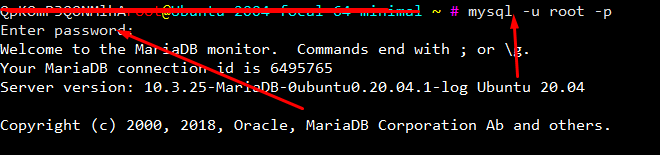
Login to SSH using your credetial vis putty/bitvise etc.
Now copy this comand and paste on your ssh terminal.
mysql -u root -p
After this terminal will ask for the root MySQL password provide a password to be processed.
In the case of cyberpanel Mysql root password location is. /etc/cyberpanel/mysqlPassword. use cmd to show.
How to resolve PHPMyAdmin blank page error CyberPanel?
Sometime after update you faced PHPMyAdmin blank page error CyberPanel. In this article i will tell you the shortest way to resolve PHPMyAdmin blank page error CyberPanel.
You have to do few steps to resolve this issue.
You have to load your default PhpMyadmin script and replaced it with the present script.
1.Login to SSH. Change directory to the phpmyadmin using this command.
cd /usr/local/CyberCP/public/phpmyadmin
2. Here you have one simple file and one the working config file. Rename the working config to the new file like config.inc.php.old using this command.
mv config.inc.php config.inc.php.old
3. Now rename simple file to the working file and try to access phpmyadmin from the CyberPanel.
mv config.sample.inc.php config.inc.php
Go to the PhpMyAdmin page of your CyberPanel and check now.
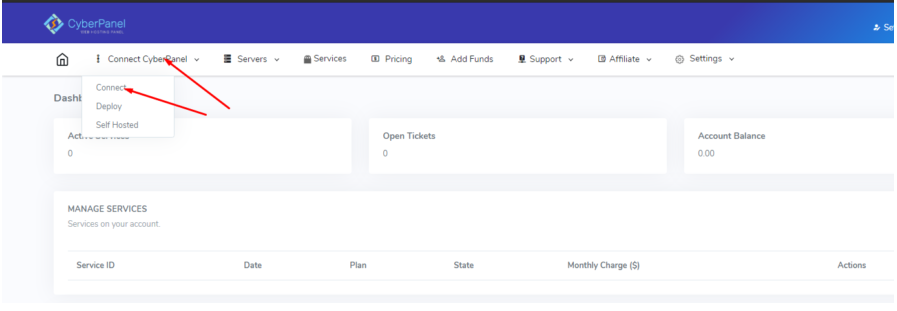
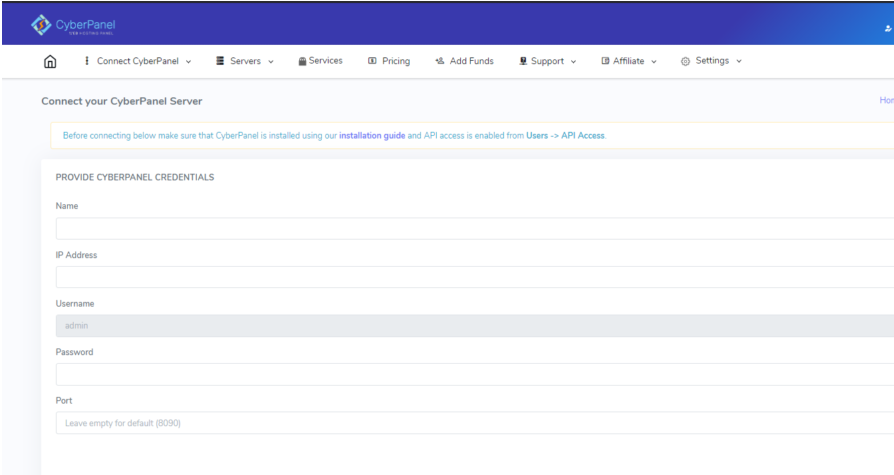
CyberPanel Cloud is not only a support platform but it have a lot of paid features there. In this article we will tell you how to connect CyberPanel with CyberPanel Cloud?
CyberPanel cloud have a lot of paid features and l3 level support but there are also some free features like email debugger, CyberPanel upgrade, etc.