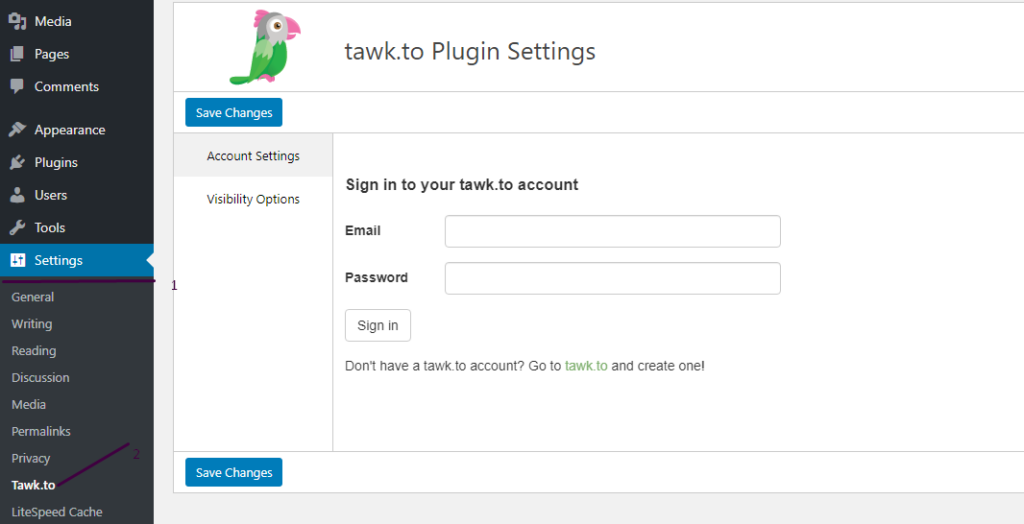
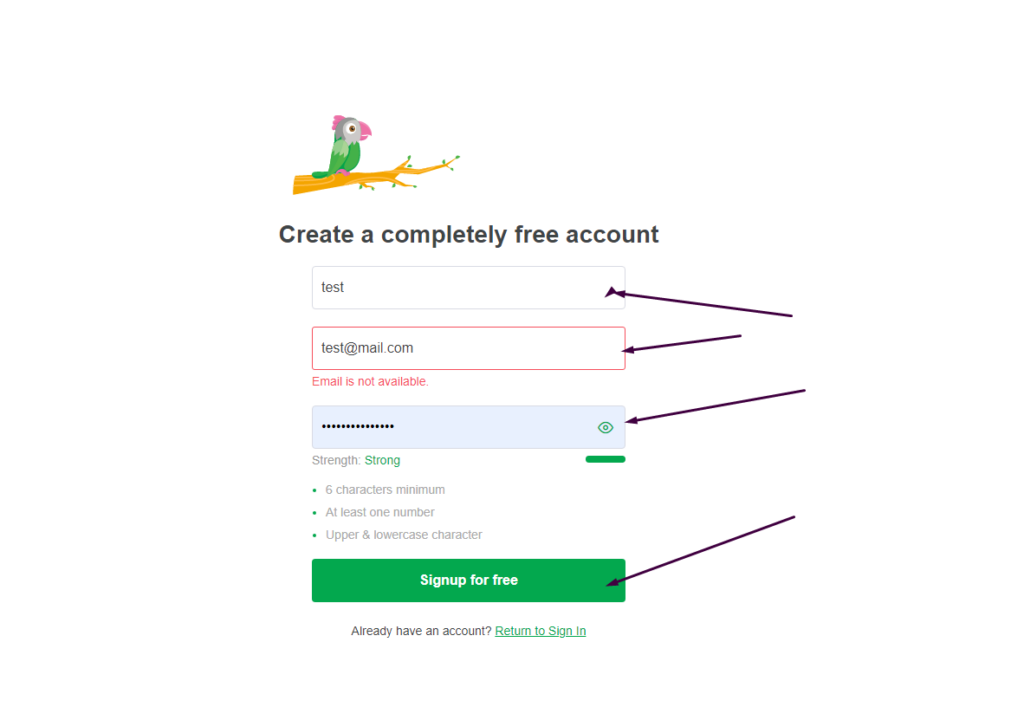
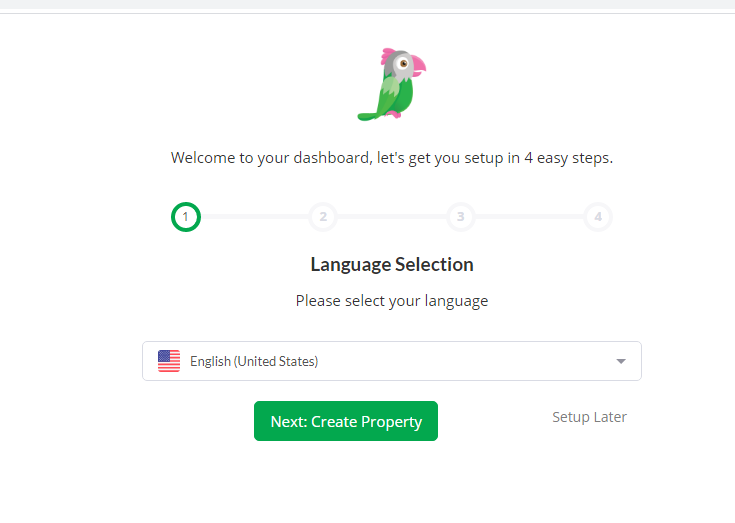
How to add live chat on WordPress Website – Integrate Tawk.To Live Chat to WordPress
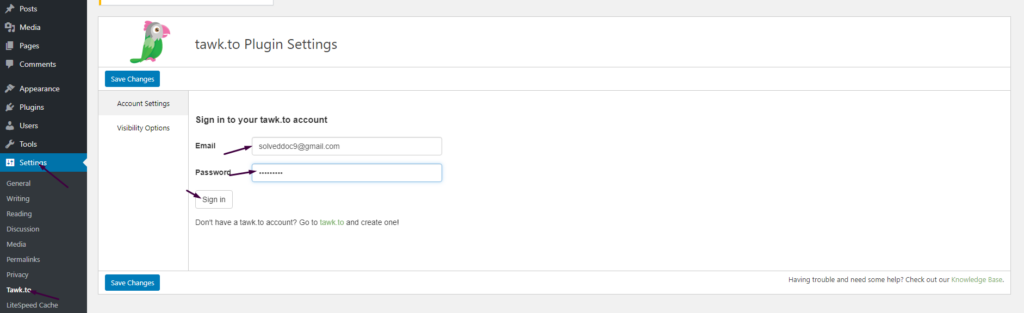
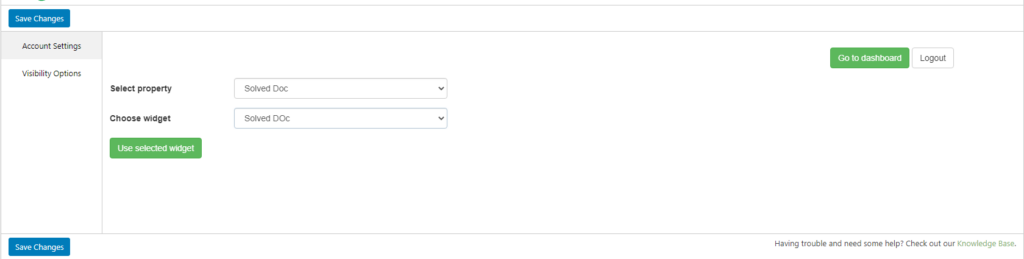
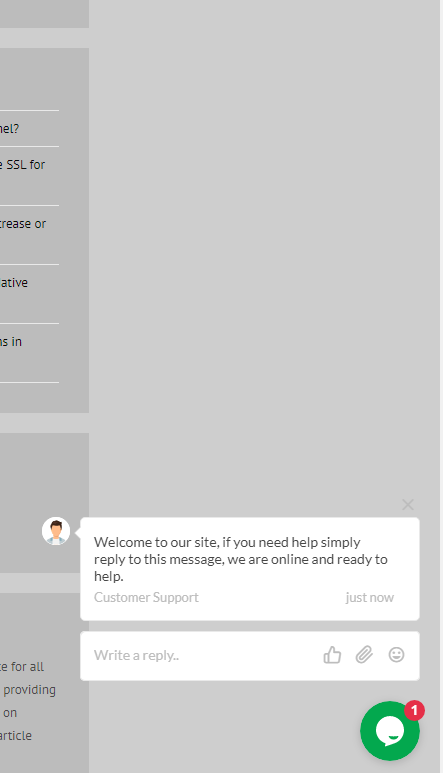
In this Article I am going to share my personal experience that how i added the Twak.to Live Chat in my WordPress Site. After reading you come to know how to add live chat on WordPress Website.
This tutorial is basically my personal experience that how I integrate live chat on my WordPress Website. So without wasting time lets start tutorial.
React Native adMob | Seamless & Fast Google AdMob Integration
Do you want to integrate your AdMob to React Native Application? Here we will learn about React Native adMob integration.
If you want to earn from your React Native Applications you need to integrate AdMob with your React Native Application. So Google AdMobs helps you to earn from your applications.
Mostly React Native Packages are installed using a single command. In this article, i will tell you the simplest way to install, Integrate, and use AdMob in your React native application.
Create AdMob Account:
First of all you must have a AdMob account. Go to this Article and check how you can create Admob account. The process of creating Admob account is very straight and simple. In this Article All steps are mentioned and described briefly.
How to Install React Native AdMob:
For the integration of Admob react native first of all we have to Install React native AdMob in your project its is very easy to do so here we discuss the steps :
There are different packages to integrate Admob with your React Native Project but here I discuss that one which I personally use and I think have easy integration than Others.
React-native-admob is bossily a react-native module for Google AdMob Banners, Interstitials, and Rewarded Videos, and also DFP Banners. To install this module Run the command stated below.
npm i @talaikis/react-native-admob
In older versions of React native, you need to configure this module manually but now This fork is a working version for RN 0.60+. Don’t link this package, auto-linking works fine. No need to do extra linking at all.
Open your already created application and install this module using the line stated above.
Once installation process is done. Nothing to do other than this.
React native AdMob Types:
React native AdMob Allows four types of Ads units for its user:
AdMobBanner,
AdMobInterstitial,
PublisherBanner,
AdMobRewarded,
AdMobBanner,
AdMobBanner is the Banner Add for your Application you can add it as sticky location on at any place on any page of your applicatio.
In comparison to the AdMobBanner and PublisherBanner which have a declaritive API, the AdMobRewarded has an imperative API, just like the AdMobInterstitial.
How to create a staging or clone of the WordPress site from CyberPanel?
Sometime you may need to create a clone or staging site of your WordPress site to make changes and test them. CyberPanel allows to create staging or clone site easily.
In this article, I will tell you how you can create a staging or clone of your WordPress site from CyberPanel.
You can create a staging site from CyberPanel and after doing that you can merge it back to the Original or master site.
Always keep backup before doing anything. So if you lost anything you can restore. The process of creating a staging site is very easy to follow along to do so.
Create a Clone or create a Staging for your site:
Step 1: Log in to CyberPanel and Go to Manage Website
Create a clone or staging site in cyberpanel is very easy. I will write the steps below to do so.
The first thing to do is login to your cyberpaner using your credentials on port 8090.
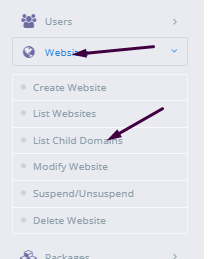
Then go to the Websites->List Websites->Manage
Step 2: Create a clone or Staging site
In the manage Dashboard, you can see the CLONE/STAGING button press that to process.
Add the Domain name which you want to use as staging or clone.
It will take some time and once staging is done it will show you this screen.
Now you must have to set A records for the staging domain you create Like staging.yourdomain.com. Visit your DNS manager and add A record for this staging site. No need to add any other records. A record is enough for staging.
In cyberpanel got to Websites->List Child Domains you can check the staging site.
Push back, Copy or sync site to Master:
Once you did all changes to staging and now you want to sync the staging back with the master site CyberPanel allows to do this very easy to do so follow steps:
Go to the Websites-> List Child Domains:
Now on this page, you can see your staging site press the Manage button in front of your site.
Now you are in the management dashboard of the staging site. You can see COPY/SYNC TO MASTER from here you can push back your staging to the original.
Here you can chose the options:
Copy complete Data
Sync Database
Copy Changed Files
Chose any option from them according to your requirement. Once the process of sync or coping is done now go back to your original site and check the changes if you have any cache plugin clear cache and then check the changes.