Warning: Redis::get(): php_network_getaddresses: getaddrinfo for localhost failed: Name or service not known in /home/solveddoc.com/public_html/wp-content/plugins/litespeed-cache/src/object-cache.cls.php on line 674 Home - Page 2 of 15 - Solveddoc
Ultimate Power of DigitalOcean VPS: 5 Steps to Set Up Your VPS
DigitalOcean VPS clients need not look elsewhere when it comes to value offered for the price paid. When compared with industry competitors, DigitalOcean VPS stands our as a host with unparalleled performance, reliability, as well as flexibility.
Speed and uptime are critical factors in website success. DigitalOcean VPS boasts state-of-the-art infrastructure and globally distributed data centers while other don’t, giving your website exposure to fast and efficient loading no matter where visitors are located. Do away with slow loading times and frustrated users, with Digital Ocean VPS, speed is on your side.
2. Complete Control
DigitalOcean VPS Options & Flexibility control puts you in control of your server fully. The customers are free to choose an Operating system, and configures the server to the preferred specifications. Would you like to scale resources to meet demand during peak traffic hours? Wish to install a specific software package? There is nothing in customer’s way with Digital Ocean VPS.
3. Advanced Security Features
One does not need any verification with DigitalOcean VPS, as this host keeps security as their utmost priority, offering built-in DDoS protection together, robust firewalls, and updates maintaining security for the clients’ websites.
How to Set Up a DigitalOcean VPS
Setting up a VPS on DigitalOcean is straightforward and efficient. Follow these steps to get started:
Create a Droplet – Choose your preferred operating system and server specifications.
Access Your Server – Use SSH to connect to your VPS securely.
Configure Security Settings – Set up firewalls, SSH keys, and security patches.
Install Required Software – Install a web server, database, and any additional tools you need.
Deploy Your Website or Application – Upload your files and configure your domain.
Who Can Benefit from DigitalOcean VPS?
Whether you’re a budding entrepreneur launching your first website or a seasoned developer in need of a reliable hosting solution, DigitalOcean VPS has everything you need to succeed. Don’t settle for mediocre hosting when you can have top-tier performance and reliability.
Make the Switch Today
In summary, DigitalOcean VPS offers the speed, control, and security necessary to take your website to the next level. Say farewell to slow load times and unreliable hosting providers—choose DigitalOcean VPS and experience the difference for yourself.
Your website deserves the best. Make the switch today and watch your online presence thrive!
Here’s a detailed article on setting up a VPS on DigitalOcean. Since I can’t include actual images here, I’ll describe what each image should contain so you can take screenshots while following the steps.
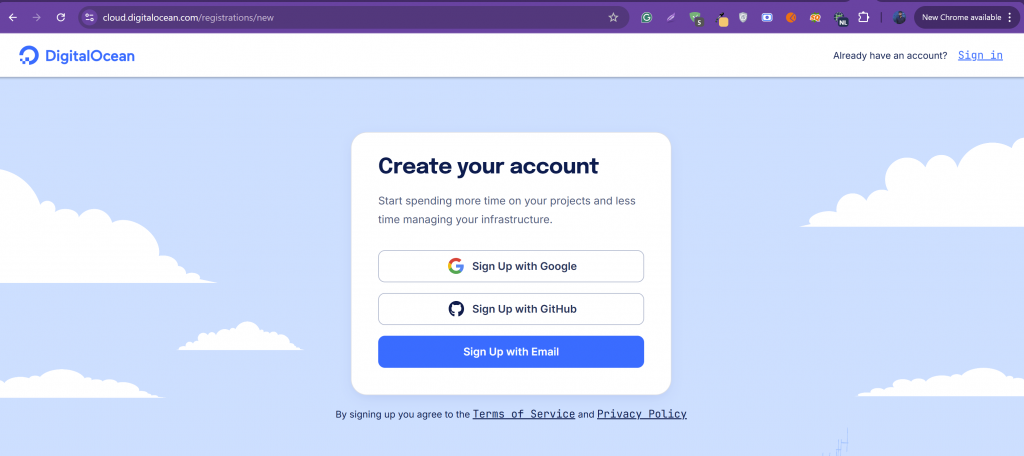
Setting up a Virtual Private Server (VPS) on DigitalOcean is a straightforward process. Whether you’re launching a website, a web application, or a personal server, DigitalOcean provides a user-friendly interface to deploy your VPS quickly. This guide will walk you through creating and configuring a VPS on DigitalOcean.
Confirm your email address and enter your billing details.
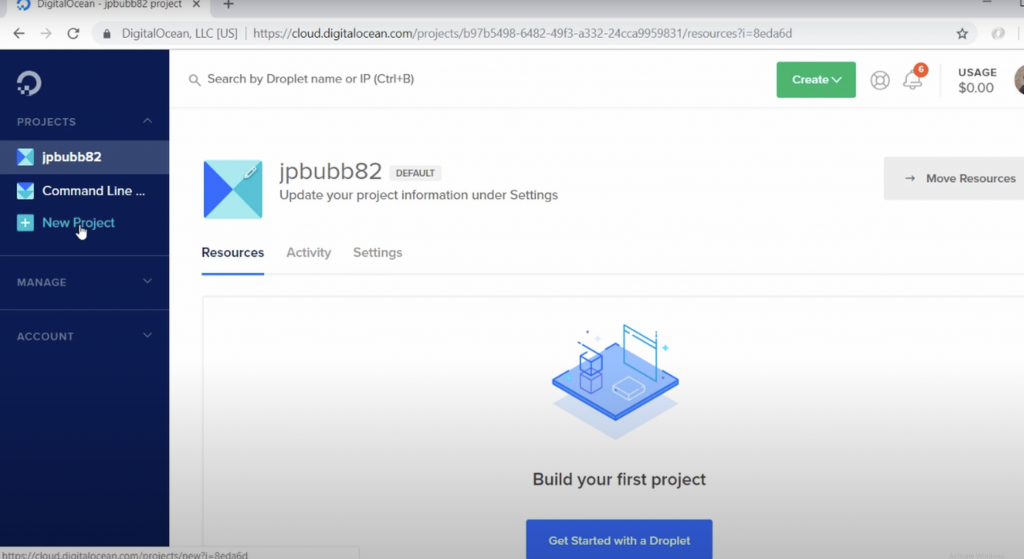
Step 2: Create a Droplet (VPS Instance)
Log in to your DigitalOcean account.
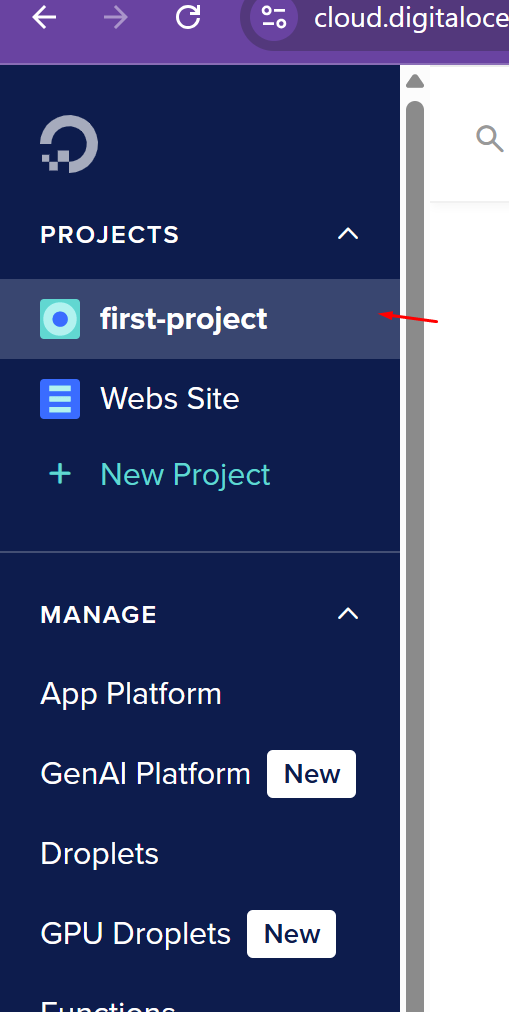
2. Select the project in which you want to deploy VPS.
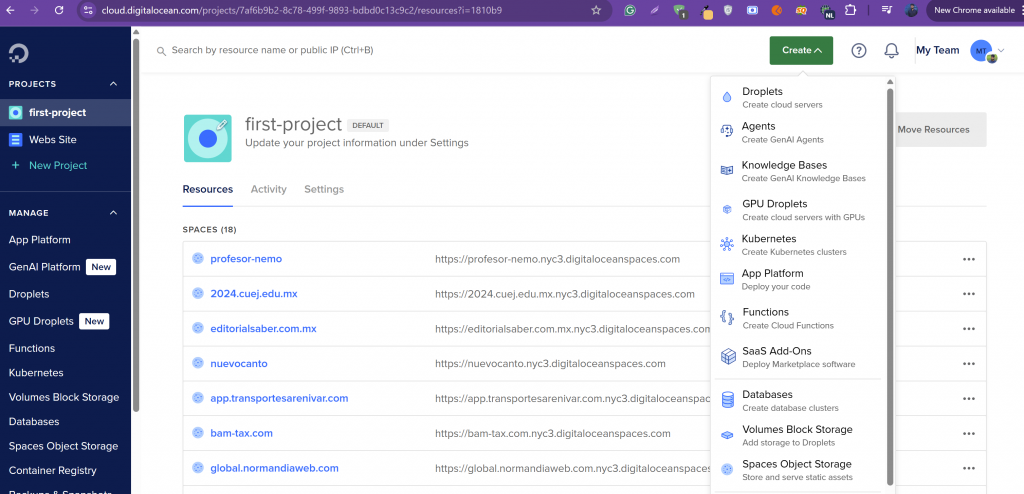
Click on Create → Droplets in the top-right corner.
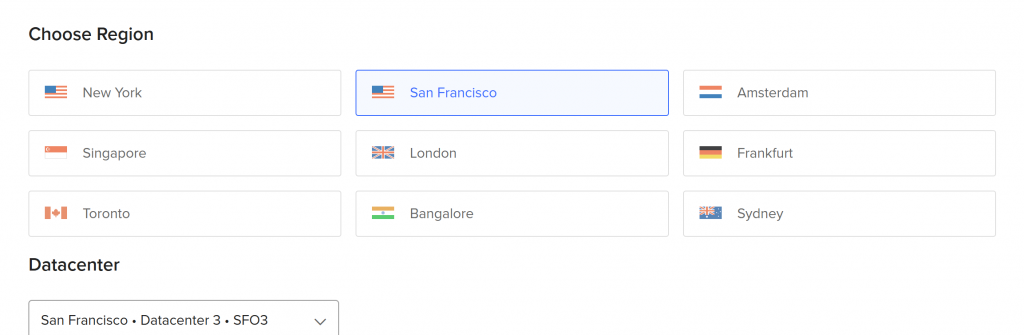
3. Choose Region:
You can choose any region that you want and also that suits you.
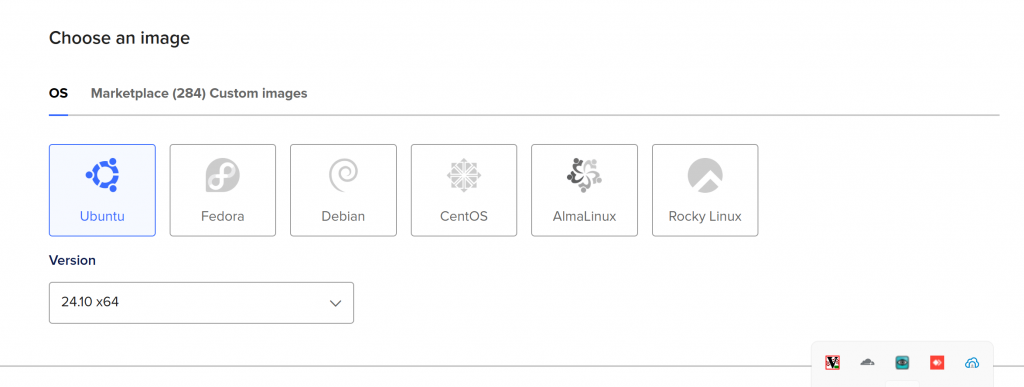
Choose an image (OS): Ubuntu, AlmaLinux, CentOS, Debian, etc.
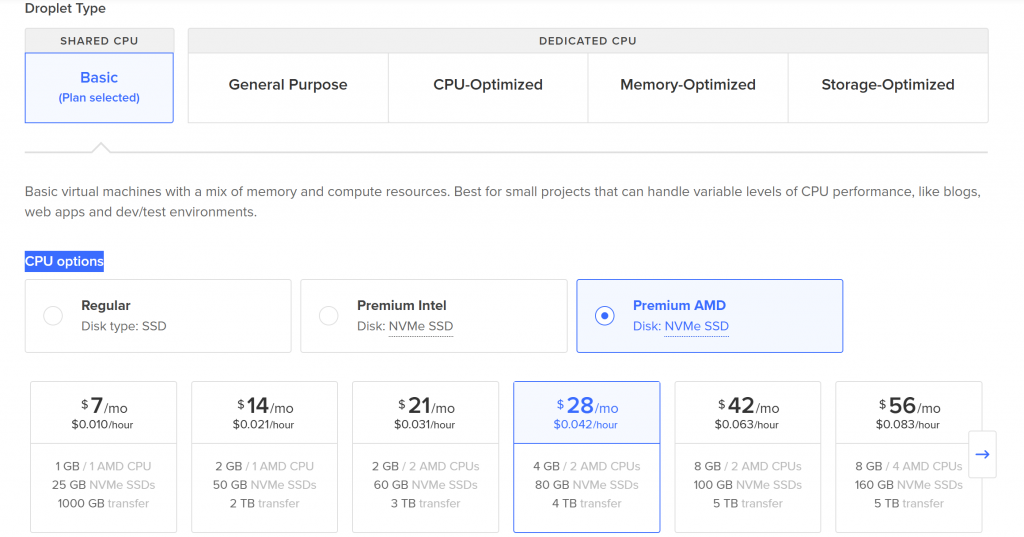
Choose Size:
In this section you can choose few things, Droplet Type, CPU options.
Droplet Type
Shared CPU
Basic (Plan Selected)
Dedicated CPU Options (Not Selected)
General Purpose
CPU-Optimized
Memory-Optimized
Storage-Optimized
CPU Options
Regular (Disk type: SSD)
Premium Intel (Disk: NVMe SSD)
Premium AMD (Disk: NVMe SSD) (Selected)
Pricing and Specifications
Price
Hourly Rate
RAM
CPU
Storage
Bandwidth
$7/mo
$0.010/hour
1 GB
1 AMD CPU
25 GB NVMe SSDs
1000 GB transfer
$14/mo
$0.021/hour
2 GB
1 AMD CPU
50 GB NVMe SSDs
2 TB transfer
$21/mo
$0.031/hour
2 GB
2 AMD CPUs
60 GB NVMe SSDs
3 TB transfer
$28/mo
$0.042/hour
4 GB
2 AMD CPUs
80 GB NVMe SSDs
4 TB transfer
$42/mo
$0.063/hour
8 GB
2 AMD CPUs
100 GB NVMe SSDs
5 TB transfer
$56/mo
$0.083/hour
8 GB
4 AMD CPUs
160 GB NVMe SSDs
5 TB transfer
Would you like help in choosing the best plan for your needs?
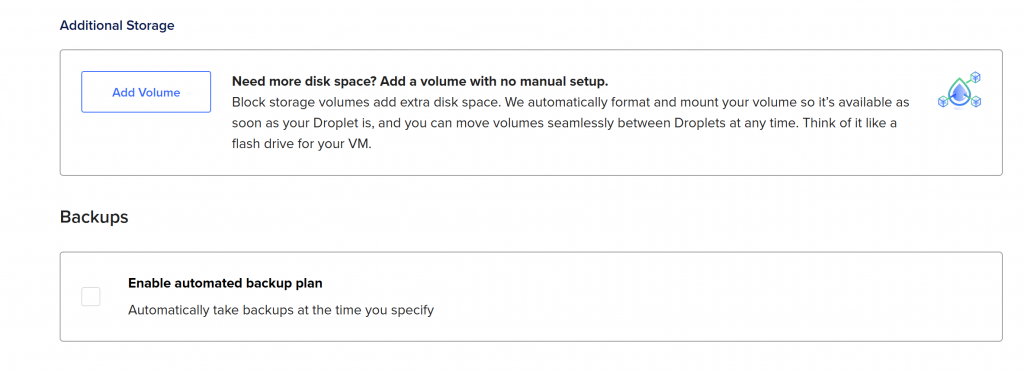
Additional Storage
Option to Add Volume
Provides extra disk space using block storage volumes.
Automatic formatting and mounting for immediate availability.
Volumes can be moved seamlessly between Droplets.
Functions like a flash drive for the virtual machine (VM).
Backups
Option to Enable Automated Backup Plan
Automatically takes backups at a specified time.
The checkbox for enabling backups is currently unchecked.
Would you like recommendations on whether to enable backups or add storage?
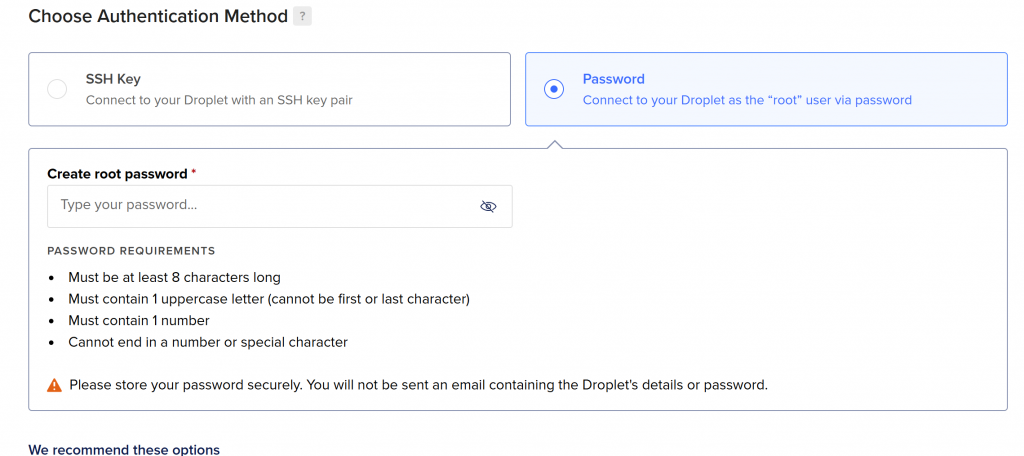
Choose Authentication Method
SSH Key (Not selected)
Connect to the Droplet with an SSH key pair.
Password (Selected)
Connect to the Droplet as the “root” user via password.
Root Password Requirements
Must be at least 8 characters long.
Must contain 1 uppercase letter (cannot be the first or last character).
Must contain 1 number.
Cannot end in a number or special character.
⚠ Important Notice:
Store your password securely.
You will not receive an email containing the Droplet’s details or password.
Would you like recommendations on securing your Droplet or choosing the best authentication method?
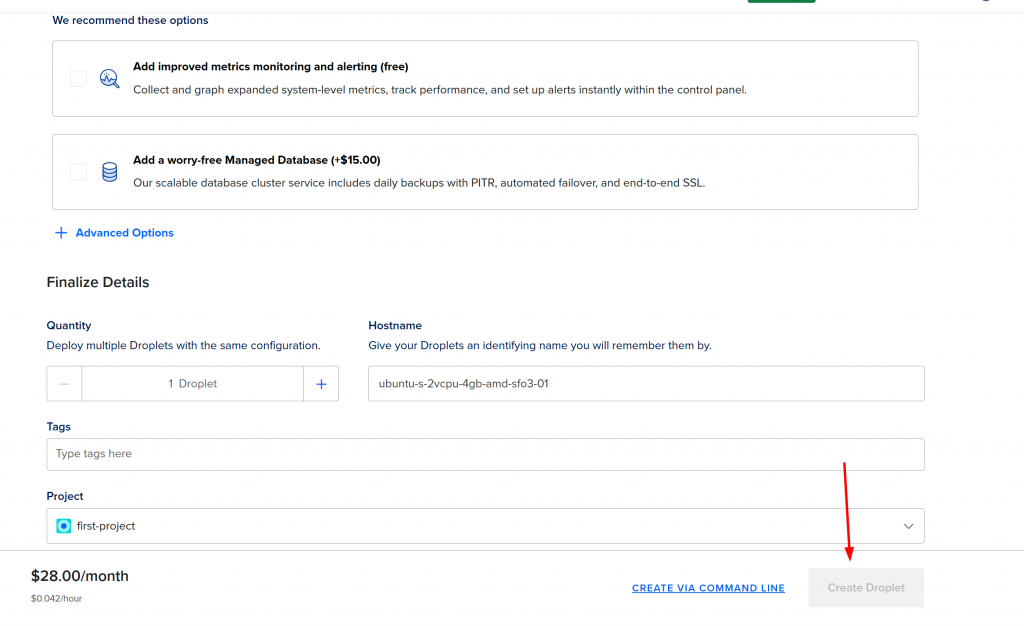
Here are the details from this final Droplet setup screen:
Recommended Options (Optional Add-ons)
Improved Metrics Monitoring and Alerting (Free)
Collect and graph system-level metrics
Track performance and set alerts instantly
Worry-Free Managed Database (+$15.00)
Scalable database service
Includes:
Daily backups with PITR
Automated failover
End-to-end SSL
Finalize Details
Quantity:
1 Droplet (default, can increase if deploying multiple instances)
Hostname:
ubuntu-s-2vcpu-4gb-amd-sfo3-01
This is an auto-generated name that you can change to something more meaningful
Tags:
Empty field for adding tags (optional)
Project:
first-project (selected project for organizational purposes)
Create Droplet Button
The “Create Droplet” button is disabled (grayed out), likely because the root password hasn’t been set yet (as seen in your previous screenshot).
✅ Once the password is set (and meets all the criteria), the “Create Droplet” button will be enabled.
Would you like help picking a hostname or deciding on monitoring/database options?
Step 3: Connect to Your VPS
Once your droplet is created, you’ll see an assigned IP address.
Using SSH (For Linux/macOS): Open the terminal and enter: ssh root@your_droplet_ip If using an SSH key, no password is needed. Otherwise, enter the root password.
Using PuTTY (For Windows):
Download and open PuTTY.
Enter your Droplet’s IP address.
Click Open and log in as root.
📷 Image Suggestion: Screenshot of a terminal connected to the VPS.
Step 4: Update and Secure Your VPS
After logging in, update the system:
apt update && apt upgrade -y  # For Ubuntu/Debian
dnf update -y  # For AlmaLinux/CentOS
Set Up a New User (Optional but Recommended)
adduser yourusername
usermod -aG sudo yourusername  # For Ubuntu/Debian
usermod -aG wheel yourusername  # For AlmaLinux/CentOS
Set Up a Firewall (Recommended for Security)
ufw allow OpenSSH
ufw enable
📷 Image Suggestion: Screenshot of a successful SSH login and system update in progress.
Step 5: Install a Web Server (Optional)
If you’re hosting a website, install a web server like Apache or Nginx.
📷 Image Suggestion: Screenshot of the Apache or Nginx welcome page when accessed via the VPS IP address.
Conclusion
Your DigitalOcean VPS is now set up and ready to use! From here, you can configure databases, deploy applications, or set up a control panel like cPanel.
Would you like a downloadable version of this guide with images? Let me know! 🚀
How to setup hetzner dedicated server?
Hetzner is one of the known server providers. In this article, we will check how you can set up Hetzner Dedicated Server.
Hetzner is one of the most known companies for providing different types of web hosting servers like VPS and dedicated. Hetzner is a Germany-based web hosting company known for dedicated servers, cloud hosting, colocation & VPS registration services. Well, they provide high-performance servers at reasonable prices.
Key Features of Hetzner:
Dynamic Discount Cloud Services: Scalable cloud instances with flexible pricing.
Colocation — Take space in a data center to house your own server hardware Statusworte Meers, SALE!
Networking & Security: Includes DDoS protection, private networking, and both IPv4/IPv6 support.
Data Centers: Germany (Nuremberg, Falkenstein) and Finland (Helsinki).
Why Choose Hetzner?
Affordable price: Economical server plans compared to other providers.
Stable Infrastructure: New high-performance data centers.
Green: Energy-efficient hosting options.
Customizable Hardware: Tailor-made server configurations.
Type of servers Hetzner offers:
Hetzner has different types of servers to suit different needs. Here are the main types:
Hetzner Dedicated Servers
Standard Dedicated Servers – High-throughput bare metal servers.
Server auction – Older dedicated servers at a discount.
AMD & Intel Servers – best for different workloads.
Hetzner Cloud Servers
General Purpose — Optimizes both performance and cost.
Dedicated vCPU – Allocated CPU resources for demanding workloads.
Storage Instances — Well-suited for storage of large amounts of data.
Load Balancers – Efficiently distribute traffic.
Hetzner VPS (Virtual Private Servers)
This is what we call a Virtual Private Server (VPS), which provides private resources at a lower price.
Hetzner Colocation Services
Let you put your own hardware into Hetzner’s data centers.
Hetzner Storage Solutions
Storage Boxes – A cloud storage that is both secure and scalable.
Backup Storage — Remote backup for data protection.
Hetzner Web Hosting (Starting from €1.76/month)
Shared hosting solutions for beginners and businesses.
Includes domain hosting, email services, and website management tools.
Hetzner Managed Servers (Starting from €34.00/month)
Fully managed dedicated servers.
Ideal for users who need high performance without handling server administration.
Hetzner Servers location:
There are currently four network zones and six locations:
eu-central
us-east
us-west
ap-southeast
DE Falkenstein fsn1
US Ashburn, VA ash
US Hillsboro, OR hil
SG Singapore sin
DE Nuremberg nbg1
FI Helsinki hel1
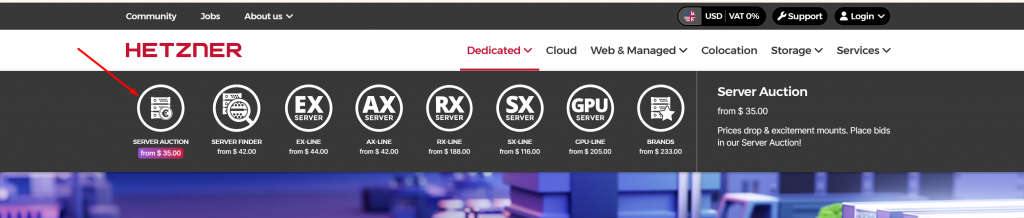
How to Setup Hetzner dedicated server?
Hetzner’s Dedicated Server section, where they offer different types of Hetzner dedicated server. Here’s a breakdown of the various server categories shown in the image:
1. Server Auction (from €31.00)
These are used servers available at discounted prices.
Prices drop over time, allowing users to place bids.
Ideal for those looking for affordable dedicated servers.
2. Server Finder (from €37.30)
A tool to find dedicated servers based on specific requirements.
Helps customers filter available servers based on CPU, RAM, and storage.
3. EX Server (from €39.00)
Part of the Enterprise (EX) series.
Balanced performance servers for general business and hosting needs.
Uses high-performance CPUs (Intel or AMD) and fast SSD/NVMe storage.
4. AX-Line (from €37.30)
AMD-based dedicated servers offering great price-to-performance ratio.
Best for applications needing multi-core performance.
Usually features Ryzen or EPYC processors.
5. RX-Line (from €169.00)
Designed for high-performance workloads.
Uses AMD EPYC or Intel Xeon processors.
Ideal for databases, virtualization, and high-demand applications.
6. SX-Line (from €104.00)
Storage-optimized dedicated servers.
Equipped with large HDD or SSD storage arrays.
Best for backup storage, large datasets, and file hosting.
7. GPU Server (from €184.00)
Dedicated servers with NVIDIA GPUs.
Designed for AI, machine learning, rendering, and GPU computing.
Typically high-end configurations for enterprise use.
Now you can see all types of dedicated servers that Hetzner is providing you have to select the dedicated server type that you want to deploy. Different types of servers have different deployment time frames. For this, I will select the auction one.
The first thing is to select which type of dedicated server you want to deploy with the hetzner. Like for now from all the above I am going to select the hetzner auction dedicated server.
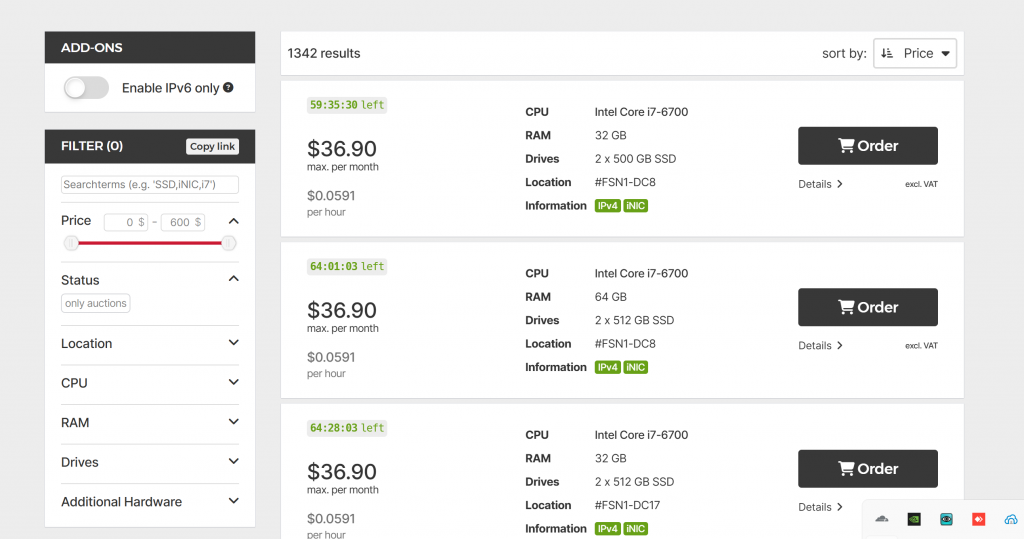
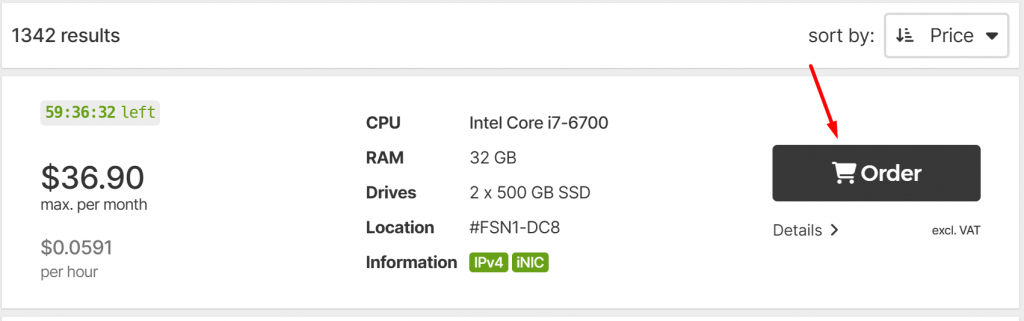
Now you can see below on the auction page all of the servers that are available in the Hetzner auction can be seen. Like right now for me I can see 1342 servers are available in the list.
Now here hetzner provides a very cool filter to get the server of exact your choice. Using this filter you filter the server according to your needs like CPU, RAM, location, etc as explained below.
This is the filter panel for searching and selecting Hetzner dedicated servers (especially in the Server Auction section). Here’s what each option means:
1. Search Terms
You can enter keywords like CPU model, RAM size, SSD type, or network card (e.g., i7, SSD, iNIC).
Helps in quickly finding servers that match your specifications.
2. Price Range
A slider lets you set a price range from 0 to 600 USD.
Helps filter servers within your budget.
3. Status
Shows only servers available in auctions.
Servers in auctions reduce in price over time until someone buys them.
4. Location
Lets you select a data center location (e.g., Germany, Finland, USA).
Useful if you need a server close to your target audience.
5. CPU
Filters based on CPU model and cores.
Example: You can select Intel i7, AMD Ryzen, or Xeon processors.
6. RAM
Lets you choose the amount of RAM (memory) you need.
Options typically range from 8GB to 512GB+.
7. Drives
Filters based on storage type:
HDD (for large storage)
SSD (for better speed)
NVMe (for ultra-fast performance)
8. Additional Hardware
Select special hardware options like:
iNIC (Intelligent Network Interface Card)
RAID controllers
Extra GPU (for AI/ML tasks)
How to Use It?
Set your budget with the price slider.
Choose the CPU and RAM based on your needs.
Pick storage type (SSD/NVMe for speed, HDD for large capacity).
Select a server location for better latency.
Use additional filters for GPUs, network cards, etc.
Click Search to find the best matching server.
Would you like help picking the best Hetzner server for your needs? 🚀
Buy Your Hetzner dedicated server Now:
Just select your server and click on the cart button
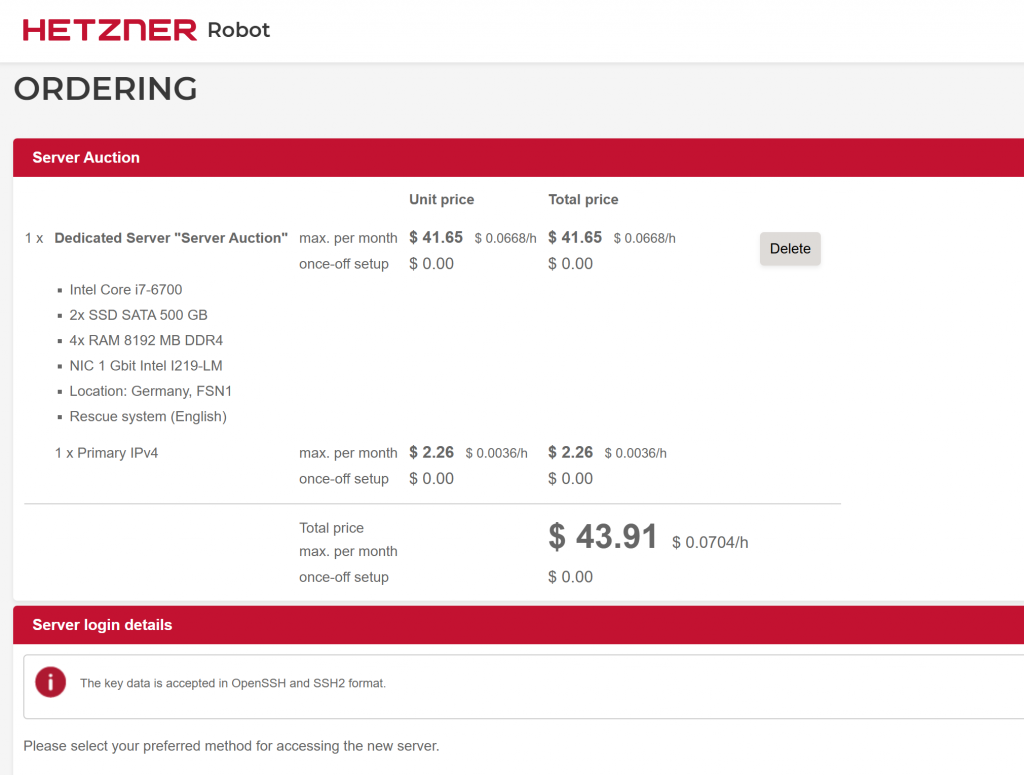
Once you click on cart button your server is select and you need to pay now.
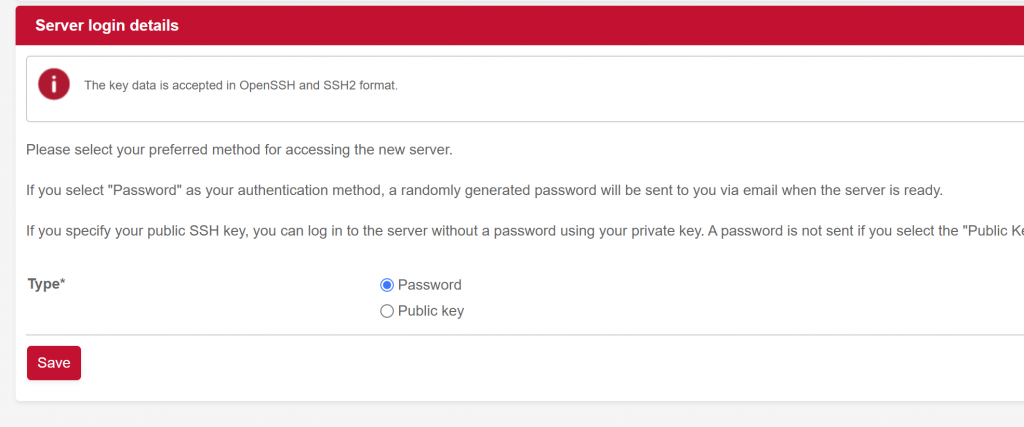
Now click on the Save button now and move on next button. Now one important thing you have to take care you should select password or public key on this screen.
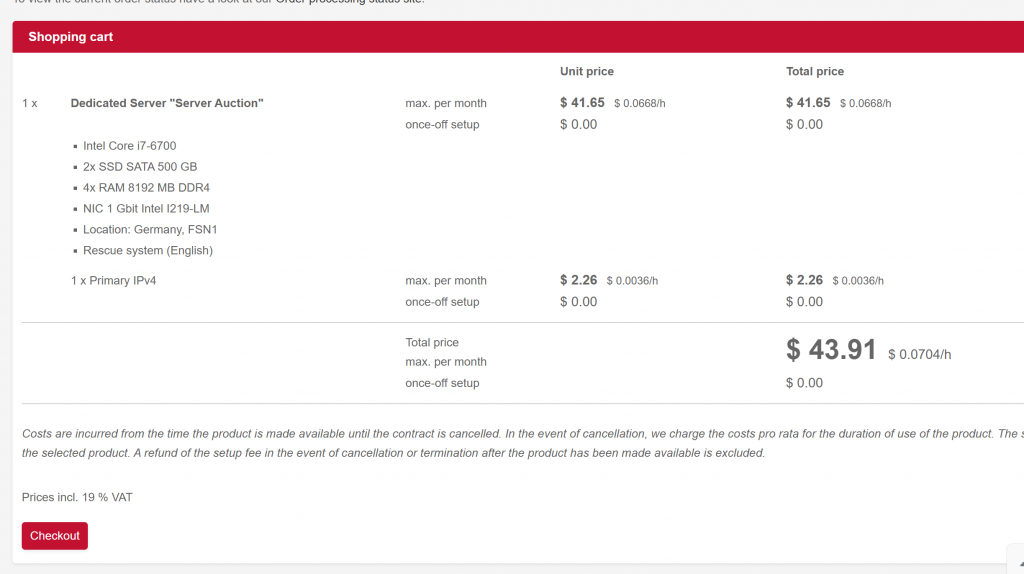
All done to get a dedicated server just click on the checkout button now.
Here if you are already logged in that will be great otherwise you will be redirected to https://accounts.hetzner.com/login here provide your logins and log in or you have to create a new account from here https://accounts.hetzner.com/signUp
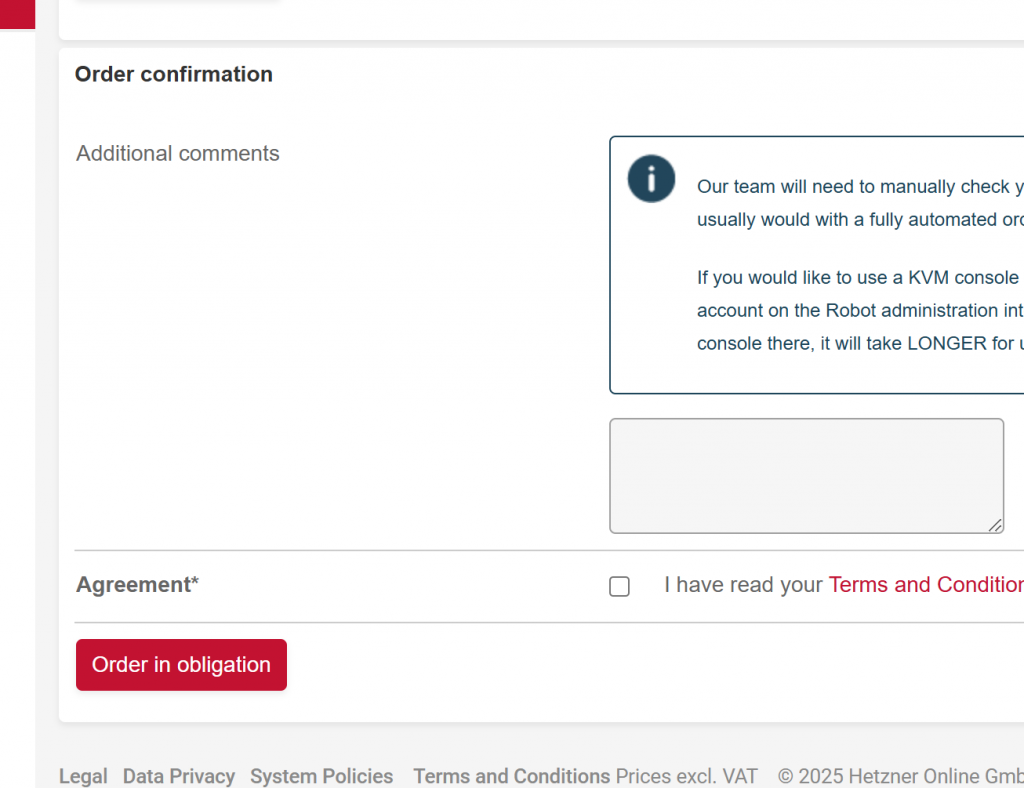
Just click on order confirmation now and all will be done.
cyberpanel install ubuntu 20.04
CyberPanel intsallation is very easy. You can install cyberpanel using one command. In this article we will discuss how to install CyberPanel install Ubuntu 20.04.
Officially CyberPanel supports a few different OS including Ubuntu 22.04, ubuntu 20.04, Alamalinux 8, Alamalinux 9, CloudLinux 7, and CloudLinux 8.
CyberPanel is a web hosting control panel designed to simplify server management. It supports one-click installations for popular applications like WordPress, Joomla, and Drupal, and offers features like email management, DNS control, and SSL certificate installation. Built on OpenLiteSpeed, CyberPanel is known for its high performance and low resource consumption, making it an excellent choice for both beginners and experienced users.
Why Choose CyberPanel?
Speed: OpenLiteSpeed, the underlying web server, is optimized for performance, ensuring fast loading times for your websites.
Ease of Use: CyberPanel’s intuitive interface makes server management accessible to users of all skill levels.
Cost-Effective: As an open-source solution, CyberPanel is free to use, making it a budget-friendly option for small businesses and individuals.
Security: CyberPanel includes built-in security features like ModSecurity and ImunifyAV, helping to protect your server from threats.
How CyberPanel install Ubuntu 20.04 Work?
Prerequisites for cyberpanel install ubuntu 20.04
Before diving into the installation process, ensure that you have the following:
A server running Ubuntu 20.04.
Root or sudo access to the server.
A stable internet connection.
A domain name pointed to your server’s IP address (optional but recommended).
Step 1: Update Your System
Start by updating your system to ensure all packages are up to date. Open your terminal and run the following commands:
sudo apt update
sudo apt upgrade -y
This will update your package list and upgrade any outdated packages.
Step 2: Run cyberpanel install ubuntu 20.04
To install the Cyberpanel on your server just get the ssh access of your server and access it via any ssh client like bitwise.
Once you are logged in just go to the terminal and run a single command:
sh <(curl https://cyberpanel.net/install.sh || wget -O - https://cyberpanel.net/install.sh)
Step 3: Follow the On-Screen Instructions
The installer will guide you through the process, asking for inputs such as:
Selecting the version of CyberPanel: Choose between the stable version or the latest pre-release version.
Setting up DNS: You can choose to install PowerDNS for DNS management.
Setting up Email: You can opt to install Postfix for email services.
Setting up a Password: You’ll be prompted to set a password for the CyberPanel admin panel.
Once you’ve made your selections, the installer will proceed with the installation. This may take a few minutes, depending on your server’s specifications and internet speed.
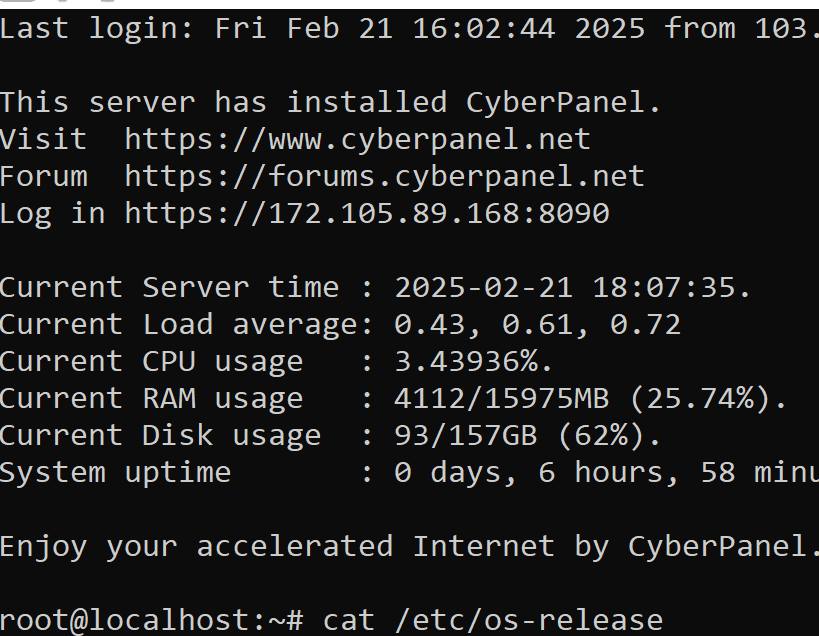
Step 4: Access CyberPanel
After the installation is complete, you can access CyberPanel by navigating to:
https://your-server-ip:8090
Replace your-server-ip with your server’s actual IP address. You’ll be greeted with the CyberPanel login page. Use the username admin and the password you set during the installation process to log in.
Step 5: Secure Your Installation
It’s crucial to secure your CyberPanel installation. Here are a few steps you can take:
Change the Default Password: After logging in, change the default admin password to something more secure.
Enable Firewall: Ensure that your server’s firewall is enabled and configured to allow only necessary ports.
Install SSL Certificates: CyberPanel makes it easy to install free SSL certificates using Let’s Encrypt, ensuring secure communication between your server and users.
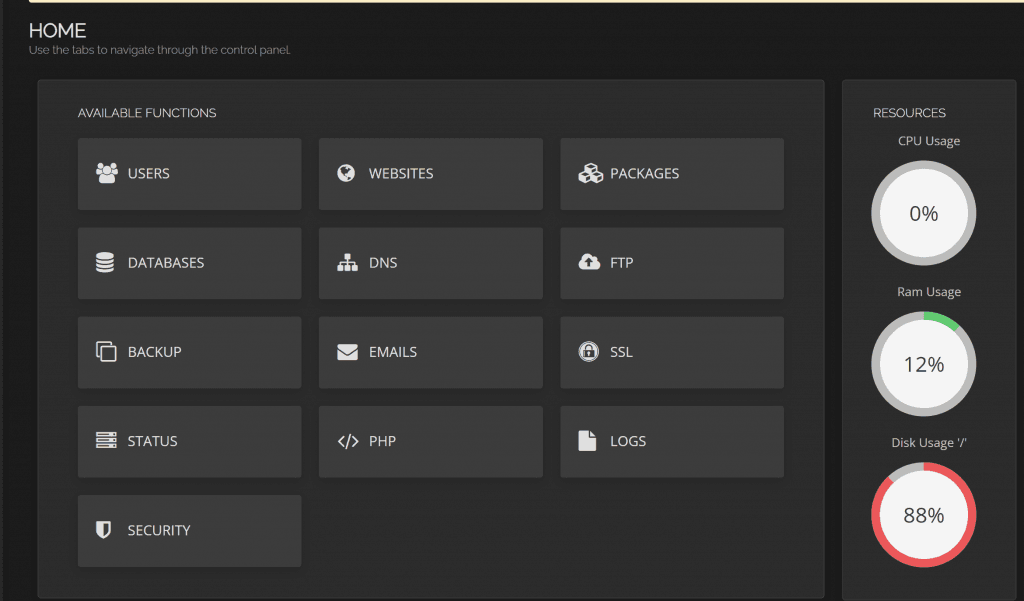
Create Websites: Easily set up new websites with just a few clicks.
Manage Databases: Create and manage MySQL databases.
Set Up Email Accounts: Create email accounts for your domains.
Monitor Server Performance: Use the built-in monitoring tools to keep an eye on your server’s health.
Conclusion
Installing CyberPanel on Ubuntu 20.04 is a straightforward process that can significantly simplify server management. Whether you’re a seasoned developer or a beginner, CyberPanel offers a user-friendly interface and powerful features to help you manage your web hosting environment efficiently. By following this guide, you should now have a fully functional CyberPanel installation ready to handle your websites and applications.
Remember, the key to a successful server management experience is regular maintenance and staying updated with the latest security practices. Happy hosting!
CyberPanel Demo: Try It for Free, But What’s the Catch?
If you are looking for a CyberPanel Demo this article is for you. CyberPanel does not offer a live demo thing. But CyberPanel offers a live demo. Demo CyberPanel was there in the past time but now CyberPanel does not have a live demo CyberPanel link but you can get a live CyberPanel Demo.
Now we will tell you how you can book a live CyberPanel call for Demo.
Process to Book CyberPanel Demo:
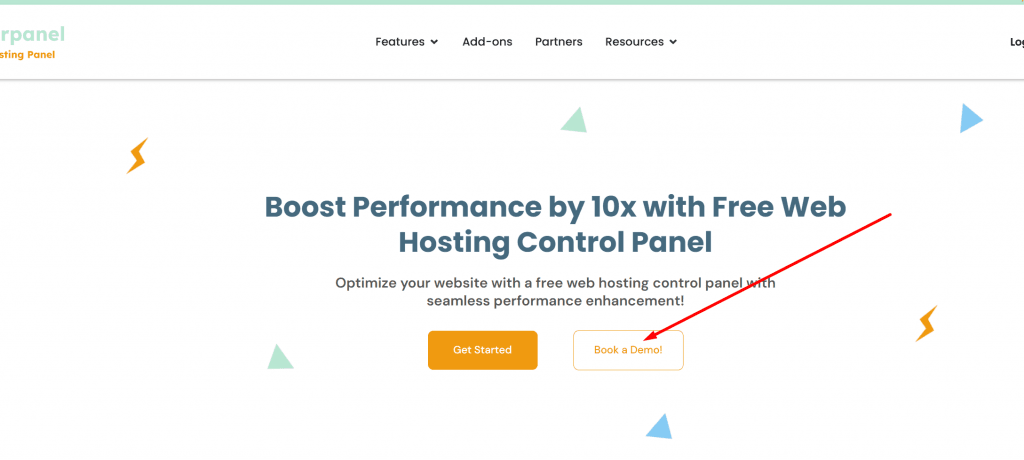
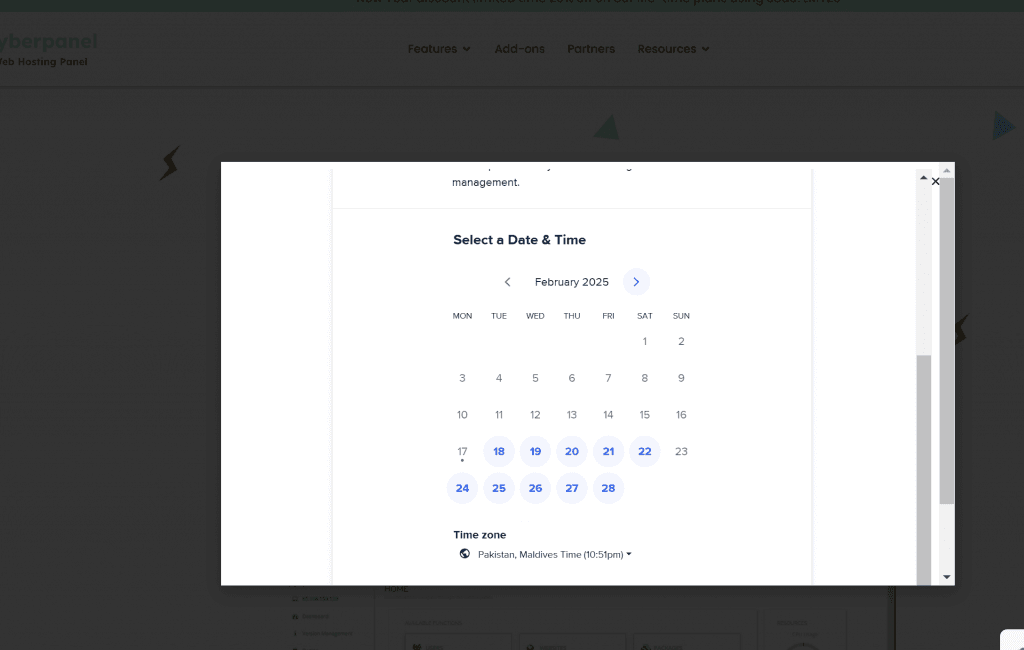
To book a CyberPanel live demo call. You just need to go to CyberPanel main site. On the CyberPanel home page, you can see a Book Demo button.
Once you click this button you will get all available time and dates to book a call with CyberPanel team.
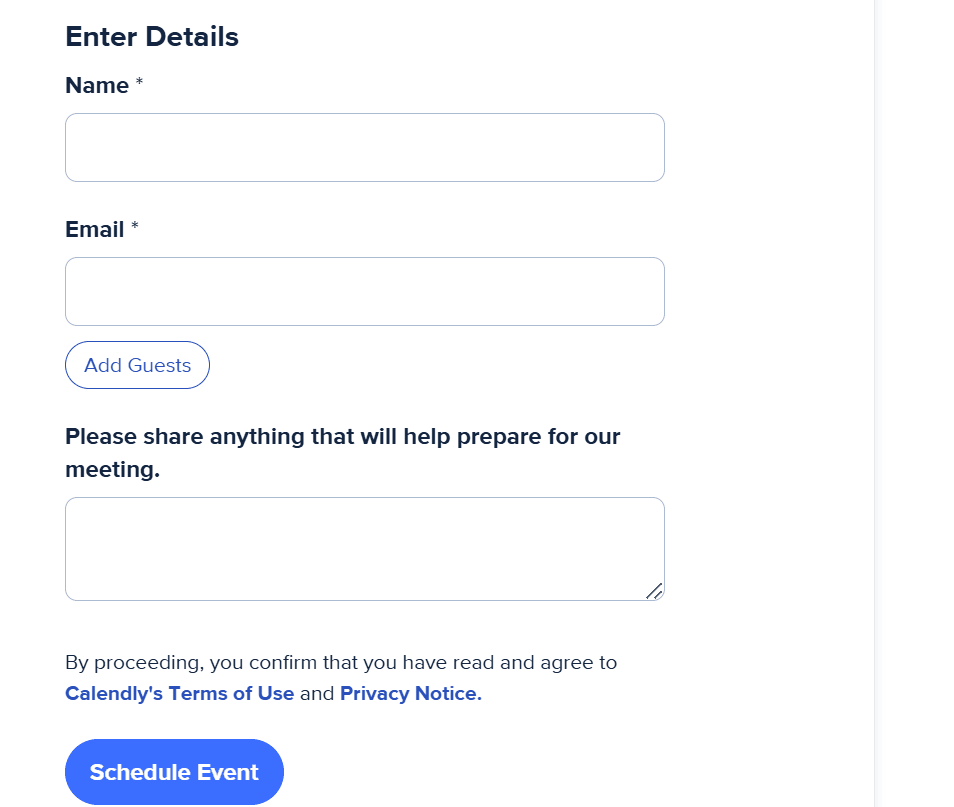
Select any data and time that suits you and once you select the time and date you have to provide your valid detials and active email that will receive your confirmation email and also the call detials.
Be on time for the booked call. and also if you need any cyberpanel-related help you can reach cyberpanel support team by email at help@cyberpanel.net
If you are using CyberPanel for your VPS Hosting and you are looking for managed cyberpanel hosting or CyberPanel VPS Hosting here we will tell you top three partners of CyberPanel who provides CyberPanel-based hosting.
CyberPanel is one of the leading web hosting control panels, widely adopted by both individual hosting users and hosting companies. Known for its simplicity, speed, and OpenLiteSpeed integration, CyberPanel has become a popular choice for managing web servers. In this article, we’ll explore some of the top VPS hosting providers that offer seamless integration with CyberPanel.
If you are using CyberPanel for your VPS hosting and are searching for managed CyberPanel hosting or CyberPanel VPS hosting, here we will highlight the top three partners of CyberPanel who offer hosting services based on the CyberPanel platform.
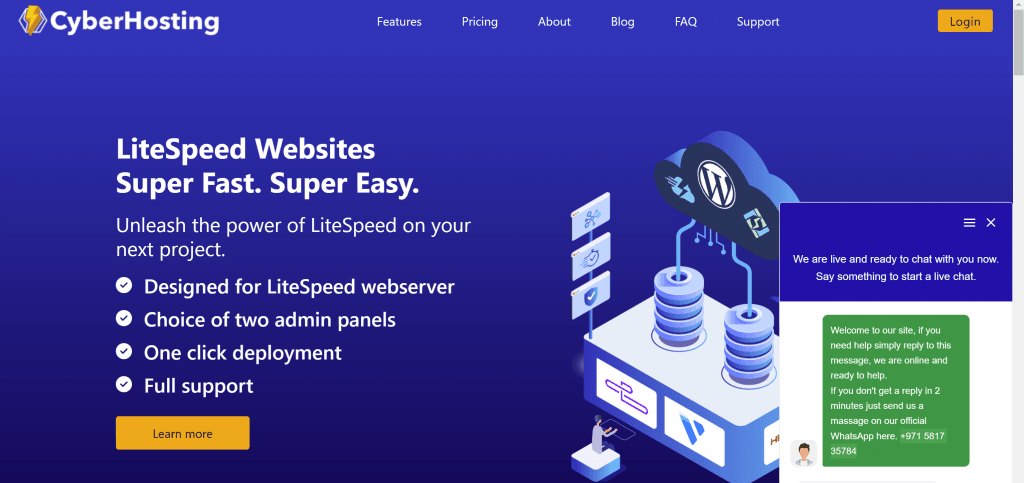
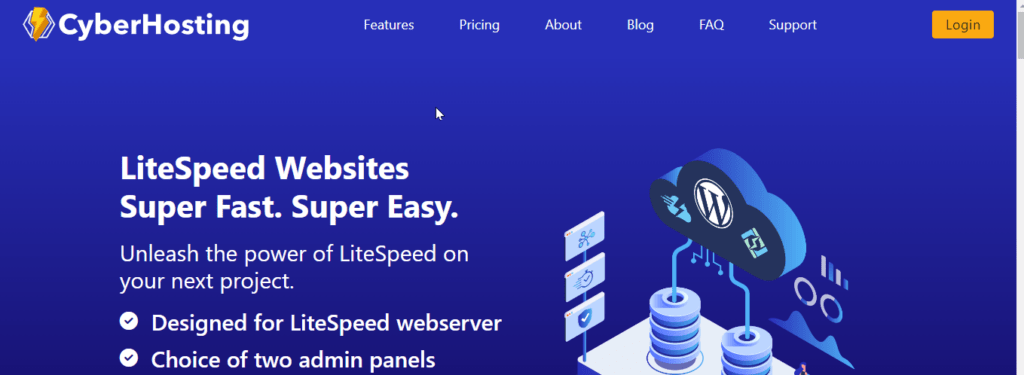
One of the top VPS providers partnered with CyberPanel is CyberHosting. With years of experience in the hosting industry, CyberHosting has established itself as a reliable and stable solution for users seeking high-performance VPS hosting. Their servers are optimized for CyberPanel, ensuring a smooth and efficient hosting experience.
Whether you’re a beginner or an experienced user, CyberHosting offers flexible pricing plans to suit your needs. Their commitment to quality and customer satisfaction makes them a standout choice for CyberPanel VPS hosting.
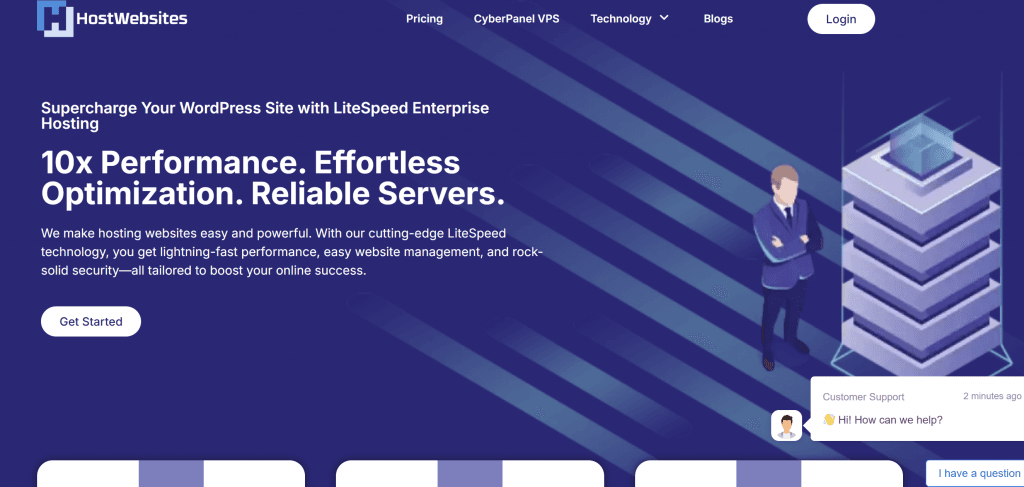
Hostwebsites: A New but Stable CyberPanel VPS Option
Another excellent option for CyberPanel VPS hosting is Hostwebsites. Although relatively new to the market, Hostwebsites has quickly gained a reputation for providing stable and reliable hosting solutions. Their VPS deployment process is smooth and user-friendly, making it an ideal choice for both beginners and advanced users.
Hostwebsites is a great choice for those looking for a fresh yet dependable hosting provider with a focus on performance and ease of use.CyberPanel VPS hosting.
Hostinger: Affordable and Feature-Packed CyberPanel VPS Hosting
Hostinger is another top-tier hosting provider that offers VPS hosting compatible with CyberPanel. Known for its affordability and feature-rich plans, Hostinger is a popular choice among individuals and businesses alike. Their VPS hosting solutions are scalable, making them suitable for small websites as well as growing online projects.
Key Features of Hostinger:
Affordable pricing with excellent value for money.
Scalable VPS plans to accommodate growing needs.
Easy-to-use control panel and one-click CyberPanel installation.
Hostinger’s combination of affordability, scalability, and user-friendly features makes it a strong contender for anyone looking for CyberPanel VPS hosting.
Conclusion
Choosing the right VPS hosting provider for CyberPanel depends on your specific needs, budget, and technical expertise. Whether you opt for the reliability of CyberHosting, the smooth deployment of Hostwebsites, or the affordability and scalability of Hostinger, each of these providers offers unique advantages to enhance your hosting experience.
If you’re ready to take your website to the next level, explore these providers and find the one that best suits your requirements!
How to enable csf cyberpanel ubuntu 22.04:
The process of installation of CSF is the same for all OS.
In newer versions of CyberPanel, CyberPanel offers CSF installtion and support without and issue. Now you can install csf in CyberPanel using one click installation to make your security more tight. let’s learn How to install cSF cyberPanel?
CSF (ConfigServer Security & Firewall) is a powerful and widely used security tool designed for Linux servers. It acts as both a firewall and a security suite, providing server administrators with advanced protection against malicious attacks, unauthorized access, and various threats.
CSF is a stateful packet inspection (SPI) firewall, login/intrusion detection, and security application that enhances server protection. It is primarily used on servers running cPanel, DirectAdmin, Webmin, CyberPanel, and other Linux-based hosting environments. It helps prevent DDoS attacks, brute force attempts, and unauthorized logins while offering real-time monitoring of network traffic.
Key Features of CSF
Advanced Firewall Rules: CSF allows you to configure firewall rules easily, blocking or allowing specific IPs, ports, and protocols. It helps restrict unauthorized traffic and enhances overall server security.
Brute-Force Protection (LFD – Login Failure Daemon): CSF includes LFD, which actively monitors repeated failed login attempts to SSH, FTP, email, and other services. If an IP exceeds the failed login limit, it gets automatically blocked.
Port Scanning Protection: Hackers often scan ports to find vulnerabilities. CSF detects and blocks these scanning attempts in real time.
DDoS Mitigation: CSF helps mitigate small-scale DDoS attacks by limiting connection rates and blocking excessive requests from a single source.
Temporary & Permanent IP Blocking: You can manually block or whitelist IP addresses. It also supports temporary blocks, which automatically expire after a set period.
Country-Based Blocking: If you need to restrict access from specific countries, CSF allows GeoIP-based blocking to enhance security.
SMTP Protection: CSF can prevent unauthorized scripts or malware from sending emails, reducing the risk of your server being used for spam.
Real-Time Process Tracking: The firewall constantly monitors running processes, detecting suspicious activities and malware infections.
Integration with Control Panels: CSF works seamlessly with cPanel, CyberPanel, DirectAdmin, and Webmin, allowing easy management from their interfaces.
Lightweight & Optimized for Performance: Unlike some firewalls that consume high resources, CSF is designed to be efficient and lightweight, ensuring minimal impact on server performance.
Why Should You Use CSF?
Easy to configure even for those with limited Linux experience.
Regularly updated to keep up with emerging threats.
Active community support for troubleshooting and guidance.
How do you install and use CSF in CyberPanel?
To install CSF CyberPanel just follow these steps:
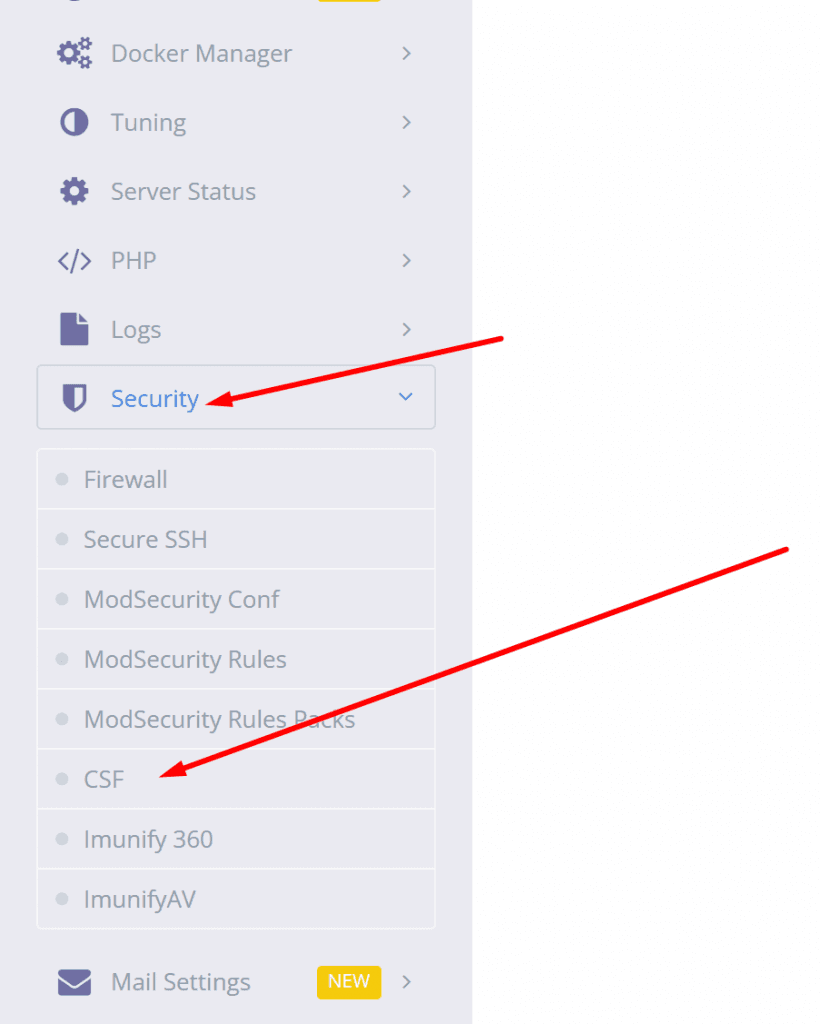
Login to your cyberpanel at port 8090 using your access.
Now go to security-> csf
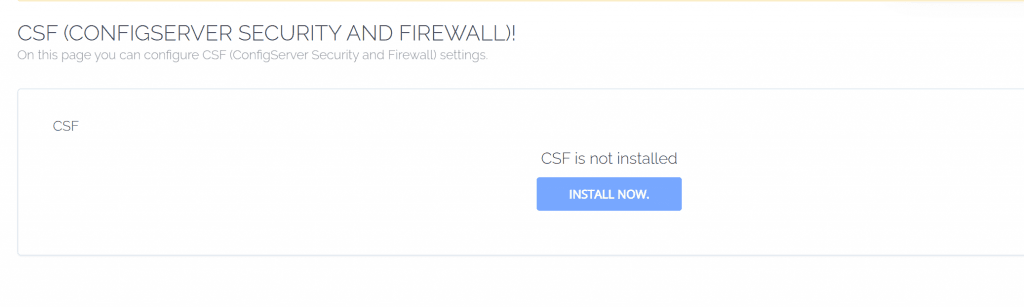
3. Now you can see install now button on this screen press that button
Installation started, and this will take 1 or 2 minutes to make it done. the process to install CSF cyberPanel is completed after this. after doing this the process of install CSF cyberPanel is completed now.
How to Install CSF on Your Server
If you’re using Ubuntu, AlmaLinux, Rocky Linux, or CloudLinux, you can install CSF with the following steps:
# Install required packages
yum install wget perl -y  # For CentOS/RHEL-based systems
apt install wget perl -y  # For Debian/Ubuntu-based systems

# Download and Install CSF
cd /usr/src
wget https://download.configserver.com/csf.tgz
tar -xzf csf.tgz
cd csf
sh install.sh

# Enable CSF and LFD
systemctl enable csf
systemctl enable lfd
systemctl start csf
systemctl start lfd

# Verify Installation
perl /usr/local/csf/bin/csftest.pl
Once installed, you can manage CSF using command-line tools or through the web interface in cPanel or CyberPanel.
Final Thoughts
CSF is one of the best security solutions for Linux servers. Whether you’re running a WordPress site, a hosting company, or a business server, CSF provides essential protection against cyber threats while remaining easy to manage. If you want to harden your server security, installing CSF is a must!
How to enable csf cyberpanel ubuntu 22.04:
The process of installation of CSF is the same for all OS.
Choosing the right web hosting provider is crucial for any business looking to establish an online presence in Pakistan. With the growth in e-commerce and internet usage in the country, the web hosting market has also expanded significantly over the past decade.
This article explores the 10 best and most reliable web hosting companies in Pakistan that businesses should consider contacting.
When evaluating web hosts, key factors to consider include server uptime, technical support, features offered, scalability options, security measures, and pricing models. By comparing providers across these parameters, you can identify the ideal web host for your specific business needs.
This list have random hosting companies in Pakistan and we do not claim that this is the best list but I will keep updating this web hosting companies in Pakistan to contact list time by time.
CyberHosting is an international hosting provider. CyberHosting provides VPS hosting that comes with a fully managed plan. CyberHosting is one of the best web hosting company in Pakistan.
CyberHosting prides itself on harnessing the power of LiteSpeed for websites, ensuring a seamless and rapid online experience. LiteSpeed web server optimization is at the forefront of this hosting service, providing users with an environment geared towards maximizing speed and efficiency.
Key Features
Cloud hosting on SSD servers
Unlimited scalability
99.9% uptime guarantee
Free SSL certificate
24/7 customer support
Plans and Pricing
Starts at PKR 2,500/month for 10 GB storage and 50 GB bandwidth
Customizable cloud hosting plans available
Contact Information
Phone: 0800-786-7638
Website: stormfiber.com
2. NAYATEL
NAYATEL provides reliable web hosting and dedicated servers out of Pakistan with excellent connectivity and speeds. They offer customizable enterprise-grade hosting solutions.
Key Features
Dedicated and VPS server options
High-bandwidth connectivity
Custom server configurations
Scalable resources
Professional management
Plans and Pricing
Custom quotes based on requirements
Starts at approx. PKR 5,000/month
Contact Information
Phone: 0800-62-92-83
Website: nayatel.com
3. HOSTSNIPES
HOSTSNIPES is a rapidly growing web hosting company based in Karachi serving businesses of all sizes. They provide VPS and reseller hosting services with strong security.
Key Features
Virtual private servers
Reseller hosting packages
Cloud-based solutions
Free site migration
Anycast DNS protection
Plans and Pricing
Starts at PKR 1,990/month for 10 GB storage VPS
Reseller plans from PKR 11,999/month
Contact Information
Phone: 021-34305363
Website: hostsnipes.com
4. HOSTINGER
HOSTINGER is an international web hosting provider that offers affordable shared hosting and VPS servers located in Pakistan. Reliable performance with unlimited websites and bandwidth.
Key Features
Local Pakistan-based servers
Unlimited websites and bandwidth
Free domain registration
Intuitive control panel
Scalable VPS offerings
Plans and Pricing
Shared hosting from $0.99/month
VPS servers start at $2.99/month
Contact Information
Phone: 051-849-6140
Website: hostinger.pk
5. iWEB
iWEB is a top web development company providing quality hosting services like dedicated servers, shared hosting, and WordPress optimization.
Key Features
Dedicated and VPS servers
Managed WordPress hosting
Expert optimization
CDN and DDoS protection
High-performance infrastructure
Plans and Pricing
Shared hosting from PKR 250/month
WordPress hosting from PKR 800/month
Get custom quotes for dedicated servers
Contact Information
Phone: 042-3259-1482
Website: iweb.com.pk
6. VEPLER
VEPLER offers secure and speedy VPS and reseller hosting options with excellent 24/7 customer support.
Key Features
High-performance VPS hosting
Reseller account options
Unlimited bandwidth and storage
Fast network and backups
Plans for e-commerce sites
Plans and Pricing
Windows VPS from $7.99/month
Linux VPS from $5.99/month
Reseller plans from $9.99/month
Contact Information
Phone: 0304-055-3323
Website: vepler.com
7. HOSTKING
HOSTKING provides Linux-based shared, VPS, and dedicated hosting with robust security, backups, and support. Reliable partner for SMBs and startups.
Key Features
Shared and VPS hosting
Managed dedicated servers
Free domain name
Regular data backups
Cloudflare CDN integration
Plans and Pricing
Shared hosting from PKR 159/month
VPS from PKR 799/month
Get quotes for custom servers
Contact Information
Phone: 0336 5252323
Website: hostking.pk
8. HOSTMEISTERS
HOSTMEISTERS offer flexible and secure hosting packages with excellent support. Suitable for small businesses looking for affordable yet reliable hosting.
Key Features
Shared, reseller, and VPS hosting
Unlimited SSD storage and bandwidth
Daily backups and SSL certificates
Cloudflare integration
Knowledgable support
Plans and Pricing
Shared hosting from PKR 250/month
VPS hosting from PKR 1,200/month
Accepts major credit cards
Contact Information
Phone: 0333-488-0225
Website: hostmeisters.com
9. FASTHOSTING
FASTHOSTING provides high-speed shared hosting and VPS solutions with an easy-to-use control panel. Reliable uptime record.
Key Features
Shared and VPS server hosting
Unlimited bandwidth and databases
Free SSL certificate
Intuitive control panel
Regular backups
Plans and Pricing
Shared hosting from $1.99/month
Windows VPS from $7.99/month
Discounted annual plans available
Contact Information
Phone: 042-37800281
Website: fasthosting.pk
10. HOSTING73
HOSTING73 offers feature-packed shared and reseller hosting targeted at small and medium businesses in Pakistan. Affordable plans.
Key Features
Shared and reseller hosting
Unlimited bandwidth and sites
SSD storage and Cloudflare CDN
Softaculous auto installer
24/7 live chat support
Plans and Pricing
Shared plans start at PKR 199/month
Reseller hosting from PKR 1,599/month
Contact Information
Phone: 0304-055-3373
Website: hosting73.com
Key Takeaways for Hosting Companies in Pakistan
Research and evaluate multiple Pakistani web hosting providers based on your business needs like expected traffic, site types, scalability needs and budget.
Look for reliable uptime, good connectivity speeds, knowledgeable support, and security features when comparing plans.
Both local and international web hosts offer competitive hosting services and infrastructure in Pakistan.
Shared hosting works well for smaller blogs and sites while VPS and dedicated servers are required for high-traffic sites and apps.
Reseller hosting allows you to host clients under your own brand. Evaluate bandwidth needs before selecting a plan.
Take the time to thoroughly compare your options before selecting a hosting provider in Pakistan. The right platform is essential for delivering a fast, reliable and secure online experience.
Final Words for Hosting Companies in Pakistan
Choosing the right web host for businesses in Pakistan looking to build an online presence. The hosting providers discussed in this article represent some of the top options to consider that offer reliable infrastructure and good technical support. Analyze your website needs and business goals to identify the ideal host that aligns with your budget and requirements.
Factors like uptime, security features, scalability and customer service should drive your decision. Taking the time to thoroughly compare hosting providers will ensure you select the best partner for your website performance and success in Pakistan’s expanding digital landscape. this a small guide for hosting companies in Pakistan.
Understanding NDIS Plan Managers: How They Simplify Your NDIS Journey
Navigating the National Disability Insurance Scheme (NDIS) can be overwhelming for many participants. From managing budgets to understanding the complexities of the plan, it often feels like a full-time job. This is where NDIS Plan Managers step in to make your life easier.
An NDIS Plan Manager is a professional service provider who helps participants manage the financial and administrative aspects of their NDIS plans. They act as a bridge between participants and service providers, ensuring that budgets are well-managed and claims are processed smoothly.
Benefits of Choosing an NDIS Plan Manager
Stress-Free Budget Management Keeping track of your NDIS budget can be daunting. Plan managers provide expert advice and support, helping you allocate funds wisely while ensuring your plan is utilized effectively.
More Control and Choice With a plan manager, you gain access to both NDIS-registered and non-registered providers. This flexibility allows you to choose services that best suit your needs.
Time-Saving Convenience Handling invoices and payments can be time-consuming. A plan manager takes care of these tasks, giving you more time to focus on your personal goals and well-being.
Expert Guidance Plan managers are well-versed in NDIS guidelines. They offer insights and recommendations, helping you avoid common pitfalls and get the most out of your plan.
How to Choose the Right NDIS Plan Manager
When selecting an NDIS Plan Manager, consider the following factors:
Experience: Look for providers with a strong track record in managing NDIS plans.
Transparency: Ensure they offer clear communication and regular updates about your budget.
Accessibility: Choose a plan manager who is responsive and easily reachable.
Personalized Service: Every NDIS participant has unique needs; find someone who tailors their approach to your goals.
Common Misconceptions About NDIS Plan Managers
“Plan Managers Take Away My Control” On the contrary, plan managers empower you with more choices while taking care of the administrative burden.
“They’re Expensive” Plan management services are covered by your NDIS funding under the ‘Improved Life Choices’ category, meaning there’s no out-of-pocket cost for participants.
Conclusion
An NDIS Plan Manager can be a game-changer for participants looking to streamline their NDIS experience. By partnering with a trusted plan manager, you can focus on what truly matters – achieving your goals and improving your quality of life.
If you’re searching for reliable and experienced NDIS Plan Managers, reach out today and take the first step toward a stress-free NDIS journey!
MTBC – CareCloud Medical Transcription and Powerful Billing
MTBC is one of the well-known medical billing multinational companies. M-T-B-C is known for its best medical billing services. CareCloud, commonly known as MTBC, is a top-tier healthcare IT and medical billing company dedicated to transforming the way healthcare practices operate. Their innovative, technology-driven solutions are designed to streamline daily operations, enhance efficiency, and allow healthcare providers to focus on what truly matters—delivering exceptional patient care.
It operates under the banner of CareCloud, a company specializing in medical billing services, particularly in the USA and UK. While CareCloud is registered in multiple countries, its primary workforce is based in Pakistan. In Pakistan, MTBC has two offices: one in MTBC Bagh and the other in CareCloud Rawalpindi. MTBC offers a lot of career opportunities you can just check MTBC career for any type of opportunity for you.
Address: J3PH+Q73, 106-A/1 Murree Rd, A Block Block A Satellite Town, Rawalpindi, Punjab 46000
Medical Billing That Works Say goodbye to billing headaches. CareCloud handles claims from start to finish, ensuring accuracy, reducing denials, and helping practices get paid faster.
Smart EHR Solutions Their cloud-based Electronic Health Record (EHR) system keeps everything organized—patient records, charts, and more—so you can deliver better care without the paperwork hassle.
Effortless Practice Management From scheduling appointments to managing daily operations, CareCloud’s tools make running a practice much easier.
Revenue Cycle Management They don’t just handle billing—they manage the entire revenue process, ensuring your practice stays financially healthy.
Top-Notch Medical Transcription Need accurate medical reports? MTBC’s transcription services turn dictations into precise records you can trust.
Telehealth Made Simple Virtual consultations are the future of healthcare, and CareCloud’s telehealth tools make it easy to connect with patients online.
Better Patient Engagement Features like appointment reminders and patient portals help you keep patients happy and engaged with their care.
In Pakistan and over all from Pakistan CareCloud has one big competitor: Bellmedux.
Why Choose MTBC CareCloud?
Expertise You Can Trust With decades of experience, MTBC knows the ins and outs of healthcare and billing.
Custom Solutions They tailor their services to fit your practice—whether it’s a small clinic or a larger group.
Affordable and Reliable Their solutions save you time and money, all while delivering exceptional results.
Always There for You With 24/7 support, MTBC
FAQs About MTBC
1. How can I apply to MTBC?
To apply to MTBC, visit their official website or careers portal. Browse through the available job openings and submit your application online. Ensure your resume and cover letter are updated and tailored to the role you’re applying for.
2. What is MTBC?
MTBC (Medical Transcription Billing Company) is a healthcare IT company that provides revenue cycle management, practice management, and other related solutions for medical practices. It aims to streamline operations and improve financial outcomes for healthcare providers.
3. What does MTBC stand for?
MTBC stands for Medical Transcription Billing Company. It specializes in healthcare solutions like medical billing, EHR (Electronic Health Records), and practice management tools.
4. Does MTBC attest to meaningful use?
Yes, Medical Transcription Billing Company helps healthcare providers meet meaningful use requirements through its EHR and related solutions, ensuring compliance with government standards and optimizing patient care.
5. Have you ever worked at MTBC? (Urdu Translation)
کیا آپ نے کبھی ایم ٹی بی سی میں کام کیا ہے؟ اگر آپ نے ایم ٹی بی سی میں کام کیا ہے تو ہمیں اپنے تجربات کے بارے میں بتائیں۔
Sometimes you need to change your server time we already have an article on changing server time here. But in this, we will check how to change the time in my cpanel. Keeping the correct server time is essential for accurate logs, scheduling tasks, and ensuring smooth website functionality. If you’re using cPanel and need to change the server time, follow this guide to adjust your settings properly.
By default, cPanel does not allow users to change the server time directly. The time settings are managed at the server level, which means only users with root access (such as VPS or dedicated server administrators) can modify them. If you are on shared hosting, you will need to contact your hosting provider for changes.
There are two ways to change the time in the server which have cpanel or any other panel.
how to change the time in my cpanel using cpanel or whm?
how to change the time in the server using the command line.
1. Change time using cpanel:
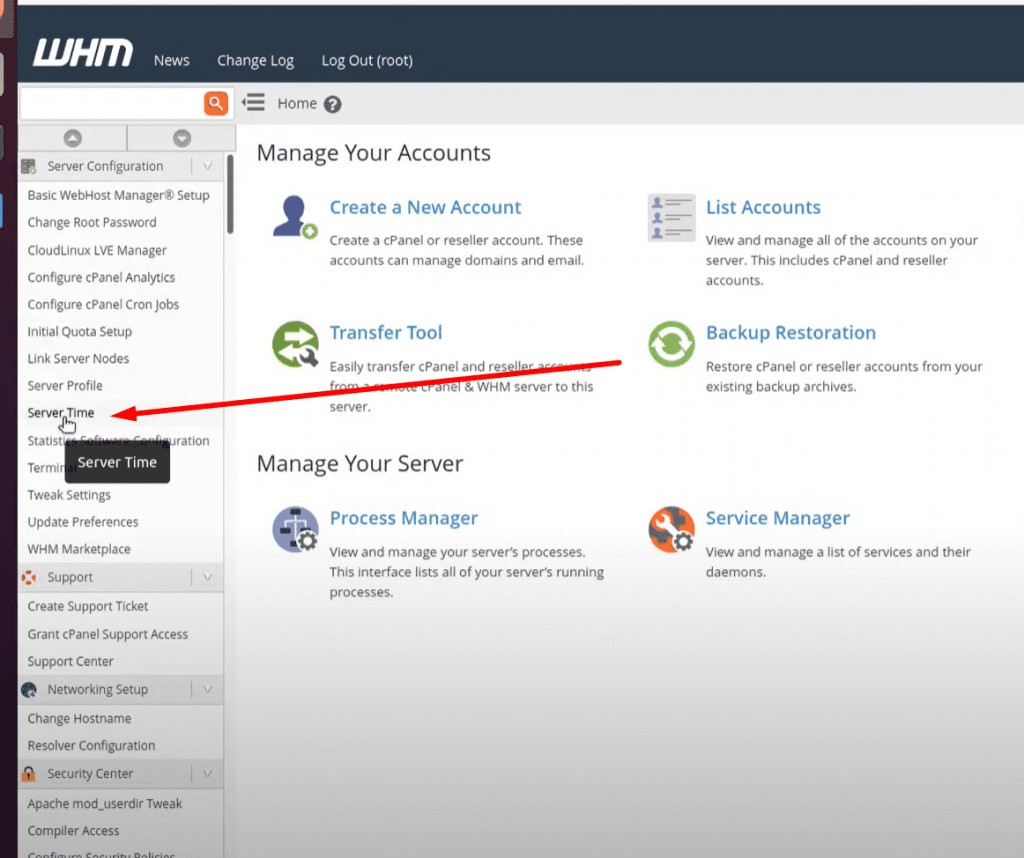
To set or change time in cpanel login to your cpanel account.
Now from left menu go to the server time option
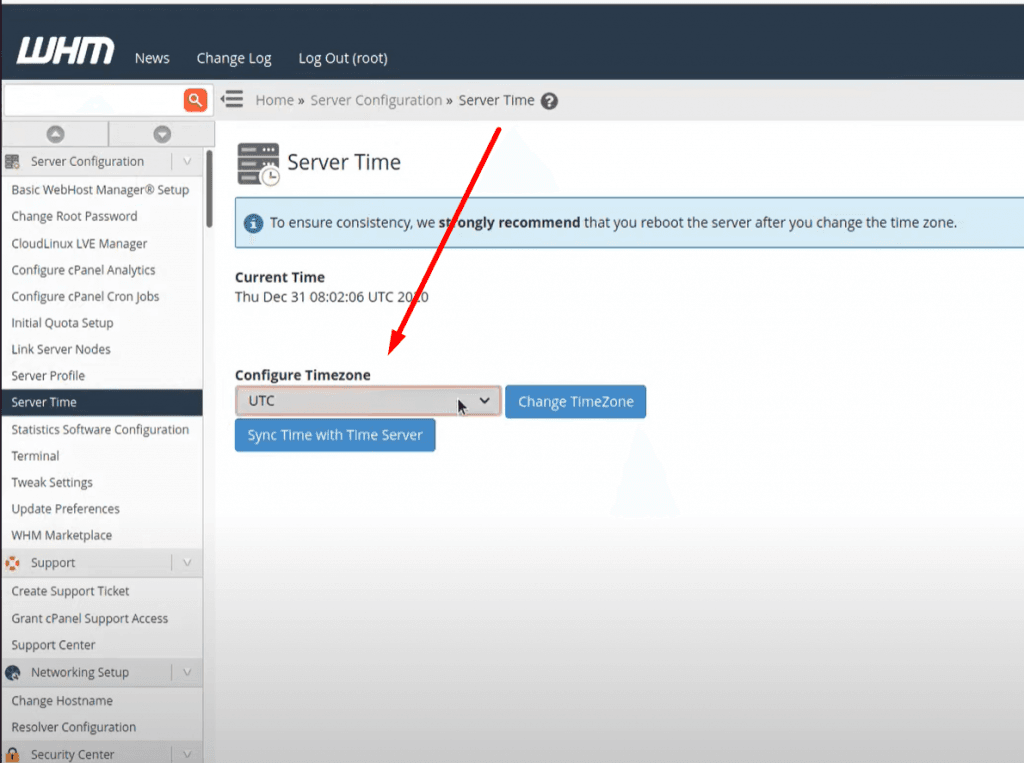
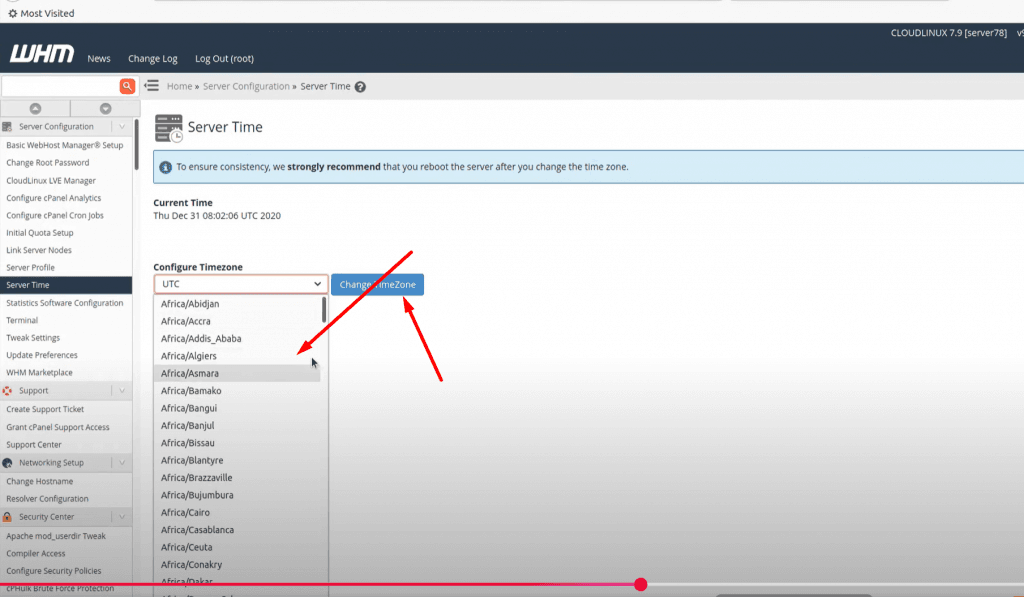
Here you can see all available time zones
Select whatever time zone you want to add in your server and click on change server time button
NOTE: Time zone is one of the core important things many features and services depend upon it so before doing anything make sure that you understood all. moreover, you just need a reboot to apply a new time zone on all servers.
2. Set / Change Time zone on Linux Server Using Command line:
Before changing your time zone first of all you must have to know about the time zone you want to set. Like if you want to set somewhere in Asia. You must know about your region and city. Now, how you can do it?
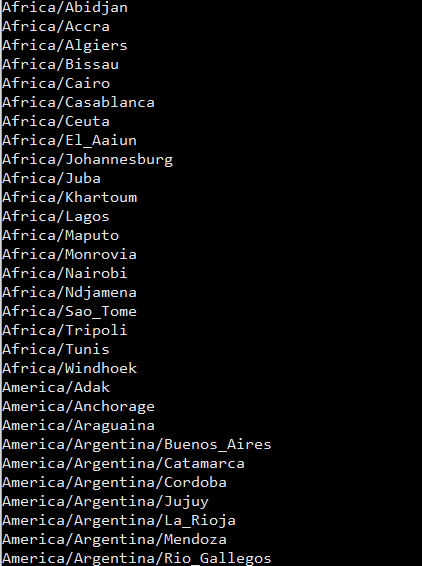
For this there is a command to list all time zones:
$ timedatectl list-timezones
List all time zones
Select your required time zone from the list and add it to this cmd.
timedatectl set-timezone “you time zone”
Make sure that you are login from root account if not use sudo with this.
$ sudo timedatectl set-timezone <your specific time zone>
set time zone
After running this run the timedatctl again and verify if time zone updated or not.
$ timedatectl
Now you can see time zone that you set using the above method.
What If You Are on Shared Hosting?
If you are using shared hosting and do not have access to WHM or SSH, you will need to contact your hosting provider to request a time zone change. Some providers allow you to modify the PHP time zone using a .htaccess file or php.ini settings.
Modify PHP Time Zone in .htaccess
Add the following line to your .htaccess file:
php_value date.timezone "America/New_York"
Modify PHP Time Zone in php.ini
If you have access to php.ini, add or edit this line:
So now Final Thoughts on how to change the time in my cpanel? Changing the time in cPanel is a quick and easy process that can save you from confusion and ensure your website operations run smoothly. By following the steps outlined above, you can set the time zone to match your local time and keep your server logs, emails, and scheduled tasks accurate.
Whether you’re a seasoned webmaster or a beginner, managing your cPanel settings effectively is key to maintaining a well-functioning website. So, take a moment to check your time zone settings today and make any necessary adjustments!