Warning: Redis::get(): php_network_getaddresses: getaddrinfo for localhost failed: Name or service not known in /home/solveddoc.com/public_html/wp-content/plugins/litespeed-cache/src/object-cache.cls.php on line 674 Home - Page 8 of 15 - Solveddoc
Common Types of Client Side Errors
In this article, we are going to write a short detail about some common client side errors. Here we added a very short detail and a few errors.
This error indicates that the user’s request contains incorrect syntax. How to Fix 400 Bad Request Errors:
a. Check the Submitted URL b. Clear Browser Cache c. Clear Browser Cookies d. File Upload Exceeds Server Limit e. Clear DNS Cache f. Deactivate Browser Extensions
2. 401 Unauthorized Error:
This error indicates that the requested file requires authentication (a username and password). Only authorized persons can access otherwise occur this Error.
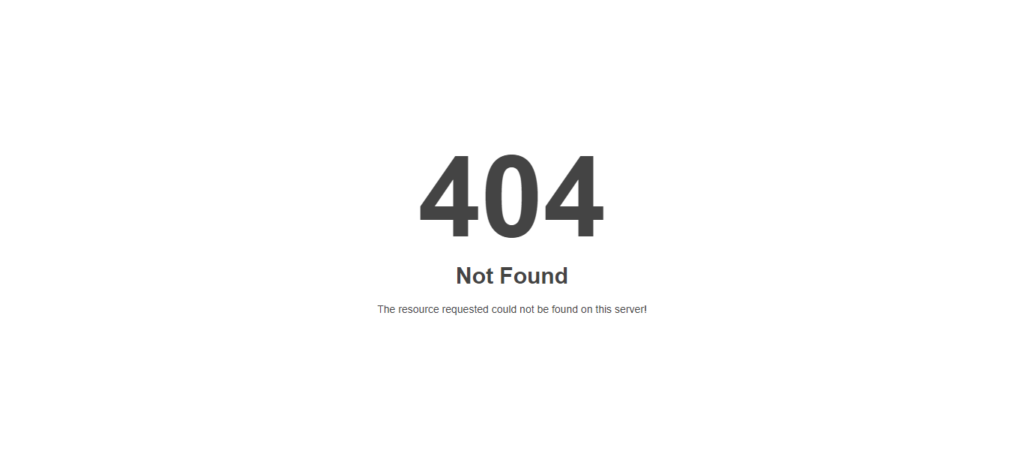
3. 404 Not Found:
This error indicates that the page you were trying to reach on a website couldn’t be found on their server. How to Fix 400 Bad Request Errors: a. Reload the page b. Check the URL c. check the directory levels or root d. Delete the browser cache and cookies e. Contact the website
4. 403 Forbidden
This error indicates that the server will not allow the visitor to access the requested file. If a visitor receives this code unexpectedly, you should check the file’s permission settings, or check whether the file has been protected.
How to Uninstall or Remove Broken Package in Linux?
Many times it happens that when you try to uninstall a package you encounter an error and the package cannot be uninstalled. This happens when the package is broken. To overcome this issue, we remove the post files of the package to make things work. in this article we are going to learn how to Remove Broken Package in Linux.
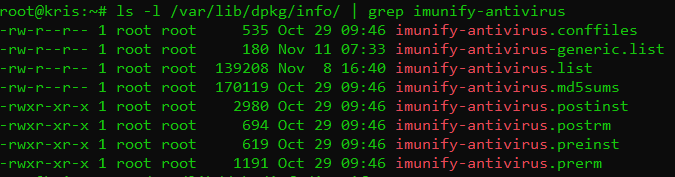
Recently, I was trying to remove the ImunifyAV package but encountered this error. E: Sub-process /usr/bin/dpkg returned an error code (1)
To fix this issue and remove the package successfully, we need to remove the post files manually for this package. But first, we need to see the files for this package. The installation files are usually located at /var/lib/dpkg/info file. Type in the following command and replace the package_name with the name of the package that you want to remove.
In my case, I replaced the package_name with imunify-antivirus. This thing helps me to list all packages of imunify-antivirus. Now we need to remove these files manually. For that, type the command:
sudo mv /var/lib/dpkg/info/package_name.* /tmp
This will move all the post files to the tmp directory in case we need them back for any reason. Once the command executed to remove files. After doing that reinstall the package again without getting any errors.
Don’t forget to run the sudo apt update command after removing the files.
after doing all these just run commands to Remove Broken Package in Linux.
Command to Remove Broken Package in Linux:
$ apt unintsall <package-name>
After doing all these steps you can run the uninstall command like this given above and get the required results.
Dovecot is an open-source IMAP and POP3 email server for Linux/UNIX-like frameworks written with security primarily in mind. It is a Mail Delivery Agent. Dovecot is easy to set up and requires almost no memory. It allows users to access their mailboxes using the IMAP interface. If configured correctly, it only interacts with authenticated users.
The main config file of Dovecot is located at /etc/dovecot/dovecot.conf. We will be looking at three main options:
listen: This options allows you to set the IP address where you want to listen. You can use an asterik (*) which the wildcard meaning all IPv4 address and for IPv6 addresses you can use (::). To use both it should be like:
listen = *, ::
protocols: This option allows you to specify which protocols you would like to support such as POP3, IMAP. LMTP is also listed here as well which stands for Local Mail Transfer Protocol:
protocols = imap, pop3, lmtp
mail_location: This option sets from where the mail is picked up. By default, this setiing is empty, which means that Dovecot attempts to locate your mail automatically. The format of the mailbox location specification option is as follows:
What is Postfix and How to Install and Configure it?
In this article, we are going to be looking at Postfix. It is a Mail Transfer Agent (MTA) which is used to send and receive emails. It is currently used by 33% of internet mail servers. Let’s move on to installing the Postfix.
You also need to install mailutils utility for Postfix to work correctly.
Configuring the Postfix
We need to configure the inet_interfaces in the Postfix main config file. The network interface addresses that this mail system receives mail on. Specify “all” to receive mail on all network interfaces (default), and “loopback-only” to receive mail on loopback network interfaces only
nano /etc/postfix/main.cf
When the file is opened, scroll down the page until you see the line:
inet_interfaces = all
Now it’s up to you on which interface you want to receive emails. You can either go with the default one this all which listens on all interfaces or you can replace it with loopback-only to listen only on localhost.
Another directive that we need to look at is mydestination, the list of domains that are delivered via the local_transport mail delivery transport. By default, this is the Postfix delivery agent which looks up all recipients in /etc/passwd and /etc/aliases.
Mine is configured to:
mydestination = localhost, localhost.localdomain
After making changes, you need to restart the Postfix.
sudo systemctl restart postfix
Testing the SMTP Server
Now it’s time to test the Postfix whether it can send an email or not using the mail the command which comes with the package mailutils that we installed earlier.
echo "This is the body of the email" | mail -s "This is the subject line" your_email_address
In place of your_email_address, enter the valid email address to which you want to send the email. Now check the account on which you have sent the mail.
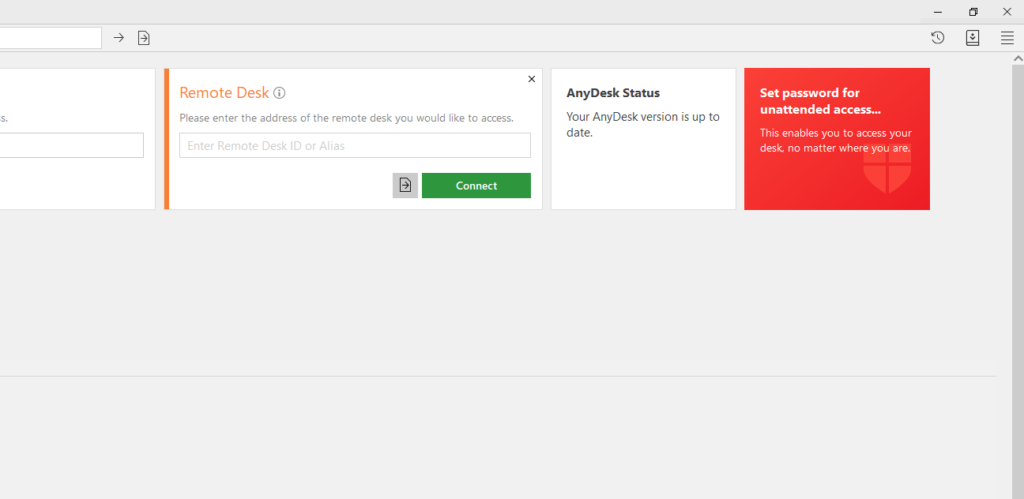
How to download Anydesk and how to install Anydesk
Downloading any desk and installing is an easy process. In this article, I will tell you how can we easily download and install Anydesk. so you can easily download any desk by following this article.
Any desk means a “Remote desktop application“. we can use any desk for remote control, file transfer, and VPN function.
Now follow these steps to download and install any desk:
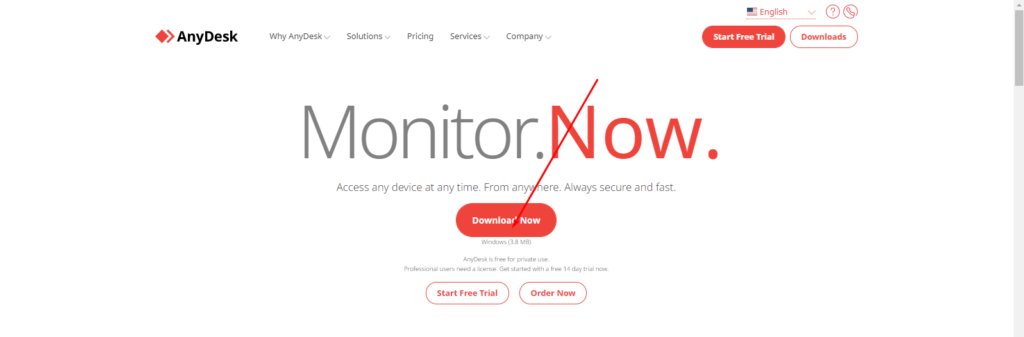
1- Any Desk Website:
Firstly, The user will go to Any desk Website. The user can download AnyDesk by using the link “www.anydesk.com“.
2-Click Any desk:
Click the first option: Any Desk “The Fast Remote Desktop Application“.
3- Click Download and Install Anydesk:
The user can download Any desk to use the “Download Now Button“.
4- Available For other Platform:
The user can also use various platforms as the users can use for MacOS, Android etc.
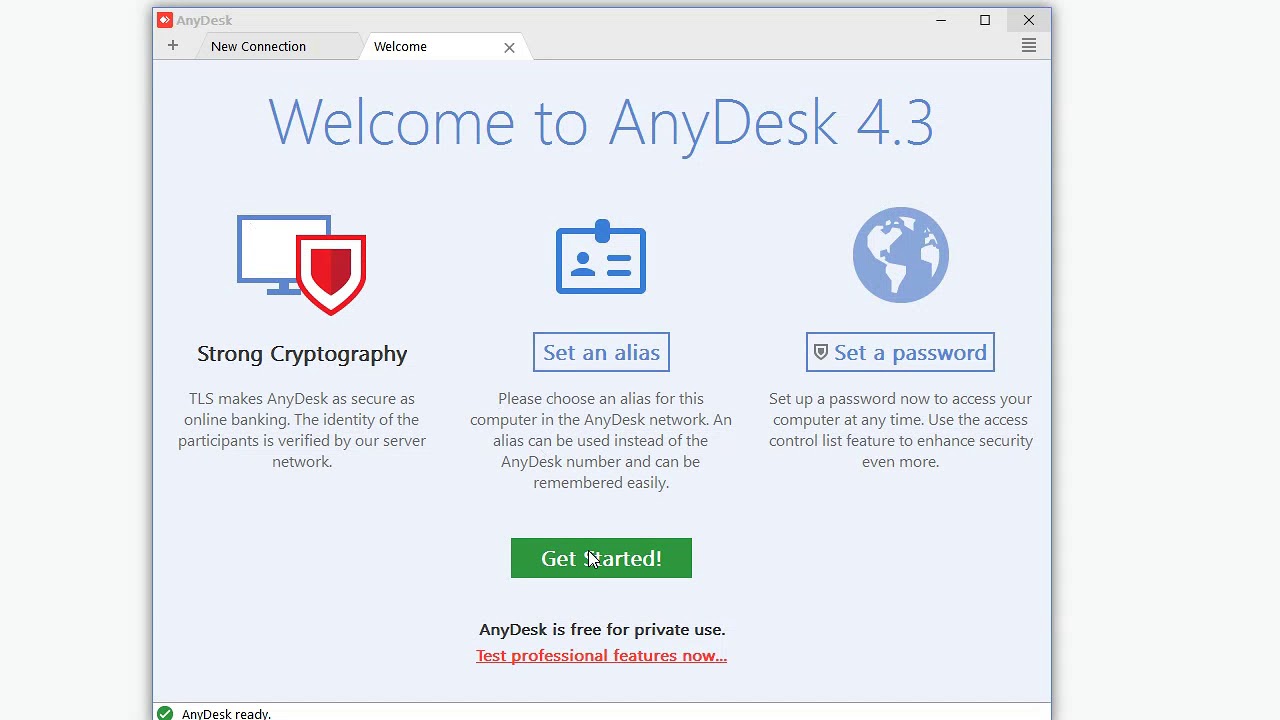
5-Open the program
When the desktop has been downloaded user will press the right button and click “Run as administration” and click the “yes” button.
6- Giving Access
The desktop provides the address to the user, so the user can give get access another person easily.
7- Accept And Install
The user Can also install Any desk to click the “installation” option that appears on the left side.
How to dump Database without Password from Linux Command line?
In this article, I am going to explain How to dump Database without a Password from the Linux Command line?
As we know when someone wants to dump a database from the Linux command line they need a password for the database to dump it. Basically dumping database means exporting the database from the Linux command line.
In a normal way when you want to export a database you need a password for the database to do it. Here is the normal command to dump.
But sometimes people don’t like to give passwords again and again. So here I will tell you how you can do the database dump using a password. To do so just follow the process along with me.
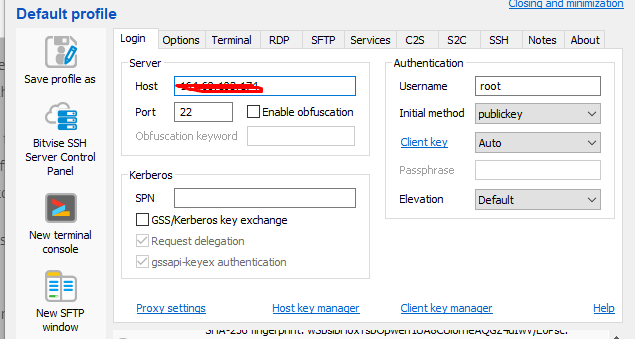
You have to do some configurations on the MySQL configurations to dump the database without a password. You have to set the root user database password in my.cnf file and you can dump a database without a password. To do so first login to your root ssh using an ssh client like bitvise, putty, etc.
Location of my.cnf is different in the case of different operating systems like in the case of Ubuntu it is /etc/mysql/my.cnf and in case of Centos it /etc/my.cnf.
You can open according to your operating system after logging in to root ssh.
No got to my.cnf simply run this command:
sudo nano /etc/mysql/my.cnf
After that paste, this code in the file
[mysqldump]
user=mysqluser
password=secret
user will be root and the password of your root MySQL user.
After doing this just restart MySQL or MariaDB and run any dump command
Create a post in WordPress is the first and the starting step in blogging and even all fields if you want to start a blogging website then this will be the first thing you need to do. Although to create a post in WordPress is a very easy and steps process.
For creating a post in WordPress user should follow these steps:
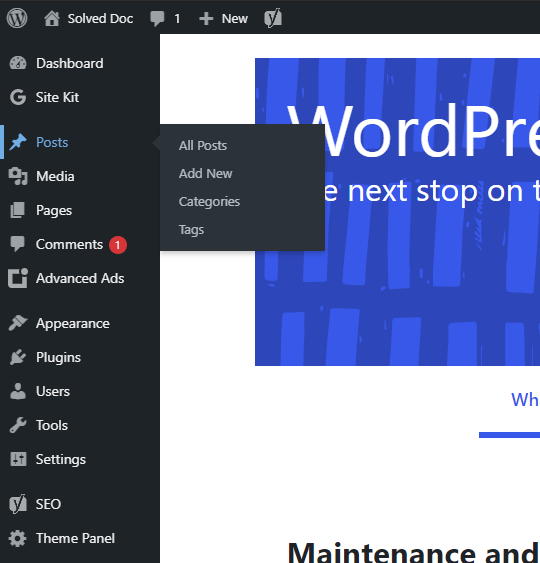
Step 1: login the site “WordPress Dashboard“.
Step 2: click the posts icon on the left side display in navigation menu.
Step 3: Four options will appear. So the user click Add new button on the Posts page for creating a new post.
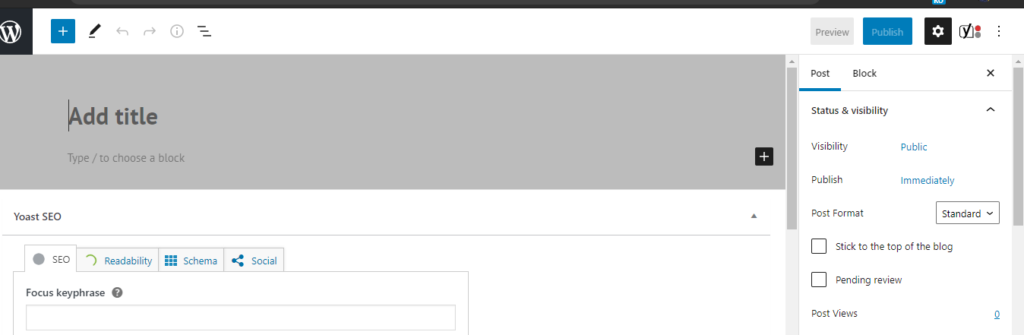
Step 4: Enter the title in a title bar it will appear on the top of the post.
Step 5: After giving the title, type content in a content bar. Users can format the text of content using an editor, like users can bold italic and also change colors of text.
Step 6: The user can also add images. The user can add an image with the help of the “Add Media button”.
Step 6: when the user has entered the information in the posting user can click the publish button. Then the post is displayed on our website.
Step 7: User can also click on save draft to save the information if user does not want to publish his post publicly.
When you want to do some work with WordPress the first step is to write a blog post in WordPress. To start writing a post in WordPress is a very easy process. In this article, I am going to tell you how you can write a post in WordPress.
When someone new starts a new blog or any type of other site using WordPress. So you must have knowledge about creating and managing posts with WordPress. This is one of the cores and basic requirements of WordPress.
So before going to do anything else in WordPress you just have to know how to create a blog in WordPress. As blog or post always have a great impact on the site ranking, site SEO, and all.
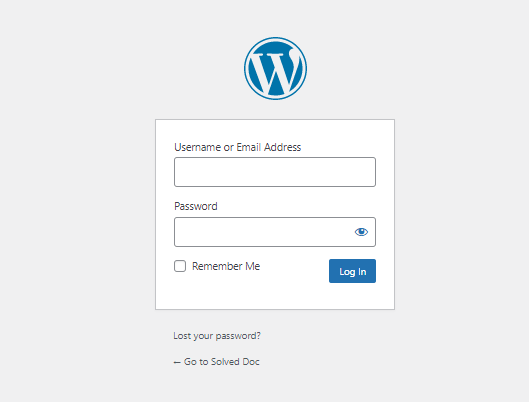
First of all, you have to log in to your WordPress admin dashboard. Normally your WordPress admin dashboard access is on:
https://www.yourwebsit.com/wp-admin
if you have any custom login link for the WordPress admin dashboard you can visit that and provide the user name and password to log in.
Login to your WordPress:
Create a post in WordPress:
Once you logged in now you can see a lot of options in the left side menu of the WordPress dashboard.
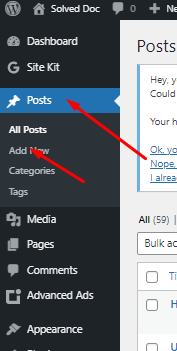
Go to the Posts-> Add new Post option in the left menu.
Create a post in WordPress
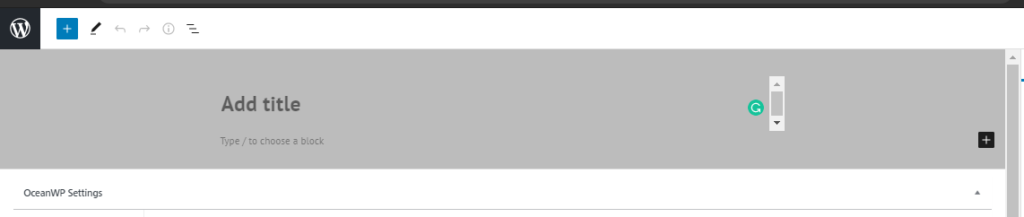
Once you click there this will redirect you to the posting page where you can write the post according to your choice and content.
On this page, you can write the content on the main page, and on the right side, you can see a lot of options like some important are Categories, tags, featured images in the post tab.
You can add categories to your posts, tag, and also set featured images to your posts.
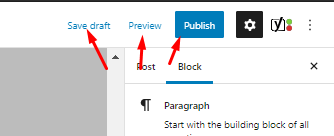
Save post:
In WordPress, you can also make posts to draft and you can also publish them once.
But as you know one post needs many reviews so you have to save it to draft and maybe you have to preview it many times and after all, you can publish a zero error post. so these all buttons and options are present on the top of the right site on the posting page.
Creating a new Hetzner server is a very easy process. In this article, I am going to tell you how easily you can create a server in Hetzner? You can create a server on the Hetzner cloud easily by following this article.
Hetzner is a service provider that provides you Hetzner dedicated server, Hetzner VPS server, and all. YOU just have to create a Hetzner account and log in to Hetzner and deploy any type of server.
Hetzner supports many Operating systems like ubuntu, centos, Debian, etc. the location of this service provider is only in Germany.
Hetzner servers are known for their reliability, high performance, and cost-effectiveness. Whether you’re hosting websites, running applications, or managing complex workloads, Hetzner offers a solid infrastructure with powerful hardware and excellent network connectivity. With flexible configurations and competitive pricing, it’s a go-to choice for businesses and developers looking for a dependable hosting solution.
Now follow these steps to set up a Hetzner server for you.
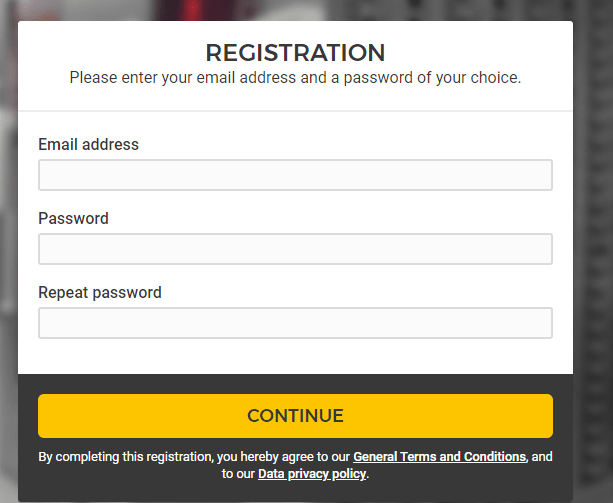
first of all, you have to log in to your Hetzner account if you already and click here and log in if you don’t have then create an account and then log in.
Provide all information to create an account and click the continue button to process for the creation of an account.
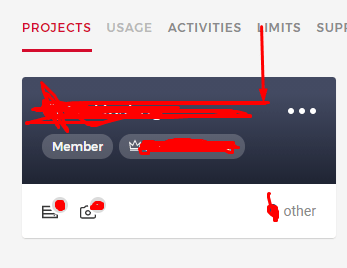
2. Go to you project
Once you created or logged in to your Hetzner account now have to go to any project that you have created in your account.
Click on the project and go to the project dashboard to create a new server.
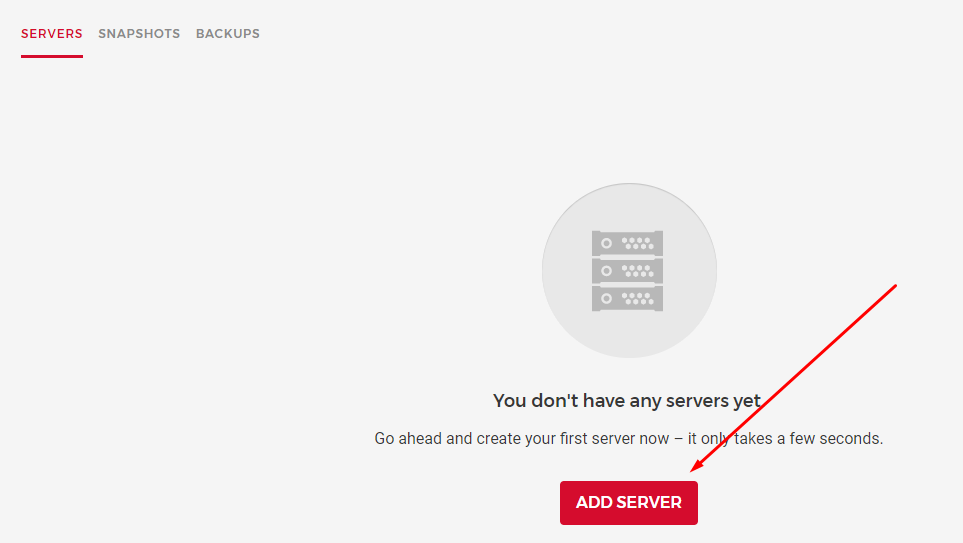
3. Create a server
once you are in the project dashboard you can see a create a server button there. Click on that.
And it will redirect to the page where you have to provide and do all the setup.
Now you have to provide and select all information to create a server. This is the basic information that you need to provide while creating Hetzner dedicated server or Hetzner VPS.
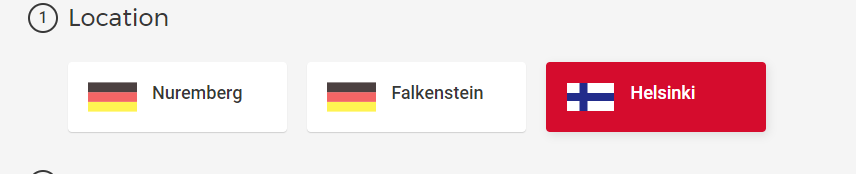
3.1 Location:
In first here you have to select the location where you want to take your server. Hetzner has only Germeny locations.
there are Nuremberg, Falkenstein, and Helsinki. You can go with any you are comfortable with.
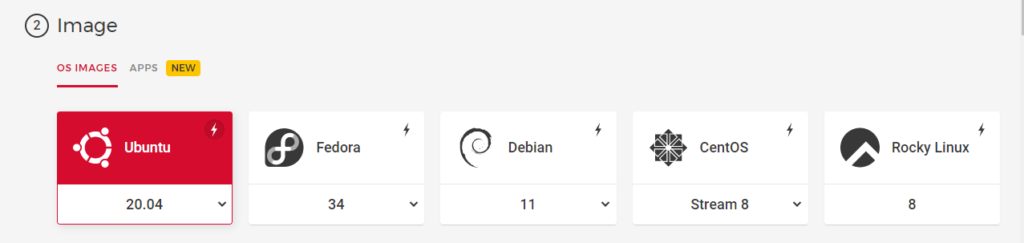
3.2 Image:
After selecting the location now select the Operating system for your server. You can select any OS on hetzner that you want to use for the server.
Hetzner Operating systems are:
Ubuntu 20.04
Fedora
Debian
CentOS
Rocky Linux etc
You can get any according to your choice.
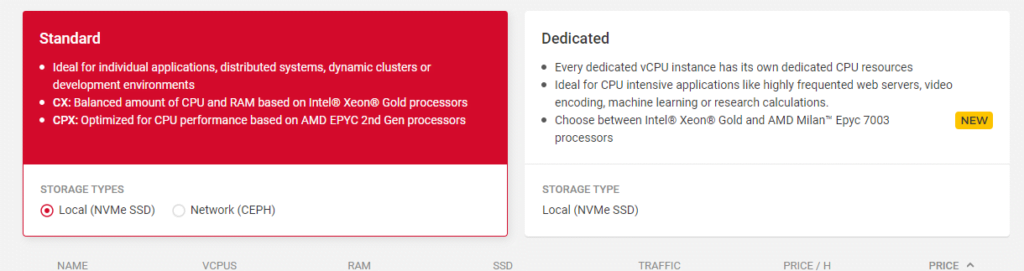
3.3 Type:
In this step you can choose a dedicated Hetzner server or a standard Hetzner VPS. You also have to choose the specification which you want for your server. like how many CPUs, RAM, etc
3.4 Volume:
if you want any extra volume you can attach it from here.
3.5 Network:
This option will allow you to create a Network for your server. DO if you want.
3.6 Firewalls- BETA:
The firewall is right now in Beta but if you want to order and use
3.7 Additional features:
Use Hetzner’s additional features in this option
3.8 SSH key:
Integrate the user SSH key that you want to access and use on the server.
3.9 Name:
Give a name to your server and press the Create button all done to create a Hetzner server.