Warning: Redis::get(): php_network_getaddresses: getaddrinfo for localhost failed: Name or service not known in /home/solveddoc.com/public_html/wp-content/plugins/litespeed-cache/src/object-cache.cls.php on line 674 install Archives - Page 2 of 3 - Solveddoc
How to Create a Hetzner server Eficiently?
Creating a new Hetzner server is a very easy process. In this article, I am going to tell you how easily you can create a server in Hetzner? You can create a server on the Hetzner cloud easily by following this article.
Hetzner is a service provider that provides you Hetzner dedicated server, Hetzner VPS server, and all. YOU just have to create a Hetzner account and log in to Hetzner and deploy any type of server.
Hetzner supports many Operating systems like ubuntu, centos, Debian, etc. the location of this service provider is only in Germany.
Hetzner servers are known for their reliability, high performance, and cost-effectiveness. Whether you’re hosting websites, running applications, or managing complex workloads, Hetzner offers a solid infrastructure with powerful hardware and excellent network connectivity. With flexible configurations and competitive pricing, it’s a go-to choice for businesses and developers looking for a dependable hosting solution.
Now follow these steps to set up a Hetzner server for you.
1. Login to Hetzner account:
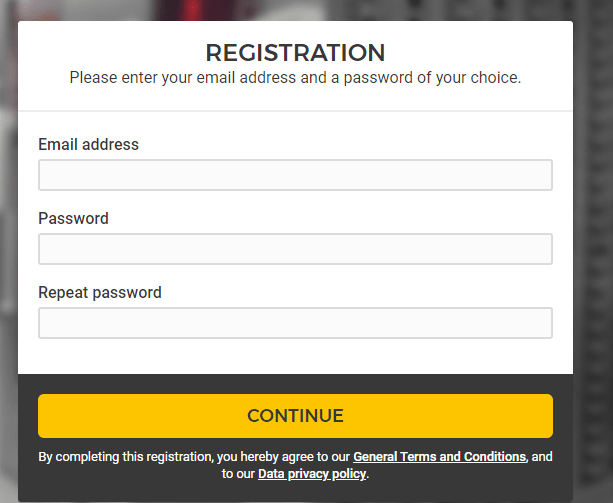
first of all, you have to log in to your Hetzner account if you already and click here and log in if you don’t have then create an account and then log in.
Provide all information to create an account and click the continue button to process for the creation of an account.
2. Go to you project
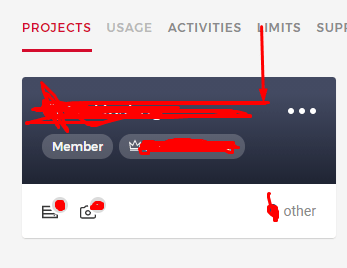
Once you created or logged in to your Hetzner account now have to go to any project that you have created in your account.
Click on the project and go to the project dashboard to create a new server.
3. Create a server
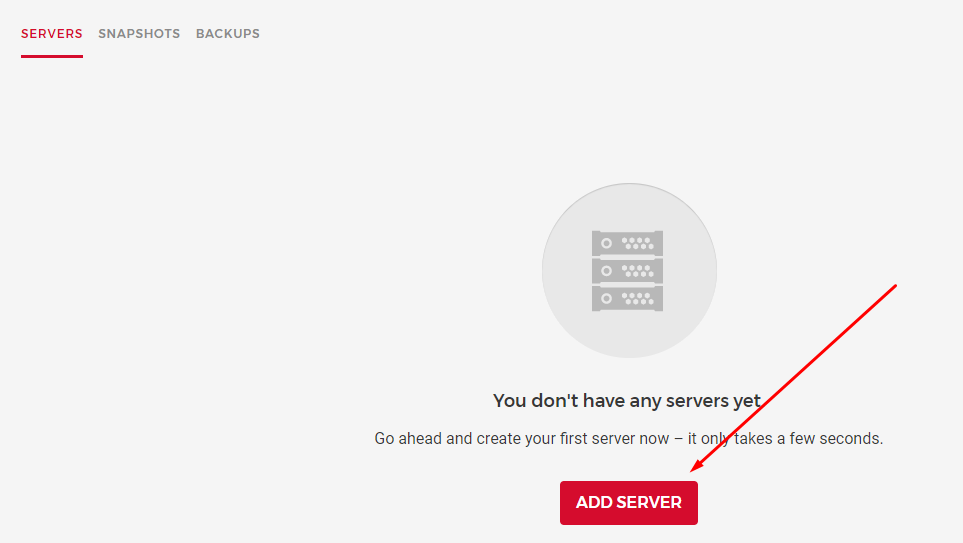
once you are in the project dashboard you can see a create a server button there. Click on that.
And it will redirect to the page where you have to provide and do all the setup.
Now you have to provide and select all information to create a server. This is the basic information that you need to provide while creating Hetzner dedicated server or Hetzner VPS.
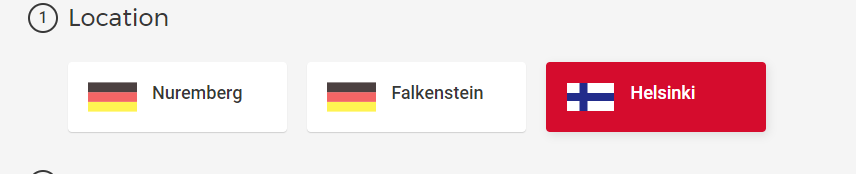
3.1 Location:
In first here you have to select the location where you want to take your server. Hetzner has only Germeny locations.
there are Nuremberg, Falkenstein, and Helsinki. You can go with any you are comfortable with.
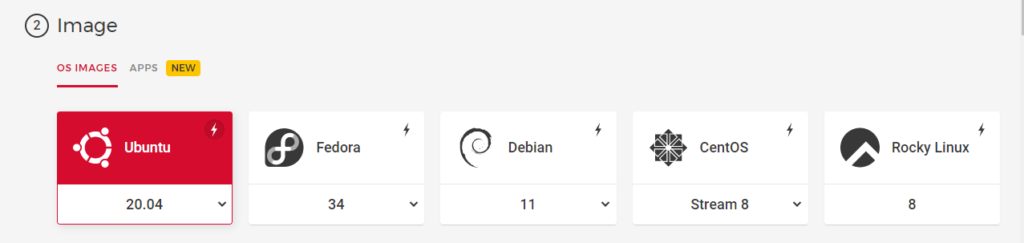
3.2 Image:
After selecting the location now select the Operating system for your server. You can select any OS on hetzner that you want to use for the server.
Hetzner Operating systems are:
Ubuntu 20.04
Fedora
Debian
CentOS
Rocky Linux etc
You can get any according to your choice.
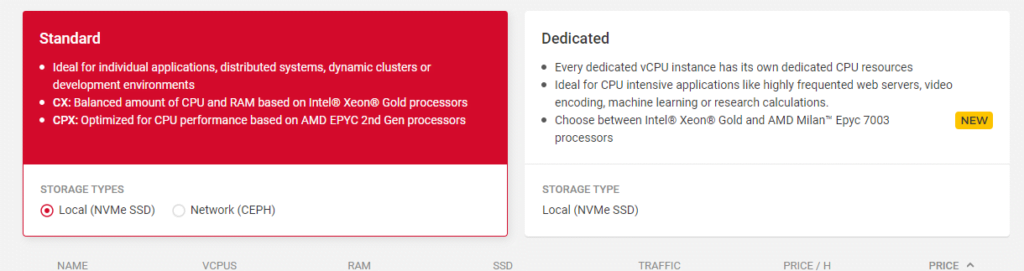
3.3 Type:
In this step you can choose a dedicated Hetzner server or a standard Hetzner VPS. You also have to choose the specification which you want for your server. like how many CPUs, RAM, etc
3.4 Volume:
if you want any extra volume you can attach it from here.
3.5 Network:
This option will allow you to create a Network for your server. DO if you want.
3.6 Firewalls- BETA:
The firewall is right now in Beta but if you want to order and use
3.7 Additional features:
Use Hetzner’s additional features in this option
3.8 SSH key:
Integrate the user SSH key that you want to access and use on the server.
3.9 Name:
Give a name to your server and press the Create button all done to create a Hetzner server.
To install MailScanner on CyberPanel is very easy and a few click process. MailScanner is one of the core requirements for the email system now. And CyberPanel has a MailScanner which you can install from the CyberPanel dashboard.
In CyberPanel MailScanner is done by the community and this feature have a goof version but i am not sure that if it is 100% stable. So maybe MailScanner causes any issue in your mail server.
To install MailScanner on CyberPanel follow these steps.
Login to CyberPanel :
Login to your Cyberpanel account using your CyberPanel credentials. You have to visit the link:
https://<your-ip>:8090
Provide username and password and log in.
Install MailScanner on CyberPanel:
To install MailScanner on the server just follow these steps.
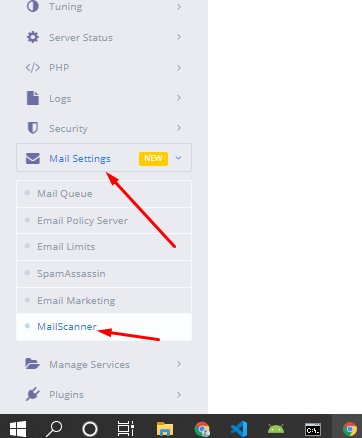
After login to CyberPanel dashboard just go to the Mail Settings-> MailScanner
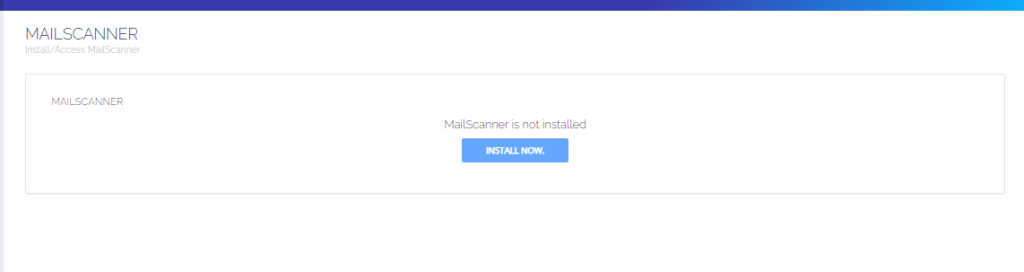
2. On the next screen you can see you have an Install button just press that and your MailScanner will be installed.
The installation process will take some time to complete and once the installation is done you can access the mail scanner on the server.
After clicking this button your Mailscanner is installed. And now you can access your MailScanner by clicking Access Now button.
Do you know now from CyberPanel version 2.0.3 you can install Redis on your server using one click? Here we will tell you one-click Redis install through CyberPanel.
Now CyberPanel made the installation and use of Redis cache on your server very easy.
Redis is an open-source cache used to cache databases, and is used as a message broker. Nowadays it is very important to use cache and boost your website. CyberPanel helps you to do this.
One-Click Redis install Through CyberPanel:
Follow these steps to setup Redis on your server.
Login to CyberPanel
One-Click Redis Install
Install Redis PHP extension
Setup Redis on WordPress using LS Cache
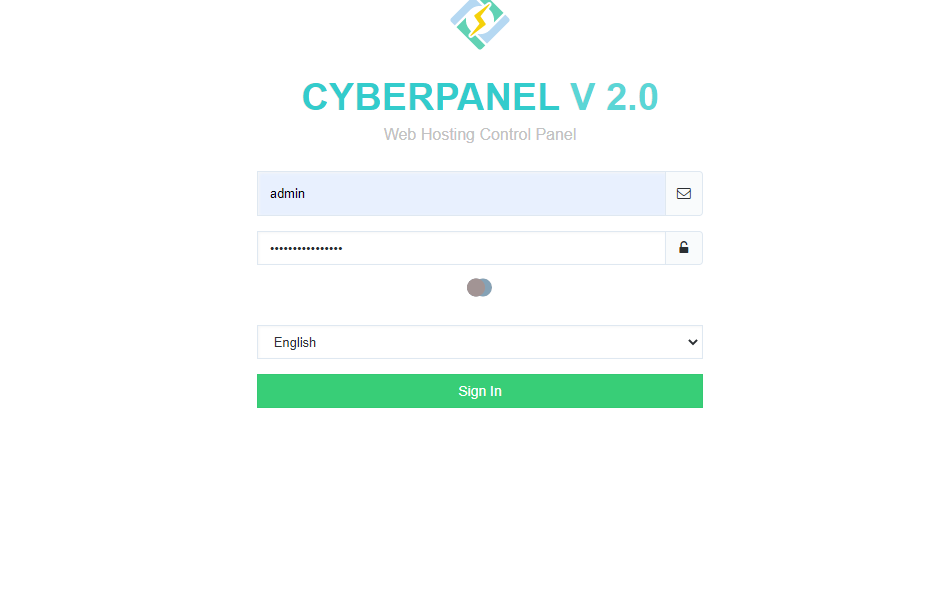
Login to CyberPanel:
Login to your CyberPanel using the credentials. Follow the link with port 8090.
https://<Your_IP>:8090
CyberPanel
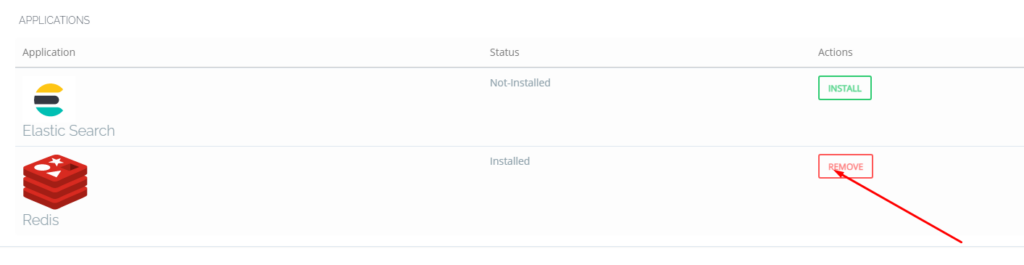
One-Click Redis Install:
To install Redis on your server you have to go to the Manage Services->Application -> Redis then you can see the install button there. Click that and your Redis installed.
Now your Redis is installed and you have to install PHP extension to run properly.
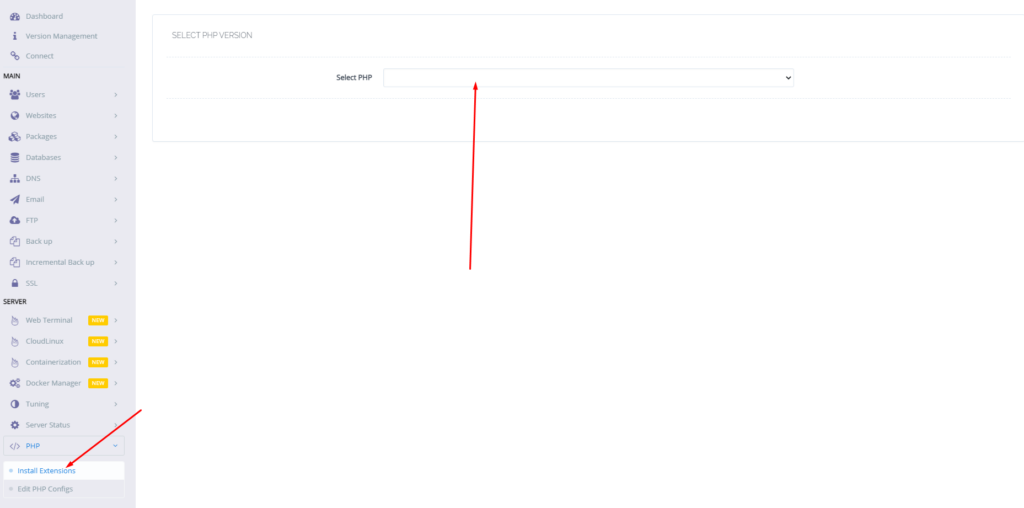
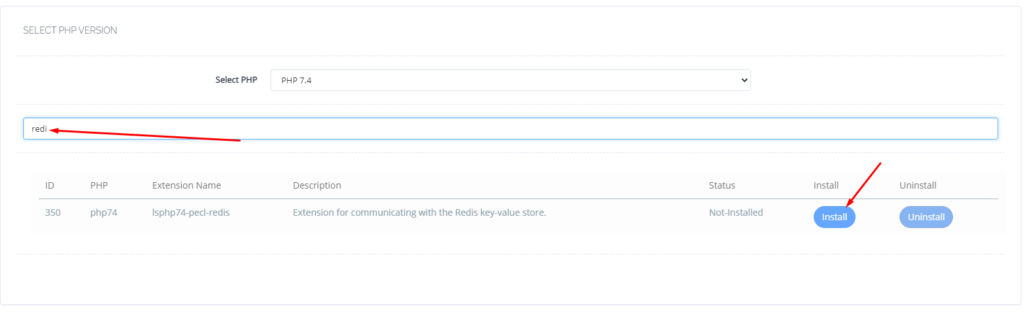
Install Redis PHP extension:
Now go to the PHP-> Install Extension Then you have to select PHP version for which you want to install Redis Extension. You can also follow this link.
Now search redis on the search bar and you can see redis PHP extension press the Install button and everything is good to go.
Redis
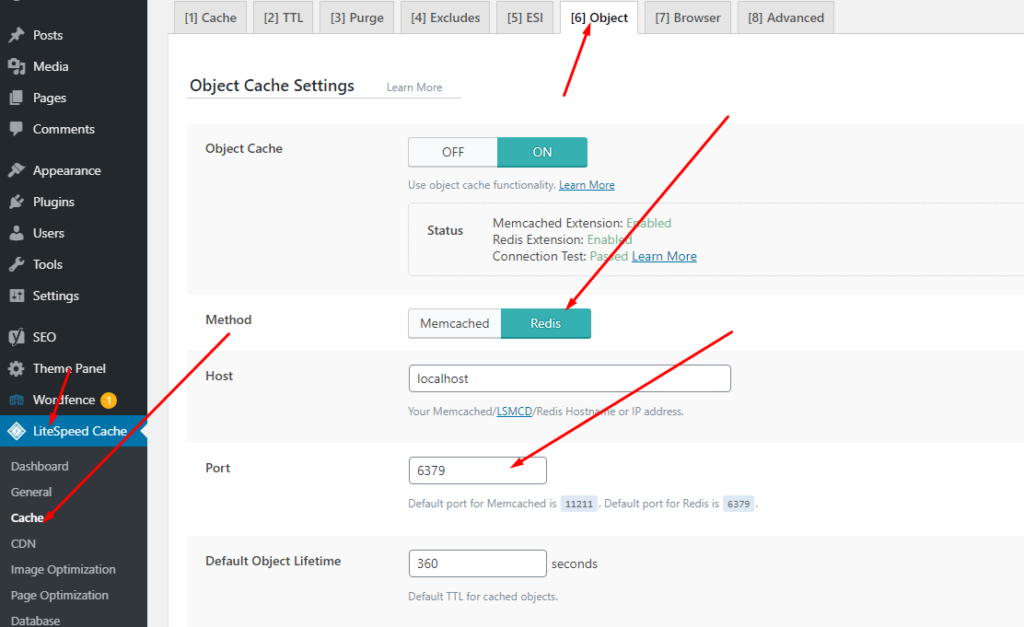
Setup Redis on WordPress using LS Cache:
Now it’s time to setup Redis on your WordPress site. We will tell you here how you can setup Redis on your WordPress site without any extra plugin. Ls cache plugin will all do for you. Let’s begin how to do.
How to Enable Developer Mode and Enable USB Debugging on Android Phone?
As a normal Android user you do not need the to enable developer mode and enable USB debugging on you device.
But If you are an android developer and want to run the Andriod app directly on your phone you need to enable developer mode and enable USB debugging on your device.
To turn on the Developer option on your android phone you just need to follow some easy steps.
Enable Developer Option From Settings
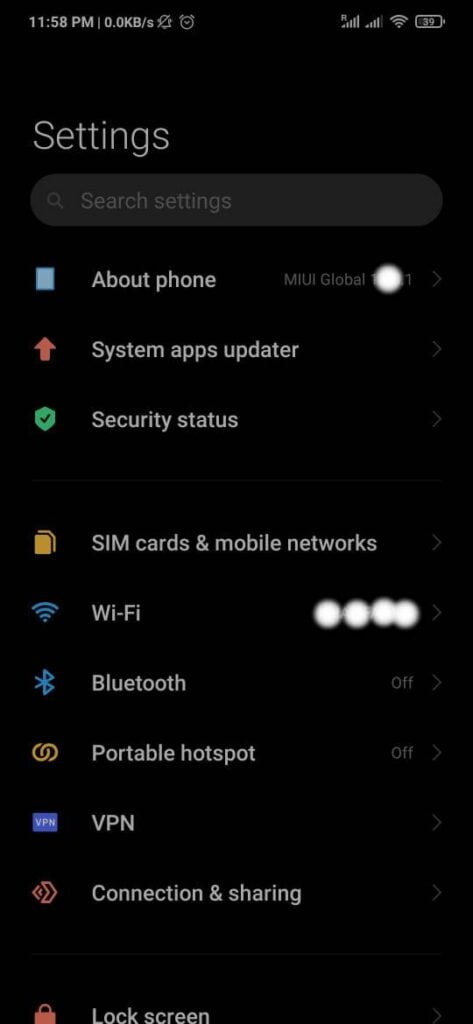
Go to the Settings option of your Phone.
You can see the About Phone option in your settings.
About Phone
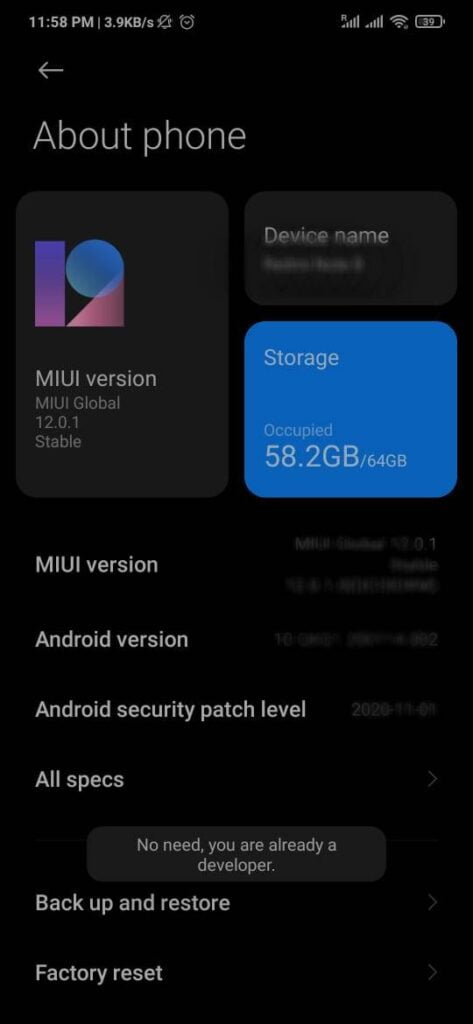
3. Now click on this About Phone option and you will see a Build Version in the case of my device it’s MIUI Version.
Click again and again on this option until this massage came, You are already on the developer mode.
Developer mode
Once you see this massage its mean developer mode is already enabled.
Enable USB dubbuing from Developer Option:
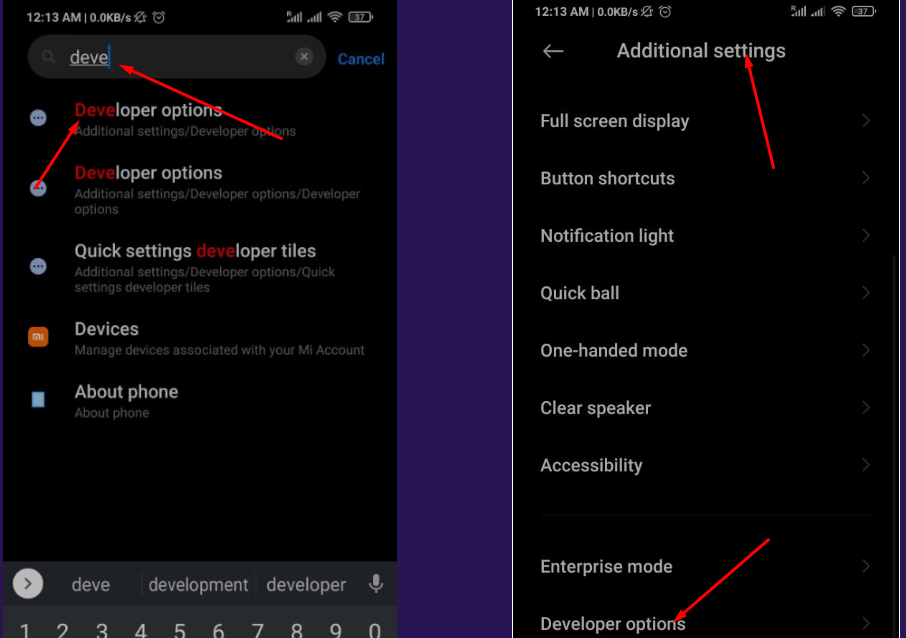
Once you completed all steps stated above now go to the Settings and Additional Features (In some cases it is on the main settings page). Here you will find the Developer Option if you scroll down.
You can also search for Developer Options in the search bar of the settings page.
Additional Features
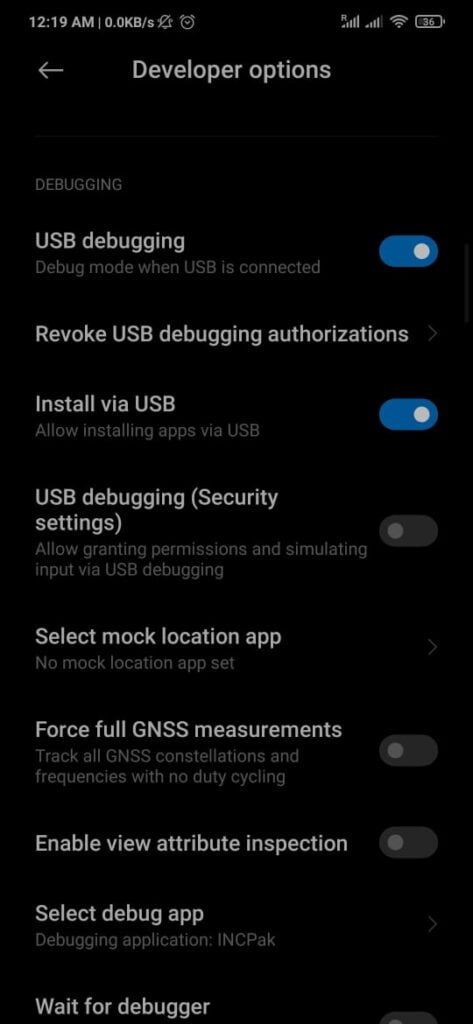
3. Go to the Developer Options and scroll down you will see the Debugging part on this screen.
4. You need to enable Both USB Debugging and Intall VIA USB.
USB Debugging and Intall VIA USB
All done for this and now you can easily use your android phone to test your Application in debugging phase.
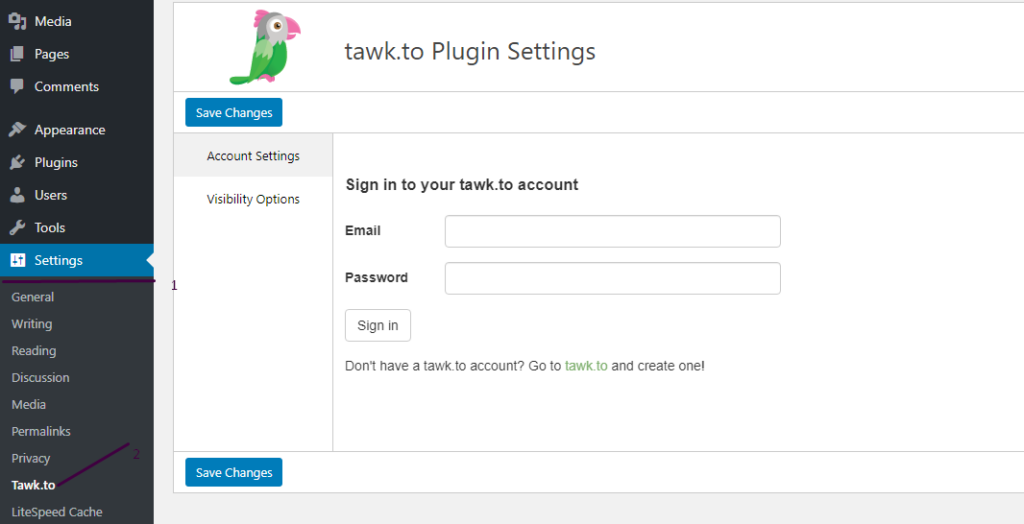
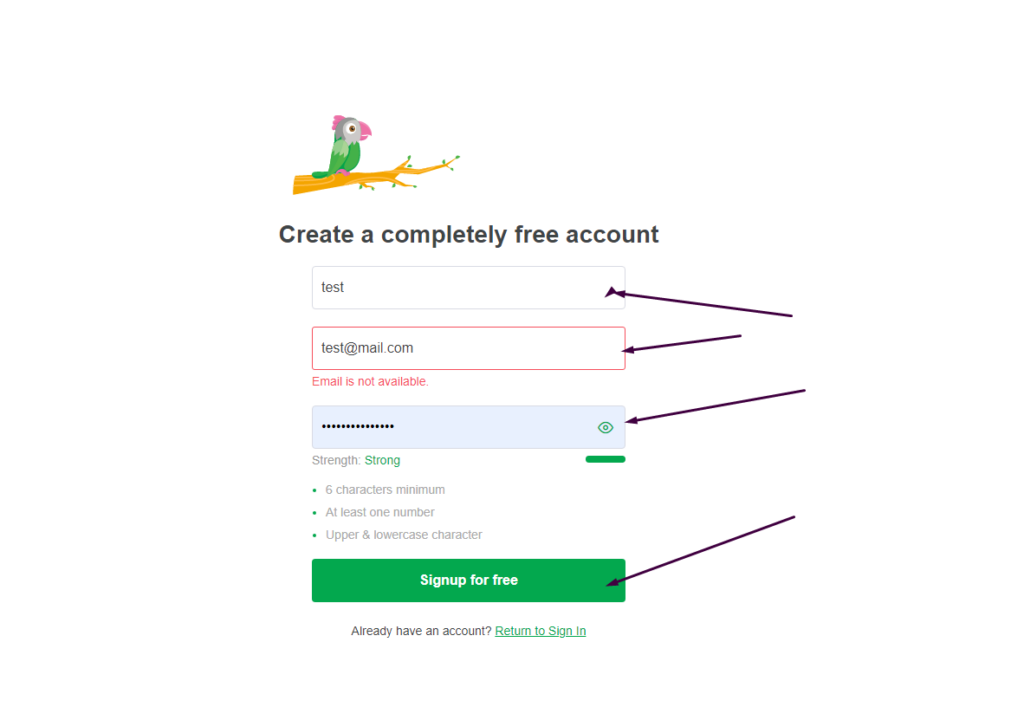
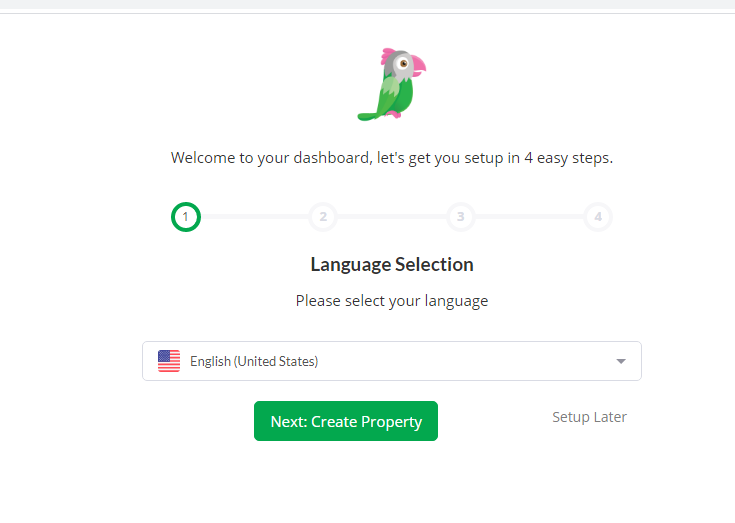
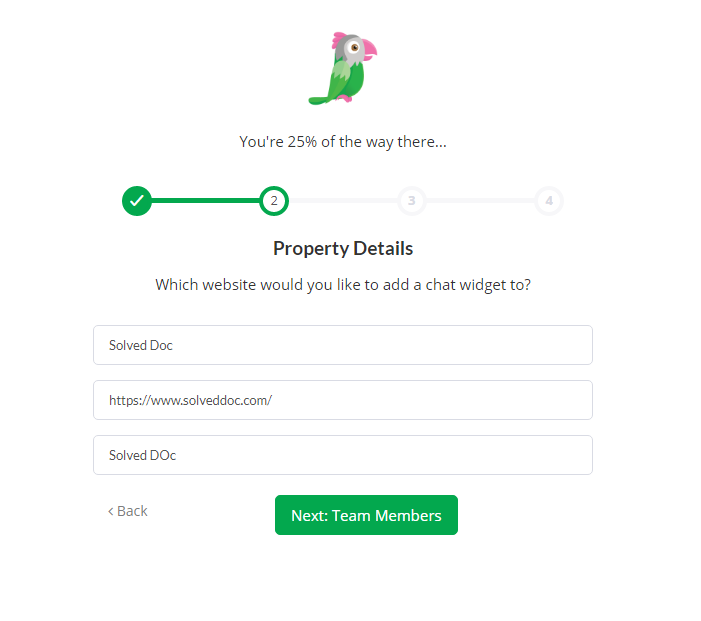
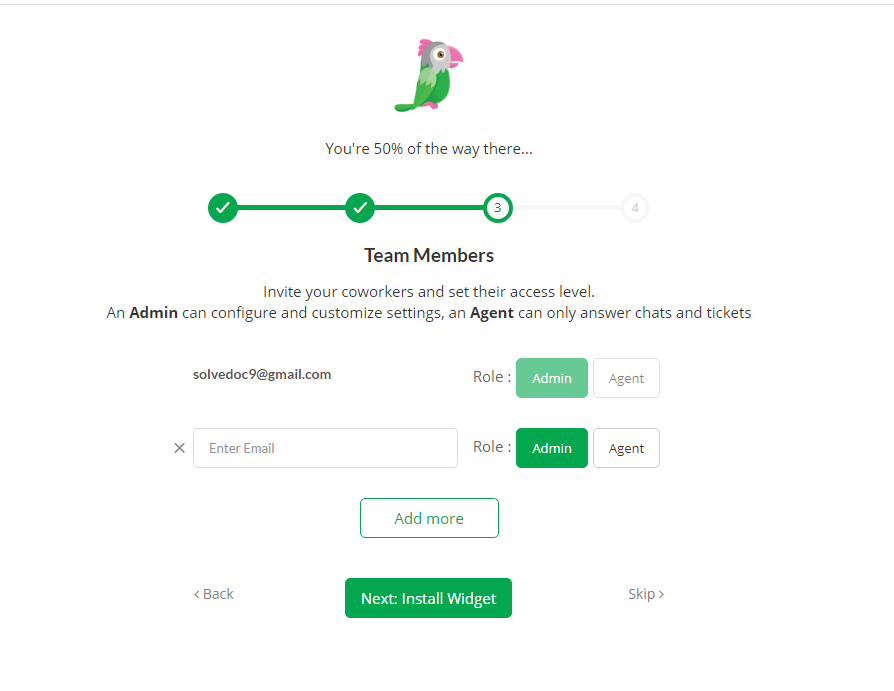
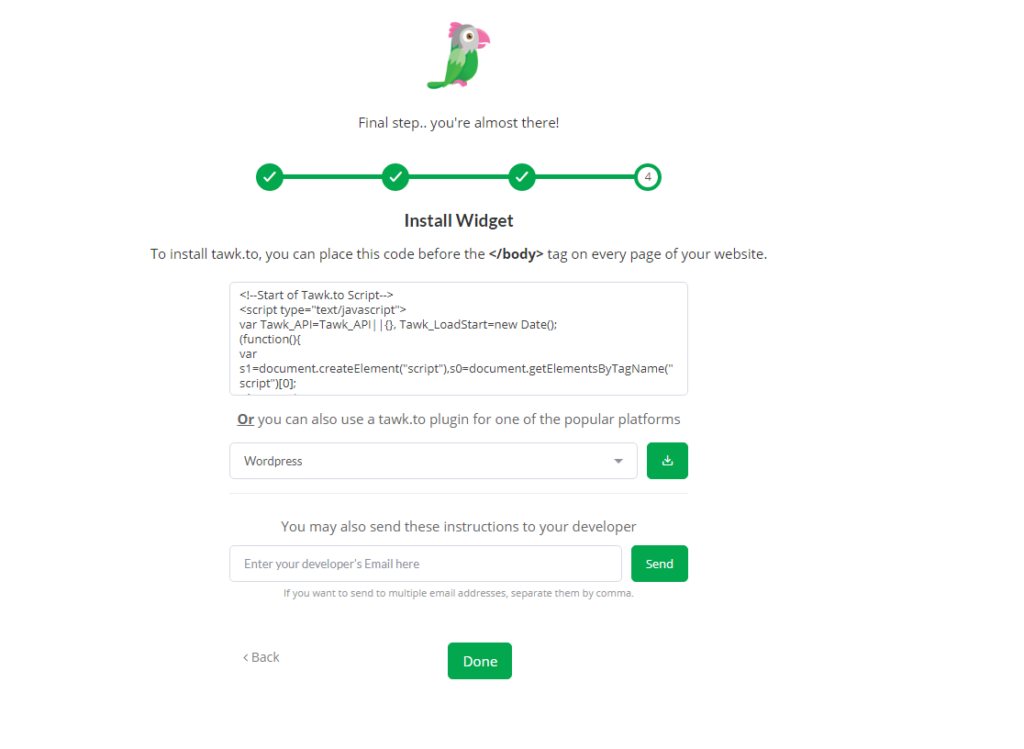
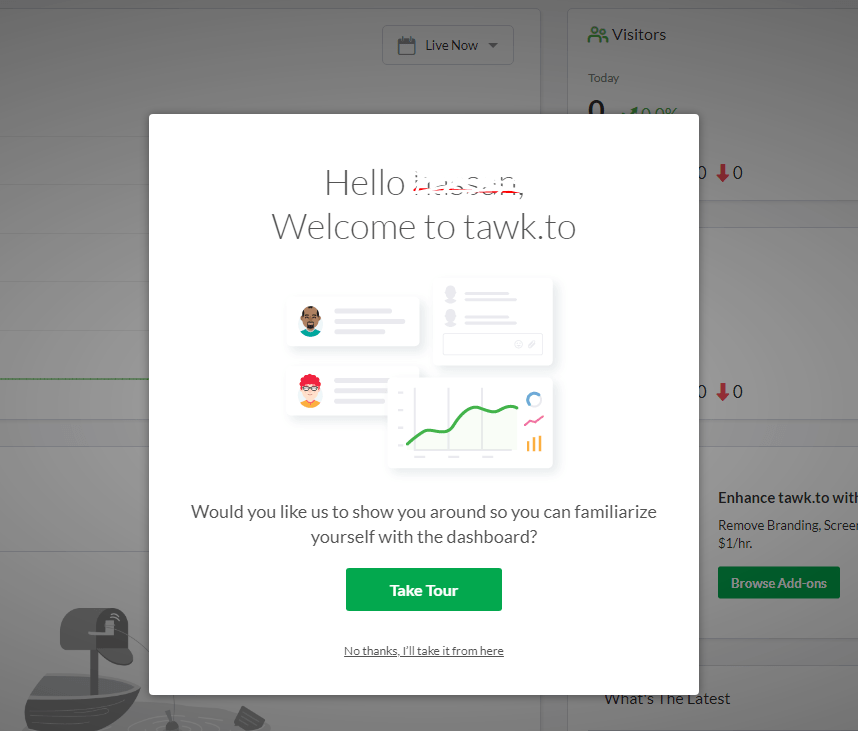
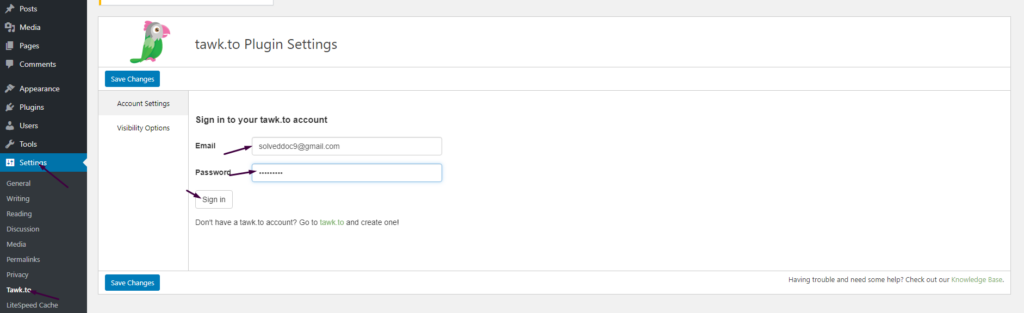
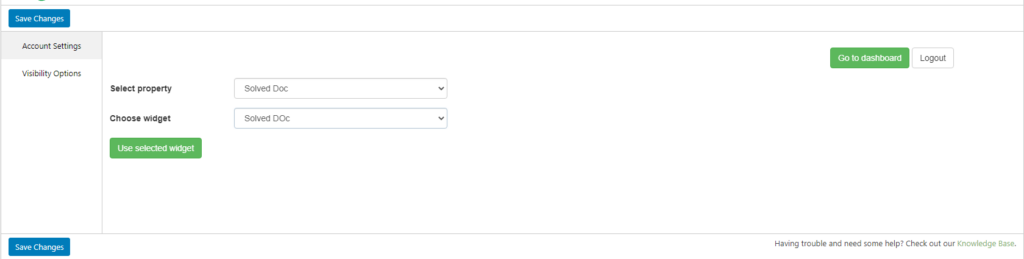
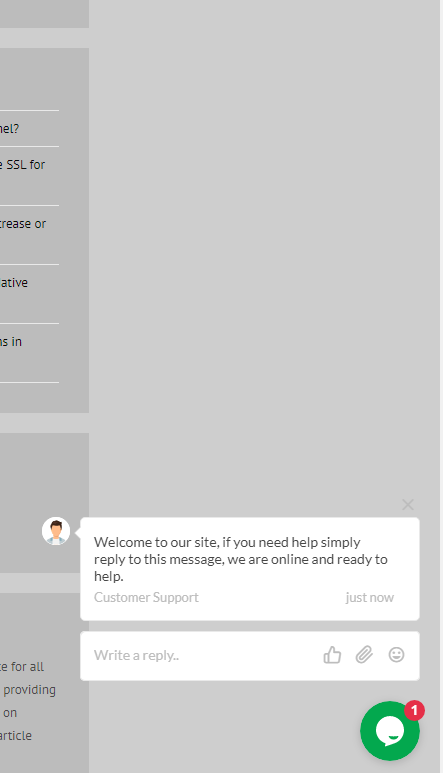
How to add live chat on WordPress Website – Integrate Tawk.To Live Chat to WordPress
In this Article I am going to share my personal experience that how i added the Twak.to Live Chat in my WordPress Site. After reading you come to know how to add live chat on WordPress Website.
This tutorial is basically my personal experience that how I integrate live chat on my WordPress Website. So without wasting time lets start tutorial.
React Native adMob | Seamless & Fast Google AdMob Integration
Do you want to integrate your AdMob to React Native Application? Here we will learn about React Native adMob integration.
If you want to earn from your React Native Applications you need to integrate AdMob with your React Native Application. So Google AdMobs helps you to earn from your applications.
Mostly React Native Packages are installed using a single command. In this article, i will tell you the simplest way to install, Integrate, and use AdMob in your React native application.
Create AdMob Account:
First of all you must have a AdMob account. Go to this Article and check how you can create Admob account. The process of creating Admob account is very straight and simple. In this Article All steps are mentioned and described briefly.
How to Install React Native AdMob:
For the integration of Admob react native first of all we have to Install React native AdMob in your project its is very easy to do so here we discuss the steps :
There are different packages to integrate Admob with your React Native Project but here I discuss that one which I personally use and I think have easy integration than Others.
React-native-admob is bossily a react-native module for Google AdMob Banners, Interstitials, and Rewarded Videos, and also DFP Banners. To install this module Run the command stated below.
npm i @talaikis/react-native-admob
In older versions of React native, you need to configure this module manually but now This fork is a working version for RN 0.60+. Don’t link this package, auto-linking works fine. No need to do extra linking at all.
Open your already created application and install this module using the line stated above.
Once installation process is done. Nothing to do other than this.
React native AdMob Types:
React native AdMob Allows four types of Ads units for its user:
AdMobBanner,
AdMobInterstitial,
PublisherBanner,
AdMobRewarded,
AdMobBanner,
AdMobBanner is the Banner Add for your Application you can add it as sticky location on at any place on any page of your applicatio.
In comparison to the AdMobBanner and PublisherBanner which have a declaritive API, the AdMobRewarded has an imperative API, just like the AdMobInterstitial.
How to create, delete and manage Child Domains in CyberPanel?
You can easily create, List and delete child domains in CyberPanel.
Here I tell you how to create a Subdomain or child domain in CyberPanel and how to delete a child domain from CyberPanel. You can easily manage your subdomains or child domains using cyberpanel.
From CyberPanel you can perform many things for your child domain like create, List, Delete, Issue SSL, Change PHP version, install application, create ftp account, and many more.
How to create a child domain in CyberPanel?
There are two methods to create a subdomain in CyberPanel. But here i will discuss the one which is specific for the child domain creation. The other method is same as the normal domain creation.
Follow these steps to create a sub domain in CyberPanel.
1: Login to your CyberPanel and go to Websites->List Website-> Manage. You can also navigate to this link
https://<Your_IP>:8090/websites/yourdomain.com
2: Now go to the DOMAINS section here and Press Add Domains.
3: Now provide all information here and press Create domain button
you can see the progress and a short time it will show you the completion massage.
How to Delete a child domain in CyberPanel?
In first part we are able to know how to create a child or subdomain in cyberpanel. Sometime we need to delete subdomain. So in this part we will discuss this.
1: Login to your CyberPanel and go to Websites->List Website-> Manage. You can also navigate to this link
2: Now go to the DOMAINS section here and Press List Domains. You can see the Subdomains in front of that you can see the Delete button press that to delete the subdomain.
it will take sometime and after that you can it disappears from here.
How to manage Subdomain SSL of in CyberPanel?
You can issue SSL to any subdomain in cyberpanel using two ways.
Issue SSL from child domain option:
This one is quick and easy way to issue SSL for any subdomain.
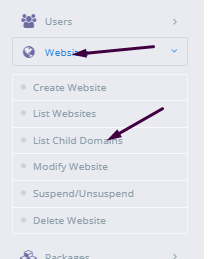
Just go to Websites->List Child Domains -> issue ssl
Issue SSL from parent website manage panel:
You can also manage the SSL for any subdomain by using this method.
1: Login to your CyberPanel and go to Websites->List Website-> Manage. You can also navigate to this link
2: Now go to the DOMAINS section here and Press List Domains. You can see the Subdomains in front of that you can see the SSL button press that.
Change PHP version for child domain, Check logs, Install applications and other features:
You can also manage a lot of features for subdomains using cyberpanel. Just need to follow this Websites-> List Child Domains->Manage:
Here you can manage a lot of features like you can change PHP version for your subdomain, you can install WordPress, you can create ftp account for subdomain and many more.
You can also use this path to manage these features:
How to create a staging or clone of the WordPress site from CyberPanel?
Sometime you may need to create a clone or staging site of your WordPress site to make changes and test them. CyberPanel allows to create staging or clone site easily.
In this article, I will tell you how you can create a staging or clone of your WordPress site from CyberPanel.
You can create a staging site from CyberPanel and after doing that you can merge it back to the Original or master site.
Always keep backup before doing anything. So if you lost anything you can restore. The process of creating a staging site is very easy to follow along to do so.
Create a Clone or create a Staging for your site:
Step 1: Log in to CyberPanel and Go to Manage Website
Create a clone or staging site in cyberpanel is very easy. I will write the steps below to do so.
The first thing to do is login to your cyberpaner using your credentials on port 8090.
Then go to the Websites->List Websites->Manage
Step 2: Create a clone or Staging site
In the manage Dashboard, you can see the CLONE/STAGING button press that to process.
Add the Domain name which you want to use as staging or clone.
It will take some time and once staging is done it will show you this screen.
Now you must have to set A records for the staging domain you create Like staging.yourdomain.com. Visit your DNS manager and add A record for this staging site. No need to add any other records. A record is enough for staging.
In cyberpanel got to Websites->List Child Domains you can check the staging site.
Push back, Copy or sync site to Master:
Once you did all changes to staging and now you want to sync the staging back with the master site CyberPanel allows to do this very easy to do so follow steps:
Go to the Websites-> List Child Domains:
Now on this page, you can see your staging site press the Manage button in front of your site.
Now you are in the management dashboard of the staging site. You can see COPY/SYNC TO MASTER from here you can push back your staging to the original.
Here you can chose the options:
Copy complete Data
Sync Database
Copy Changed Files
Chose any option from them according to your requirement. Once the process of sync or coping is done now go back to your original site and check the changes if you have any cache plugin clear cache and then check the changes.
How to Create a Website and install WordPress on CyberPanel one-click installation?
In this article, I am going to tell you how to install WordPress on CyberPanel. This article is about the one-click installation of WordPress on CyberPanel.
I will briefly describe how to create a website on CyberPanel. And then we will go toward the installation of WordPress on CyberPanel. The main theme is how you can create a website and install WordPress on CyberPanel.
if you are new on CyberPanel and want to know the basic Information and usage of CyberPanel then do not leave the article i will explain some basic at the end of article.
How to create a new Website on CyberPanel?
Creating a website on CyberPanel is very simple and easy. Here the all steps to create a Website on CyberPanel are listed.
Go to the Websites-> Create Website Option in CyberPanel Menu:
Can navigate to this ULR to Create new web site:
https://your_IP:8090/websites/createWebsite
Provide the following details here
Select Package (Default )
Select Owner (Admin or any other)
Domain name (example.com without www)
Email (Your email address (youremail@xyz.com))
Select PHP (Latest is recommended )
SSL (Always check)
DKIM (Always check)
Open Basedir Protection (Check )
Create Mail Domain (Check if you want to you on same server)
After providing all information press Create Website Button. It will take sometime to complete and will show the confirmation massage once its Done.
How to install WordPress on your domain from CyberPanel?
When creation of your website on cyberpanel is done. Time to install WordPress on that site using CyberPanel. Just Follow these steps and do it quickly.
Go to the Websites-> list websites
Can follow this URL to list all websites
https://your_IP:8090/websites/listWebsites
2. Click the Manage button to navigate to the manage website dashboard
Navigate to this URL to list all websites
https://your_IP:8090/websites/listWebsites
3. On the management dashboard to the last section there you found WordPress click on that.
You can also get access the dashboard through this Url
https://your_IP:8090/websites/yoursite.com
4. Once you click this button now you can see a screen asking for the WordPress details.
You want to Install node js on windows 10 machine?
To start the guide to install node js on your windows 10 machine. First of all, we have to know what actually node js is. Before knowing how to install node js on your windows 10 know about the node js.
Basic node js is a JavaScript runtime environment. It simply means that the node js run-time environment includes everything you need to execute a program written in JavaScript. Now I would like to mention some points about node js for better understanding.
What is node js?
Node js is free and opensource environment.
Node js uses javascript on the server.
Node js can generate dynamic pages, can do many operation on databases and its is available for different platforms (Operating Systems).
How to Install Node js on windows 10?
In order to install node js to your windows 10 machine. You need to follow different steps.
Download Node.js
In order to install node js on your windows 10, you have to download the Node js. To do so click here or visit this link https://nodejs.org/en/download/ in your favorite browser. Here you can see this screen.
You can see the latest and current version always chose the current version from them because that is the stable one then chose the windows installer from the operating systems. you can also download:
Windows Installer (.msi) Windows Binary (.zip) Source Code
In 32 and 64 bits depending on your operating system.
Install Node js on windows 10:
Once your download completed now its time to install it on your machine to do so follow these steps:
Click on the download file and then click install.
2. You will receive a screen that asks you to run Wizard to install node js. Press Next.
3. Now accept the License Agreement. To go to the next step.
4. You can specify the location in your computer where you want to install the node js. By default its C:/Program Files/nodejs/ and leave as its and click Next.
5. In this step you can see which node js packages you are going to install and what is disk usage, and all. Click Next to proceed.
6. In this step you can allow node js to Automatically install the necessary tools. you can follow the instruction from the link given on-screen. Then press Next.
7. All setup is done Press Install to install node js on your windows 10.
Allow the installation and this installation may take some time to complete wait until the status bar show completion.
8. All done now your node js is installed and you can press Finish and go ahead.
Verification of node js installation
Once the installation process has done you need to verify the installation of your node js on windows 10. to do so just run a simple command:
npm -v
You can see the installed version it’s mean your installation is complete. Now your system is good to go.