Warning: Redis::get(): php_network_getaddresses: getaddrinfo for localhost failed: Name or service not known in /home/solveddoc.com/public_html/wp-content/plugins/litespeed-cache/src/object-cache.cls.php on line 674 CyberPanel Archives - Page 2 of 6 - Solveddoc
CloudPanel vs CyberPanel: 5 Key Differences & Which One is Better
CloudPanel vs CyberPanel, Which one is better? So this is a very simple compression article for both of these panels. These days people are finding a very cheap and useful hosting management panel for their sites to manage. So without going into a lot of discussions, I will straight go to the features, pricing, and details of both cyberpanel and cloudpanel then will compare both as well.
cloudPanel vs cyberPanel
CyberPanel:
CyberPanel is a free and open-source product that supports Open LItspeed and LiteSpeed enterprise. The CyberPanel is serving in market science 2015 at that time cyberpanel was the only panel that supported LiteSpeed. The CyberPanel is a web hosting control panel designed to simplify the process of managing web servers and hosting websites. It is a free and open-source control panel that is designed to work with the LiteSpeed web server. LiteSpeed is known for its high performance and efficiency, making it a popular choice for web hosting.
Website:https://cyberpanel.net/
CyberPanel Features:
CyberPanel comes with a long list of great features. In general, cyberpanel is considered an alternative to cpnale. Because it has all the features and specialties like cpnale. It has the email, FTP, DNS, database, user, and database management in its dashboard.
In CyberPanel you will get the complete webhosting managed panel feature list.
Email services
FTP services
DNS services
SFTP services
User management
WordPress manager
Email debugger
Mod Security
Let’s encrypt SSL
SSL v2
Remote backup
S3 backups
SFTP Backups
G drive backups
Local Backups
CSF
Firewalld
SSH Management
Rspamd
Website Management
Packages Management
CyberPanel Pricing:
The basic version of CyberPanel comes totally free and you can just buy a VPS, cloud, or dedicated server to install this and use it.
But CyberPanle also has some paid add-ons you can check here. Ready to Complete the CyberPanel tutorial here.
CloudPanel is a user-friendly, open-source control panel that simplifies server management. It’s built with efficient components like NGINX, PHP-FPM, and MySQL to ensure high performance. With CloudPanel, you can have your server up and running in just 60 seconds, making it a quick and accessible solution for managing web hosting, websites, and related services, all at no cost.
Website:https://www.cloudpanel.io/
CloudPanel pricing:
Now let’s discuss cloudpanel. CloudPanel is totally free and you can install this at your server.
CloudPanel features:
There is a large list of CloudPanel features as well.
In the quest for an efficient and cost-effective hosting management panel, the comparison between CloudPanel vs CyberPanel stands as a pivotal choice. While delving into the features, pricing, and core details of both solutions, we find that each offers a unique set of advantages.
CloudPanel shines with its lightweight technology stack, providing an array of features for optimized server management. On the other hand, CyberPanel boasts a user-friendly interface and quick setup, making it an attractive choice for those who prioritize ease of use. The choice between these panels ultimately depends on your specific needs and preferences, as both CloudPanel and CyberPanel bring valuable tools to the table. It’s advisable to weigh the distinct features and capabilities of each to align with your hosting requirements, budget, and user experience expectations.
If you are going to buy a new CyberPanel hosting for your business you should have to consider few providers I am going to list in this article.
In this article, I am not just going to add few hosting option and ask you to buy. I will give you brief details about how to choose hosting, what you have to take care of while choosing a hosting, which stack is good for your site, and all.
Once you read this article let’s move toward the options we have in CyberPanel.
CyberPanel base Hosting options:
There are a few top-level options for this which are managed and unmanaged let’s discuss them one by one.
1. CyberHosting:
CyberHosting is a managed hosting solution that provides you with hosting solutions in different locations and different providers. The CyberHosting has a large range of servers with Hetzner, Vultr, Upcloud, and their own cyberhosting dedicated VPS solution.
Webiste: https://www.cyberhosting.cloud
Pricing: https://cyberhosting.cloud/pricing/
Trial: Cyberhosting offers 3 days free trial
Locations: CyberHosting offers a large range of locations
2. Hostinger:
Hostinger is also an option that provides you the CyberPanel hosting. They provide mostly unmanaged hosting and mostly they work on their hardware.
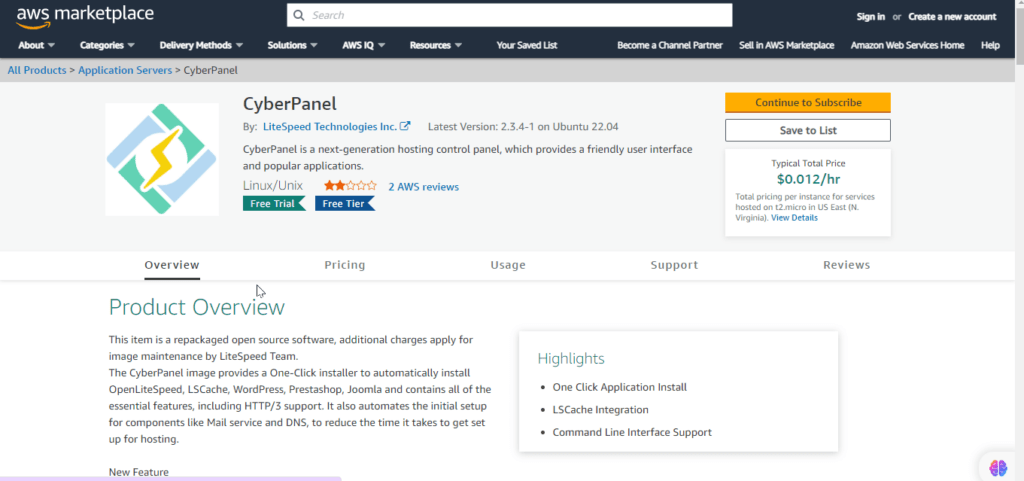
Vultr is one of the well-known hosting providers and they are very popular for their VPS. Especially the high-frequency VPS. They offer unmanaged VPS solutions and you will find the Cyberpanel in their market place and you can use that.
Like Vultr AWS also has the cyberpanel in their marketplace. Amazon Web Services (AWS) is a cloud computing platform offered by Amazon that provides a wide range of cloud services, including hosting solutions for websites, applications, and various workloads. AWS offers a flexible and scalable infrastructure that allows businesses and developers to host their applications and data in the cloud.
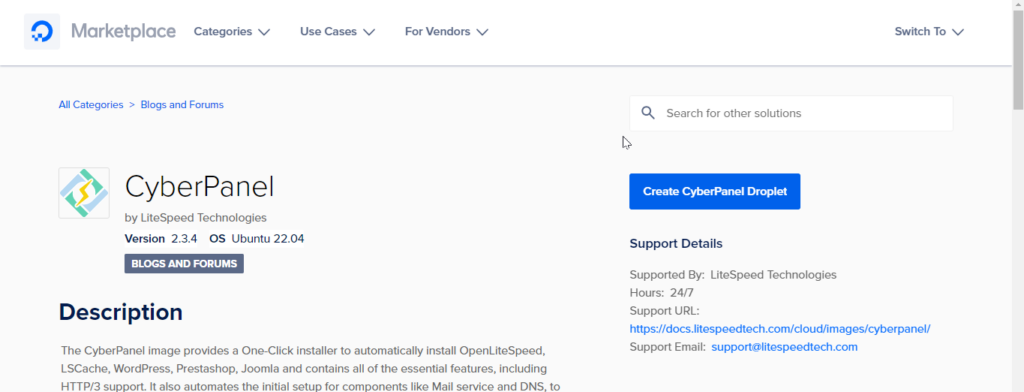
DigitalOcean is a cloud infrastructure provider that offers cloud computing services to developers and businesses. While it’s not as comprehensive as Amazon Web Services (AWS) in terms of the number of services offered, DigitalOcean is known for its simplicity, developer-friendly approach, and competitive pricing.
There are many other small and large hosting solutions that provide cyberpanel. There are also managed and unmanaged hosting solutions that are cyberpanel-based. But these are some top solutions that I added to my list.
My recommendation is cyberhosting.cloud.
How to use Cyberpanel 2fa?
In this quick article, we will write how you can setup CyberPanel 2fa and how you can use 2fa to access Cyberpanel? this will be a quick guide for all this process.
From the version 2.03 to onward now CyberPanel support 2fa for users. So you can make thing more secure by using that.
How to setup two factor authentication in cyberpanel?
To setup this security feature just login to your cyberpanel by visiting URL access URL and using your login access.
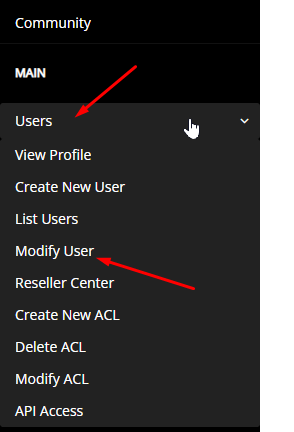
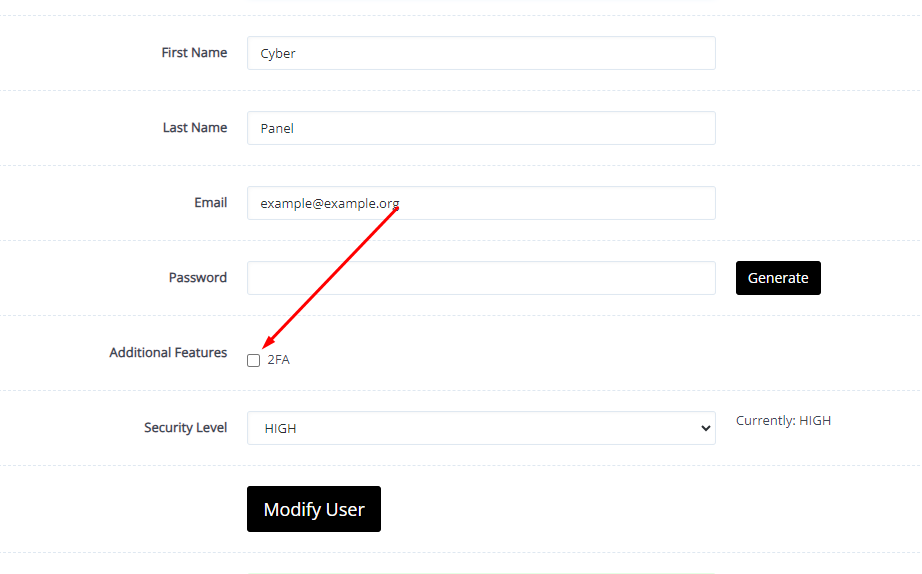
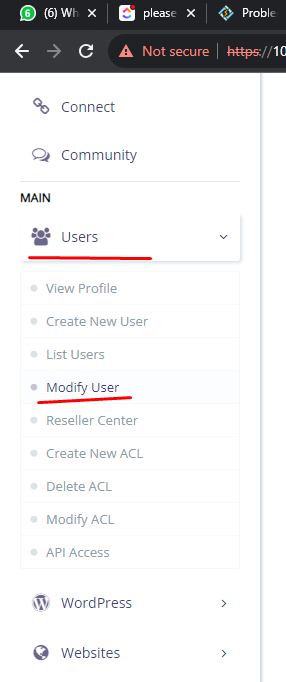
Now got to User->Modify User from the left menu.
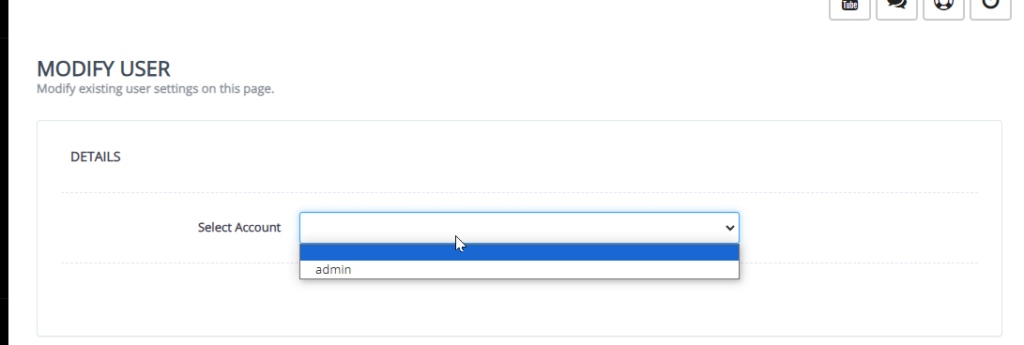
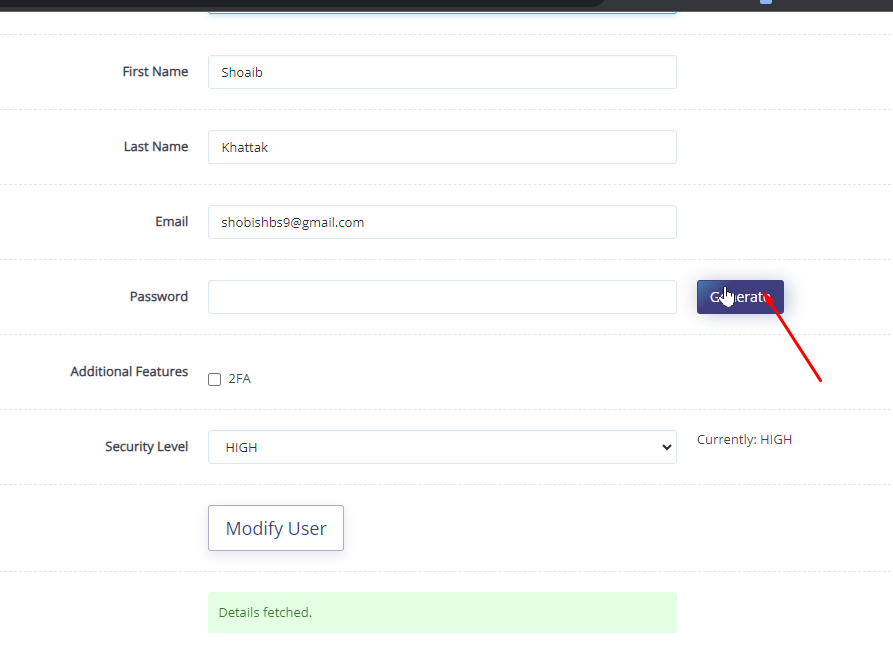
Now on this page you have to select the user for that you want to enable the 2fa.
Here after selection you can see the screen with all of user modification details just enable the 2fa by clicking the addition features tick.
Once you click that the QR code will appres to scan and check authenticate.
Now scan the code in your google authenticator app and save the modifications.
Test two factor Authentication by login:
To test the two factor authentication what you need to do is log out from your account you enabled two factor authentication.
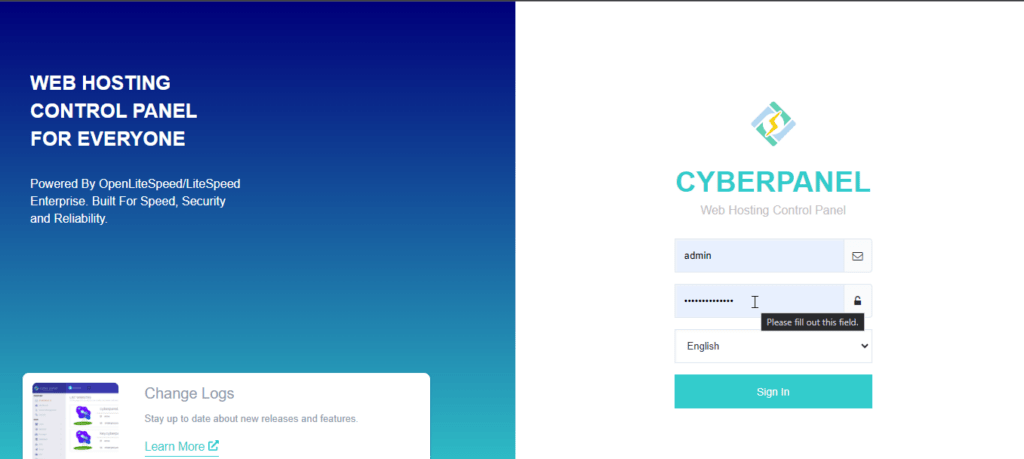
Now you can see the login page provide the login details and press Sign in button.
Now it will ask you Enter code from Google Authenticator. provide the code that you saved in google authenticator app and press Sign In.
How to Access CyberPanel?
This will be a very easy and short article. In this, I will just tell you how you can access CyberPanel once it’s installed on your server.
Before going to explain and tell how you can access your panel that is installed on top of your server you must know how you can install CyberPanel on your server.
Before installing CyberPanel on your server your server you must know about the support OS on which you can install CYberPanel click here.
To install CyberPanel on your server just follow their official guide here.
Access CyberPanel Via server IP:
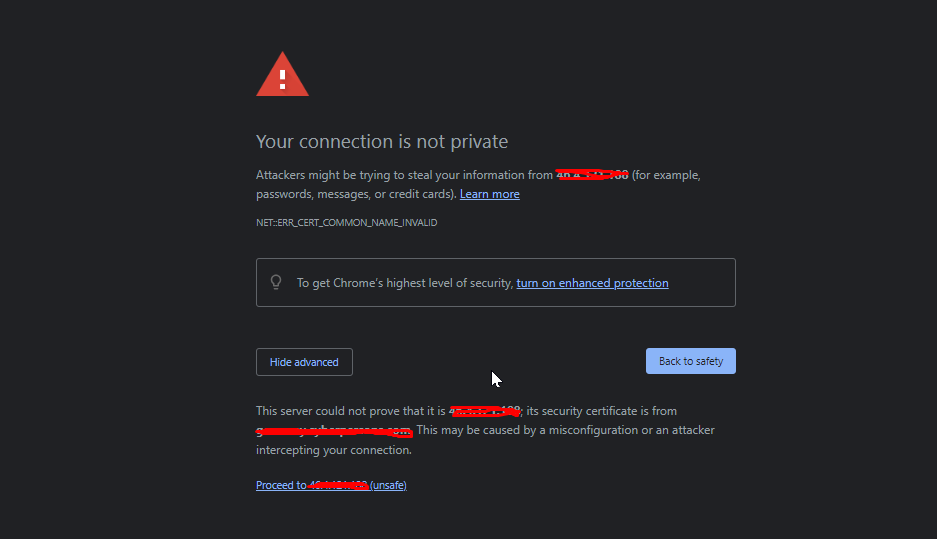
Basically, when you install CyberPanel on your server it will only allow you to log in via IP address in start. You can access using the IP and the port 8090,
https://<IP>:8090
This will not have SSL to access.
Just click on the advance button on this page and then process to the unsafe.
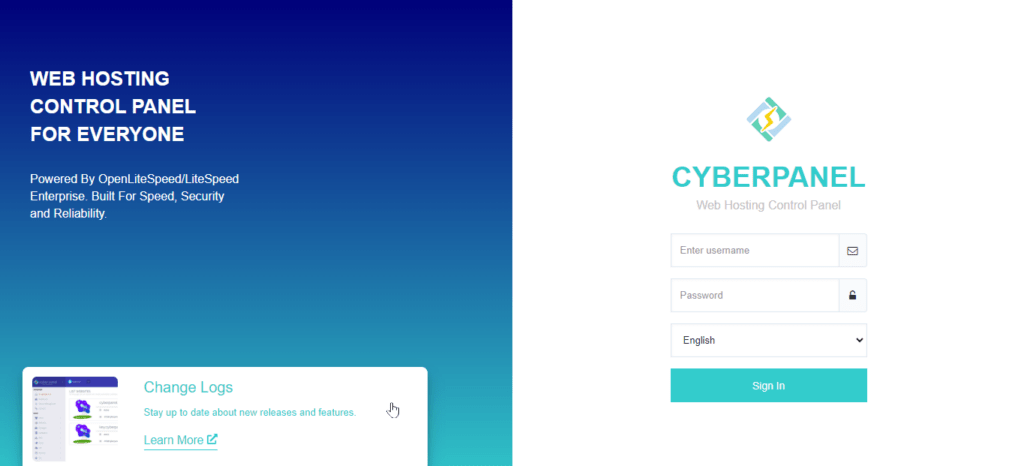
After this login screen will appear and you can provide the username and password to access this.
Access CyberPanel via Hostname:
To login CyberPanel via hostname just issue the hostname SSL using this article here.
Once you issued a hostname SSL to a valid domain name just use the link like domain with port 8090.
htts://domainname:8090
Last Words:
This will be a very easy and short article. In this, I will just tell you how you can access CyberPanel once it’s installed on your server.
Before going to explain and tell how you can log in to your panel that is installed on top of your server you must know how you can install CyberPanel on your server.
Sometimes you need to change the CyberPanel password. So there are two methods to do so. One is to do from the UI and the other is from the terminal. So in this article, we will discuss How to Change CyberPanel Password.
Follow both methods as per your requirements.
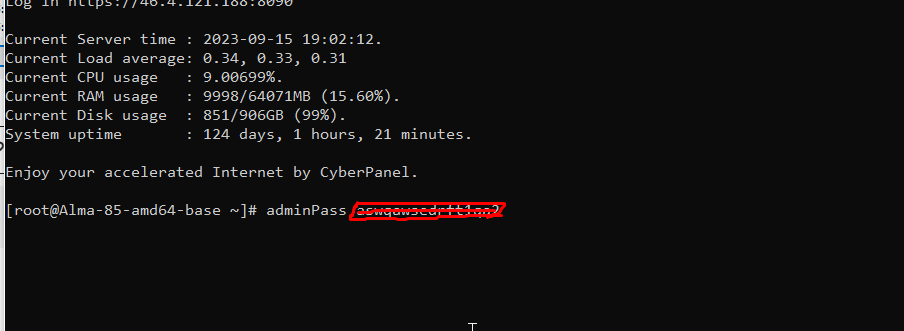
Method 1: Change CyberPanel Password from the terminal:
You can change the cPanel password from the terminal. This password will be for the admin account. So basically you can change the CP admin password from the terminal. You can also see How to Change CyberPanel Port. To do so follow the steps:
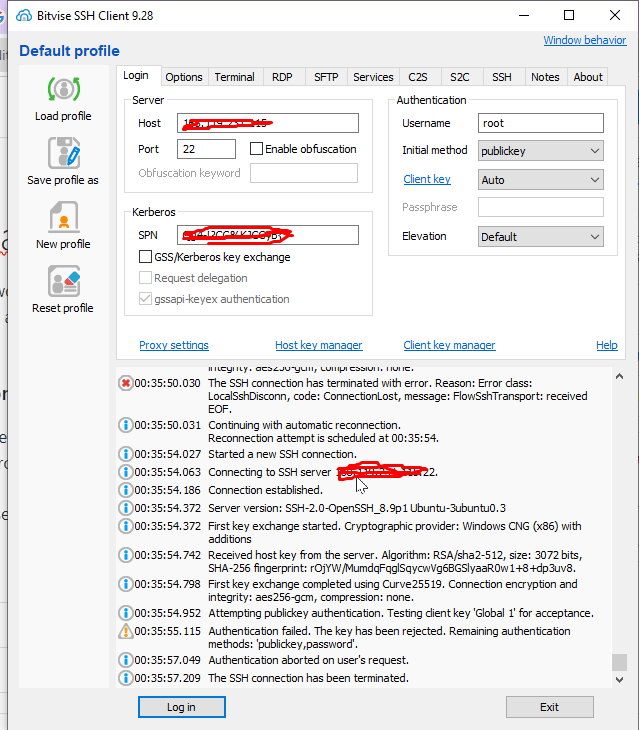
Login to your SSH using any SSH client like Bitvise.
2. Open the terminal from the SSH client and then run the command to change the CyberPanel admin password.
adminPass <new-password>
Methode 2: CyberPanel Change Password using Dashboard:
Login to your CyberPanel at port 8090 using your CyberPanel username and password.
Just go to the User-> Modify User from the left side menu.
3. Now click the Generate button in the form of a password and then use that.
4. Just click the save button at the end of the process and use that password afterward.
FAQ about CyberPanel:
What is the username and password for CyberPanel?
Answer: By default CyberPanel username is admin and the password is 1234567 (not recommended to set default password).
How do I change my password on WordPress?
Answer: You can change the users from the WP admin dashboard and then modify that user.
How do I change my CyberPanel username?
Answer: Just log in to your CyberPanel and then modify the user.
What is the login URL for CyberPanel?
Answer: your login for CyberPanel will be https://<ip>:8090
Changing the port of CyberPanel is also a security measure but a lot of users don’t know how to change the CyberPanel port. So in this article straight away we will discuss how you can change the 8090 port of cyberpanel to any other port.
Change CyberPanel Port Complete steps:
there are two parts to this task first to enable the required port in the firewall and then change the port from CyberPanel.
Part 1: Enable Port in Firewall
Login to your CyberPanel using your login credentials.
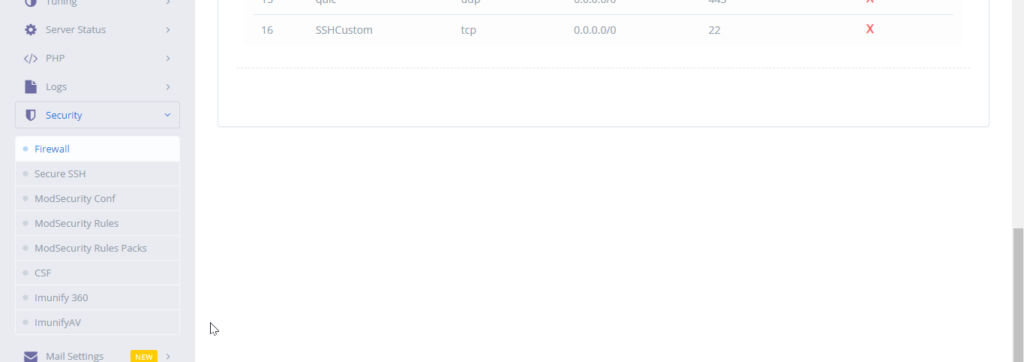
2. From the left bar menu go to the Security -> Firewall. Here you can see the CyberPanel port list
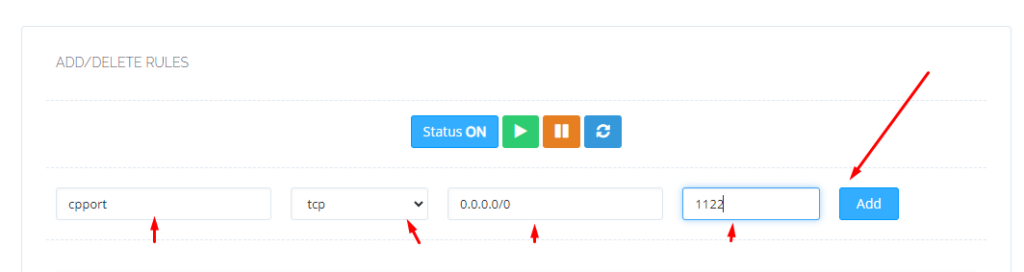
3. Now add the required port that needs some information as I have given below.
Name: cpport (just the name to identify the port)
type: tcp/udp (select TCP for CyberPanel )
Allow ip: Select the 0.0.0.0/0 for global If you want to bound add that IP here
port number: last add a port number like I added 1122
Part 2: Update the new port and change the old one:
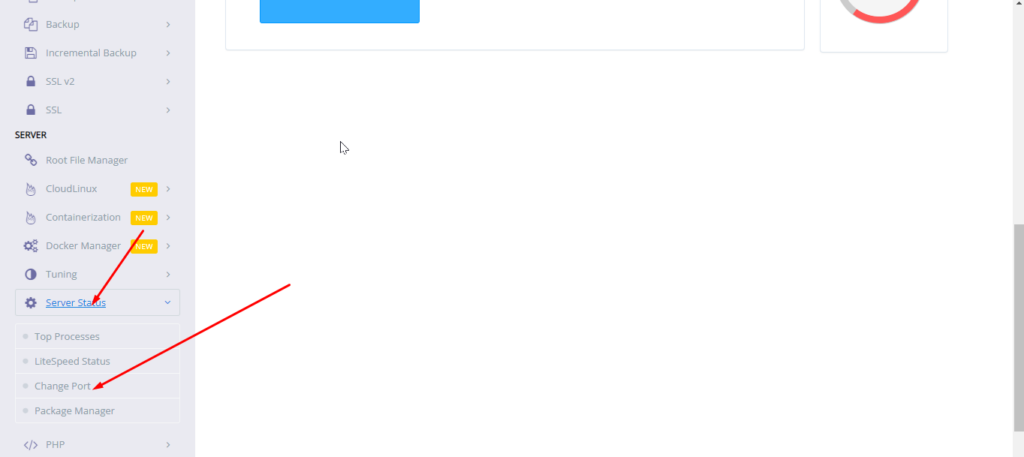
1. From the left bar menu go to the server status -> change port.
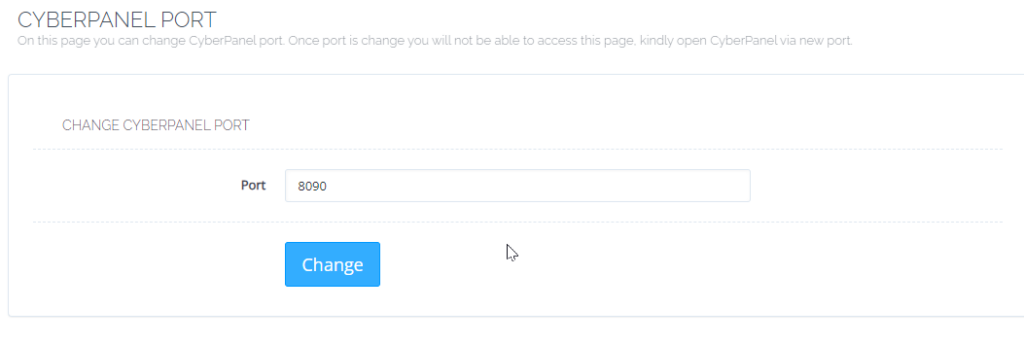
2. In this screen you can see your CyberPanel default port will be 8090. Change that port to your required port like I will do for 1122.
These are steps to do it from the CyberPanel UI that is simple but you can also change CyberPanel port ssh
Counculion|:
Changing the default port (8090) of CyberPanel is a crucial security measure that often goes overlooked. In this article, we’ll guide you through the process of changing CyberPanel’s port to enhance the security of your server. By doing so, you can reduce the risk of common cyberattacks targeting well-known ports and strengthen your server’s defenses. We’ll provide clear instructions, prerequisites, and considerations for selecting a new port, ensuring that even users with limited server management experience can follow along. Don’t leave your CyberPanel vulnerable; follow these steps to safeguard your server effectively.
There are a lot of questions that users ask about CyberPanel port:
What is the admin port for CyberPanel?
So the default CYberPanel port is 8090
2. How do I remove port 8090 from CyberPanel?
method is given above in this article
3. How do I change port 8090 from CyberPanel?
That is also will be done in this article
4. How do I open a port in CyberPanel?
Follow this article part 1.
How to remove or Uninstall CyberPanel from my server?
There are some of CyberPanel users who want to know how to Uninstall CyberPanel from my server. This is a very basic thing that every user of any site wants to install and maybe later for any reason user wants to remove the application from the server as well. There is no removal command for cyberpanel but there is always some ways to do so.
About CyberPanel:
CyberPanel is a web hosting control panel designed to simplify the process of managing web hosting services and websites on a server. It is a relatively lightweight and open-source alternative to more established control panels like cPanel or Plesk.
A common reason to Uninstall CyberPanel From the server:
Reinstallation of CyberPanel
Server errors
Change of OS
Change of Panel
Change of server Provider
if you have any other in mind do comment below.
There may be other reasons for this as well but in the end user want a command or a way to get with it.
How to remove CyberPanel from my server
How to remove CyberPanel?
There is no specific command to run or any button in UI to do so but there are few ways to do.
Rebuilt your server from the server provider.
Reinstall OS from the server provider
Change server from server provider
These are the only ways to Uninstall CyberPanel from your server.
Here are some Operating systems that cyberpanel supports for the installation link.
We also have a complete guide to Cyberpanel that can help you understand each and every feature of Cyberpanel. Also how to use that feature is also written there. So here is the guide.
Operating System for CyberPanel Installation | Best OS for CyberPanel Installation
CyberPanel stands out as a popular hosting control panel among its peers. You can install CyberPanel with different Operating systems. Here in this article, we will discuss the best os for Cyberpanel installation as there are a lot of operating system where you can install CyberPanel and use it. But we will discuss all and get an answer about this.
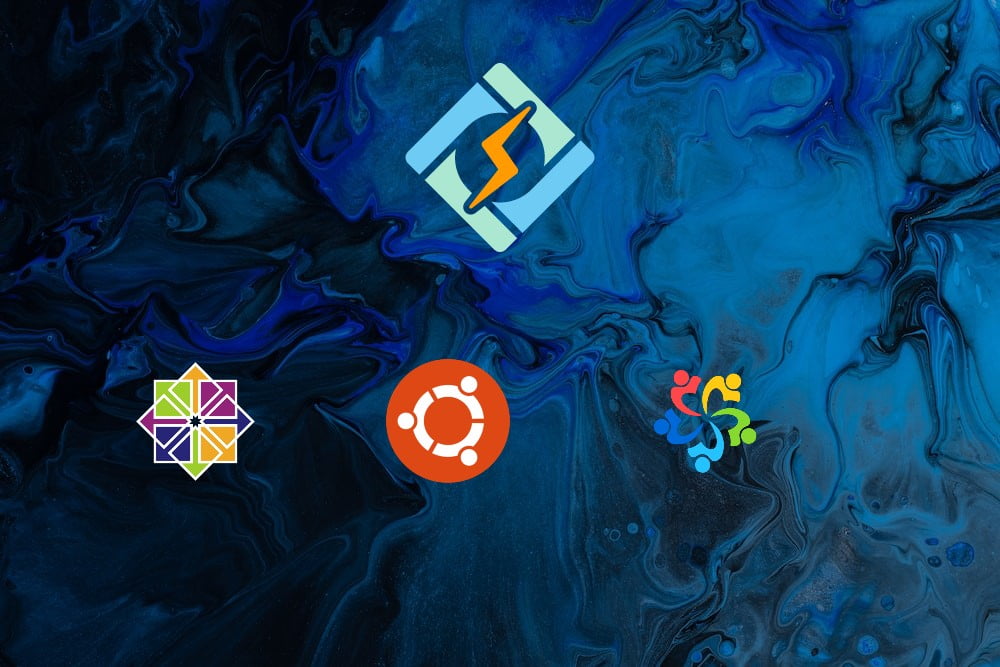
Supported Operating Systems for CyberPanel installation:
These are some top supported OS by CyberPanel. Centos is no longer recommended.
In the realm of operating systems supported by CyberPanel, there are several noteworthy choices. While it’s important to mention some of the top-supported OS options, it’s also crucial to note that CentOS is no longer recommended. CyberPanel, a popular hosting control panel, offers compatibility with various operating systems, including Ubuntu, Debian, and even CentOS. Supported operating systems are chosen for their robustness and compatibility with CyberPanel’s features, ensuring users have a reliable and efficient hosting experience.
However, it’s worth noting that CentOS, which was previously a favored choice among users, has seen a shift in recommendations. The change is due to CentOS’s altered versioning strategy, moving from CentOS Linux to CentOS Stream, which brought uncertainty regarding long-term support and stability. As a result, CyberPanel users are now encouraged to explore alternative options like Ubuntu or Debian for their hosting needs to ensure they have access to a dependable and well-maintained operating system that aligns with CyberPanel’s performance goals.
Best OS for CyberPanel installation:
So the decision of best depends upon the usability and your attachment to that OS. In the past, most users like Centos 7 to use with cyberpanel but as now Centos is going to stop updating so people are shifting toward Alama Linux and Rocky.
But one of the best operating systems is Ubuntu 22.94 update and smooth. i personally like this to use with CyberPanel be a lot of users do not agree with this.
We also have a complete guide to Cyberpanel that can help you understand each and every feature of Cyberpanel. Also how to use that feature is also written there. So here is the guide.
Here you will get all details about CyberPanel logs. I will clear all points on which time which logs you need to check.
CyberPanel Main logs:
Where to check cyberpanel main logs:
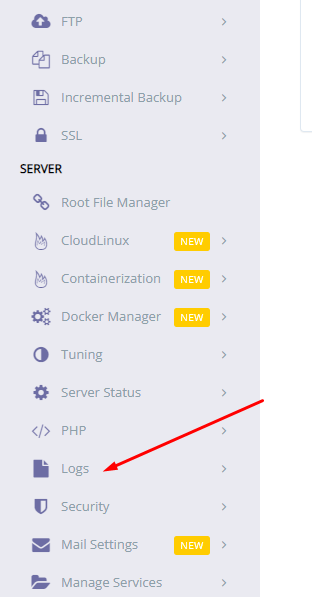
Login to cyberpanel and go to Cyberpanel dashboard.
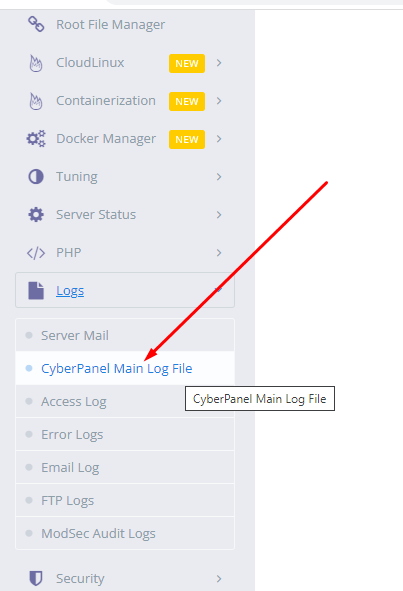
Click on logs
and then click on cyberpanel main log
When you need to check:
You need to check CyberPanel’s main logs when any issue related to Cyberpanel happens like SSL for the website, backup, creation of backup, etc.
when SSL cyberpanel issues. we need to check cyberpanel logs
Error logs
Where to check error logs:
login to bitwise SSH client and click on New SFTP window
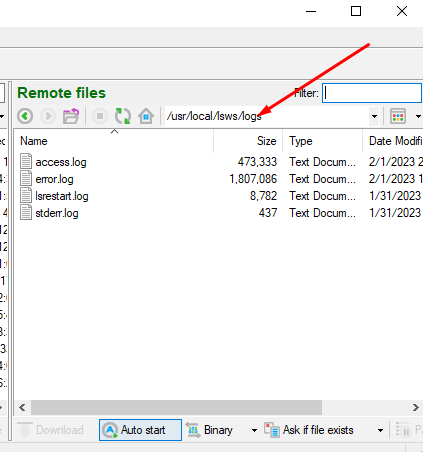
And go to the /usr/local/lswsl/logs directory
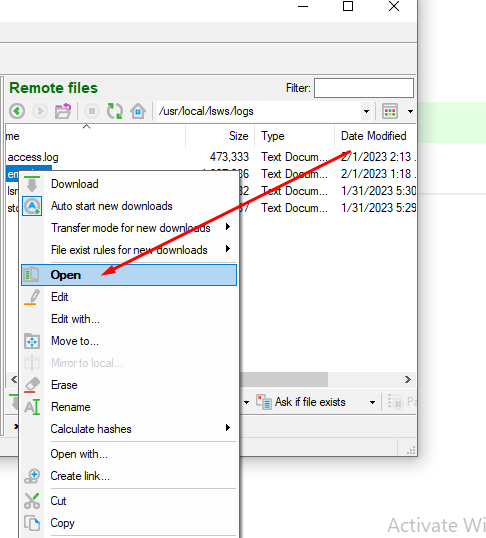
And here you will find error.log file open that and you can check all logs
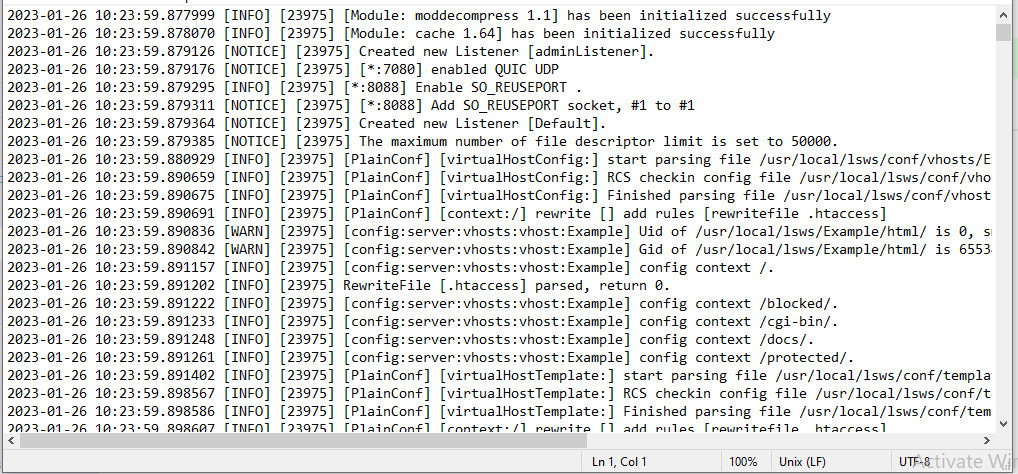
error log will be like this you can also open error logs from the terminal using the command
cat /usr/local/lswsl/logs/error.log
When you need to check:
Error logs help you to debug and solve website-level issues. Like 500 errors on site, 521, 404, 403 and cont connection
STDERR Logs
Where to check the Stderr log
login to bitvise SSH client and click on the New SFTP window
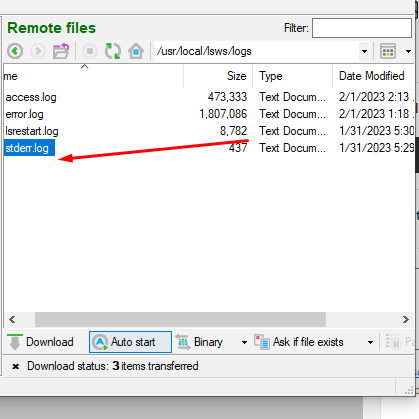
And go to the /usr/local/lswsl/logs directory
And here you will find stderr.log file open that and you can check all logs
you can also open stderr logs from the terminal using the command
cat /usr/local/lswsl/logs/stderr.log
When you need to check:
Stderr is the standard error message that is used to print the output on the screen or windows terminal. Stderr is used to print the error on the output screen or window terminal.
Email Logs
Where to check cyberpanel main logs:
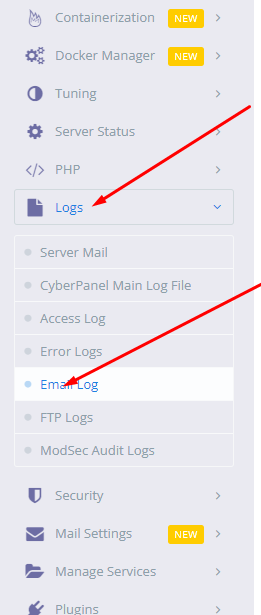
login to cyberpanel go to the dashboard
Click on logs and the email logs
When you need to check:
Use Email Log to find and review email messages that people in your organization send and receive. You can find all messages within a specific time range, or search for messages by sender, date, or message ID
How does Cyberpanel Remote Backup work?
Cyberpanel Remote Backup
Cyberpanel remote backup stores files on another server. This helps to retains the files from the loss or any other attack. That provides users with a system for the backup, storage, and recovery of website files.
Procedure to Perform Remote Backup
Setup a Remote server
Enable API access
Setup Remote backup
Setup a Remote server
Organize a remote server which you want to use for the backup purpose. Create a new server with cyberpanel (Remote server)
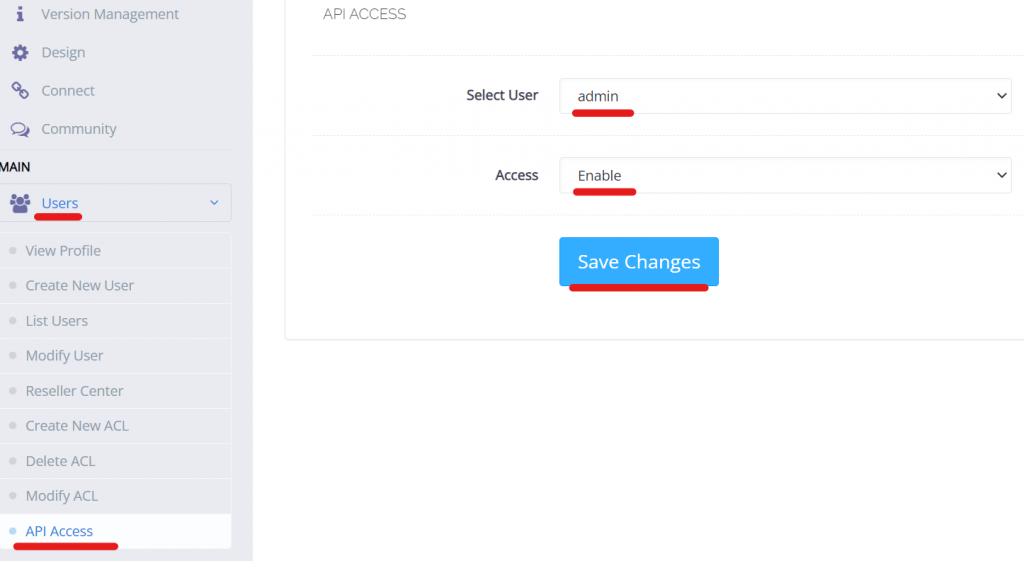
Enable API access
Go to Cyberpanel where you are managing your websites
Open Users –> API Access->
Setup a Remote backup.
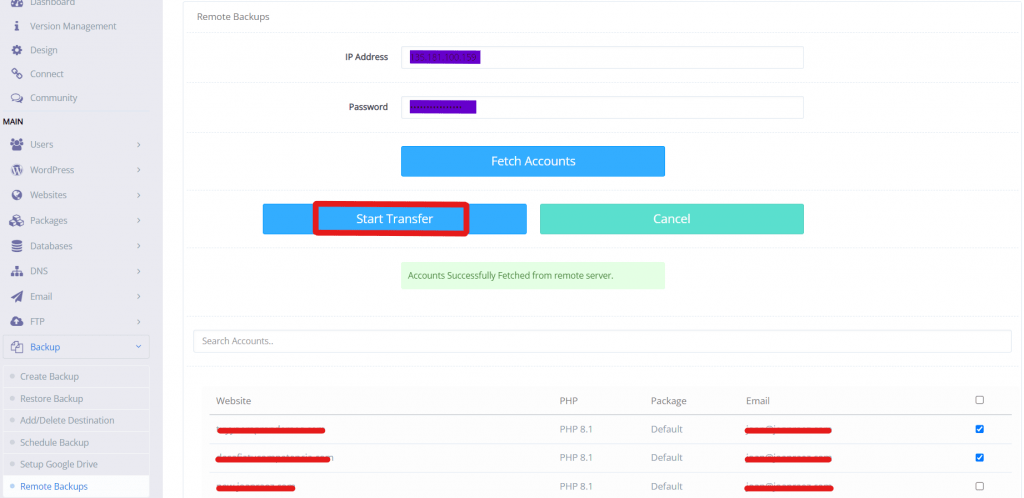
Open a remote server
Go-To Backup–>Remote backup
Enter the Server IP Address and Password of the server where the domain exist
Fetch Record from that server .
Select the website for which you want to create backup. (You can also choose multiple sites)
Then click on Start Transfer.(I will take some time if the size is large)