Warning: Redis::get(): php_network_getaddresses: getaddrinfo for localhost failed: Name or service not known in /home/solveddoc.com/public_html/wp-content/plugins/litespeed-cache/src/object-cache.cls.php on line 674 WordPress Techniques Archives - Solveddoc
How WordPress automatically approving comments?
Comments are a very important part and a way to increase engagement with your site. some sites allow auto commenting and some sites don’t allow that both have their own views about this In this article, we will learn about WordPress automatically approving comments. how is WordPress automatically approving comments enabled?
What are WordPress comments?
In WordPress, a comment is a message left by a reader or visitor on a blog post or page. Comments allow readers to engage with the content on a WordPress site, and can be a useful way for the site owner to gauge reader reactions and gather feedback.
When a reader leaves a comment on a WordPress site, it is added to the comment section at the bottom of the post or page. Site owners can moderate comments, approving or deleting them as necessary, and can also allow readers to reply to comments, creating a threaded conversation.
What are the benefits of commenting on the site?
There are several benefits to allowing comments on a website:
Increased engagement: Comments allow readers to engage with the content on a site and share their thoughts and opinions. This can create a sense of community and encourage readers to return to the site in the future.
Feedback: Comments provide a way for readers to give feedback on the content on a site. This can help the site owner understand what readers like or dislike about the content, and make improvements accordingly.
Search engine optimization (SEO): Fresh, unique, and high-quality content can help improve a site’s search engine rankings. Allowing comments can encourage readers to add their own thoughts and ideas to a post, which can help increase the overall word count and add fresh content to the site.
Social proof: Comments can serve as social proof, showing other readers that the content on a site is valuable and worth reading. This can help increase the site’s credibility and authority.
Increased exposure: Allowing comments on a site can help increase the site’s visibility on the web. When readers leave comments, it can generate more links to the site, which can help improve the site’s search engine rankings.
Why we allow WordPress automatically approving comments
There are a few reasons why you might want to allow WordPress to automatically approve comments:
To save time: Moderating comments can be a time-consuming process, especially if you receive a large volume of comments on your site. Allowing WordPress to automatically approve comments from trusted commenters can save you time and allow you to focus on other tasks.
To encourage engagement: Allowing comments to be automatically approved can encourage readers to leave comments, as they will see their comments appear on the site more quickly. This can increase reader engagement and help create a sense of community on your site.
To reduce spam: By automatically approving comments from trusted commenters, you can help reduce the amount of spam comments that you need to deal with. You can also use a plugin like Akismet to help filter out spam comments.
To keep the conversation flowing: If you receive a lot of comments on your site, allowing comments to be automatically approved can help keep the conversation flowing and prevent delays in the approval process.
However, it’s important to note that you should still regularly check your comments to ensure that they meet your site’s guidelines and are appropriate for your audience.
Why we do not allow WordPress automatically approving comments
There are a few reasons why you might not want to allow WordPress to automatically approve comments:
To maintain control: By manually approving comments, you can have more control over the content that appears on your site. This can be especially important if you have a high-profile website or if you are concerned about maintaining a certain image or tone on your site.
To prevent spam: While using a plugin like Akismet can help filter out spam comments, manually approving comments can give you an extra level of control over the comments that appear on your site.
To ensure quality: Manually approving comments can allow you to ensure that the comments on your site are of high quality and add value to the conversation. This can help create a more positive user experience for your readers.
To protect sensitive content: If you have a site that discusses sensitive topics, manually approving comments may be a good way to ensure that inappropriate or offensive comments do not appear on your site.
How to approve comments automatically in WordPress?
To approve comments automatically in WordPress, you can follow these steps:
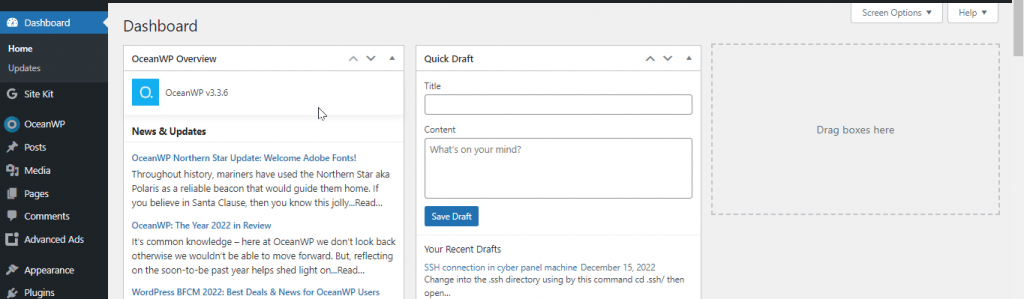
Log in to your WordPress dashboard.
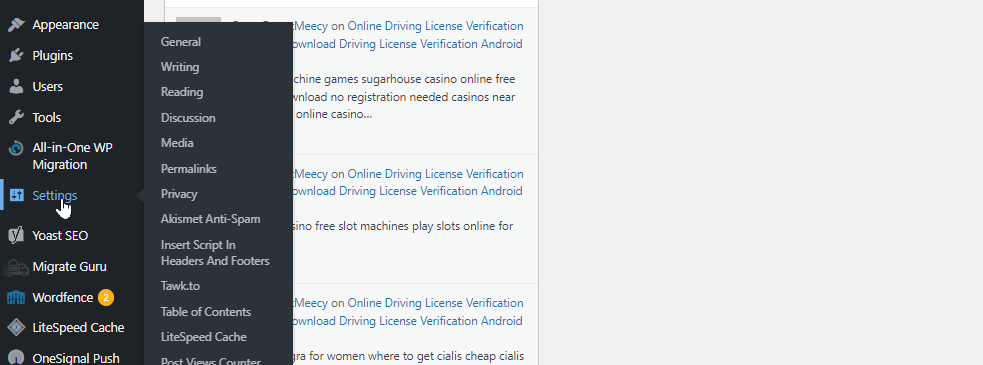
Click on the “Settings” option in the left-hand menu.
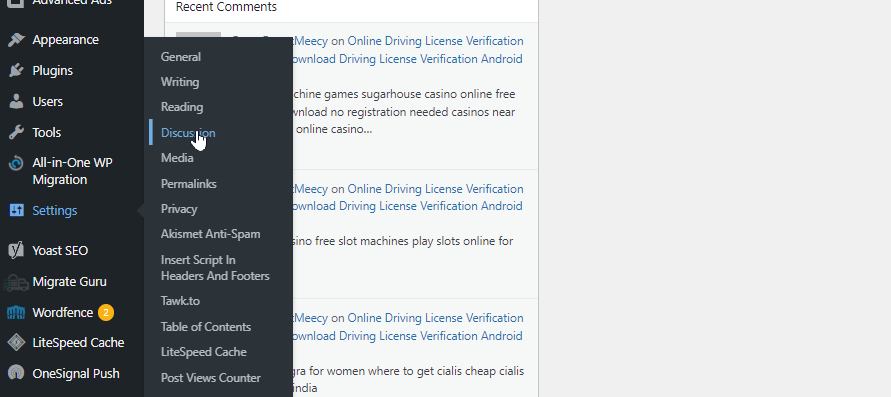
Click on the “Discussion” submenu item.
Scroll down to the “Before a comment appears” section.
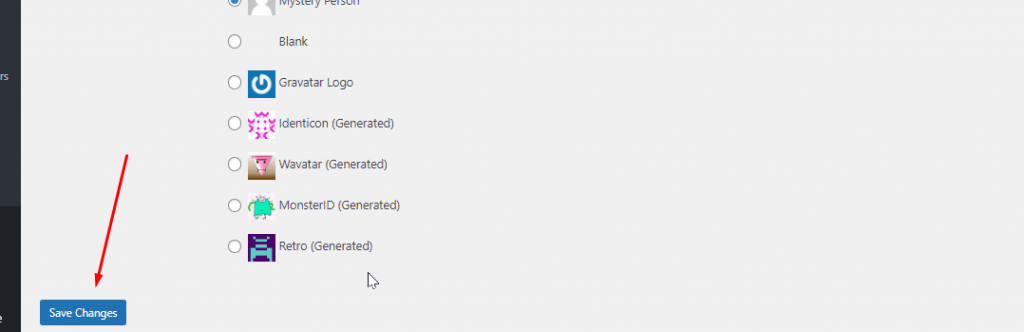
Under “Comment Moderation,” uncheck the box next to “An administrator must always approve the comment.”
Scroll down and click the “Save Changes” button.
With these settings, comments from trusted commenters will be automatically approved, while comments from new commenters will be held for moderation. You can also use plugins like “Akismet” to automatically filter spam comments.
Last Words:
Ultimately, whether or not to allow WordPress to automatically approve comments is a decision that will depend on your specific needs and goals for your site. Comments can be enabled or disabled for individual posts or pages, or for the entire site. Site owners can also set comment moderation options, choose whether or not to allow anonymous comments, and customize the look and feel of the comment form.
If you allow comments automatically or not but you need a firewall on your WordPress site and here are some firewall plugins.
How to Center the Page Title in WordPress?
To center the page title in WordPress, you can use the following steps:
Log in to your WordPress dashboard and go to the page that you want to edit.
Click on the “Edit” button to enter the page editor.
In the page editor, click on the “Text” tab to access the HTML code for the page.
Find the code for the page title. It should look something like this:
<h1 class="entry-title">Page Title</h1>
Add a style attribute to the h1 element and set the text-align property to center, like this:
Click the “Update” button to save your changes. The page title should now be centered on the page.
If you want to center the page title on all pages, you can add the same style attribute to the h1.entry-title element in your theme’s stylesheet (usually style.css).
Please note that the exact steps may vary depending on your theme and WordPress version. If you’re having trouble centering the page title, you may want to consult your theme’s documentation or reach out to the theme developer for support.
In WordPress, the index.php the file is the main template file for your website. It controls the display of the main content area of your website, and it acts as a fallback template if other templates are not available. we will discuss all information related to WordPress index.php in this blog.
The index.php the file is used to render the home page of your website if you have not set a static home page. It is also used to display the blog page if you have set your front page to display static content and your posts page to display your latest blog posts.
The index.php the file is located in the root directory of your WordPress installation and it is a part of the theme you are using for your website. You can edit the index.php file to customize the way your home page and blog page look. However, it is generally recommended to use a child theme or a custom plugin to make changes to your website, as changes made directly to the index.php file may be lost when you update your theme.
WordPress index.php location
In WordPress, the index.php file is located in the root directory of your WordPress installation. This is the directory where you installed WordPress, and it is typically called “wp-content” or “public_html” on most hosting platforms.
To access the index.php file, you can use a file manager tool provided by your hosting provider or connect to your website via FTP and navigate to the root directory of your WordPress installation.
Once you have located the index.php file, you can edit it using a text editor. It is generally recommended to use a child theme or a custom plugin to make changes to your website, as changes made directly to the index.php file may be lost when you update your theme.
index.php content in WordPress
The index.php file in WordPress controls the display of the main content area of your website. It is a part of the theme you are using for your website and it acts as a fallback template if other templates are not available.
The index.php file typically includes code to display the header, footer, and sidebar of your website, as well as the main content area. The main content area is usually populated with posts or pages from your WordPress website, depending on the settings you have chosen for your home page and blog page.
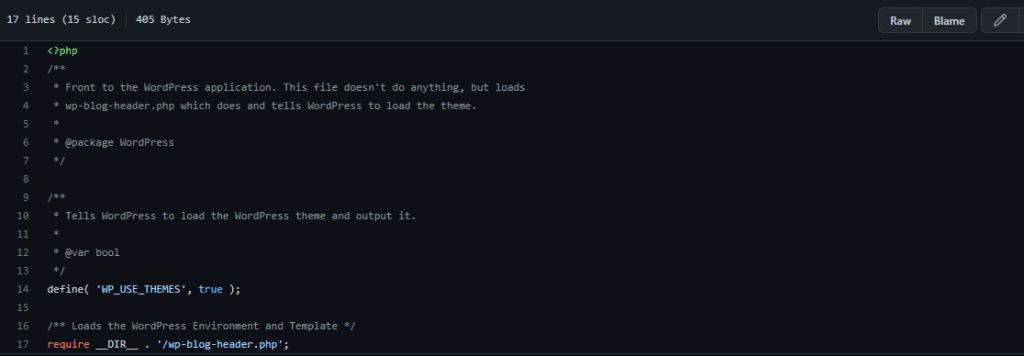
Sample code:
Here is a simplified example of the basic structure of an index.php file in WordPress:
<?php

get_header();

if ( have_posts() ) {
  while ( have_posts() ) {
    the_post();
    the_content();
  }
}

get_sidebar();
get_footer();
This code will display the header, footer, and sidebar of your website, and it will loop through the posts or pages on your website and display their content in the main content area.
You can customize the index.php file by adding or modifying the code that controls the display of your website. However, it is generally recommended to use a child theme or a custom plugin to make changes to your website, as changes made directly to the index.php file may be lost when you update your theme.
If you are working on some kind of customizations or developing some kind of theme or plugin in thing in WordPress you must have to read this. here we will discuss how WordPress get blog page permalink works.
WordPress development is made easy for developers due to its built-in functions. If you want to know how to get the blog page URL in WordPress this article is for you.
Details of wordpress get blog page permalink function:
In simple words, this function is used to get the URL or permalinks of one WordPress post to another post.
Syntax:
get_blog_permalink( int $blog_id, int $post_id ): string
Create a post in WordPress is the first and the starting step in blogging and even all fields if you want to start a blogging website then this will be the first thing you need to do. Although to create a post in WordPress is a very easy and steps process.
For creating a post in WordPress user should follow these steps:
Step 1: login the site “WordPress Dashboard“.
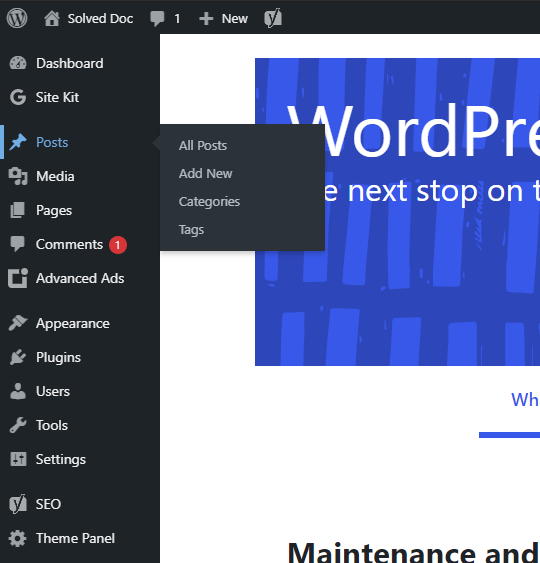
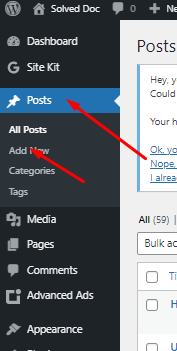
Step 2: click the posts icon on the left side display in navigation menu.
Step 3: Four options will appear. So the user click Add new button on the Posts page for creating a new post.
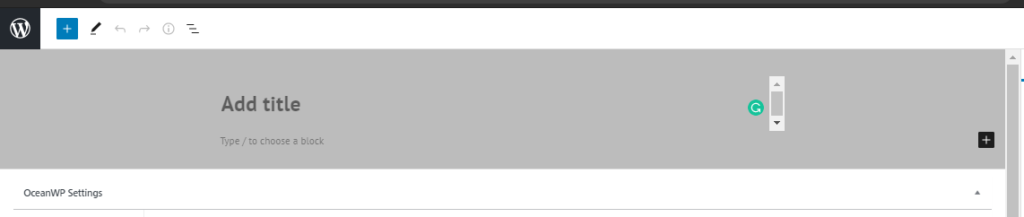
Step 4: Enter the title in a title bar it will appear on the top of the post.
Step 5: After giving the title, type content in a content bar. Users can format the text of content using an editor, like users can bold italic and also change colors of text.
Step 6: The user can also add images. The user can add an image with the help of the “Add Media button”.
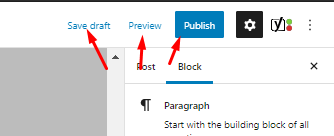
Step 6: when the user has entered the information in the posting user can click the publish button. Then the post is displayed on our website.
Step 7: User can also click on save draft to save the information if user does not want to publish his post publicly.
When you want to do some work with WordPress the first step is to write a blog post in WordPress. To start writing a post in WordPress is a very easy process. In this article, I am going to tell you how you can write a post in WordPress.
When someone new starts a new blog or any type of other site using WordPress. So you must have knowledge about creating and managing posts with WordPress. This is one of the cores and basic requirements of WordPress.
So before going to do anything else in WordPress you just have to know how to create a blog in WordPress. As blog or post always have a great impact on the site ranking, site SEO, and all.
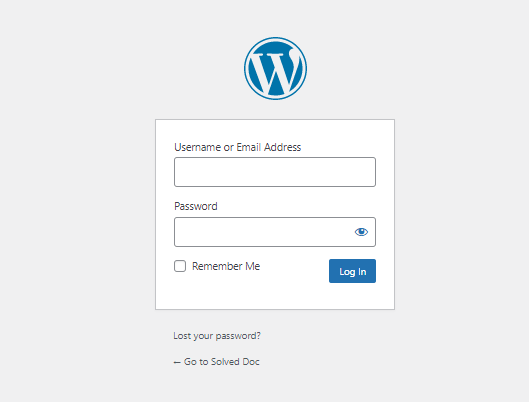
Login to your WordPress:
First of all, you have to log in to your WordPress admin dashboard. Normally your WordPress admin dashboard access is on:
https://www.yourwebsit.com/wp-admin
if you have any custom login link for the WordPress admin dashboard you can visit that and provide the user name and password to log in.
Login to your WordPress:
Create a post in WordPress:
Once you logged in now you can see a lot of options in the left side menu of the WordPress dashboard.
Go to the Posts-> Add new Post option in the left menu.
Create a post in WordPress
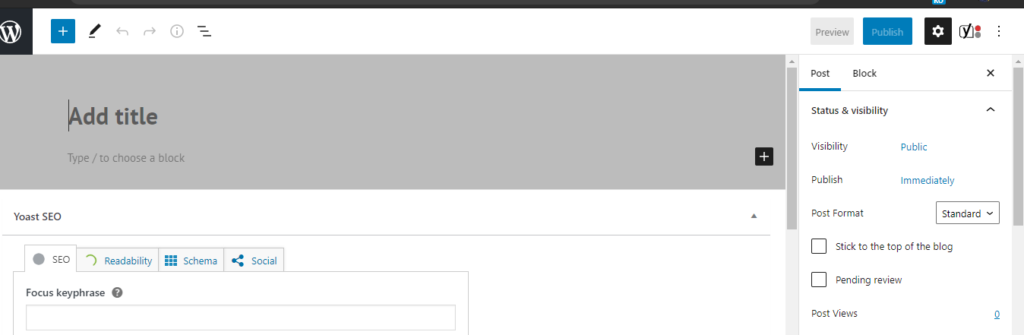
Once you click there this will redirect you to the posting page where you can write the post according to your choice and content.
On this page, you can write the content on the main page, and on the right side, you can see a lot of options like some important are Categories, tags, featured images in the post tab.
You can add categories to your posts, tag, and also set featured images to your posts.
Save post:
In WordPress, you can also make posts to draft and you can also publish them once.
But as you know one post needs many reviews so you have to save it to draft and maybe you have to preview it many times and after all, you can publish a zero error post. so these all buttons and options are present on the top of the right site on the posting page.
How to force redirect HTTP to HTTPS website in CyberPanel?
In this article we will tell you how to force redirect HTTP to HTTPS website in CyberPanel?
What is HTTP?
HTTP stand foe Hypertext Transport Protocol. When you enter http:// in your address bar in front of domain, it tells the browser to connect over HTTP. HTTP use TCP(Transmission control protocol), generally over port 80, to send and receive data packets over ther web.
What is HTTPS?
HTTPS stands for Hypertext Transfer Protocol Secure (also referred to as HTTP over TLS or HTTP over SSL). When you enterhttps://in your address bar in front of the domain, it tells the browser to connect over HTTPS. Generally sites running over HTTPS will have a redirect in place so even if you type inhttp:// it will redirect to deliver over a secured connection. HTTPS also uses TCP (Transmission Control Protocol) to send and receive data packets, but it does so over port 443, within a connection encrypted by Transport Layer Security (TLS).
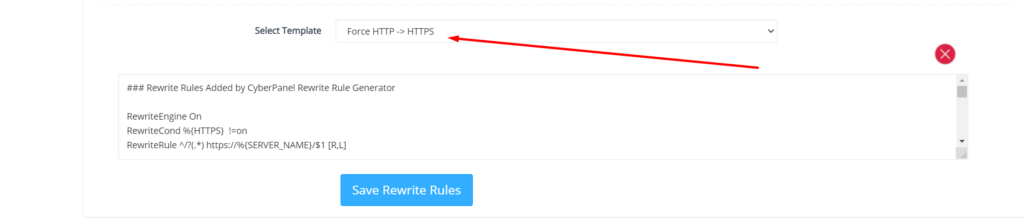
Redirect from HTTP to HTTPS
if you forcefully redirect your website HTTP to HTTPS in Cyberpanel, you will need to add a rewrite rule to that website in order to have it automatically forward to HTTPS instead of HTTP.
In CyberPanel you can forcefully redirect HTTP to HTTPS website using rewrite rules.
To add this:
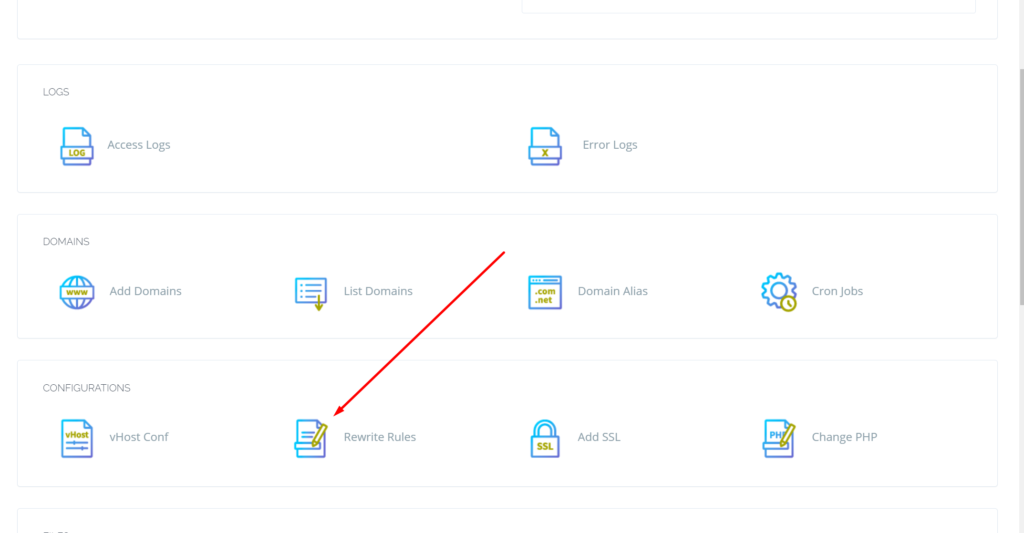
Force redirect HTTP to HTTPS website in CyberPanel:
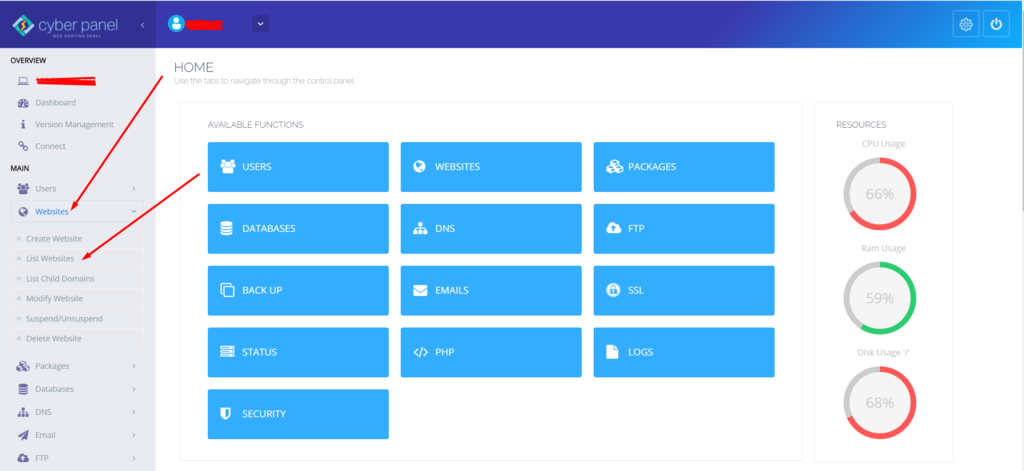
Select Websites on the left menu
2. Choose the SSL enabled website from the list
3. Select “Rewrite Rules” in the Configuration section
How to fix Fix WordPress 404 permalink OpenLiteSpeed- 404 error on OpenLiteSpeed
If you host your WordPress websites with OpenLiteSpeed you may get a 404 error on the permalink of your website. here in this article, I will explain how you can fix ix WordPress 404 permalink OpenLiteSpeed.
OpenLiteSpeed is the free version of LiteSpeed Enterprise and this free version is not as stable as the paid version. Not OpenLiteSpeed WordPress permalink often gives 404 error. When you move site from one server to another or made any change this error comes up. Here i will discuss few methods to solve this issue.
Methods to fix WordPress 404 permalink OpenLiteSpeed:
Method 1 Fix Permissions:
If you are using CyberPanel and you did any change of website after that 404 error come to the site you can fix it by doing few thing.
Fix permissions from the file manager
Restart OLS
Fix Permissions from the file manager:
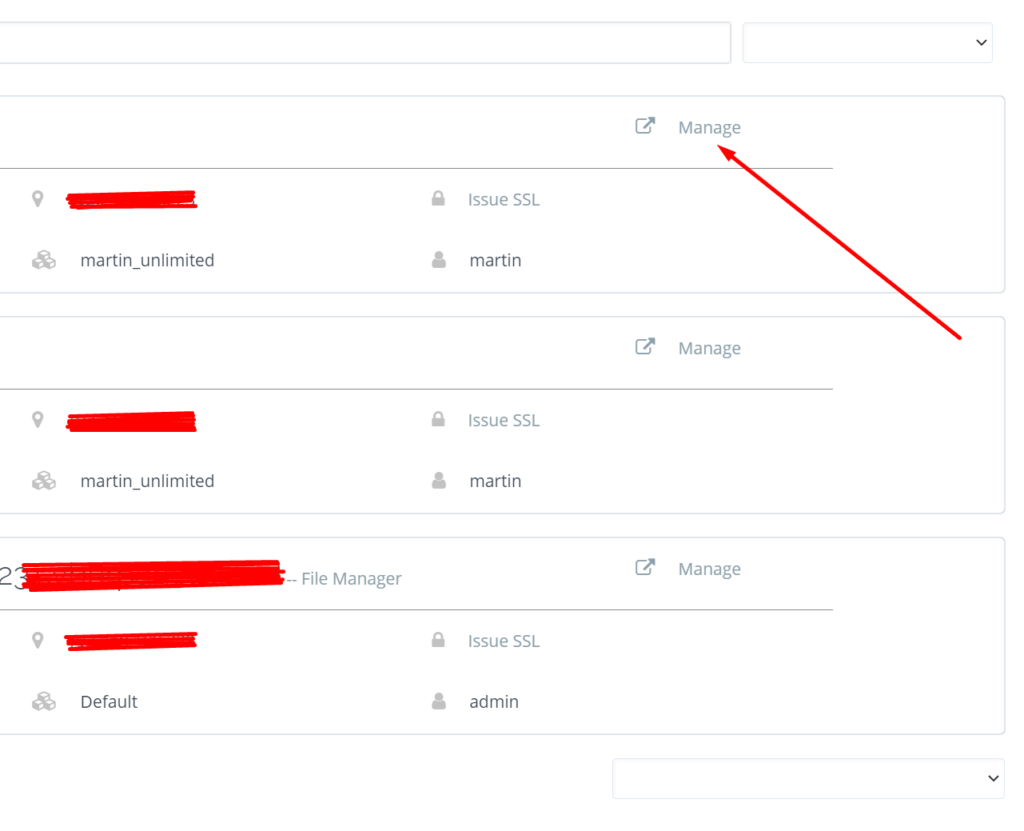
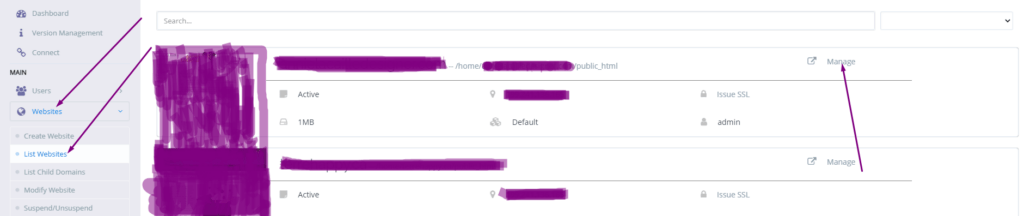
To fix permission you have to log in to your cyber panel then go to the Websites-> List website select the domain for which you have to fix the issue then press the Manage button present in front of the website.
Manage Website
On the Website Dashboard you can see File Manager press to access the file manager.
File Manager
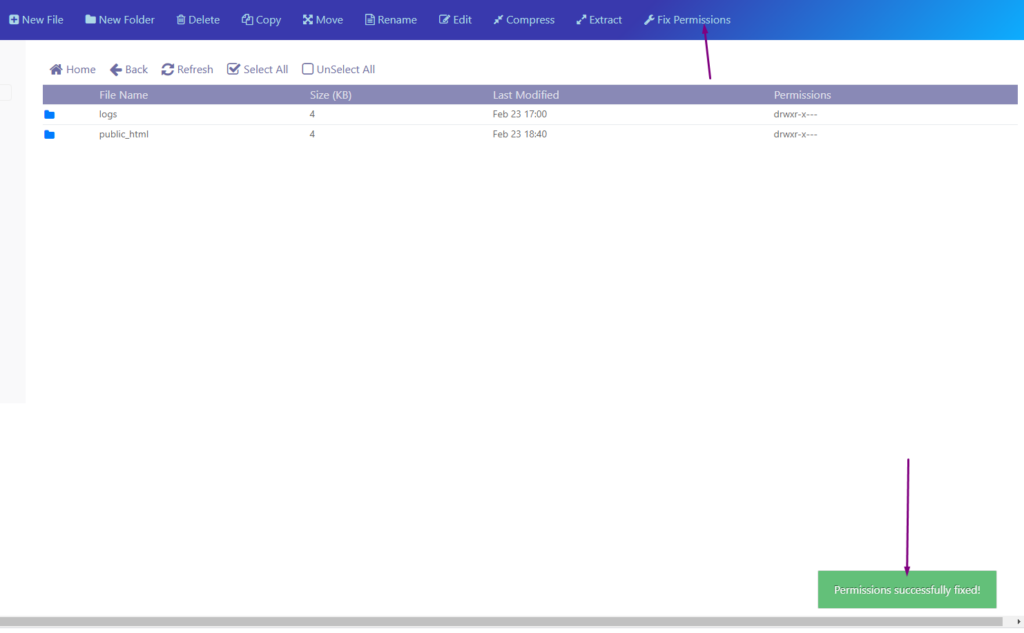
In file manager click Fix Permission button and you can see the success massage in green color.
Fix Permission
After doing all now its time to restart OLS.
Restart OpenLiteSpeed:
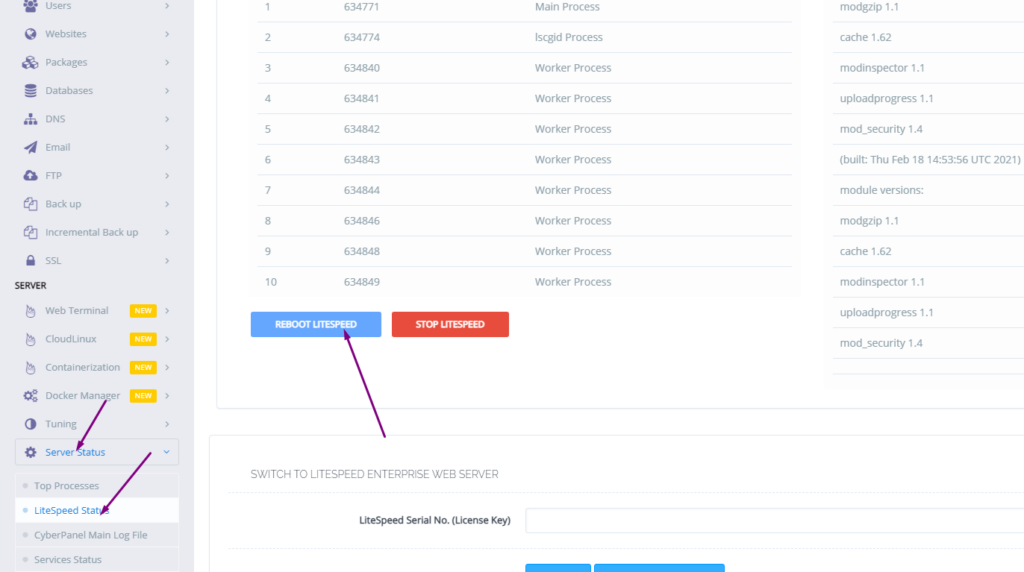
To restart OLS from CyberPanel you have to go on Server Status ->LiteSpeed Status and then you see two-button shutdown and reboot. Press the Reboot button and you can see a success message.
Restart OpenLiteSpeed:
Method 2 htaccess:
An other reason is the missing rules in htaccess for WordPress. To check htaccess rules. Go to the Public_html folder of the website. If you have CyberPanel go to the Website->List Websites then press Manage button.
Then go to the file manager from the Website Dashboard.
File Manager
In file manager open and open .htaccess file and see if there is rules or if the file is empty.
Do you know now from CyberPanel version 2.0.3 you can install Redis on your server using one click? Here we will tell you one-click Redis install through CyberPanel.
Now CyberPanel made the installation and use of Redis cache on your server very easy.
Redis is an open-source cache used to cache databases, and is used as a message broker. Nowadays it is very important to use cache and boost your website. CyberPanel helps you to do this.
One-Click Redis install Through CyberPanel:
Follow these steps to setup Redis on your server.
Login to CyberPanel
One-Click Redis Install
Install Redis PHP extension
Setup Redis on WordPress using LS Cache
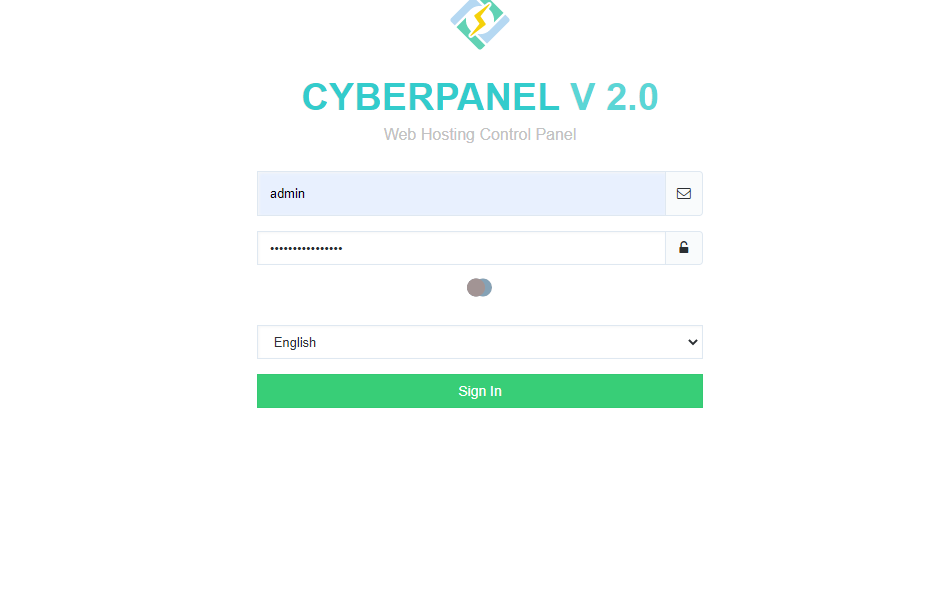
Login to CyberPanel:
Login to your CyberPanel using the credentials. Follow the link with port 8090.
https://<Your_IP>:8090
CyberPanel
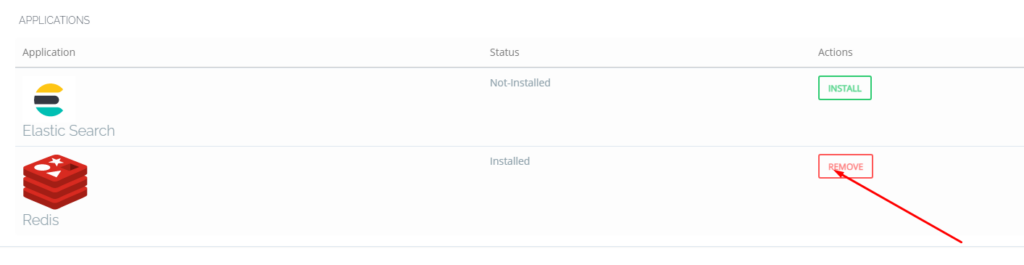
One-Click Redis Install:
To install Redis on your server you have to go to the Manage Services->Application -> Redis then you can see the install button there. Click that and your Redis installed.
Now your Redis is installed and you have to install PHP extension to run properly.
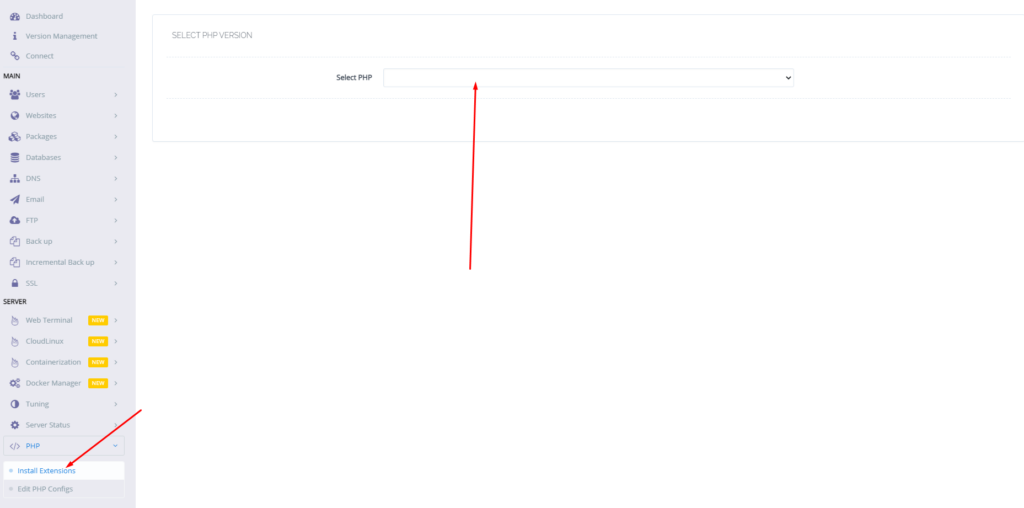
Install Redis PHP extension:
Now go to the PHP-> Install Extension Then you have to select PHP version for which you want to install Redis Extension. You can also follow this link.
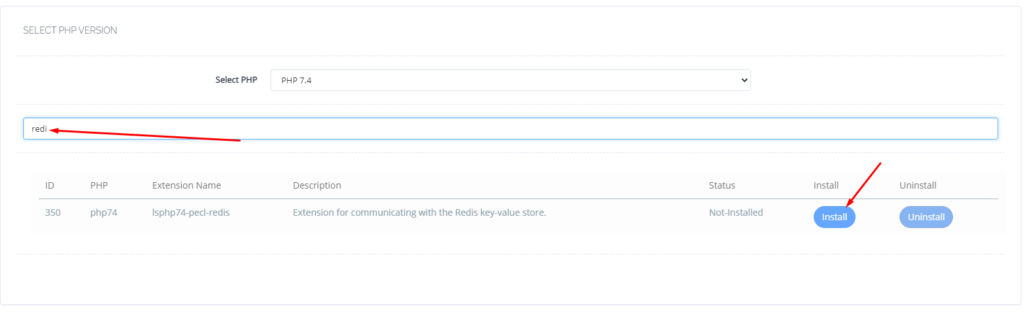
Now search redis on the search bar and you can see redis PHP extension press the Install button and everything is good to go.
Redis
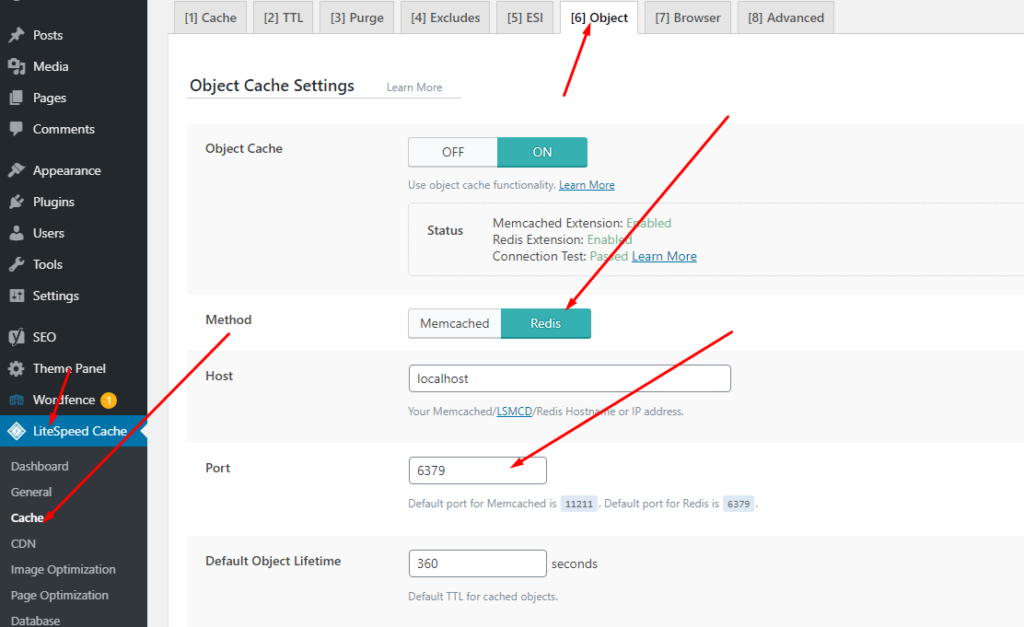
Setup Redis on WordPress using LS Cache:
Now it’s time to setup Redis on your WordPress site. We will tell you here how you can setup Redis on your WordPress site without any extra plugin. Ls cache plugin will all do for you. Let’s begin how to do.
How to Install and Setup Wordfence Security Plugin in WordPress
Do you want to secure your website from hackers? You want a secure website? Do you want to install and setup Wordfence Security Plugin to make your website more secure?
If you need anything above here in this article you will get all this information.
Wordfence Security is the most popular WordPress Scanner and Firewall. Wordfence uses to scan, remove malware, firewall again attacks, IP securing, 2FA login, etc.
You have to follow these steps to install and setup Wordfence in WordPress:
Install and Activate Wordfence
Setup Firewall in Wordfence
Scan your site from Wordfence
Login Security Setup
Other Security tools
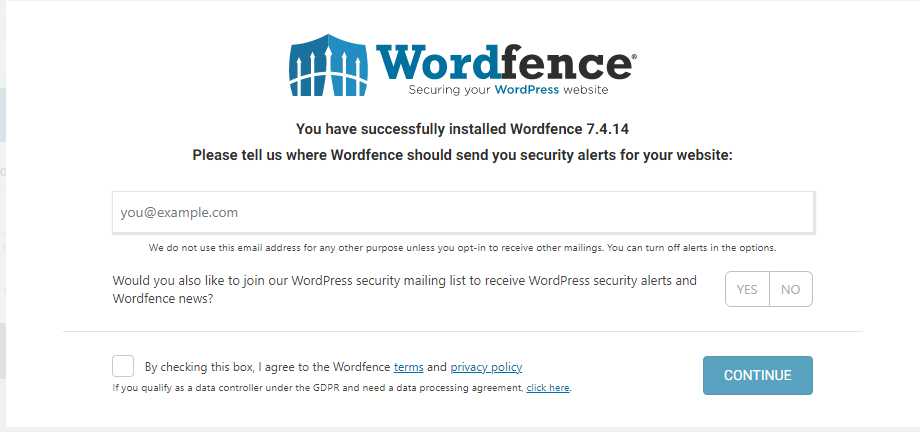
Install Wordfence Plugin:
installation of Wordfence is just like any other WordPress Plugin. You can easily install Wordfence Plugin from the Plugin directory or you can download it from the Wordfence site and upload it.
After installation activate this Wordfence security plugin to configure it.
Install Wordfence Plugin
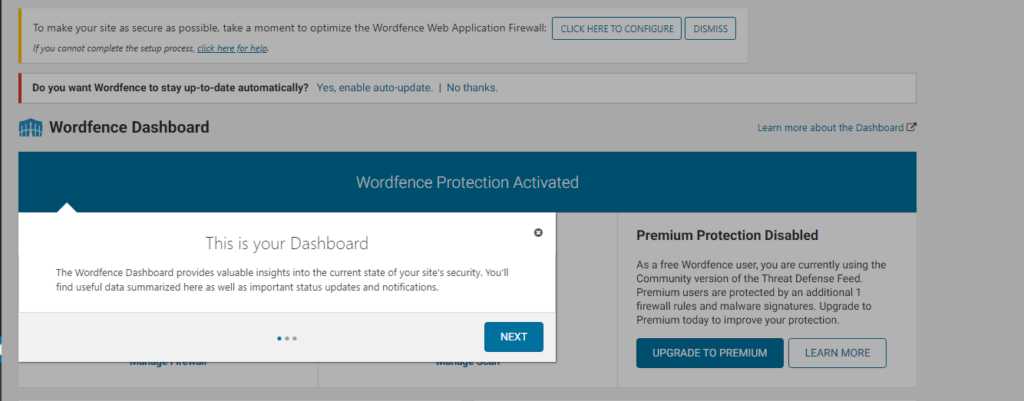
Once you completed the installation and check this privacy policy and terms link you can see the Dashboard of the Wordfence plugin by click on it from Wordfence -> Dashboard.
Wordfence Dashboard
They guide you through these steps and you can follow these but follow another part of this article in order to understand better.
Setup Firewall in Wordfence:
Wordfence Firewall saves your website from malleolus access of the website. The firewall has general real-time security and secures your website from brute force attacks on your website.
The free version of the Firewall of the workforce does most of the things for you but in the premium version, you will get all the advanced features also.
Premium versions include Real-time IP blocklist, Real-time firewall rules, and malware defense.
The firewall has two-level f protection one is basic and the other one is advanced level protection. The basic level of protection covers the threads and attacks on the website but may miss some plugin and themes attacks. Advanced level covers all these.
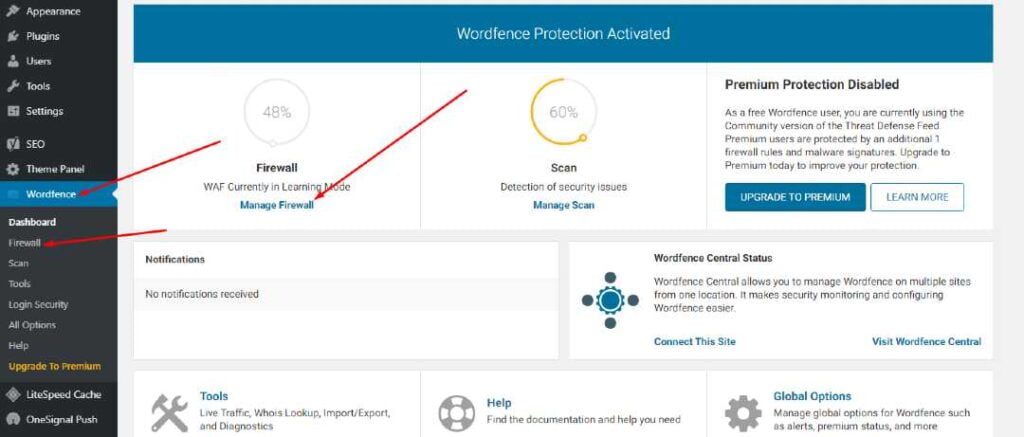
On the Dashboard page of your Wordfence plugin, you can see the firewall percentage.
Wordfence plugin
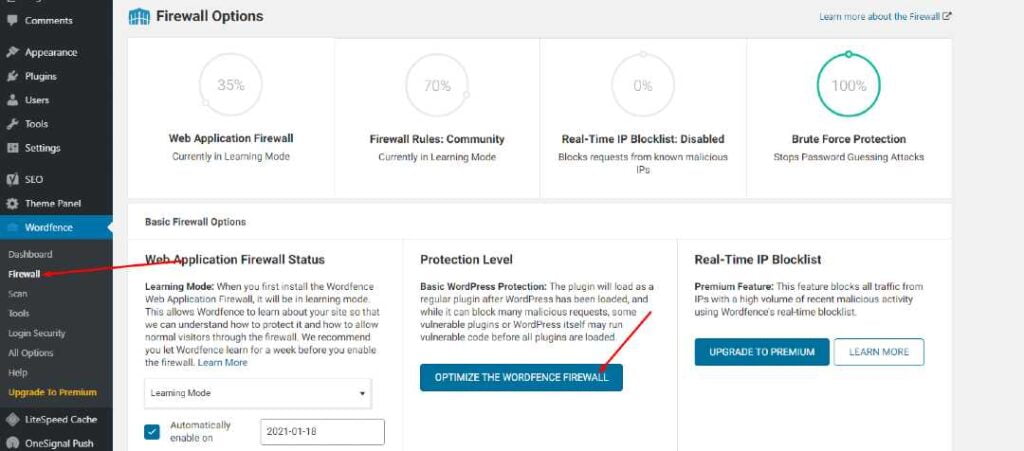
To configure your Wordfence firewall go to Wordfence->Firewall option.
Configure your Wordfence firewall
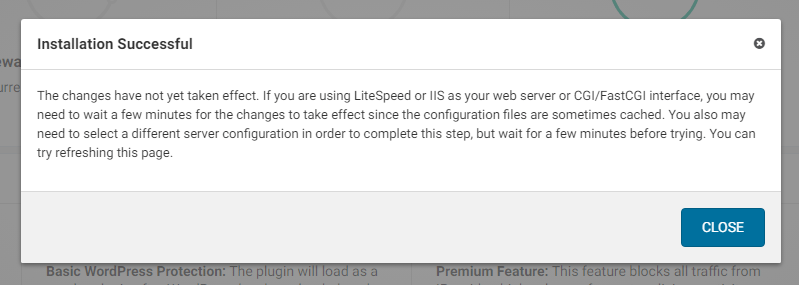
Once you click the Optimize The Wordfence Firewall you will see a notice click Continue and you can see your firewall is successfully installed.
Done
You can also see extended mode is enabled. if you check your firewall performance is also increased.
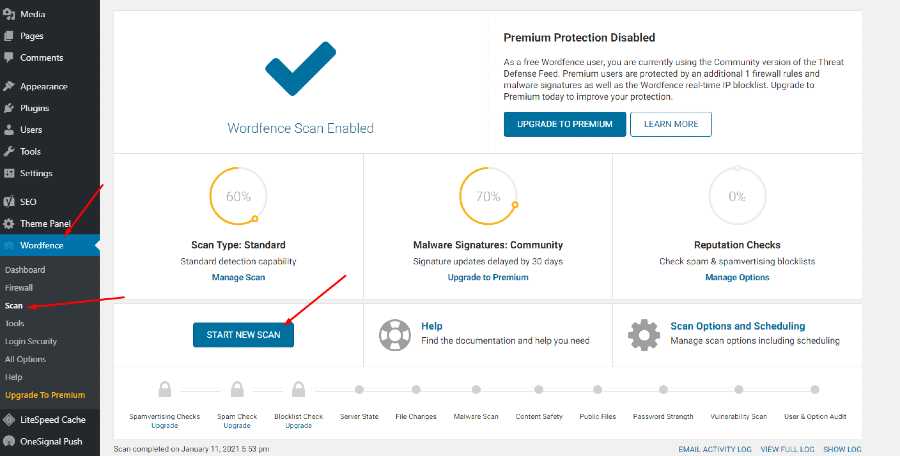
Scan your site from Wordfence:
You can scan your website using the Wordfence security plugin. To scan your website go to the Wordfence->Scan->Start Scan.
Scan your site from Wordfence
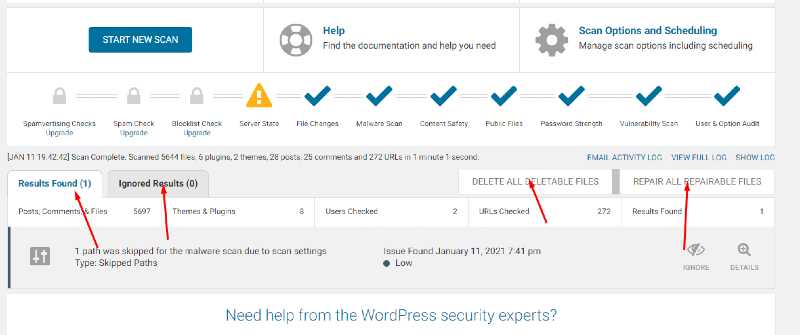
After clicking start scan you can see that your site starts scanning and now wordfence goes into the file of your WordPress site.
Basically, wordfence goes into the files of your websites and scans all the files present on your website directory. Note all changes that happen in that file and write those on your screen.
Wordfence tells you that which issue and changes of files are critical, which are ignorable, which files need to delete and which can be ignored.
The scanning process does not go into just one step it complete in a number of steps.
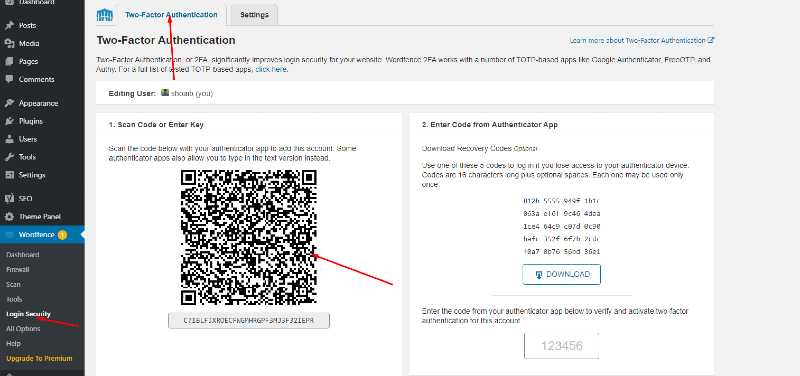
The coolest feature of worfence is that it has a Login security feaster also use this plugin you can set 2FA. Now your question is how to set up a 2FA login using wordfence security plugin?
To set 2FA login go to the Wordfence->Login->2FA scan code.
Login Security Setup
You can also go to settings and check for the other settings too like whom you want to 2FA for.
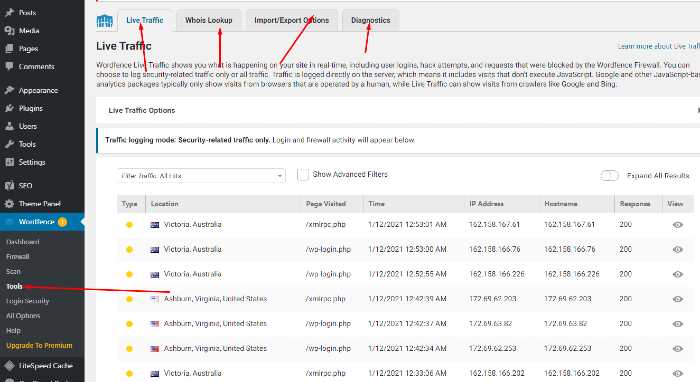
Other Security tools:
There are also other security tools like Live traffic, Whois Lookup, Import/Export Options, and Diagnostics.
These option also help user in security as well as performance.
Other Security tools
Security of your website is very important you have to secure your website no matter you use this plugin or use any other matter but the point is your site must be secure.
From this guide, How to Install and Setup Wordfence Security Plugin in WordPress you got a good idea to configure your Wordfence plugin with your website.