Warning: Redis::get(): php_network_getaddresses: getaddrinfo for localhost failed: Name or service not known in /home/solveddoc.com/public_html/wp-content/plugins/litespeed-cache/src/object-cache.cls.php on line 674 Home - Page 14 of 15 - Solveddoc
How to create an AdMob account?
If you want to earn from your Android and IOS application then you can use AdMob. The question is how to Signup on AdMob Account?
In order to make money from your application first, you need to know how to create an AdMob account. In this article, I will show you a detailed method to signup on AdMob.
I will tell you the process step by step so you can understand the method in a better way.
Go to this LINK And press Get started OR Signup button on the screen.
2. If you access this link in a browser where you have already login with a Google account you will receive this screen. Where they ask you to verify your account click Next.
3. Place the password and Click the Next button.
4. Now place all the required information in this step.
country or territory
Time Zone
Billing currency
Check the agreement
Click the CREATE ADMOB ACCOUNT button after adding all information.
5. Check the email notifications for your account. And continue to next screen.
6. Your account is created and ready to to use. Click Get stared to create units on your AdMob to earn.
How To create AdMob Units:
the main part is to create AdMob units on google admob account. Follow the steps to do so.
Click on the Apps in left menu and the click Add Your First APP.
2. After clicking Add Your First App you will receive a screen that ask you about the application is on the play store or not. Press Yes or No
3. I press No on the next screen you have to put some details.
App name
Android or IOS
After providing these details press ADD.
4. Now finally you reach at the point where you can create ADD UNIT. Press Create Ad Unit button.
5. You have to chose the ad format which you want to create and add to your Application like i go for Banner.
6. Add name for ad unit and Press the create button.
Your admob units are created successfully. If you want to create an other unit press CREATE ANOTHER AD UNIT Or press done.
If you want to view ad units of any specific app you can go to Apps->App name->Ad Units and from here you can add a new ADD unit from here also.
Add Payment Information:
On a new AdMob account without payment information, your ads did not go live. You have to add Payment information in order to proceed. For this follow these steps:
Go to the Payments-> Setup Payment
Add the following required information on Payments Page:
Please provide a valid address and passcode because your approval depends upon this. After providing all details press SUBMIT and you can see this screen.
And on Home you can see this massage that your account is being verified Please wait untill they verfiy your account.
Once your account is versified you will receive a verification email. And your adds goes live after verification.
How to Create a Website and install WordPress on CyberPanel one-click installation?
In this article, I am going to tell you how to install WordPress on CyberPanel. This article is about the one-click installation of WordPress on CyberPanel.
I will briefly describe how to create a website on CyberPanel. And then we will go toward the installation of WordPress on CyberPanel. The main theme is how you can create a website and install WordPress on CyberPanel.
if you are new on CyberPanel and want to know the basic Information and usage of CyberPanel then do not leave the article i will explain some basic at the end of article.
Creating a website on CyberPanel is very simple and easy. Here the all steps to create a Website on CyberPanel are listed.
Go to the Websites-> Create Website Option in CyberPanel Menu:
Can navigate to this ULR to Create new web site:
https://your_IP:8090/websites/createWebsite
Provide the following details here
Select Package (Default )
Select Owner (Admin or any other)
Domain name (example.com without www)
Email (Your email address (youremail@xyz.com))
Select PHP (Latest is recommended )
SSL (Always check)
DKIM (Always check)
Open Basedir Protection (Check )
Create Mail Domain (Check if you want to you on same server)
After providing all information press Create Website Button. It will take sometime to complete and will show the confirmation massage once its Done.
How to install WordPress on your domain from CyberPanel?
When creation of your website on cyberpanel is done. Time to install WordPress on that site using CyberPanel. Just Follow these steps and do it quickly.
Go to the Websites-> list websites
Can follow this URL to list all websites
https://your_IP:8090/websites/listWebsites
2. Click the Manage button to navigate to the manage website dashboard
Navigate to this URL to list all websites
https://your_IP:8090/websites/listWebsites
3. On the management dashboard to the last section there you found WordPress click on that.
You can also get access the dashboard through this Url
https://your_IP:8090/websites/yoursite.com
4. Once you click this button now you can see a screen asking for the WordPress details.
How to migrate WordPress Site using Migrate Guru Step by Step guide
Do you want to transfer your site from Local to live server? Do you want to create a clone of your site? Do you want to migrate your site from one server to another server? the question is How to transfer your website to another host?
So you are in the right place. In this article, I am going to tell you how to migrate the WordPress site using migrate Guru.
This guide helps you to migrate WordPress site using migrate guru from local to live, from one live server to another live server, from one domain to any other domain and all.
But first of all, I am going to add some information about the Migrate Guru plugin. So before going deep you have some knowledge about the migrate guru plugin.
Migrate Guru made the WordPress migration on click migration. You just need to enter the details of remote server (host) and click to processed.
Migrate large site:
Migrate Guru allows you to migrate large sites even the large as 200 GB. There is no limit for transfer. Large site migrations usually fail because of live-site server import limits.
No addons:
You don’t need any add-ons to move multi-sites. You know that sometimes we need add-ons to migrate multi sites from one place to another.
No space required for migration:
As the migration process of the wordpress site is done on there server so no extra space need for the migration process.
After the migration is complete, the copy is erased.
Compatible with almost every host:
Migrate guru plugin is compatible with a large amount of web hosts. you can see them when you are going to perform migration. Like FTP, BLUEHOST, GoDaddy, A2 hosting, etc.
Fully Automatic:
The process of migration is fully automatic and you didn’t need to perform any task manfully. Migrate Guru will take care of each and every thing.
Timely alters:
The main thing that i like about them is timely alerts. They alert instantly when the process began and inform immediately when the process complete.
Step-by-Step Guide to Migrate Your WordPress Site to a New Host
Follow these steps:
Install Migrate Guru
Setup site where need to move
Move Site using Migrate Guru
Install Migrate Guru:
To install migrate guru Go to the Plugins-> add new
Type migrate guru into the search bar and install this one.
Activate migrate guru by pressing the activate button.
Your migrate guru is installed and activated you can see the Migrate Guru in the menu.
Video link
Setup WordPress site where need to move:
Migrate Guru migrate WordPress site from one server to another. For this process, we need to create the WordPress site on the other server to make the migration possible.
Simply Go to the control panel or the environment that you are using to create a new website there and then install the WordPress on that website.
You need to create a just simple WordPress site.
For FTP transfer:
For the transfer through FTP create an FTP account also on your host provider. different host provider has different methods to create FTP account.
Move Site using Migrate Guru
Noe the phase to transfer the site from one place to another started. Follow these steps to migrate the site.
Step1: Start Migrate Guru:
Click the migrate guru from the menu and provide details write your email, check the agreement and press the migrate button.
Setp2: Select your Server:
Now select your host from here to transfer site. I selected FTP to show you how to transfer through FTP. You can go with others.
Step3: Provide detials to tranfere:
Provide all the required details for the transfer. The following details and press migrate
your domain
your host IP
FTP user name
FTP account password
Path as(public_html)
After this, you can click the migrate and go to the migrate WordPress site using migrate guru. You can see the screen that show the process of migration.
At the beginning and end of the migration. Migrate Guru will send you email there are very good in timely updating.
Migrate Guru is a free Plugin powered by BlogVault. Migrate Guru plugin helps you to migrate your site from one place to any other with out risk of losing any thing.
You can migrate even a large site in a short time using this plugin. Migrate guru makes the migration 1 click process. You have nothing to do manually migrate guru will do everything automatically.
You want to Install node js on windows 10 machine?
To start the guide to install node js on your windows 10 machine. First of all, we have to know what actually node js is. Before knowing how to install node js on your windows 10 know about the node js.
Basic node js is a JavaScript runtime environment. It simply means that the node js run-time environment includes everything you need to execute a program written in JavaScript. Now I would like to mention some points about node js for better understanding.
Node js can generate dynamic pages, can do many operation on databases and its is available for different platforms (Operating Systems).
How to Install Node js on windows 10?
In order to install node js to your windows 10 machine. You need to follow different steps.
Download Node.js
In order to install node js on your windows 10, you have to download the Node js. To do so click here or visit this link https://nodejs.org/en/download/ in your favorite browser. Here you can see this screen.
You can see the latest and current version always chose the current version from them because that is the stable one then chose the windows installer from the operating systems. you can also download:
Windows Installer (.msi) Windows Binary (.zip) Source Code
In 32 and 64 bits depending on your operating system.
Install Node js on windows 10:
Once your download completed now its time to install it on your machine to do so follow these steps:
Click on the download file and then click install.
2. You will receive a screen that asks you to run Wizard to install node js. Press Next.
3. Now accept the License Agreement. To go to the next step.
4. You can specify the location in your computer where you want to install the node js. By default its C:/Program Files/nodejs/ and leave as its and click Next.
5. In this step you can see which node js packages you are going to install and what is disk usage, and all. Click Next to proceed.
6. In this step you can allow node js to Automatically install the necessary tools. you can follow the instruction from the link given on-screen. Then press Next.
7. All setup is done Press Install to install node js on your windows 10.
Allow the installation and this installation may take some time to complete wait until the status bar show completion.
8. All done now your node js is installed and you can press Finish and go ahead.
Verification of node js installation
Once the installation process has done you need to verify the installation of your node js on windows 10. to do so just run a simple command:
npm -v
You can see the installed version it’s mean your installation is complete. Now your system is good to go.
In this article, I am going to tell you how you can install a WordPress plugin on your WordPress site. In this article, I will explain briefly how can you install any WordPress plugin on your site.
I know if you are familiar with WordPress then its not an issue for you to install any plugin. But I must say if you are an expert then this article is not for you. How to install a WordPress Plugin is for the beginner. Those who have very little knowledge of WordPress.
In this article, I am going to tell you different methods to Install any Plugin on WordPress. I will tell you a different method if one does not work for you you can go with the other one. But mostly all methods work without any issue. Lets go.
Install plugin from WordPress admin Dashboard plugin section
Install Plugin via Upload plugin method
Install plugin from WordPress admin Dashboard plugin section:
This one is the easiest and most used way to install any plugin on WordPress. Commonly most of the free plugins available here and you can easily install plugins from here. This method is a 1 click installation method. You just need to click the install button and the installation is done. Now I am going to define the installation process step by step.
Set 1: Search in Plugins Section:
The first thing to do for installation is Go to the Plugins-> Add New from the admin dashboard.
Now on the left side, you can see a search box. You have to search the name of the plugin in that search box which you want to install. Just go to that search box and write the name of plugin.
You can see I want to install an element or plugin and I wrote Elementor in the search box and the results are there.
Step 2: Install Plugin
Now its time to install your required Plugin. To do so just click on the Install Button present next to the name of the plugin that you searched.
Step 3: Activate Plugin
Once the installation is done now click the Activate button to activate the plugin.
Now your plugin is installed and Activated. Good to go.
Install Plugin via Upload plugin method:
You are now familiar with plugin installation now I am going to tell you another method to install the plugin. This method is slightly different from the first one. Let’s move toward the steps so you can understand this method.
Step 1: Download Plugin
First of all, you have to download the required plugin from a valid source. mostly free plugins are available on WordPress official sites and plugins also have there own sites to download. I am going to download elementor plugin. I just opened Google and write elementor plugin.
I prefer to download from the official site you can download from any source. From the official site click on the Get Started button
Now you can see the screen to add an email and download the zip file for the plugin. Click the download button.
Setp2: Upload and install Plugin:
Its time to log in to your WordPress admin dashboard and go to the Plugins->Add New.
Here you can see the Upload option. Click upload
Select the Plugin file from choose file option that you downloaded in the last step. Please note that your file must be in zip format.
Once file is selected now you can see install button is active click Install.
After a short time, you will see a screen that shows that your required WordPress plugin is installed. Now press Activate to activate Plugin
There are also some other methods to install plugins on WordPress but for this article, we discuss these two only.
Do you know what is WordPress? If you don’t know relax I will tell you that what is WordPress is. WordPress is an open-source and a free content Management system (CMS). WordPress is written in PHP and MySQL or MariaDB is used as a database. A very large amount of websites are using WordPress as their content management system. Almost 38% of the websites are built on WordPress and a very huge number of os bloggers and companies are also using this CMS. WordPress is used for small blog websites to large eCommerce websites that mean every kind of website. WordPress has a large number of Themes and Plugins for its user. These plugins and Themes come in free and paid versions. WordPress itself is free but its themes and plugins paid. There are free WordPress plugins and themes also but they also have paid versions.
Do you know how to install OpenLiteSpeed on Centos?
First of all, I would like to tell you that what is OpenLiteSpeed? I know most of you know that what is OpenLiteSpeed but it’s my habit to discuss things before going to deep. So OpenLiteSpeed is the Open Source edition of LiteSpeed Web Server Enterprise.
In this article, we will discuss step by step how to install OpenLiteSpeed on Centos.
Once you added the repository now you can install the OpenLiteSpeed on your server easily. To do so you have to run the command:
yum install openlitespeed
Now what? if you want to install any specific version of OpenLiteSpeed. In that case you can use this command:
yum install openlitespeed-x.x.x
Replace the x value with your required version. Like 1.6.5 or something. You can access the web server on:
http://your_ip:7080
Setup Administrator Password:
Now your LiteSpeed web server is installed. You have to set a password for the OpenLiteSpeed web server in order to access it. You can set the password by using this command:
/usr/local/lsws/admin/misc/admpass.sh
Use sudo if you don’t have root rights. you can also use this to change the OpenLiteSpeed web server password. When you run this command this will ask you User name [admin]: put admin here
And after that, it will ask for a password add a password and confirm that.
Now your web server is go to go.
Some common commands for OpenLiteSpeed:
Here some common commands that you must need to know about the OpenLiteSpeed.
To check the status of OpenLiteSpeed you can use this command.
Systemctl status lsws
2. To stop the OpenLiteSpeed service use this command.
Systemctl stop lsws
3. To start the OpenLiteSpeed service use this command
Systemctl start lsws
4. To restart the OpenLiteSpeed service use this command
Systemctl restart lsws
Directories and Logs for OpenLiteSpeed:
Now I think it’s very important to tell you about directories and logs of OpenLiteSpeed. Maybe you want to do some testing on it. Joke apart never try to do tests on anything you have not enough knowledge.
The default OpenLiteSpeed installation directory is: /usr/local/lsws
You can also start OLS using this command:
/usr/local/lsws/bin/lswsctrl start
You can also stop OLS using this command:
/usr/local/lsws/bin/lswsctrl stop
If you faced any error on OLS and want to find what is that then you can check the error log in /usr/local/lsws/logs/error.log.
Some more information about OpenLiteSpeed:
Well, the free version of LiteSpeed web servers. Although both OpenLiteSpeed and LiteSpeed ENT. are developed by the same developers. But there must be some difference between them. You can imagine a price thing and a paid thing must be different from each other.
OpenLiteSpeed has almost all the features that LiteSpeed Ent have. But there must be some difference. The main difference is OpenLiteSpeed requires a restart to load any new .htaccess file. While LiteSpeed Ent does this Automatically.
If you want you upgrade your Cyberpanel to latest version then you are at right place.
Here we tell you how to upgrade CyberPanel to the latest version. this is pretty easy to upgrade CyberPanel. You can get the latest Upgraded CyberPanel through just one command.
Upgrade CyberPanel To latest version:
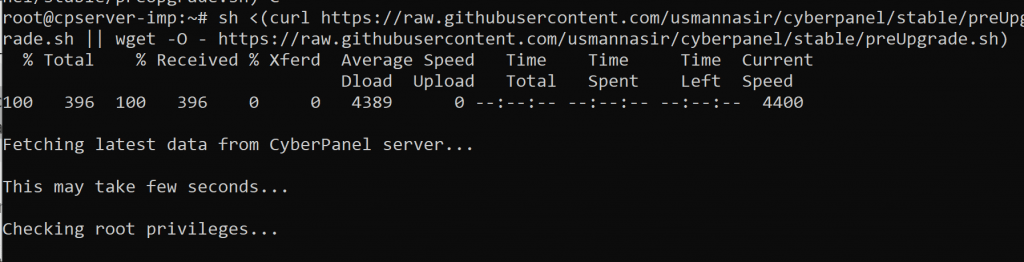
Here the command to upgrade the cyber panel to the latest version.
sh <(curl https://raw.githubusercontent.com/usmannasir/cyberpanel/stable/preUpgrade.sh || wget -O - https://raw.githubusercontent.com/usmannasir/cyberpanel/stable/preUpgrade.sh)
But if you do not want the latest released version. You want to install any other specific version then use another command which allows you to update the cyber panel to a specific version.
<branch name> is the name of the branch you want to install like 2.0.1
From the first command, you can also upgrade the Cyberpanel to a specific version for this you have to take care of a thing, and what id that?
sh <(curl https://raw.githubusercontent.com/usmannasir/cyberpanel/stable/preUpgrade.sh || wget -O - https://raw.githubusercontent.com/usmannasir/cyberpanel/stable/preUpgrade.sh)
When you run this command and at a point, they ask for a version you can give the version like 2.0.2 or any you want. And if you want to upgrade to the version that is not released yet get and find the version from the CyberPanel team and provide the version when this command asks for the version.
Cyberpenel developers are very fast and good at updating. And introducing new features for CyberPanel users. I think they are always in a hurry to launch a new version. And trust me, they always introduce the best in the new version of CyberPanel. That’s why I like them. But I don’t think auto-upgrade is possible for CyberPanel. You will need to update when they release the new version. Here I will give you a very easy way to upgrade the cyber panel. Believe me, it has only one command.
How to install CyberPanel? I know everyone who came on this article will know that what is CyberPanel and want to know how to install CyberPanel. Some of you have basic knowledge and some are experts hehe.
But If you are totally new here then let me tell you that CyberPanel is a control panel. Basically, CyberPanel is a hosting control panel like the other popular one c-panel.
CyberPanel is a free and open-source next-generation hosting control panel. CyberPanel is Powered by LiteSpeed technologies. And mostly used by the LiteSpeed web servers. Basically CyberPanel is free but here is the twist. CyberPanel has two versions CyberPanel and CyberPanel Enterprise. There is not a huge difference between the CyberPanel and Cyber Panel Ent. CyberPanel Ent comes with LiteSpeed Ent so that makes the difference. See here what the official website of Cyberpanel said about CyberPanel ent.
Here in this article, I am going to tell you how to install CyberPanel on Centos. I will discuss about the installation on other Operating systems and flavors of Linux but in this, I will stay with Centos.
Requirements for installation (Hardware and General requirements ):
CyberPanel requirements for installation are not so high and complicated. We discuss the main here:
A server or machine with Centos
Minimum 1 GB Ram
SHH access with root
10GB Disk Space.
How to install CyberPanel?
CyberPanel Installation is very easy and its just one command installation. When you search for how to install cyberpanel you will foun a bunch of commands and different steps. But i perfer only one command to install CyberPanel and that command is:
sh <(curl https://cyberpanel.net/install.sh || wget -O - https://cyberpanel.net/install.sh)
This will do have for you now you have to take care of some processes while installing CyberPanel. These are
Install Specific Version Of CyberPanel:
Now sometimes you have to install a specific version of CyberPanel. This is a bit tricky. First of all, you have to wget (download) the specific branch of CyberPanel you want to install using this command:
Business Management help is a brilliant mechanicaget.
-together for arranging tremendous and private undertakings. It contains an amazing goal. It is an application that assists clients with dealing with their business. It will by and large be referred to into different pieces, for example, bookkeeping, task and experience the board, correspondences and client help, record sharing, authority the bosses, or the board plans.
Applications have attempted various procedures and applications that will help you with coordinating different sorts of business, for instance, work, record, bargains, etc Business the board instruments have different features, asset the chiefs, CRM, programming-based programming, and endeavors. programming programs. The cost of assignments is low in the organization of colossal businesses undertaking programming programs. While changing business terms this program is thoroughly enjoyed. Head business information can be procured constantly through this organization program. ERP and business the board programming come in different developments. Their work is varying and veered from business the chiefs programs, it is a solid strategy. BMS is less difficult to execute than ERP. ERP is more expensive than BMS yet it diminishes upkeep costs.
1. Management capabilities. Proper management is one of the most vital keys to a successful organization. This software is designed not just to assess scenarios, but provide the best response as well.
2. Fast solutions. Instant and accurate solutions are needed whenever incidents occur. The best dispatching software may save an organization from different kinds of emergencies.
3. Create incident reports and update details more accurately and efficiently. Incident management software definitely makes creating and updating details a lot easier and faster.
4. Reliability and efficiency. Aside from providing fast assessment, this software also ensures effective solutions to ay incident.
5. Real time management of multiple resources. Not only can you manage incidents in real time. You can also manage multiple resources as well.
6. Lesser errors. When you have efficient software to do the tricky parts of incident management, there is little room for errors.
7. Cost effective. Investing on incident management software is definitely worth it. With all the benefits and convenience that it offers, the cost should no longer be an issue.
8. Prevention of hazards from re-occurring. This software is designed to correct hazards and prevent them from happening again. They are designed beforehand or during an occurrence so that normal functions are restored.
9. Manage emergencies. More importantly, this software is known among public safety agencies as a means of managing emergencies.
10. Avoid loss and disruption to your organization’s operations. An incident that is not well managed will eventually blow off proportions and create emergencies or worse, disasters. With the help of incident management software, an organization can limit a potential disruption by preparing for it beforehand. In turn, this means continuity of business without stress.
An effective incident management software can rapidly decrease the chances of disruptions in vital business functions. It provides convenience for the business, information security, operations, IT systems, clients, and employees.
This system is currently used in many private organizations as a part of wider process of managing incidents. In most cases, these organizations run a post-incident analysis to determine why an incident happened and how it can be managed and avoided with proper precaution and control.
The analysis are generally supervised by the leaders of these private organizations. Through this software, executives and other organization leaders can formulate better precautionary measures to prevent repetitions and formulate effective security policies.
In other words, this software is great for any private organization. It is definitely a great investment to avoid long term problems caused by incidents that could have been avoided in the first place. With this software in your system, you can avoid greater losses. At the end of the day, managing damages is always better than actual damages. It is best to avoid incidents before they happen and you can do that with this software.
Top 5 Websites for Jobs Search in UK 2021
The 5 best websites for a job search in UK 2021 are available for those who wish to find job openings in a certain sector or sector. There are many websites in the UK dedicated to providing information about different regions and regions.
This website is very popular and they get huge traffic. If you are looking for a specific job you can search through the website to find work in UK. The website for job searches in the UK offers a variety of job–related portals and they also show a monthly average job search graph.
The website shows a list of paid jobs for job searches in the UK and also has information about the latest jobs in various sectors and sectors. The website is one of the best online job search portals for job searches in the UK, and they attract millions of visitors every month. For job search in the UK, the website’s work portal makes it possible to find jobs related to your interests. You can narrow down the search according to your skills and preferences.
Websites List for Jobs Search in UK:
1. Adzuna:
Helpful Website for Job Search in UK is the leading provider of data entry jobs in the UK market. If you are looking to start a new career in data entry jobs in UK or simply looking for additional income sources, this could be an opportunity that is right for you. Adjuna’s website for job searches in the UK worked for almost 10 years and had built up a good reputation.
It offers different types of data entry and you can also get paid for telecommuting from your home. It allows its members to take advantage of premium services and many other recruitment agents like work blogs and work portals. All these benefits are included in the helpful website for job searches to become the leader in UK.
If you think of a helpful website for job searches in the UK, all you need to do is start registering on their website. This simple registration process is free and all tools, including options for submitting job ads, customer service, career advice, and free job alerts.
You can choose to search for all jobs on the ADSuzuna website or search for certain categories for job searches in the UK. You can also set your workplace as you will get the information about the open vacancies in time. Other great features of the helpful site for job searches in the UK are that they also regularly provide news and updates related to data entry.
2. CV–Library:
The cv–library website for a job search in UK is very useful for those who apply for jobs abroad. It is a well–known fact that the UK has become one of the most preferred targets for multinational companies, international investments, and multinational projects.
The recruitment process in these organizations is very complex and time–consuming, which further makes the process of writing a CV and other related tasks. On the other hand, job seekers looking to find work in the UK can easily find all the information on the CV–Library website.
The job seekers not only get an opportunity to know about the essential qualifications but also get an opportunity to know the important points which are required to be highlighted during the interview. Moreover, this website provides a large number of job seekers.
They have options to keep all their details like academic qualification, work experience, and even their latest achievements so that they can reach the right people as soon as possible. Apart from this, this website also provides various tools like work alert, release writing services, and CV writer tools, which help to promote their resume more interesting and impressive.
3. Escape the City:
There are many websites for job searches in English that are easily available on the internet which can take a lot of work to find your job. Many large and medium organizations are always looking for software engineers, professional software, and software graduates whom they design a website for a job search in UK. Most of these recruitment websites for these professionals are specifically for professional recruiters with at least three to five years.
The recruitment services provided by this website for job searches in UK are quite professional and comfortable, making it easy for professionals and professionals to register and search through professional databases.
This recruitment website is quite efficient for IT professionals as they help you to get jobs in a short period. The website for job searches in UK provides job–related information such as openings, qualifications, skills and qualifications, and other useful information which will prove useful for your IT career search.
4. Glassdoor:
Glassdoor website for a job search in UK is a website where you can easily find work in UK, it is the best place to find work in UK. Very easy to use and offer a user–friendly interface. Very easy to use, enough cut and paste capability on your resume and click the search button. After passing this process, you will get various search results related to workplaces and related vacancies in UK.
Many professional corporate families work as consultants, trainers, managers, and many other job descriptions to help them improve their business by increasing their business performance. These professionals need to work independently and under the right supervision.
This is why you may find it very useful to use the Glacier website for job searches in the UK. Many recruitment agents have come up with their websites for job searches in the UK and they provide all the information related to particular job descriptions so that you can easily pick the one that suits you.
5. Zoek:
For job searches in the UK, we have a website they want to help those seeking jobs. Jobs include positions in all kinds of sectors, which include, but are not limited to: communications and entertainment, information technology, health care, education and teaching, law, hospitality and tourism, sports and entertainment, and more. This website allows job seekers to browse multiple job vacancies, submit their resumes, and submit appropriate posts. Job seekers can also opt for training and development training options.
For job searching in the UK, this website is a valuable source of information for those looking for work and who cannot afford expensive advertising or promotional campaigns. Because the maintenance and updating of these sites are done by volunteers and staff, they do not charge any fees.
With the help of this website, one can get comprehensive data about job opportunities, new vacancies, skills, and career options. This website is a perfect platform for those who want to establish a long–term career or want to find part–time work.
Conclusion:
This article jumps to the conclusion: A website for job searches in the UK is the most important job portal available in the UK today. The information provided by the website for job searches in the UK is frequently updated and all the details are in easy–to–use language. The website for job searches in the UK is the first point of contact for those who wish to work and move to England via the Internet.
The website for job searches in UK is one of the best options available to all those who are all in search of work. It is one of the fastest–growing job portals in the UK, providing free access to great work, information and profiles from every organization.