How to restart litespeed in cyberpanel | restart litespeed cyberpanel?
CyberPanel is the only panel that comes with the OpenLiteSpeed and LiteSpeed Enterprise, both as well. CyberPanel is the first panel that started offering a LiteSpeed webserver. In the case of OLS, you need to restart the web server many times. So this is about restarting LiteSpeed cyberpanel.
Read a complete details guide for CyberPanel here.
Cyberpanel provides a quick restart button for LiteSpeed whether you have the OLS or LSWS.
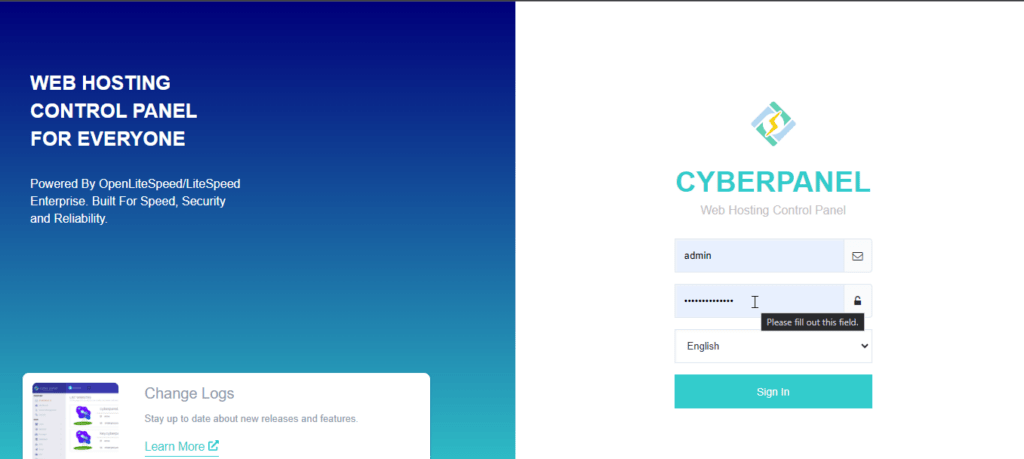
Login to your CyberPanel dashboard on port 8090 using your password and username.
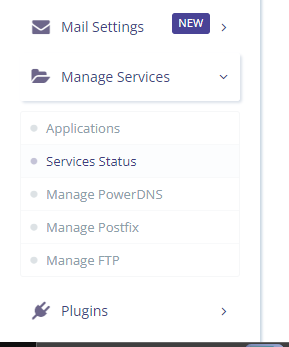
Now go to the Manage Services ->Services Status
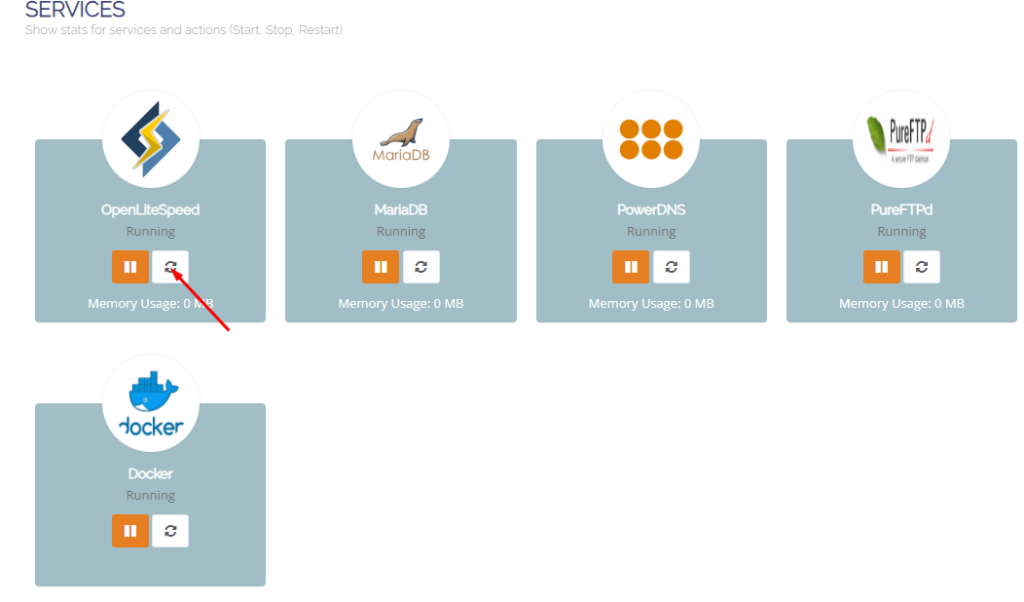
Here on the services page, you can see all of your active services you can now restart any service but in the first number, you can see LiteSpeed or open LiteSpeed and restart button in front of that just press that.
Methode 2: Restart LiteSpeed From Terminal:
LiteSpeed provides you with very short and easy commands to restart stop and restart. Litespeed has its own commands as well and you can do anything using systemctl or service command.
Start LiteSpeed: sudo service lsws start OR sudo systemctl start lsws
Stop LiteSpeed: sudo service lsws stop OR sudo systemctl stop lsws
Restart LiteSpeed: sudo service lsws restart OR sudo systemctl restart lsws
Graceful Restart: A graceful restart allows LiteSpeed to restart without dropping existing connections. sudo service lsws reload OR sudo systemctl reload lsws
Check LiteSpeed Status: sudo service lsws status OR sudo systemctl status lsws
Remember to adjust the paths accordingly based on your LiteSpeed installation directory. These commands assume a standard installation; however, it’s always a good idea to verify the specific paths on your system.
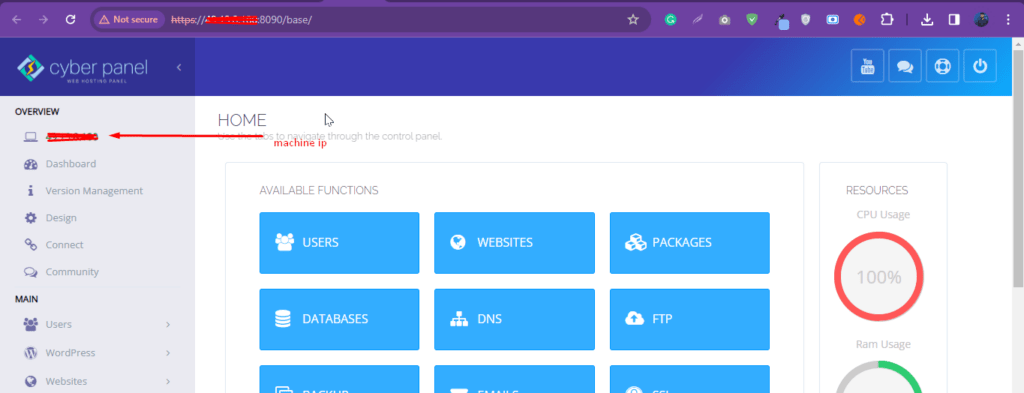
Sometimes your provider updates the IP of your server but in CyberPanel you can access the CyberPanel using a new IP in the dashboard. The old IP is showing so here is a quick guide on how to update the machine IP in CyberPanel. In this case, you have to update the machine IP in cyberpanel.
Here is the IP you can understand from the picture.
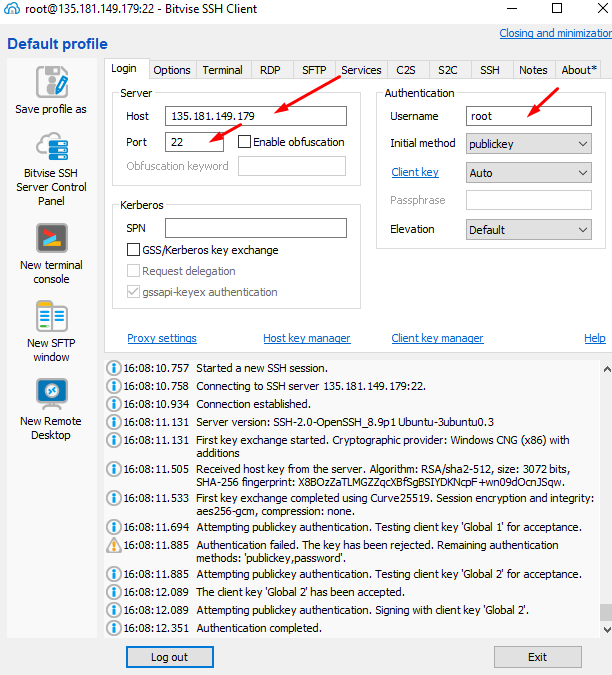
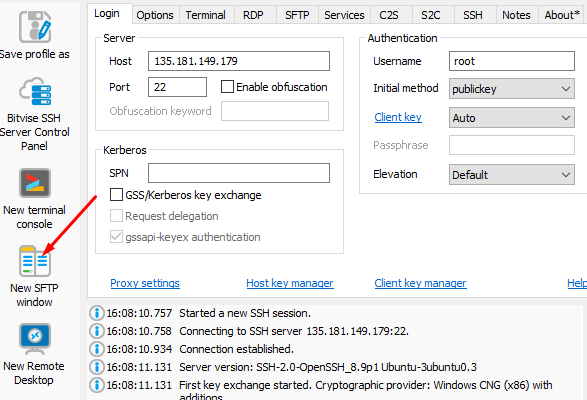
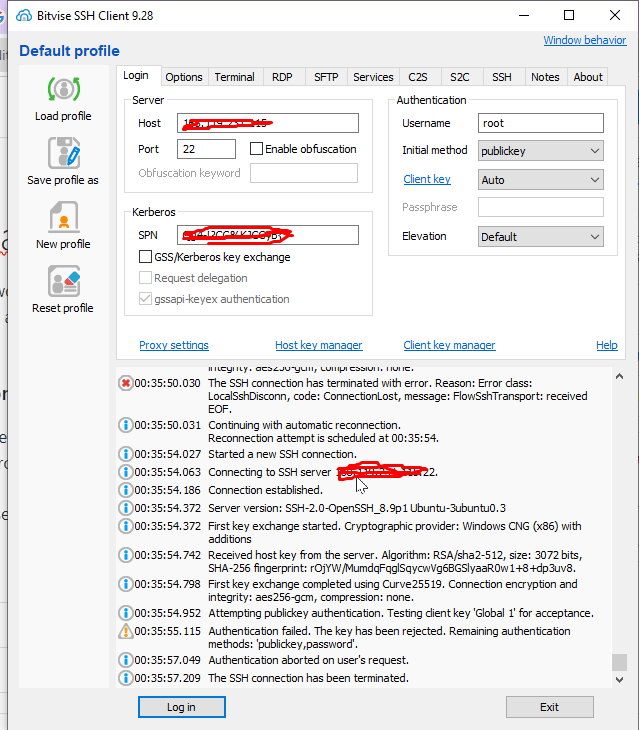
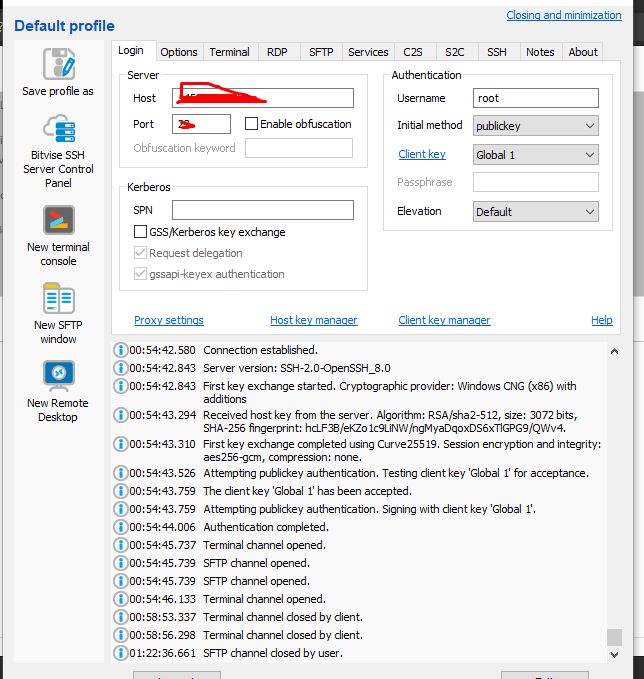
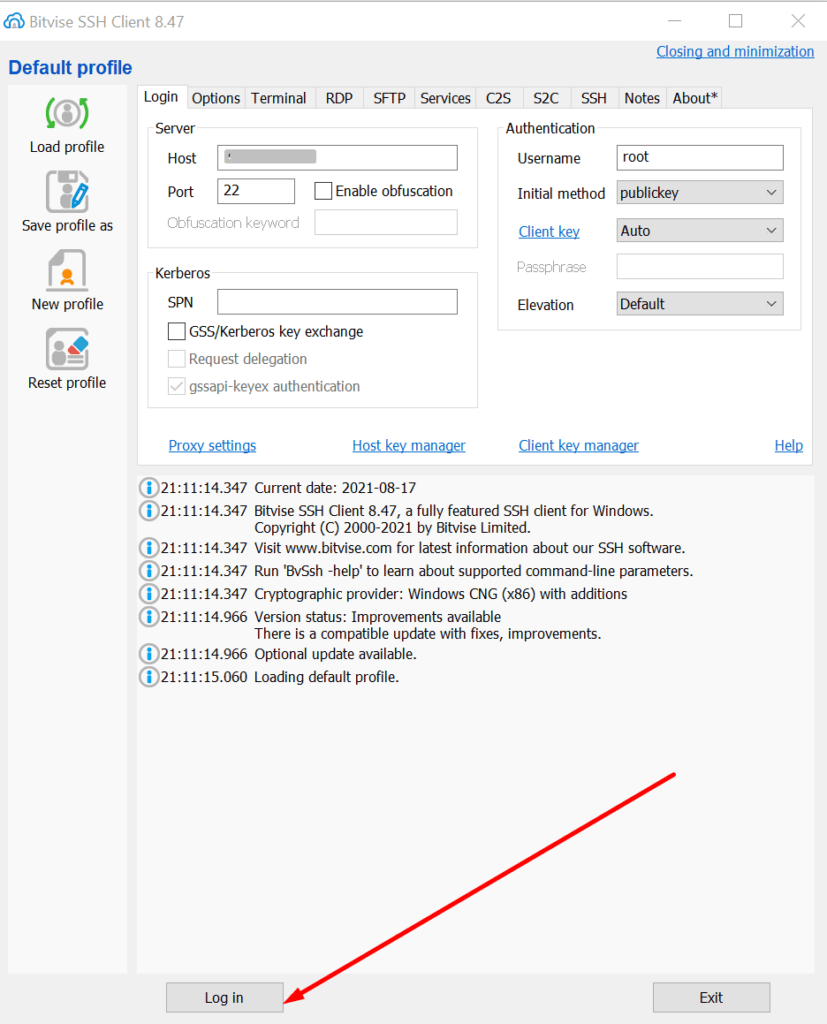
Step 1. Login to your server SSH access and add the IP address username password and port. After entering the details Click on the login button at the bottom
Step 2. Click on the left-side menu new SFTP window
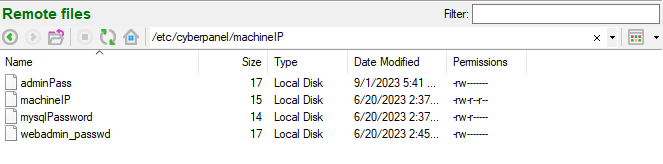
Step 3. You go to this page now and add the file name
/etc/cyberpanel/machineIP
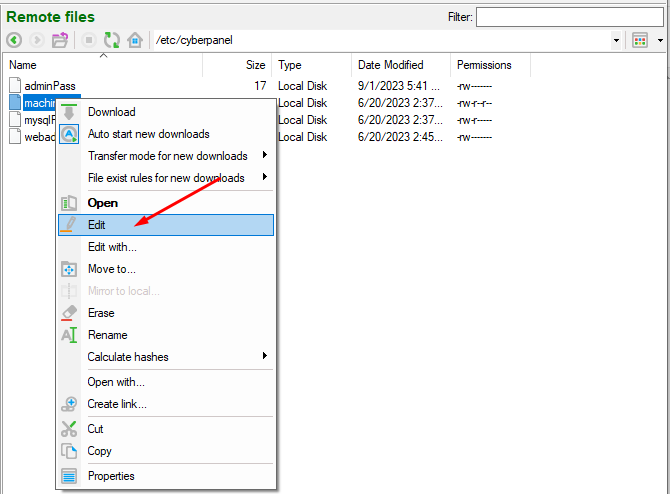
Step 4. Open the machineIP file. Click on edit file.
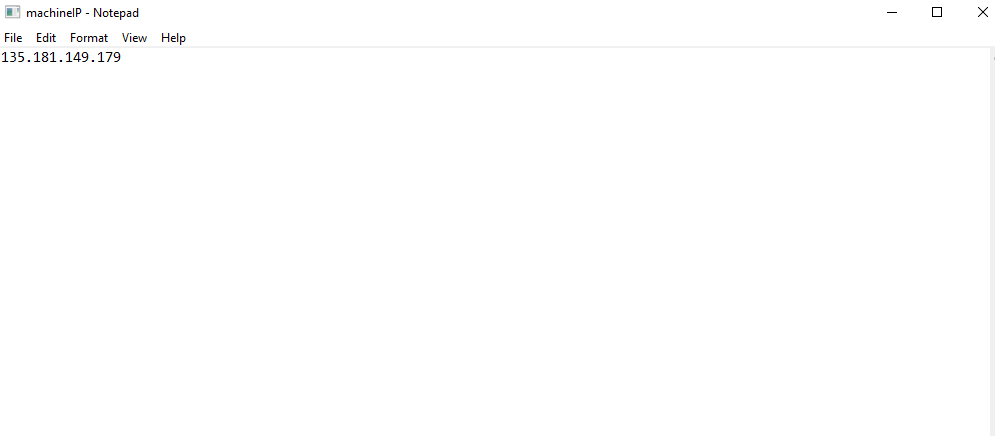
Step 5. Here you can change the IP and save the file
Step 6. After saving the file Go to the terminal and Run the command on the terminal:
Sometimes you need to change the CyberPanel password. So there are two methods to do so. One is to do from the UI and the other is from the terminal. So in this article, we will discuss How to Change CyberPanel Password.
Follow both methods as per your requirements.
Method 1: Change CyberPanel Password from the terminal:
You can change the cPanel password from the terminal. This password will be for the admin account. So basically you can change the CP admin password from the terminal. You can also see How to Change CyberPanel Port. To do so follow the steps:
Login to your SSH using any SSH client like Bitvise.
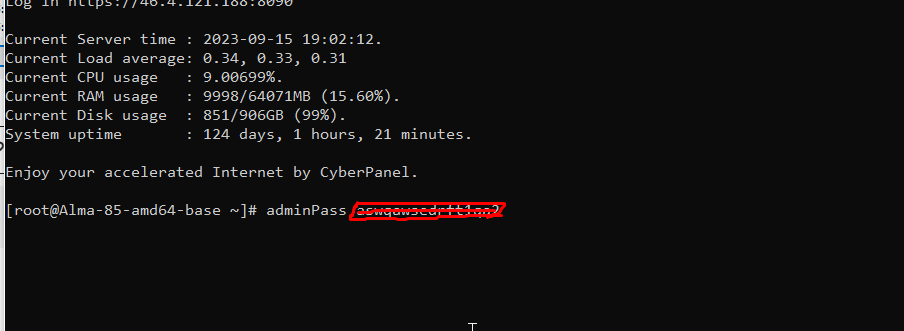
2. Open the terminal from the SSH client and then run the command to change the CyberPanel admin password.
adminPass <new-password>
Methode 2: CyberPanel Change Password using Dashboard:
Login to your CyberPanel at port 8090 using your CyberPanel username and password.
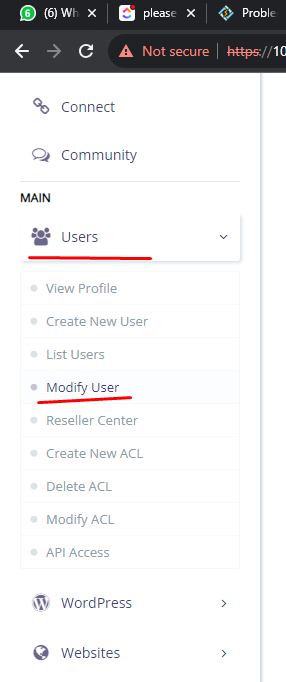
Just go to the User-> Modify User from the left side menu.
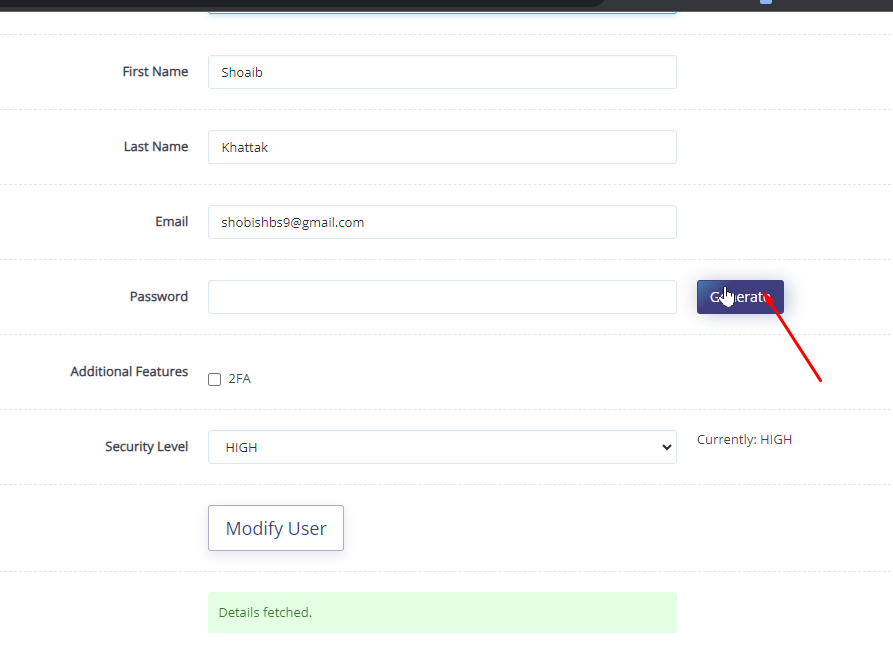
3. Now click the Generate button in the form of a password and then use that.
4. Just click the save button at the end of the process and use that password afterward.
FAQ about CyberPanel:
What is the username and password for CyberPanel?
Answer: By default CyberPanel username is admin and the password is 1234567 (not recommended to set default password).
How do I change my password on WordPress?
Answer: You can change the users from the WP admin dashboard and then modify that user.
How do I change my CyberPanel username?
Answer: Just log in to your CyberPanel and then modify the user.
What is the login URL for CyberPanel?
Answer: your login for CyberPanel will be https://<ip>:8090
Changing the port of CyberPanel is also a security measure but a lot of users don’t know how to change the CyberPanel port. So in this article straight away we will discuss how you can change the 8090 port of cyberpanel to any other port.
Change CyberPanel Port Complete steps:
there are two parts to this task first to enable the required port in the firewall and then change the port from CyberPanel.
Part 1: Enable Port in Firewall
Login to your CyberPanel using your login credentials.
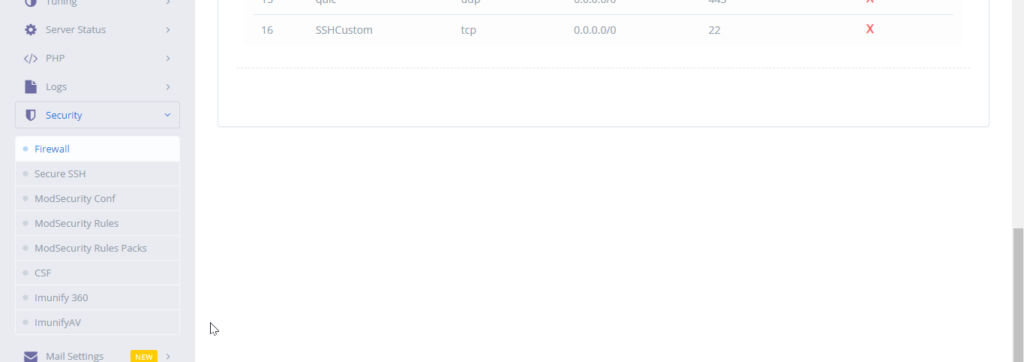
2. From the left bar menu go to the Security -> Firewall. Here you can see the CyberPanel port list
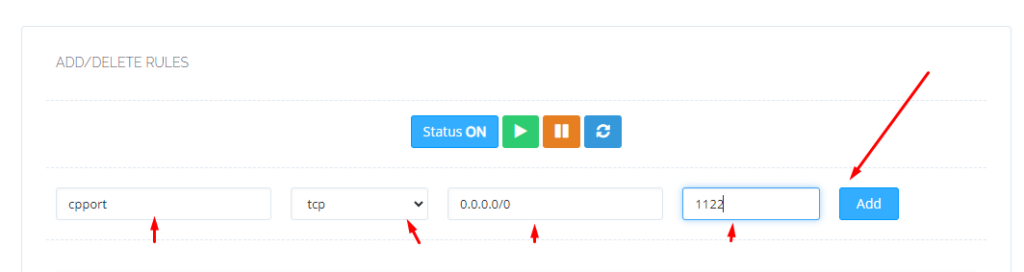
3. Now add the required port that needs some information as I have given below.
Name: cpport (just the name to identify the port)
type: tcp/udp (select TCP for CyberPanel )
Allow ip: Select the 0.0.0.0/0 for global If you want to bound add that IP here
port number: last add a port number like I added 1122
Part 2: Update the new port and change the old one:
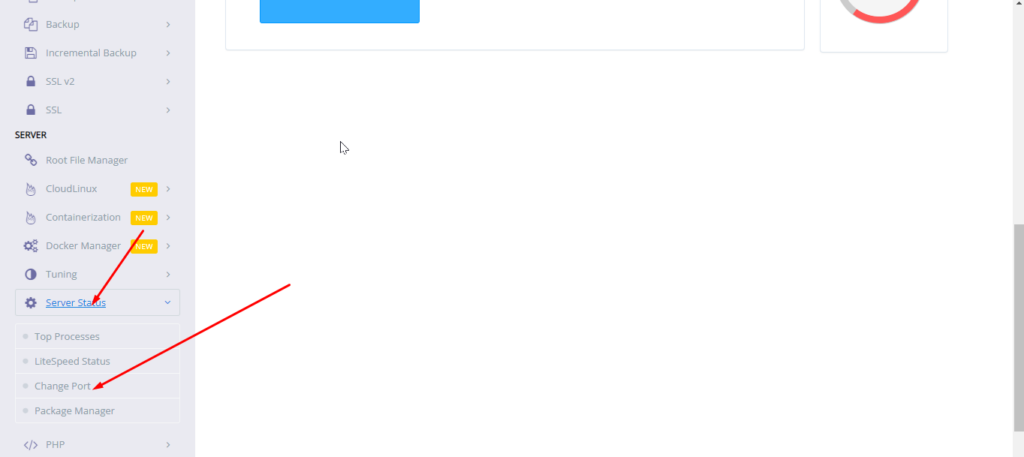
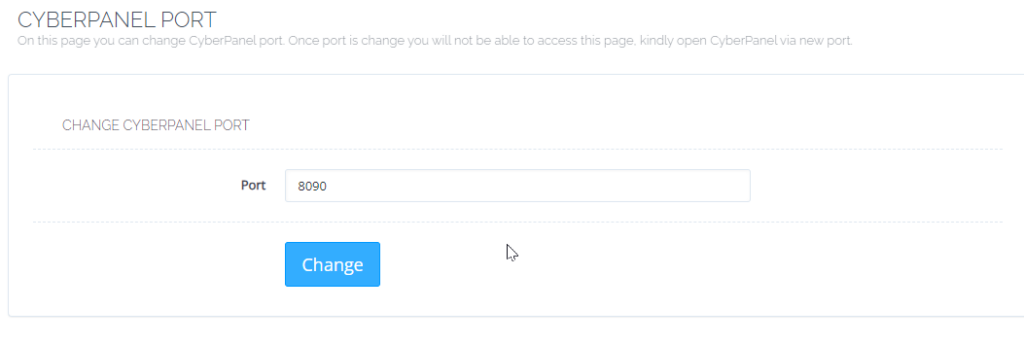
1. From the left bar menu go to the server status -> change port.
2. In this screen you can see your CyberPanel default port will be 8090. Change that port to your required port like I will do for 1122.
These are steps to do it from the CyberPanel UI that is simple but you can also change CyberPanel port ssh
Counculion|:
Changing the default port (8090) of CyberPanel is a crucial security measure that often goes overlooked. In this article, we’ll guide you through the process of changing CyberPanel’s port to enhance the security of your server. By doing so, you can reduce the risk of common cyberattacks targeting well-known ports and strengthen your server’s defenses. We’ll provide clear instructions, prerequisites, and considerations for selecting a new port, ensuring that even users with limited server management experience can follow along. Don’t leave your CyberPanel vulnerable; follow these steps to safeguard your server effectively.
There are a lot of questions that users ask about CyberPanel port:
What is the admin port for CyberPanel?
So the default CYberPanel port is 8090
2. How do I remove port 8090 from CyberPanel?
method is given above in this article
3. How do I change port 8090 from CyberPanel?
That is also will be done in this article
4. How do I open a port in CyberPanel?
Follow this article part 1.
Different Ways to Open Control Panel Windows
Discovering how to access the Control Panel on Windows 10, 8, or 7? This article presents a comprehensive guide featuring 10 different methods, including shortcuts for Windows 10, control panel via cmd to open the Control Panel, and more.
What Is a Control Panel in windows?
Control Panel is a crucial component of the Windows operating system. It serves as a centralized hub that allows users to manage and configure various settings and features of their computer. Through the Control Panel, users can customize hardware and software settings, install or uninstall programs, modify user accounts, adjust display and resolution options, set up network connections, manage security settings, and perform many other administrative tasks.
In essence, the Control Panel provides a user-friendly interface for accessing and adjusting the system’s settings, making it easier for users to personalize their Windows experience and optimize their computer’s performance according to their preferences and needs. While newer versions of Windows may introduce alternative ways to access certain settings through the Settings app, the Control Panel remains an essential and powerful tool for advanced system management and configuration.
Accessing Control Panel in Windows 10 using the Search Box
To open the Control Panel in Windows 10 using the Search Box, follow these steps:
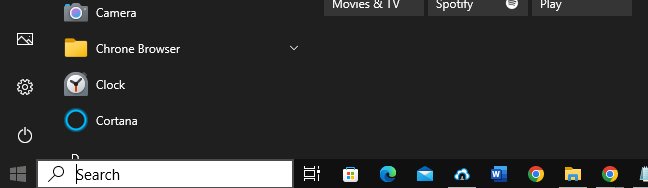
Click on the Start button located at the bottom-left corner of the screen, or press the Windows key on your keyboard.
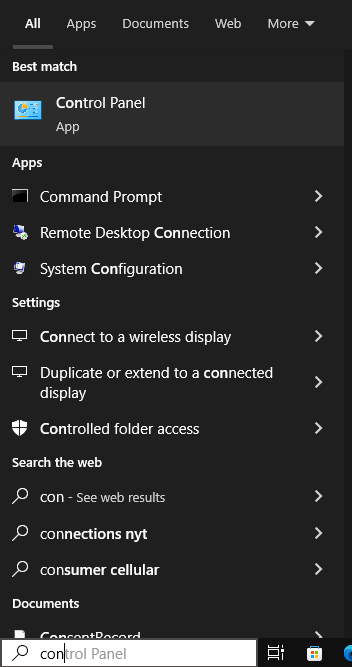
In the search box that appears next to the Start button, type Control Panel and wait for the search results to display.
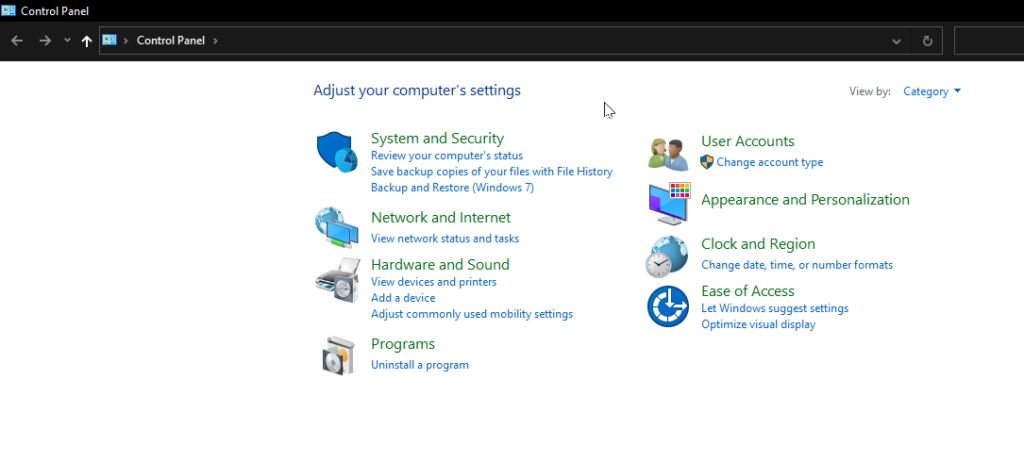
From the search results, click on the Control Panel app or select it with the arrow keys and press Enter.
The Control Panel will now open, allowing you to access and manage various settings and configurations on your Windows 10 computer. control panel via cmd
Open Control Panel Windows via Run:
To open the Control Panel on Windows 10, 8, or 7 using the Run dialog, follow these steps:
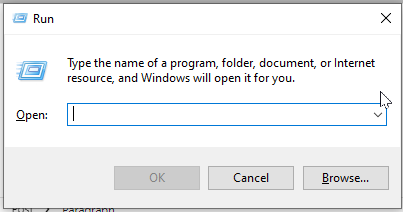
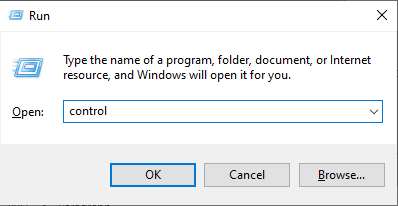
Press the Windows key + R on your keyboard. This will open the Run dialog.
In the Run dialog, type “control” (without the quotes).
Click on the “OK” button or press Enter.
Open Control Panel Windows 10 from Quick Access Menu:
To open the Control Panel from the Quick Access feature in Windows Explorer, you can follow these steps:
Press the Windows key + E on your keyboard to open Windows Explorer (File Explorer).
Look on the left-hand side of the Windows Explorer window. You should see a section called “Quick Access” with frequently used folders listed.
Scroll down in the “Quick Access” section until you find “Control Panel” listed.
Click on “Control Panel” to open the Control Panel window.
Open Control Panel Windows 10 through Cortana:
You can also open control panel vis Cortana:
Make sure you have a working microphone and speaker on your computer.
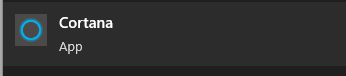
Activate Cortana by saying “Hey Cortana” if you have enabled the “Hey Cortana” feature. Alternatively, you can click on the Cortana icon on the taskbar to activate it.
Once Cortana is listening, say “Open Control Panel.”
Cortana should process your command and open the Control Panel window on your Windows 10 computer.
Control Panel via cmd
Sure, you can open Control Panel in Windows 10 using PowerShell. Here’s how you can do it:
Open PowerShell: Press the Windows key on your keyboard, type “PowerShell,” and then press Enter.
In the PowerShell window, type the following command and press Enter:
codecontrol
This will open the Control Panel window on your Windows 10 computer.
Alternatively, you can also use the Start-Process cmdlet to open Control Panel from PowerShell:
Start-Process "control.exe"
Both of these methods will open the Control Panel, allowing you to access various system settings and configurations.
Conclusion:
In conclusion, this article explored various methods to open the Control Panel on Windows operating systems. Whether through traditional navigation, keyboard shortcuts, Run dialog, Command Prompt, or PowerShell, users have a range of options to access the Control Panel and customize their system settings efficiently. By understanding these different approaches, users can choose the method that best suits their preferences and needs, enhancing their overall Windows experience.
We have an other article on this as well check here. For old version CyberPanel official guide is here.
How to Uninstall or Remove Broken Package in Linux?
Many times it happens that when you try to uninstall a package you encounter an error and the package cannot be uninstalled. This happens when the package is broken. To overcome this issue, we remove the post files of the package to make things work. in this article we are going to learn how to Remove Broken Package in Linux.
Recently, I was trying to remove the ImunifyAV package but encountered this error. E: Sub-process /usr/bin/dpkg returned an error code (1)
Removing the Post Files
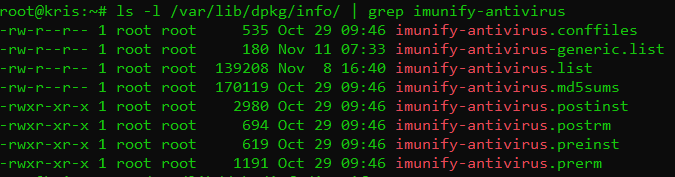
To fix this issue and remove the package successfully, we need to remove the post files manually for this package. But first, we need to see the files for this package. The installation files are usually located at /var/lib/dpkg/info file. Type in the following command and replace the package_name with the name of the package that you want to remove.
In my case, I replaced the package_name with imunify-antivirus. This thing helps me to list all packages of imunify-antivirus. Now we need to remove these files manually. For that, type the command:
sudo mv /var/lib/dpkg/info/package_name.* /tmp
This will move all the post files to the tmp directory in case we need them back for any reason. Once the command executed to remove files. After doing that reinstall the package again without getting any errors.
Don’t forget to run the sudo apt update command after removing the files.
after doing all these just run commands to Remove Broken Package in Linux.
Command to Remove Broken Package in Linux:
$ apt unintsall <package-name>
After doing all these steps you can run the uninstall command like this given above and get the required results.
Sometimes for some special patches and bug fixes, you need to upgrade Cyberpanel to any specific branch. Like you got any issue in the stable branch and the team announced that the issue is fixed in another CyberPanel branch then you have to move on that.
In this article, I will tell you the few commands to upgrade CyberPanel to any specific branch.
Step 1: Remove old script:
First, you have to remove the old script file to get new and upgrade. Use the command given below to do this.
rm -rf cyberpanel_upgrade.sh
Step 2: Download specific branch script:
Now in the next step, you have to download the script for new branch you want to install using the command stated below.
ImunifyAV is not suitable for every server and maybe sometimes you need to uninstall ImunifyAV from your server to work properly.
In this short article, I will try to explain how to uninstall ImunifyAV from your server using few commands. So follow the process along with me to remove imunifyAV from your server.
Step 1:
Access the SSH client as root of your server using credentials to your server. Like bitwise or Putty,
Step 2:
Stop the imunifyAV services using the command given below.
systemctl stop imunify-antivirus
Step 3:
Now download the imunifyAV script to uninstall the imunifyAV from your server. To download that scrip use the command.
How to change or reset LiteSpeed Webserver admin password?
Sometimes you can’t remember your LiteSpeed webserver admin password and you want to login as an admin what can you do? In this article, I will show you how to change or reset LiteSpeed Webserver admin password through the root SSH client, in this guide I will show you the step-by-step procedure.
Reset the LiteSpeed Webserver admin password from the SSH terminal is just a few commands processes.
Step-1: Login to Root SSH
Open your root ssh client and log in then open the terminal
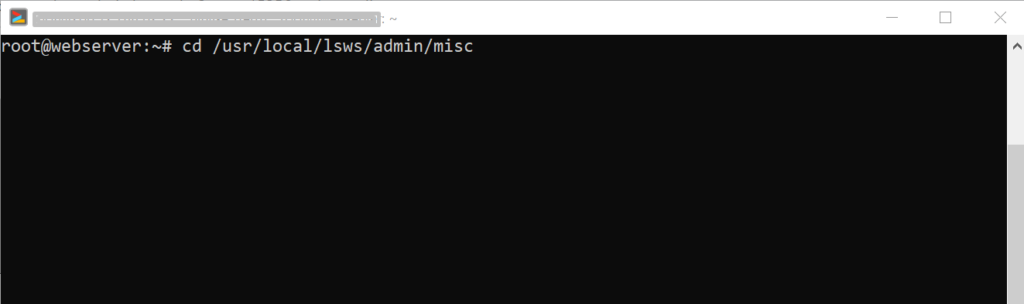
Step-2: Change Directory
To change or reset the password you have to go to this directory /usr/local/lsws/admin/misc, so change the directory using this command:
cd /usr/local/lsws/admin/misc
Step-3: Reset LiteSpeed Webserver admin password
Once you changed the directory you can change the password. to change the admin password run this command:
./admpass.sh
Once you run the command it will ask you the username type the username (must be admin) and then press enter then it will show you an input password option enter the new password and then press enter it also requires you to retype the password, re-enter the password, and press enter. it will show you “Administrator’s username/password is updated successfully!”.
Your password is changed now access webserver using these credentials at:
How to change time zone on Linux server using command line?
In this article, we will know How to change time zone on a Linux server using command line. This is a very easy and a few steps process so follow along to change your time zone according to your need.
The Time zone is the standard time for any specific region. The server time zone is a basic and one of the important things. Server time zone set while installing and setup server. Sometimes we need to change our server time zone according to our requirements. There are many ways but here we will go through command line one. This is one of the easy ways while using Linux.
How to check Current TimeZone of your server?
Before changing your server time zone first of all you must know what is the current time zone of your server to do so you just need to run a very simple command. This command is available in all Linux flavors.
open terminal and run:
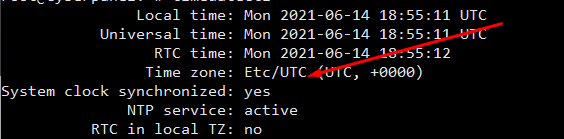
$ timedatectl
How to check Current TimeZone of your server?
You can see your current time zone of your server.
2. Set / Change Time zone on Linux Server Using Command line:
Before changing your time zone first of all you must have to know about the time zone you want to set. Like if you want to set somewhere in Asia. you must have to know about your region and cit. Now, how you can do it.
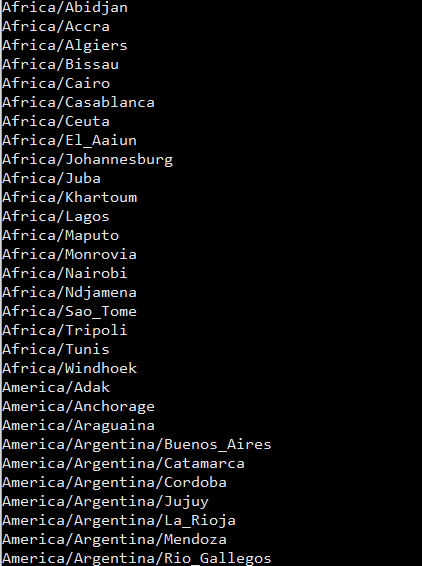
For this there is a command to list all time zones:
$ timedatectl list-timezones
List all time zones
Select your required time zone from the list and add it to this cmd.
timedatectl set-timezone “you time zone”
Make sure that you are login from root account if not use sudo with this.
$ sudo timedatectl set-timezone <your specific time zone>
set time zone
After running this run the timedatctl again and verify if time zone updated or not.
$ timedatectl
Now you can see time zone that you set using above methode.
NOTE: Time zone is one of the core important things many features and services depend upon it so before doing anything make sure that you understood all. moreover, you just need a reboot to apply a new time zone on all servers.