In this Article I am going to share my personal experience that how i added the Twak.to Live Chat in my WordPress Site. After reading you come to know how to add live chat on WordPress Website.
This tutorial is basically my personal experience that how I integrate live chat on my WordPress Website. So without wasting time lets start tutorial.
Steps to add live chat on WordPress:
- Add Plugin to your WordPress website.
- Create account on Tawk.To Live Chat
- Integrate Tawk.To with your website.
Step 1: Add Plugin to your WordPress website:
The first thing to do during the process of setup Live chat on your website. You have to add Tawk.To Live Chat WordPress plugin on your WordPress.
You can add this plugin using different ways. You can follow this guide to add tawk.To plugin on your WordPress website. Click Here to follow guide.

Once plugin is added to your WordPress site. Now you have to check your plugin here.
Now go to Setting-> Tawk.to option.
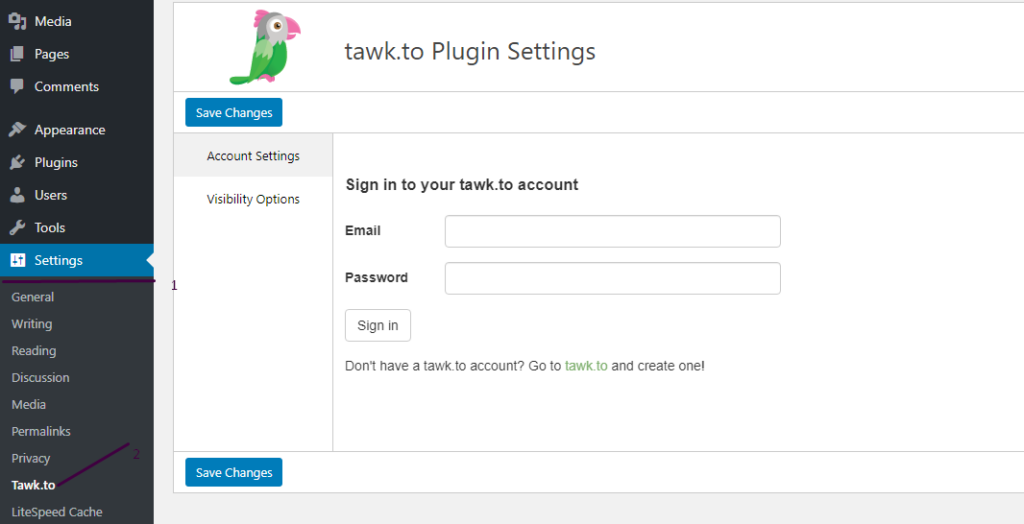
This page need some details from your Tawk.to account. its time to signup on tawk.to.
Steps 2: Create account on Tawk.To Live Chat
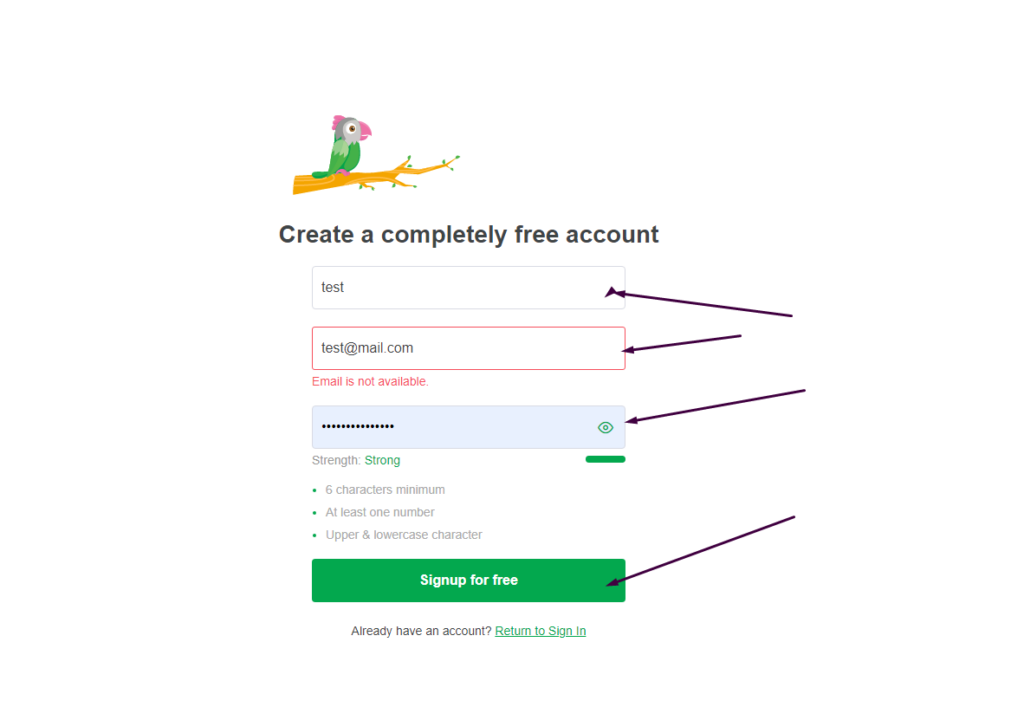
To configure your Tawk.to with your WordPress site you need to create Twak.to account on there platfrom first.
To create your account please click here.
- Click on the signup button and provide all required details. Provide all the following details EMAIL, NAME, PASSWORD.
If all of your information is correct then next screen appears that ask you to chose the Language for your live chat like i chose ENGLISG US.
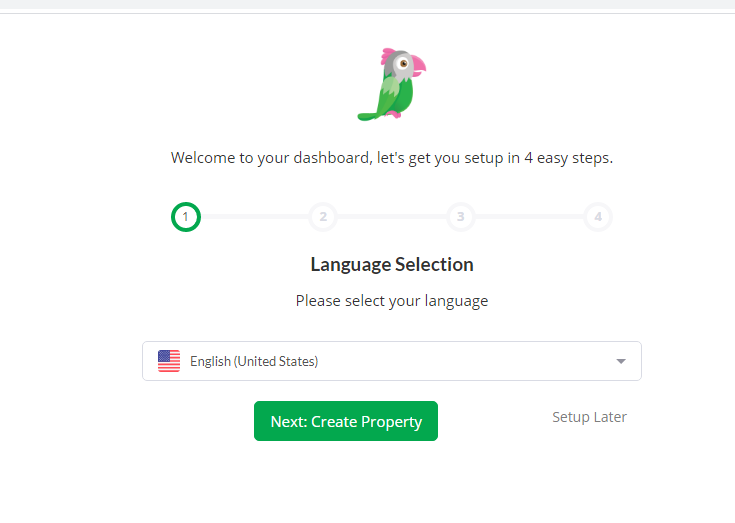
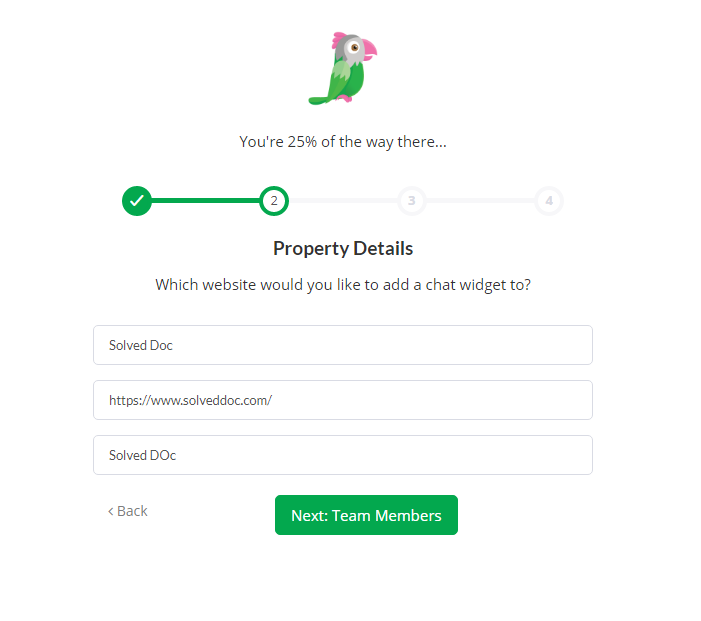
After the selection of language click on Create Property and provide Property Details.
- Site Name
- Site URL
- Widget Name
Click on Team Members button and add there details.
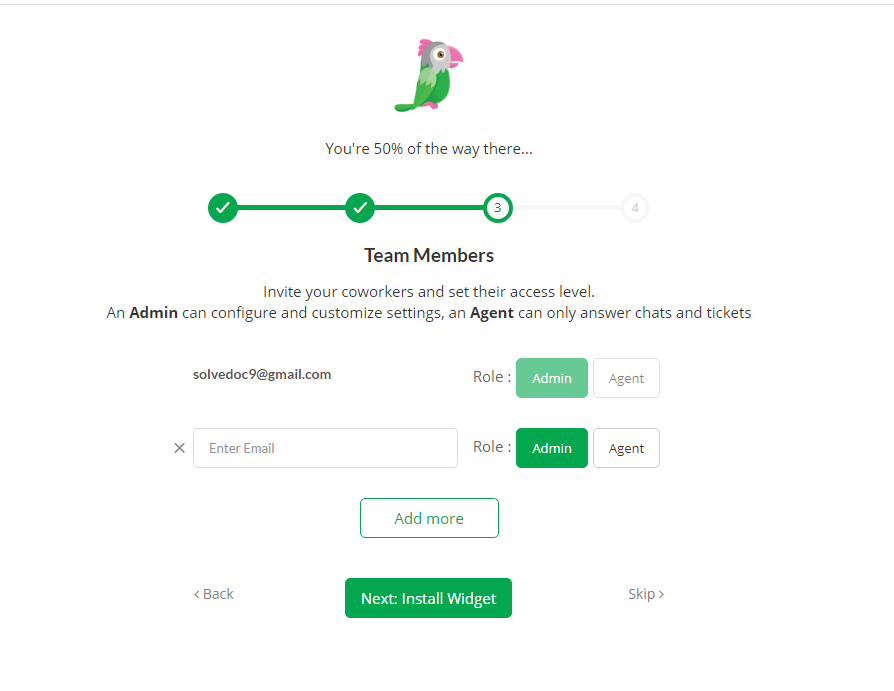
Your email is default admin for your account but if you want to add someone else you can add.
Now you will asked to select type of your website and widget. you can add on this screen and click on done.
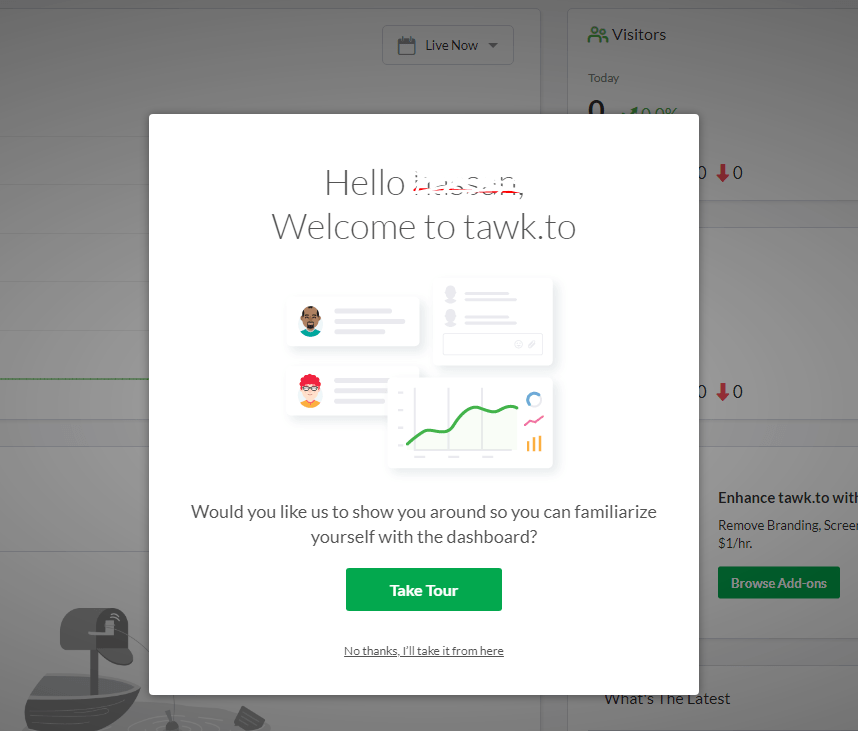
Once process completed you can see take a tour screen.
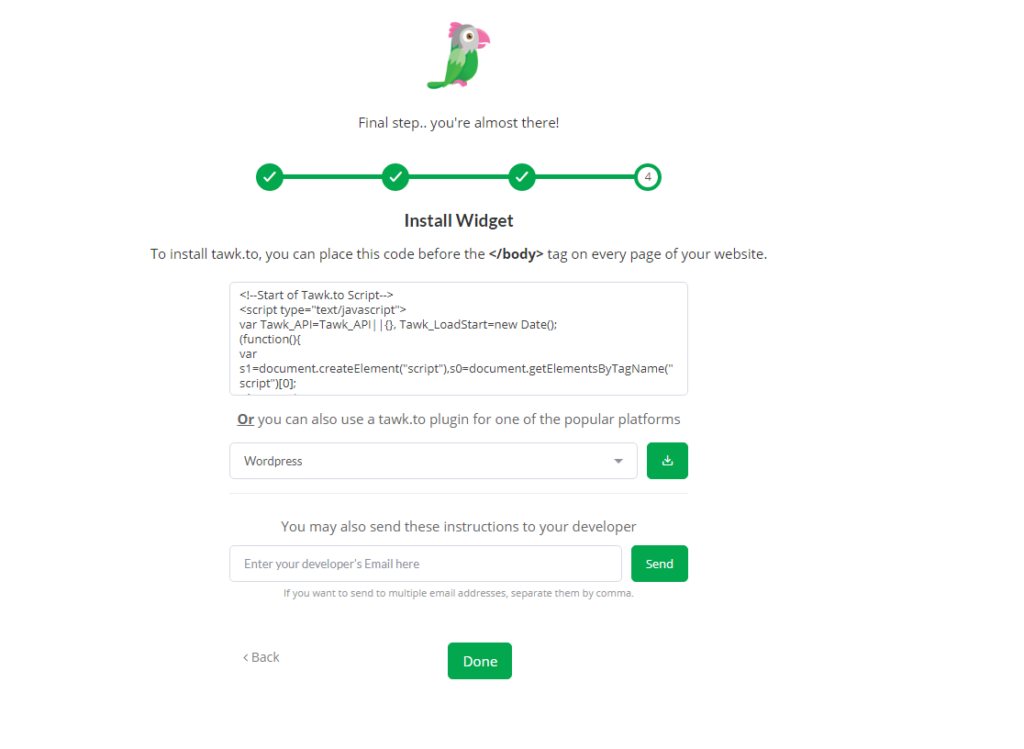
Step 3: Integrate Tawk.To with your website:
You have to integrate your tawk.to account to your website now.
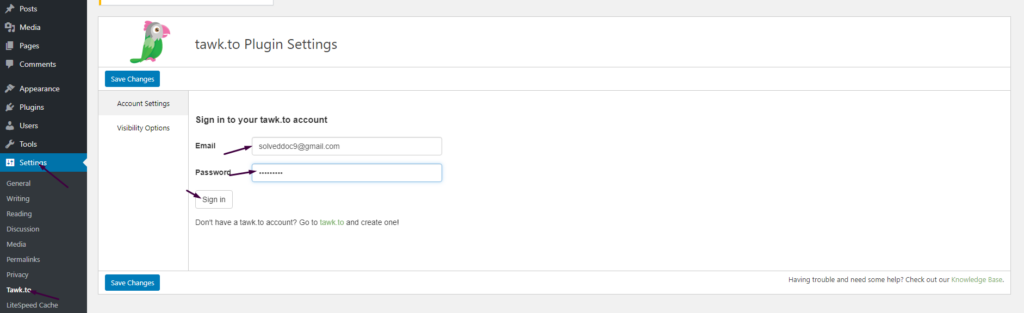
Go to the Settings-> Tawk.to Add email and password for your tawk.to account that you created in last step.
Now after sign in you have to select property that you created there on tawk.to account to enable live chat on your wordpress site.
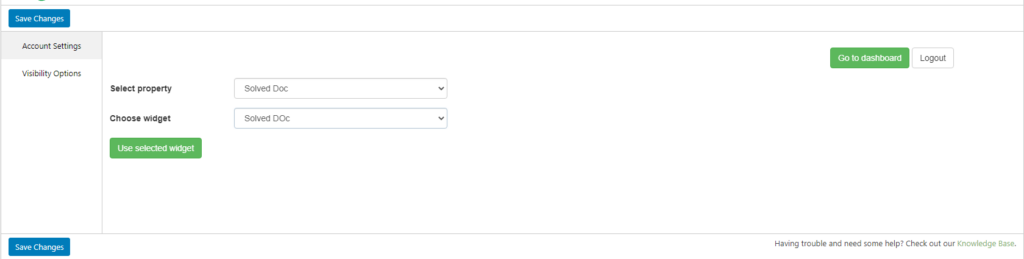
You can visit the dashboard from here also.

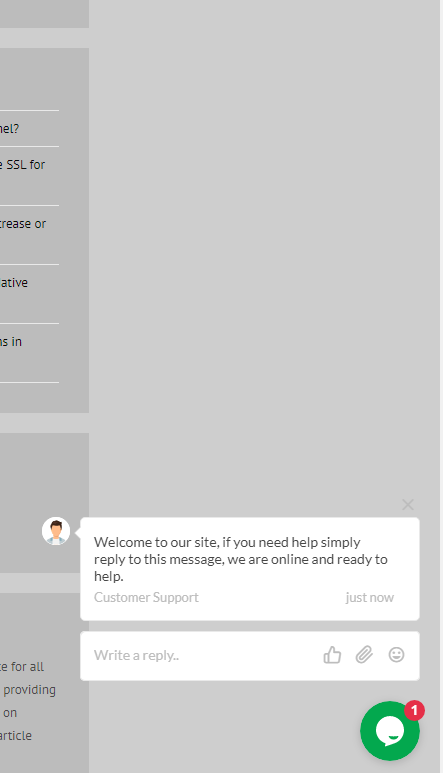
Now if you visit your site you can see this option for live chat on your WordPress site.