Redis One-Click Install through CyberPanel

Redis One-Click Install through CyberPanel

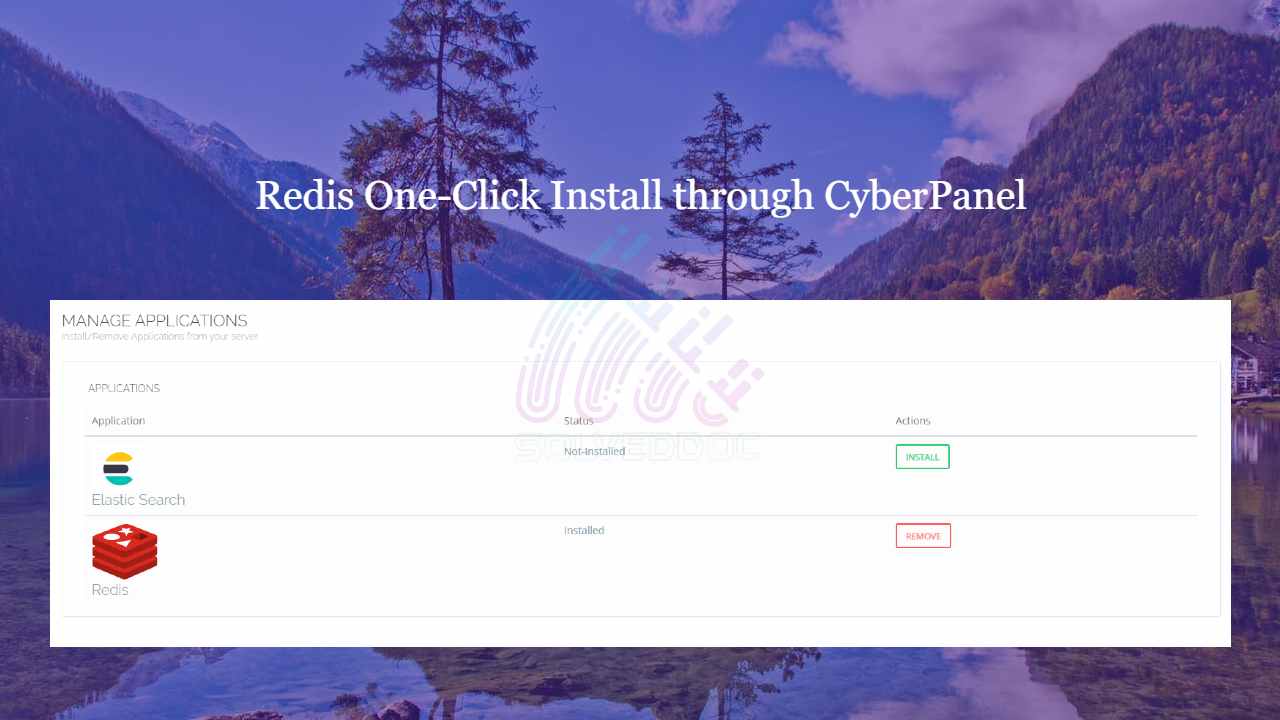
Do you know now from CyberPanel version 2.0.3 you can install Redis on your server using one click? Here we will tell you one-click Redis install through CyberPanel.

Now CyberPanel made the install and use of Redis cache on your server very easy.

Redis is an open-source cache use to cache database, and use as a message broker. Nowadays it is very important to use cache and boost your website. CyberPanel helps you to do this.

One-Click Redis install Through CyberPanel:

Follow these steps to setup Redis on your server.

  1. Login to CyberPanel
  2. One-Click Redis Install
  3. Install Redis PHP extension
  4. Setup Redis on WordPress using LS Cache

Login to CyberPanel:

Login to your CyberPanel using the credentials. Follow the link with port 8090.

https://<Your_IP>:8090
CyberPanel

One-Click Redis Install:

To install Redis on your server you have to go to the Manage Services->Application -> Redis then you can see the install button there. Click that and your Redis installed.

https://<Your-IP>:8090/manageservices/manageApplications
Redis Install

Now your Redis is installed and you have to install PHP extension to run properly.

Install Redis PHP extension:

Now go to the PHP-> Install Extension Then you have to select PHP version for which you want to install Redis Extension. You can also follow this link.

https://<Your-IP>:8090/managephp/installExtensions
PHP Extension

Now search redis on the search bar and you can see redis PHP extension press the Install button and everything is good to go.

Redis

Setup Redis on WordPress using LS Cache:

Now it’s time to setup Redis on your WordPress site. We will tell you here how you can setup Redis on your WordPress site without any extra plugin. Ls cache plugin will all do for you. Let’s begin how to do.

  1. Go to the LiteSpeed Cache -> Cache option in the left menu
  2. Then go to the Object
  3. Turn on object Cache and set method to Redis
  4. Change port to 6379 and press save
  5. You can check here if the Redis extension and connection test are passed then it’s good to go.

Read more: How to create, delete and manage Child Domains in CyberPanel?

Follow US on Facebook / Twitter Instagram .