DO you want to access CyberPanel via a hostname with valid SSL ?
By default, you can access your cyber panel using the IP of your server and Port 8090. But For a valid SSL certificate, you must need a valid domain to access cyber panel with a valid SSL.
In this article, we will discuss how you can select a hostname and then issue SSL for that. So follow all steps along to access Cyberpanel Via Hostname with SSL.
Table of Content:
- Select a Valid Domain
- Create a Website on CyberPanel
- Issue SSL for HostName
- Access Cyberpanel
Select a Valid Domain
To access CyberPanel through a hostname and valid SSL first you need a domain through which you want to access CyberPanel. Like you want to use https://domian.com:8090 to access your CyberPanel you need to add domain.com to your CyberPanel.
Before creating a domain make sure that your DNS A records are point this server where you want to add a domain.
Create a Website on CyberPanel
To do so login to your CyberPanel using your Credentials then go to Websites->Create Website :

Now provide all the required details and press Create Website button.

Now your required website is created. SSL may be working for this domain But we need to issue for the Hostname and select this domain as the hostname.
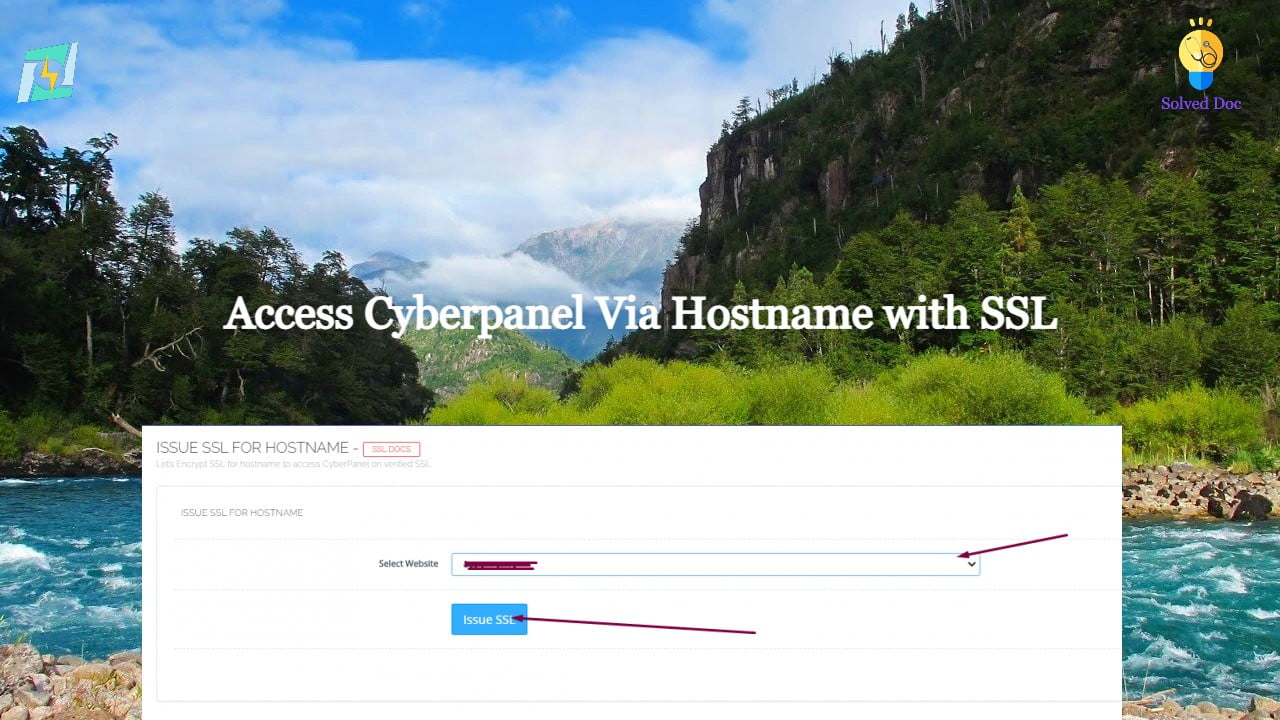
Issue SSL for HostName:
Go to the SLL->Hostname SSL

Now select that domain you want to use for the Hostname. Then Press the Issue SSL.

This domain has now SSL for hostname you can use this to access cyberpanel
Access Cyberpanel:
Now it’s time to check that is this domain is working to access the CyberPanel. Go to your brewers and visit the Link https://your-domain.com:8090 it should work for your Hostname now you can access CyberPanel using this link.