How to log in to the Rainloop admin dashboard?

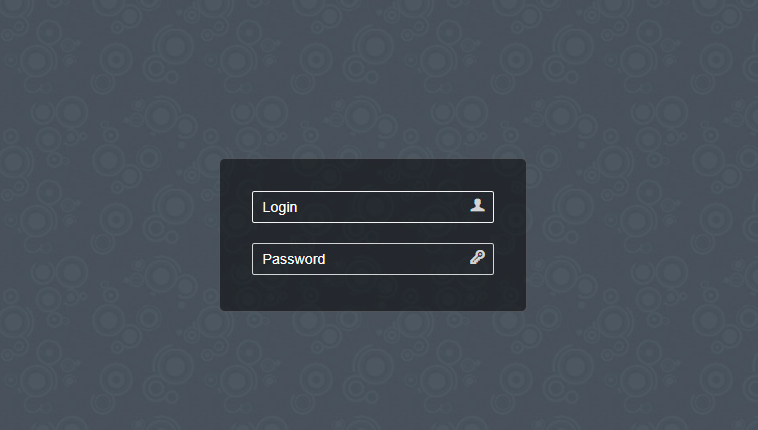
Sometimes we need to log in to the rainloop dashboard to do some configurations. Here in this article, we will tell you how to log in to rainloop admin dashboard?

Rainloop is an efficient memory webmail solution. it is a fast, simple, and modern web-based client email client. Rainloop is the email solution that comes with CyberPanel. It has an amazing user interface. Not only the interface also works great as any other email service.

RainLoop Admin Dashboard access address:

To access rainloop dashboard you just need to go to.

http://your-webmail.domain.com/?admin

But in case of cyberpanel it will be like:

https://<IP/Hostname>:8090/rainloop/?admin

You can access rainloop web admin using this link.

How to login to Rainloop admin dashboard?

RainLoop admin Password:

Default login is “admin”, password is “12345”. But in the case of CyberPanel and changed password here is the location of rainloop admin password.

CyberPanel Rainloop admin password location:

/usr/local/CyberCP/public/rainloop.php

General Rainloop admin password location:

/var/www/rainloop/data/_data_/_default_/configs/application.ini

How to Access Rainloop Webmail in CyberPanel?

How to force redirect HTTP to HTTPS website in CyberPanel?

In this article we will tell you how to force redirect HTTP to HTTPS website in CyberPanel?

What is HTTP?

HTTP stand foe Hypertext Transport Protocol. When you enter http:// in your address bar in front of domain, it tells the browser to connect over HTTP. HTTP use TCP(Transmission control protocol), generally over port 80, to send and receive data packets over ther web.

What is HTTPS?

HTTPS stands for Hypertext Transfer Protocol Secure (also referred to as HTTP over TLS or HTTP over SSL). When you enter https://in your address bar in front of the domain, it tells the browser to connect over HTTPS. Generally sites running over HTTPS will have a redirect in place so even if you type in http:// it will redirect to deliver over a secured connection. HTTPS also uses TCP (Transmission Control Protocol) to send and receive data packets, but it does so over port 443, within a connection encrypted by Transport Layer Security (TLS).

Redirect from HTTP to HTTPS

if you forcefully redirect your website HTTP to HTTPS in Cyberpanel, you will need to add a rewrite rule to that website in order to have it automatically forward to HTTPS instead of HTTP.

In CyberPanel you can forcefully redirect HTTP to HTTPS website using rewrite rules.

To add this:

Force redirect HTTP to HTTPS website in CyberPanel:

  1. Select Websites on the left menu
force redirect HTTP to HTTPS website in CyberPanel

2. Choose the SSL enabled website from the list

force redirect HTTP to HTTPS website in CyberPanel

3. Select “Rewrite Rules” in the Configuration section

force redirect HTTP to HTTPS website in CyberPanel

4. Copy and paste the following code:

force redirect HTTP to HTTPS website in CyberPanel
rewriteCond %{HTTPS} !on
rewriteCond %{HTTP:X-Forwarded-Proto} !https
rewriteRule ^(.*)$ https://%{SERVER_NAME}%{REQUEST_URI} [R,L]

5. Now just save your changes, and you’re done!

After doing this on OpenLiteSpeed you must have to restart your webserver. Beacuse OLS need to restart to read the rewrite rules properly.

How to add ZeroSSL on your site? Free SSL for your website?

Read More: How to Change Upload limit On CyberPanel?

How to Change Upload limit On CyberPanel?

How to add ZeroSSL on your site? Free SSL for your website

How to add ZeroSSL on your site? Free SSL for your website

You always need a secure URL for your website. Secure means your website will be accessible with SSL(Secure Sockets Layer). It’s very important to access your site on HTTPS instant of HTTP. Today I will tell you how you can add ZeroSSL to your website. ZeroSSL is totally free for your website.

ZeroSSL allows the free start of three domains. You can add free-of-cost SSL to your first three sites after those you have to buy if you want to issue SSL for more sites.

Create ZeroSSL account:

In first step you have to create an account on ZeroSSL website. For this go Here.

Here on this page you can see the Get Free SSL button click on that and visit to registration button.

On this page you have to provide some information to signup.

  1. Subscription Plan
  2. Email Account
  3. Password

After providing these all press to the Next Step button.

Once you press this button you can see the ZeroSSL dashboard.

Create New SSL Certificate:

Here on Dashboard you can see New Certificate button press this button present in the above image.

On the next page you have to provide following information:

  1. Enter Domain (Enter your domain name for which you want to issue SSL)

You will see this Green ticks for a valid domain name.

2. Validity (For how many time this ssl is valid )

Usually for 90 days its free and if you want for 1 year you have to buy.

3. CSR & Contact

Finalize Your Order (you have to select )

You have limit to issue three free ssl to your domain. Once the process of plan selection done now you have to verify your domain.

Verification Method:

ZeroSSL allow three types of verification:

  1. Email Verification
  2. DNS (CNAME) HTTP  
  3. File Upload

You can chose any one you are comfortable with. If you have this email then use it, or update DNS records according to the second or upload the file to dns.

Verification Method:

After this you will get a option to download SSL. you can download crteficate.

download SSL
download SSL

Add ZeroSSL to your Website?

When you got your SSL file there must be three files after extracting. ca_budle, certificate, private key

Add these files values according to the require mint on your site.

Read More: How to Change Upload limit On CyberPanel?

How to Change Upload limit On CyberPanel?

Access Cyberpanel Via Hostname with SSL- Issue SSL for Hostname

DO you want to access CyberPanel via a hostname with valid SSL ?

By default, you can access your cyber panel using the IP of your server and Port 8090. But For a valid SSL certificate, you must need a valid domain to access cyber panel with a valid SSL.

In this article, we will discuss how you can select a hostname and then issue SSL for that. So follow all steps along to access Cyberpanel Via Hostname with SSL.

Table of Content:

  1. Select a Valid Domain
  2. Create a Website on CyberPanel
  3. Issue SSL for HostName
  4. Access Cyberpanel

Select a Valid Domain

To access CyberPanel through a hostname and valid SSL first you need a domain through which you want to access CyberPanel. Like you want to use https://domian.com:8090 to access your CyberPanel you need to add domain.com to your CyberPanel.

Before creating a domain make sure that your DNS A records are point this server where you want to add a domain.

Create a Website on CyberPanel

To do so login to your CyberPanel using your Credentials then go to Websites->Create Website :

Create a Website on CyberPanel

Now provide all the required details and press Create Website button.

Now provide all the required details and press Create Website button.

Now your required website is created. SSL may be working for this domain But we need to issue for the Hostname and select this domain as the hostname.

Issue SSL for HostName:

Go to the SLL->Hostname SSL

Issue SSL for HostName:

Now select that domain you want to use for the Hostname. Then Press the Issue SSL.

Now select that domain you want to use for the Hostname. Then Press the Issue SSL.

This domain has now SSL for hostname you can use this to access cyberpanel

Access Cyberpanel:

Now it’s time to check that is this domain is working to access the CyberPanel. Go to your brewers and visit the Link https://your-domain.com:8090 it should work for your Hostname now you can access CyberPanel using this link.

Read More: How to set up Google Drive Backup on CyberPanel?

How to create a New User in CyberPanel?

CyberPanel is next generation hosting control panel. CyberPanel is powered by LiteSpeed Technologies.

In CyberPanel you can create new users easily and allow them access so they can manage their website settings there.

CyberPanel allow three types of user access ADMIN, USER, and RESALLER. You can easily create new account of any type according to the requirement of user.

How to create a new user account in CyberPanel:

The process of creating user, admin and reseller account is same i will tell you where the difference is during creation steps.

Login to your cyberpanel using port 8090.

Step 1:

In left menu go to Users-> CREATE NEW USER or navigate to this URL

https://<Yourip>:8090/users/createUser
Login to your cyberpanel using port 8090

Step 2:

Now Provide the information that need to create new user:

  1. First Name
  2. Last Name
  3. Email
  4. Select ACL ( admin, reseller, user)
  5. Websites Limit (Put 0 for unlimited)
  6. Username
  7. Password (Press Generate for strong)
  8. Security Level (High or Low)
Now Provide the information that need to create new user:

Here in Select ACL you can create the admin, user or reseller permissions. Admin has access for every thing, reseller has less access then admin and at last user has some specific access.

Step 3:

After providing these required information press create a user and user is created successfully now you can see your user by navigating to USERS->LIST USERS. Or visit this URL

https://<your ip>:8090/users/listUsers
you can see your user by navigating to USERS->LIST USERS. Or visit this URL

How to create a staging or clone of the WordPress site from CyberPanel?

How to Transfer the whole Website From one CyberPanel to Other CyberPanel using a backup method?

If you want to transfer your web site from one cyberpanel to any other cyberpanel without losing any data, you are on right place follow this article step by step.

If you are thinking to transfer your site from any other CyberPanel. Maybe you Changed your server. In this article, I will tell you how you can transfer your site from one Cyberpanel to another Cyberpanel. I will use the backup method to transfer the whole website from one CyberPanel to the second Cyberpanel.

Table of Contents:

  1. Create a Backup
  2. Set Permissions or Move Public_html
  3. Download to local Computer or Download on a remote server
  4. Move to the backup folder
  5. Restore Backup
  6. Check through the Host file.

Create a Backup:

To tranfer your website from CyberPanel to CyberPanel this methode is one of the simple and easy method. Follow along with me to setup:

  1. Login to your CyberPanel through your cyberpanel link like https://<your-ip>:8090: Provide credentials and press login.
Login to your CyberPanel

2. Now in the left menu bar Go to the Backup->Create Backup section. You can also navigate to this link. https://<your-ip>:8090/backup/backupSite

Now in the left menu bar Go to the Backup->Create Backup section.

Click on create back up button here.

3. Now cyberPanle asks you to select a site and the destination where the backup will store. The site for which you want to create a backup. Select your website, and leave the path as empty. And press Create back up button to start the backup creation process.

The site for which you want to create a backup

4. Now you can see the process of backup creation is running and in process.

 Now you can see the process of backup creation is running and in process.

wait until it will give you the massage Done. After creation you can see the massage of completed and can see a backup with its id on screen.

After creation you can see the massage of completed and can see a backup with its id on screen.

Done for backup process go to next step.

Set Permissions or Move Public_html:

If you are going to download files from cyber panel to a local computer then skip this step. Now in this step, you need to login to your SSH terminal. Using any software like putty or Bitvise. For this article, I am going to use Bitvise.

  1. Login to Bitvise SSH you must have credentials:
    1. Your server IP
    2. Username (root)
    3. Port number (22)
    4. Password
Login to Bitvise SSH you must have credentials

After providing all details press the Login button. Now open STFP to check and confirm the backup.

open STFP to check and confirm the backup

2. Now go to this path in sfpt

/home/yoursite/backup
go to this path in sfpt

Here you can use two method one is to change permissions and download this file directly from this path on the remote server and other is move it into the public_html and then download. Second one is recommended.

Change Permission:

Click on the file and the go to Properties->Permissions :

Click on the file and the go to Properties->Permissions

Change the permission to 777 as shown in picture. And press OK

Move to Public_html:

Type this command:

cp /home/yourdomain.com/backup/backupfilename home/yourdomain.com/public_html

Go and check the file.

Download to local Computer or Download on a remote server:

Now its time to download the file to the local pc or on another server in order to restore the backup. Make sure that the cyber panel is installed on this server.

Download to local computer and then upload:

This way is time taking way but if you dont have credentials fo SSH then go for this.

Go to the Websites->List website

Websites->List website

Press Manage button on the right side of website

Press Manage button on the right side of website

Press Manage button on the right side of website

Press Manage button on the right side of website

Go to the backup folder and Click the file and then click download you can see the file while downloading

click download you can see the file while downloading

Download Remotely using command:

Login to your SSH terminal and type this command if backupfile is in public_html folder:

wget yourdomain.com/backupfilename

If backup files are in back folder then type:

wget yourdomain.com/backup/backupfilename

Move to backup folder:

Now in order to restore Backup, you have to create a directory backup at home. use these commands to create a backup directory

cd /home
mkdir backup

Restore Backup:

Now its ite to restore backup for this log in to the new cyberpane.

  1. Go to the Backup->Restore backup:
Backup->Restore backup

Select the backup file that you placed inside the backup folder

2. Click start backup I will take some time to restore wait until backup is completed.

 I will take some time to restore wait until backup is completed.

Check through Host file:

At last step confirm that the backup is restored properly foe this open host file from your local computer.

  1. Write Notepad in search bar of window.
Write Notepad in search bar of window.

Open Notepad as administrator

Open Notepad as administrator

Now open the file host place in

C:\Windows\System32\drivers\etc
Now open the file host place in

Write your new ip and then press TAB then write your site

 press TAB then write your site

Go to your browser and visit your site is working or not.

How to set up Google Drive Backup on CyberPanel?