How to download Anydesk and how to install Anydesk

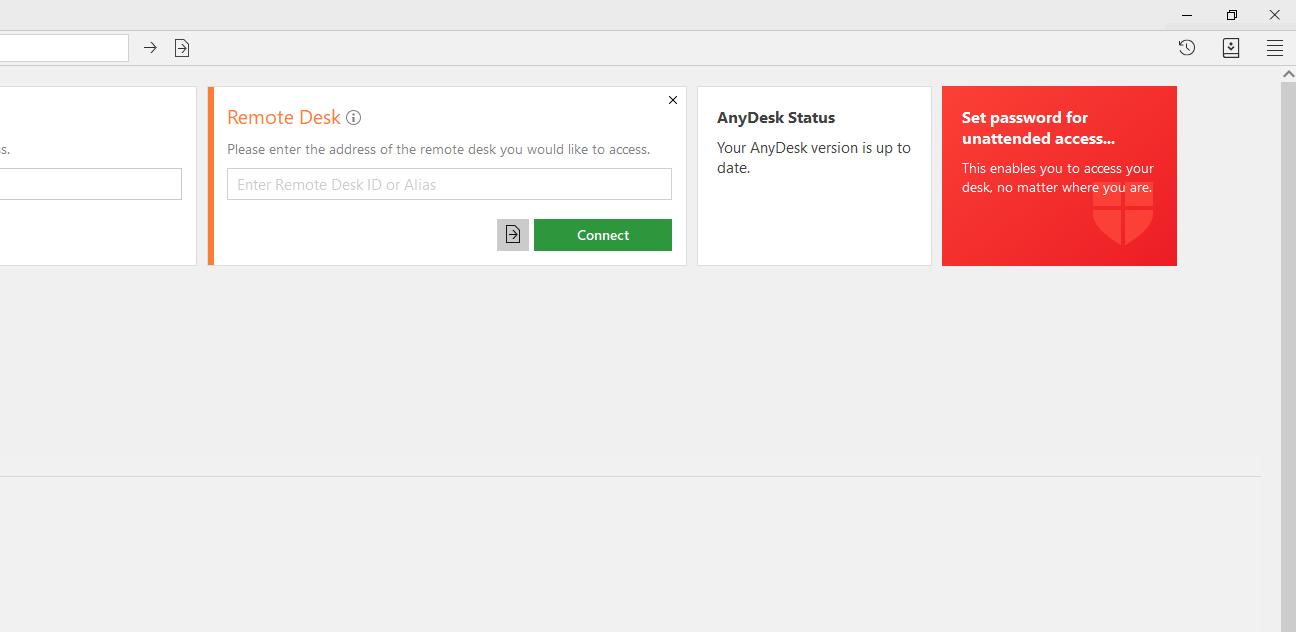
Downloading any desk and installing is an easy process. In this article, I will tell you how can we easily download and install Anydesk. so you can easily download any desk by following this article.

Any desk means a “Remote desktop application“. we can use any desk for remote control, file transfer, and VPN function.

Now follow these steps to download and install any desk:

1- Any Desk Website:

Firstly, The user will go to Any desk Website. The user can download AnyDesk by using the link “www.anydesk.com“.

download Any Desk

2- Click Any desk:

Click the first option: Any Desk “The Fast Remote Desktop Application“.

3- Click Download and Install Anydesk:

The user can download Any desk to use the “Download Now Button“.

4- Available For other Platform:

The user can also use various platforms as the users can use for MacOS, Android etc.

5- Open the program

When the desktop has been downloaded user will press the right button and click “Run as administration” and click the “yes” button.

6- Giving Access

The desktop provides the address to the user, so the user can give get access another person easily.

7- Accept And Install

The user Can also install Any desk to click the “installation” option that appears on the left side.

8- Set Password

The User can set a password for security.

Now you can see this dashboard.

Here you can read How to log in to the Rainloop admin dashboard?

Read More: How to Change Upload limit On CyberPanel?

How to Change Upload limit On CyberPanel?

You can follow us on Facebook too.

How to dump Database without Password from Linux Command line?

In this article, I am going to explain How to dump Database without a Password from the Linux Command line?

As we know when someone wants to dump a database from the Linux command line they need a password for the database to dump it. Basically dumping database means exporting the database from the Linux command line.

In a normal way when you want to export a database you need a password for the database to do it. Here is the normal command to dump.

mysqldump -u [user name] -p[password] [database name] > [dump file]

But sometimes people don’t like to give passwords again and again. So here I will tell you how you can do the database dump using a password. To do so just follow the process along with me.

You have to do some configurations on the MySQL configurations to dump the database without a password. You have to set the root user database password in my.cnf file and you can dump a database without a password. To do so first login to your root ssh using an ssh client like bitvise, putty, etc.

Location of my.cnf is different in the case of different operating systems like in the case of Ubuntu it is /etc/mysql/my.cnf and in case of Centos it /etc/my.cnf.

You can open according to your operating system after logging in to root ssh.

How to dump Database without Password from Linux Command line?

No got to my.cnf simply run this command:

sudo nano /etc/mysql/my.cnf

After that paste, this code in the file

[mysqldump]
user=mysqluser
password=secret

user will be root and the password of your root MySQL user.

After doing this just restart MySQL or MariaDB and run any dump command

mysqldump -u root [Database naem] > /dbbackup.sql

Here you can read How to log in to the Rainloop admin dashboard?

Read More: How to Change Upload limit On CyberPanel?

How to Change Upload limit On CyberPanel?

How to create a post in WordPress?

post in wordpress

Create a post in WordPress is the first and the starting step in blogging and even all fields if you want to start a blogging website then this will be the first thing you need to do. Although to create a post in WordPress is a very easy and steps process.

For creating a post in WordPress user should follow these steps:

Step 1: login the site “WordPress Dashboard“.

Step 2: click the posts icon on the left side display in navigation menu.

Step 3: Four options will appear. So the user click Add new button on the Posts page for creating a new post.

Step 4: Enter the title in a title bar it will appear on the top of the post.

Step 5: After giving the title, type content in a content bar. Users can format the text of content using an editor, like users can bold italic and also change colors of text.

Step 6: The user can also add images. The user can add an image with the help of the “Add Media button”.

Step 6: when the user has entered the information in the posting user can click the publish button. Then the post is displayed on our website.

Step 7: User can also click on save draft to save the information if user does not want to publish his post publicly.

Here you can read How to log in to the Rainloop admin dashboard?

Read More: How to Change Upload limit On CyberPanel?

How to Change Upload limit On CyberPanel?