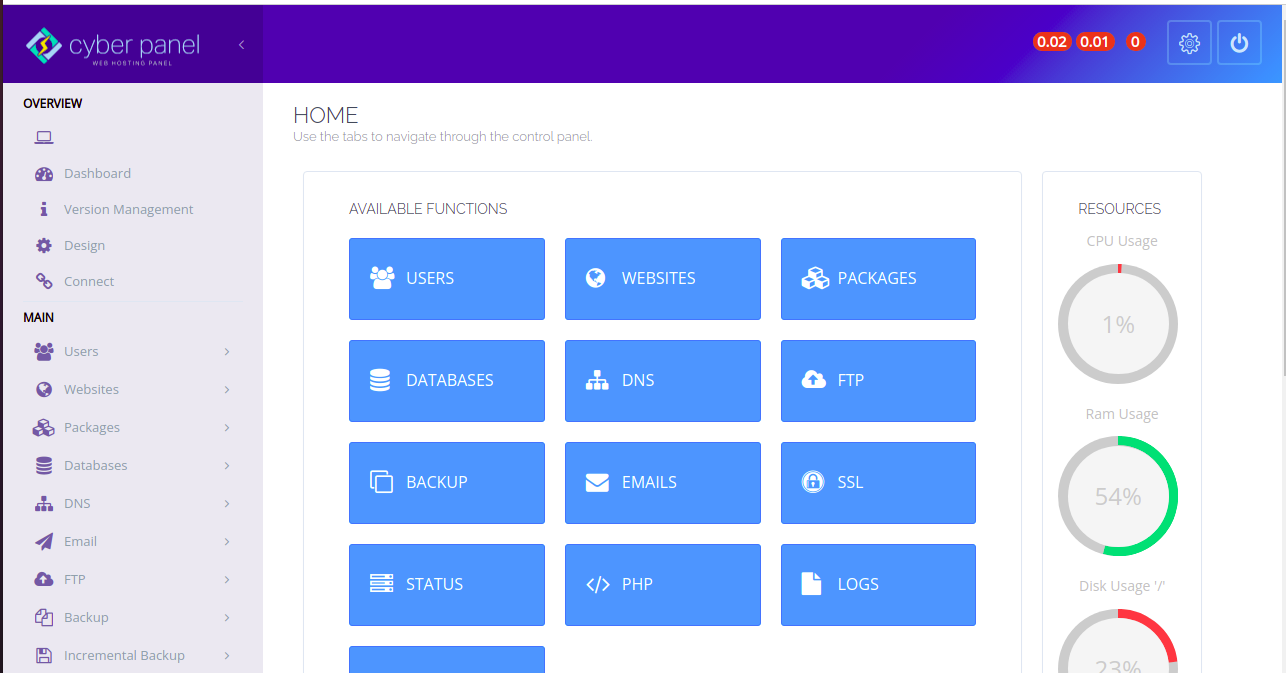
How to update machine IP in CyberPanel?

Sometimes your provider updates the IP of your server but in CyberPanel you can access the CyberPanel using a new IP in the dashboard. The old IP is showing so here is a quick guide on how to update the machine IP in CyberPanel. In this case, you have to update the machine IP in cyberpanel.

Here is the IP you can understand from the picture.

machine IP in CyberPanel

Step 1. Login to your server SSH access and add the IP address username password and port. After entering the details Click on the login button at the bottom

Step 2. Click on the left-side menu new SFTP window

Step 3. You go to this page now and add the file name

/etc/cyberpanel/machineIP

Step 4. Open the machineIP file. Click on edit file.

Step 5. Here you can change the IP and save the file

Step 6. After saving the file Go to the terminal and Run the command on the terminal:

systamctl restart lscpd

Read more: How To Make A VPS Hosting Company?

How to use Cyberpanel 2fa?

In this quick article, we will write how you can setup CyberPanel 2fa and how you can use 2fa to access Cyberpanel? this will be a quick guide for all this process.

From the version 2.03 to onward now CyberPanel support 2fa for users. So you can make thing more secure by using that.

How to setup two factor authentication in cyberpanel?

To setup this security feature just login to your cyberpanel by visiting URL access URL and using your login access.

Now got to User->Modify User from the left menu.

Cyberpanel user

Now on this page you have to select the user for that you want to enable the 2fa.

cyberpanel 2fa

Here after selection you can see the screen with all of user modification details just enable the 2fa by clicking the addition features tick.

enable 2fa

Once you click that the QR code will appres to scan and check authenticate.

Download google authenticator app from here.

Now scan the code in your google authenticator app and save the modifications.

Test two factor Authentication by login:

To test the two factor authentication what you need to do is log out from your account you enabled two factor authentication.

Now you can see the login page provide the login details and press Sign in button.

Now it will ask you Enter code from Google Authenticator. provide the code that you saved in google authenticator app and press Sign In.

cyberpanel

How to Access CyberPanel?

This will be a very easy and short article. In this, I will just tell you how you can access CyberPanel once it’s installed on your server.

Before going to explain and tell how you can access your panel that is installed on top of your server you must know how you can install CyberPanel on your server.

Before installing CyberPanel on your server your server you must know about the support OS on which you can install CYberPanel click here.

To install CyberPanel on your server just follow their official guide here.

Access CyberPanel Via server IP:

Basically, when you install CyberPanel on your server it will only allow you to log in via IP address in start. You can access using the IP and the port 8090,

https://<IP>:8090

This will not have SSL to access.

Just click on the advance button on this page and then process to the unsafe.

After this login screen will appear and you can provide the username and password to access this.

Access CyberPanel via Hostname:

To login CyberPanel via hostname just issue the hostname SSL using this article here.

Once you issued a hostname SSL to a valid domain name just use the link like domain with port 8090.

htts://domainname:8090

Last Words:

This will be a very easy and short article. In this, I will just tell you how you can access CyberPanel once it’s installed on your server.

Before going to explain and tell how you can log in to your panel that is installed on top of your server you must know how you can install CyberPanel on your server.

You can follow us on Facebook too.

Also ReadOperating System for CyberPanel Installation | Best OS for CyberPanel Installation.

How to Change CyberPanel Password?

Sometimes you need to change the CyberPanel password. So there are two methods to do so. One is to do from the UI and the other is from the terminal. So in this article, we will discuss How to Change CyberPanel Password.

Follow both methods as per your requirements.

Method 1: Change CyberPanel Password from the terminal:

You can change the cPanel password from the terminal. This password will be for the admin account. So basically you can change the CP admin password from the terminal. You can also see How to Change CyberPanel Port. To do so follow the steps:

  1. Login to your SSH using any SSH client like Bitvise.
ssh client like bitvise

2. Open the terminal from the SSH client and then run the command to change the CyberPanel admin password.

adminPass <new-password>
change the CyberPanel admin password.

Methode 2: CyberPanel Change Password using Dashboard:

  1. Login to your CyberPanel at port 8090 using your CyberPanel username and password.
  2. Just go to the User-> Modify User from the left side menu.
Methode 2: CyberPanel Change Password using Dashboard:

3. Now click the Generate button in the form of a password and then use that.

4. Just click the save button at the end of the process and use that password afterward.

FAQ about CyberPanel:

What is the username and password for CyberPanel?

Answer: By default CyberPanel username is admin and the password is 1234567 (not recommended to set default password).

How do I change my password on WordPress?

Answer: You can change the users from the WP admin dashboard and then modify that user.

How do I change my CyberPanel username?

Answer: Just log in to your CyberPanel and then modify the user.

What is the login URL for CyberPanel?

Answer: your login for CyberPanel will be https://<ip>:8090

You can follow us on Facebook too.

Also Read: Operating System for CyberPanel Installation | Best OS for CyberPanel Installation.

Different Ways to Open Control Panel Windows

Discovering how to access the Control Panel on Windows 10, 8, or 7? This article presents a comprehensive guide featuring 10 different methods, including shortcuts for Windows 10, control panel via cmd to open the Control Panel, and more.

What Is a Control Panel in windows?

Control Panel is a crucial component of the Windows operating system. It serves as a centralized hub that allows users to manage and configure various settings and features of their computer. Through the Control Panel, users can customize hardware and software settings, install or uninstall programs, modify user accounts, adjust display and resolution options, set up network connections, manage security settings, and perform many other administrative tasks.

In essence, the Control Panel provides a user-friendly interface for accessing and adjusting the system’s settings, making it easier for users to personalize their Windows experience and optimize their computer’s performance according to their preferences and needs. While newer versions of Windows may introduce alternative ways to access certain settings through the Settings app, the Control Panel remains an essential and powerful tool for advanced system management and configuration.

Accessing Control Panel in Windows 10 using the Search Box

To open the Control Panel in Windows 10 using the Search Box, follow these steps:

  1. Click on the Start button located at the bottom-left corner of the screen, or press the Windows key on your keyboard.
  1. In the search box that appears next to the Start button, type Control Panel and wait for the search results to display.
  1. From the search results, click on the Control Panel app or select it with the arrow keys and press Enter.

The Control Panel will now open, allowing you to access and manage various settings and configurations on your Windows 10 computer. control panel via cmd

Open Control Panel Windows via Run:

To open the Control Panel on Windows 10, 8, or 7 using the Run dialog, follow these steps:

  1. Press the Windows key + R on your keyboard. This will open the Run dialog.
  1. In the Run dialog, type “control” (without the quotes).
  1. Click on the “OK” button or press Enter.

Open Control Panel Windows 10 from Quick Access Menu:

To open the Control Panel from the Quick Access feature in Windows Explorer, you can follow these steps:

  1. Press the Windows key + E on your keyboard to open Windows Explorer (File Explorer).
  2. Look on the left-hand side of the Windows Explorer window. You should see a section called “Quick Access” with frequently used folders listed.
  3. Scroll down in the “Quick Access” section until you find “Control Panel” listed.
  4. Click on “Control Panel” to open the Control Panel window.

Open Control Panel Windows 10 through Cortana:

You can also open control panel vis Cortana:

  1. Make sure you have a working microphone and speaker on your computer.
  2. Activate Cortana by saying “Hey Cortana” if you have enabled the “Hey Cortana” feature. Alternatively, you can click on the Cortana icon on the taskbar to activate it.
  3. Once Cortana is listening, say “Open Control Panel.”
  4. Cortana should process your command and open the Control Panel window on your Windows 10 computer.

Control Panel via cmd

Sure, you can open Control Panel in Windows 10 using PowerShell. Here’s how you can do it:

  1. Open PowerShell: Press the Windows key on your keyboard, type “PowerShell,” and then press Enter.
  2. In the PowerShell window, type the following command and press Enter:
codecontrol

This will open the Control Panel window on your Windows 10 computer.

Alternatively, you can also use the Start-Process cmdlet to open Control Panel from PowerShell:

Start-Process "control.exe"

Both of these methods will open the Control Panel, allowing you to access various system settings and configurations.

Conclusion:

In conclusion, this article explored various methods to open the Control Panel on Windows operating systems. Whether through traditional navigation, keyboard shortcuts, Run dialog, Command Prompt, or PowerShell, users have a range of options to access the Control Panel and customize their system settings efficiently. By understanding these different approaches, users can choose the method that best suits their preferences and needs, enhancing their overall Windows experience.

We have an other article on this as well check here. For old version CyberPanel official guide is here.

You can follow us on Facebook too.

How to  Change Upload Limit for phpMyAdmin?

Step by Step procedure to Change upload limit for phpMyAdmin

Step 1. Access PhpMyAdmin from cyberpanel

Open the Cyberpanel Dashboard.
Go to Databases –> PHPMYADMIN

This will redirect you on the PhpMyAdmin.

Step 2. Check the Max PHP limit.

Go to the PhpMyAdmin dashboard
Click on the “Import“.
You will see the upload limit size.

Step 3. Check PHP version.

Open SSH terminal
Run Command “php -v” and you will get to know the PHP version.

Step 4. Change limit in cyberpanel

Open Cyberpanel dashboard.
Go to PHP–>Edit PHP configs
Select the PHP version 7.4 (which you found in your terminal)
Set the “upload_max_size” you want and save .
Then click on the RESTART PHP.

The upload size of PHP will be changed.
Go to the PHPMYADMIN dashboard you will see the changes will be done.

How to Uninstall or Remove Broken Package in Linux?

Many times it happens that when you try to uninstall a package you encounter an error and the package cannot be uninstalled. This happens when the package is broken. To overcome this issue, we remove the post files of the package to make things work. in this article we are going to learn how to Remove Broken Package in Linux.

Recently, I was trying to remove the ImunifyAV package but encountered this error. E: Sub-process /usr/bin/dpkg returned an error code (1)

Uninstallation Error

Removing the Post Files

To fix this issue and remove the package successfully, we need to remove the post files manually for this package. But first, we need to see the files for this package. The installation files are usually located at /var/lib/dpkg/info file. Type in the following command and replace the package_name with the name of the package that you want to remove.

How to download Anydesk and how to install Anydesk

sudo ls -l /var/lib/dpkg/info | grep package_name
Remove Broken Package in Linux

In my case, I replaced the package_name with imunify-antivirus. This thing helps me to list all packages of imunify-antivirus. Now we need to remove these files manually. For that, type the command:

sudo mv /var/lib/dpkg/info/package_name.* /tmp

This will move all the post files to the tmp directory in case we need them back for any reason. Once the command executed to remove files. After doing that reinstall the package again without getting any errors.

Don’t forget to run the sudo apt update command after removing the files.

after doing all these just run commands to Remove Broken Package in Linux.

Command to Remove Broken Package in Linux:

$ apt unintsall <package-name> 

After doing all these steps you can run the uninstall command like this given above and get the required results.

Here you can read How to log in to the Rainloop admin dashboard?

Read More: How to Change Upload limit On CyberPanel?

How to Change Upload limit On CyberPanel?

You can follow us on Facebook too.

How to dump Database without Password from Linux Command line?

In this article, I am going to explain How to dump Database without a Password from the Linux Command line?

As we know when someone wants to dump a database from the Linux command line they need a password for the database to dump it. Basically dumping database means exporting the database from the Linux command line.

In a normal way when you want to export a database you need a password for the database to do it. Here is the normal command to dump.

mysqldump -u [user name] -p[password] [database name] > [dump file]

But sometimes people don’t like to give passwords again and again. So here I will tell you how you can do the database dump using a password. To do so just follow the process along with me.

You have to do some configurations on the MySQL configurations to dump the database without a password. You have to set the root user database password in my.cnf file and you can dump a database without a password. To do so first login to your root ssh using an ssh client like bitvise, putty, etc.

Location of my.cnf is different in the case of different operating systems like in the case of Ubuntu it is /etc/mysql/my.cnf and in case of Centos it /etc/my.cnf.

You can open according to your operating system after logging in to root ssh.

How to dump Database without Password from Linux Command line?

No got to my.cnf simply run this command:

sudo nano /etc/mysql/my.cnf

After that paste, this code in the file

[mysqldump]
user=mysqluser
password=secret

user will be root and the password of your root MySQL user.

After doing this just restart MySQL or MariaDB and run any dump command

mysqldump -u root [Database naem] > /dbbackup.sql

Here you can read How to log in to the Rainloop admin dashboard?

Read More: How to Change Upload limit On CyberPanel?

How to Change Upload limit On CyberPanel?

Upgrade CyberPanel to any specific branch

Upgrade CyberPanel to any specific branch

Sometimes for some special patches and bug fixes, you need to upgrade Cyberpanel to any specific branch. Like you got any issue in the stable branch and the team announced that the issue is fixed in another CyberPanel branch then you have to move on that.

In this article, I will tell you the few commands to upgrade CyberPanel to any specific branch.

Upgrade CyberPanel to any specific branch

Step 1: Remove old script:

First, you have to remove the old script file to get new and upgrade. Use the command given below to do this.

rm -rf cyberpanel_upgrade.sh 

Step 2: Download specific branch script:

Now in the next step, you have to download the script for new branch you want to install using the command stated below.

wget https://raw.githubusercontent.com/usmannasir/cyberpanel/v<branch>/cyberpanel_upgrade.sh 

remove <branch> to your required branch name

Step 3: Give execute Permissions :

using the command stated below gives the upgrade command execution permissions.

chmod +x cyberpanel_upgrade.sh 

do all this in / or root directory and you must log in as root.

Step 4: Run upgrade script:

Now in the last step just run this command and wait when the system asks for the version give the branch version like “2.0.1-dev”

./cyberpanel_upgrade.sh

NOTE: Giving version is a must process and always give that

Here you can read How to log in to the Rainloop admin dashboard?

Read More: How to Change Upload limit On CyberPanel?

How to Change Upload limit On CyberPanel?

You can follow us on Facebook too.

How to uninstall ImunifyAV from your server?

ImunifyAV is not suitable for every server and maybe sometimes you need to uninstall ImunifyAV from your server to work properly.

In this short article, I will try to explain how to uninstall ImunifyAV from your server using few commands. So follow the process along with me to remove imunifyAV from your server.

Step 1:

Access the SSH client as root of your server using credentials to your server. Like bitwise or Putty,

How to uninstall ImunifyAV from your server?

Step 2:

Stop the imunifyAV services using the command given below.

systemctl stop imunify-antivirus

Step 3:

Now download the imunifyAV script to uninstall the imunifyAV from your server. To download that scrip use the command.

wget https://repo.imunify360.cloudlinux.com/defence360/imav-deploy.sh

Step 4:

Now run the uninstall script and remove the ImunifyAv from your server. use the command given below.

bash imav-deploy.sh --uninstall

Here you can read How to log in to the Rainloop admin dashboard?

Read More: How to Change Upload limit On CyberPanel?

How to Change Upload limit On CyberPanel?

You can follow us on Facebook too.

How to change or reset LiteSpeed Webserver admin password?

Sometimes you can’t remember your LiteSpeed webserver admin password and you want to login as an admin what can you do? In this article, I will show you how to change or reset LiteSpeed Webserver admin password through the root SSH client, in this guide I will show you the step-by-step procedure.

Reset the LiteSpeed Webserver admin password from the SSH terminal is just a few commands processes.

Step-1: Login to Root SSH

Open your root ssh client and log in then open the terminal

Login to Root SSH

Step-2: Change Directory

To change or reset the password you have to go to this directory /usr/local/lsws/admin/misc, so change the directory using this command:

cd /usr/local/lsws/admin/misc
Change Directory

Step-3: Reset LiteSpeed Webserver admin password

Once you changed the directory you can change the password. to change the admin password run this command:

./admpass.sh

Once you run the command it will ask you the username type the username (must be admin) and then press enter then it will show you an input password option enter the new password and then press enter it also requires you to retype the password, re-enter the password, and press enter. it will show you “Administrator’s username/password is updated successfully!”.

reset LiteSpeed Webserver admin password

Your password is changed now access webserver using these credentials at:

https://your_ip:7080

Here you can read How to log in to the Rainloop admin dashboard?

Read More: How to Change Upload limit On CyberPanel?

How to Change Upload limit On CyberPanel?

You can follow us on Facebook too.

How to resolve PHPMyAdmin blank page error CyberPanel?

How to resolve PHPMyAdmin blank page error CyberPanel?

Sometime after update you faced PHPMyAdmin blank page error CyberPanel. In this article i will tell you the shortest way to resolve PHPMyAdmin blank page error CyberPanel.

You have to do few steps to resolve this issue.

You have to load your default PhpMyadmin script and replaced it with the present script.

How to resolve PHPMyAdmin blank page error CyberPanel?

1.Login to SSH. Change directory to the phpmyadmin using this command.

cd /usr/local/CyberCP/public/phpmyadmin

2. Here you have one simple file and one the working config file. Rename the working config to the new file like config.inc.php.old using this command.

mv config.inc.php config.inc.php.old

3. Now rename simple file to the working file and try to access phpmyadmin from the CyberPanel.

mv config.sample.inc.php config.inc.php

Go to the PhpMyAdmin page of your CyberPanel and check now.

https://<ServerIp>:8090/dataBases/phpMyAdmin
How to resolve PHPMyAdmin blank page error CyberPanel?

Read: How to connect CyberPanel with CyberPanel Cloud?

Read more: How to create, delete and manage Child Domains in CyberPanel?

Follow US on Facebook / Twitter Instagram .