Create a post in WordPress is the first and the starting step in blogging and even all fields if you want to start a blogging website then this will be the first thing you need to do. Although to create a post in WordPress is a very easy and steps process.
For creating a post in WordPress user should follow these steps:
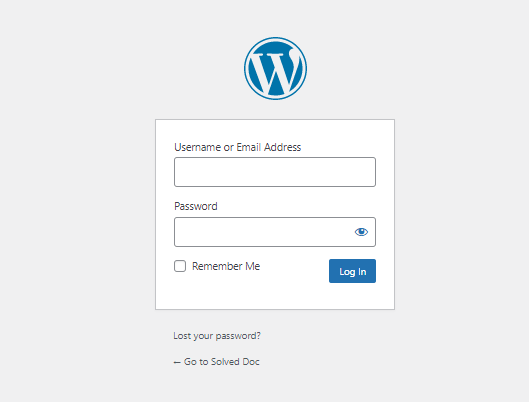
Step 1: login the site “WordPress Dashboard“.
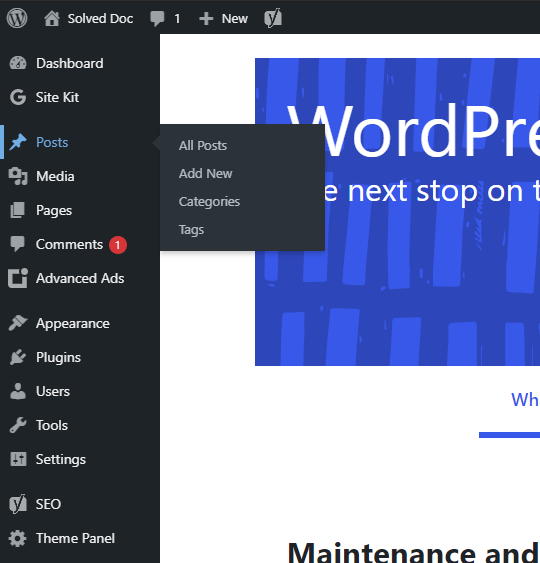
Step 2: click the posts icon on the left side display in navigation menu.
Step 3: Four options will appear. So the user click Add new button on the Posts page for creating a new post.
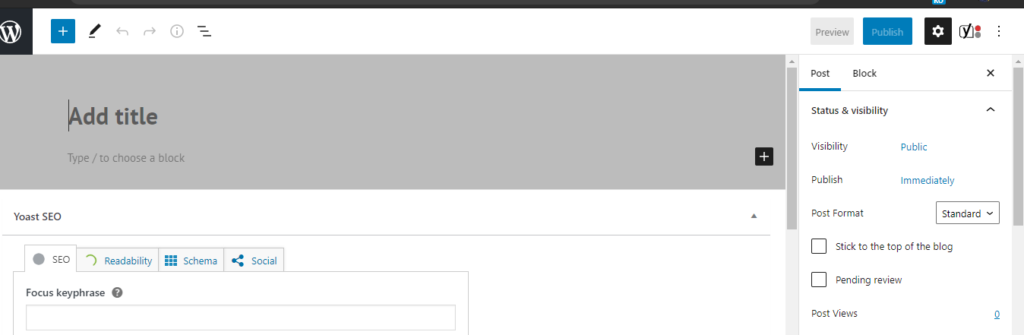
Step 4: Enter the title in a title bar it will appear on the top of the post.
Step 5: After giving the title, type content in a content bar. Users can format the text of content using an editor, like users can bold italic and also change colors of text.
Step 6: The user can also add images. The user can add an image with the help of the “Add Media button”.
Step 6: when the user has entered the information in the posting user can click the publish button. Then the post is displayed on our website.
Step 7: User can also click on save draft to save the information if user does not want to publish his post publicly.
When you want to do some work with WordPress the first step is to write a blog post in WordPress. To start writing a post in WordPress is a very easy process. In this article, I am going to tell you how you can write a post in WordPress.
When someone new starts a new blog or any type of other site using WordPress. So you must have knowledge about creating and managing posts with WordPress. This is one of the cores and basic requirements of WordPress.
So before going to do anything else in WordPress you just have to know how to create a blog in WordPress. As blog or post always have a great impact on the site ranking, site SEO, and all.
Login to your WordPress:
First of all, you have to log in to your WordPress admin dashboard. Normally your WordPress admin dashboard access is on:
https://www.yourwebsit.com/wp-admin
if you have any custom login link for the WordPress admin dashboard you can visit that and provide the user name and password to log in.
Login to your WordPress:
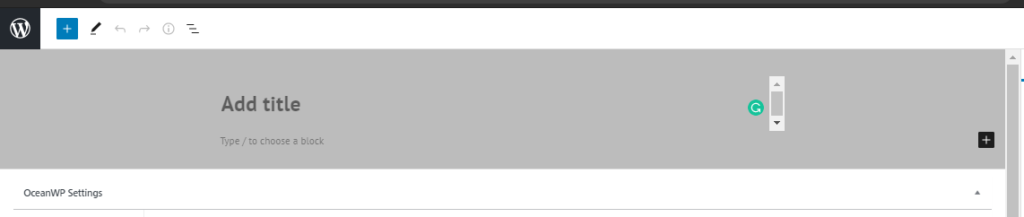
Create a post in WordPress:
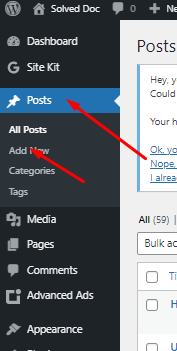
Once you logged in now you can see a lot of options in the left side menu of the WordPress dashboard.
Go to the Posts-> Add new Post option in the left menu.
Create a post in WordPress
Once you click there this will redirect you to the posting page where you can write the post according to your choice and content.
On this page, you can write the content on the main page, and on the right side, you can see a lot of options like some important are Categories, tags, featured images in the post tab.
You can add categories to your posts, tag, and also set featured images to your posts.
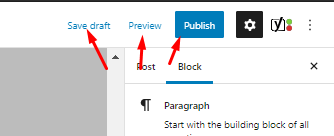
Save post:
In WordPress, you can also make posts to draft and you can also publish them once.
But as you know one post needs many reviews so you have to save it to draft and maybe you have to preview it many times and after all, you can publish a zero error post. so these all buttons and options are present on the top of the right site on the posting page.
Creating a new server in Hetzner is a very easy process. In this article, I am going to tell you how easily you can create a server in Hetzner? You can create a server on the Hetzner cloud easily by following this article.
Hetzner is a service provider that provides you Hetzner dedicated server, Hetzner VPS server, and all. YOU just have to create an Hetzner account and log in to Hetzner and deploy any type of server.
Hetzner supports many Operating systems like ubuntu, centos, Debian, etc. the location of this service provider is only in Germany.
Now follow these steps to set up a Hetzner server for you.
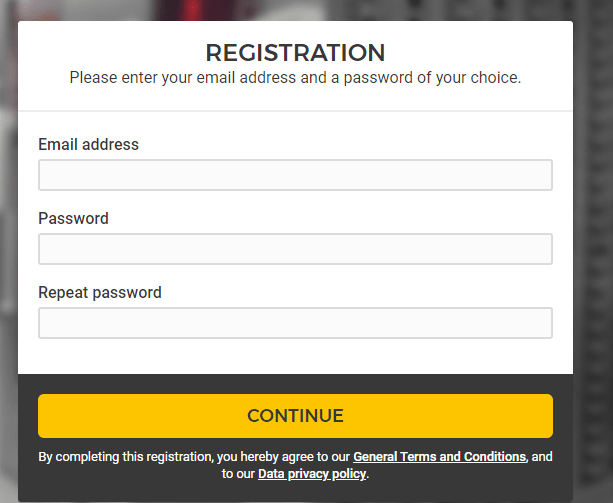
1. Login to Hetzner account:
first of all, you have to log in to your Hetzner account if you already and click here and login if you don’t have then create an account and then log in.
Provide all information to create an account and click the continue button to process for the creation of an account.
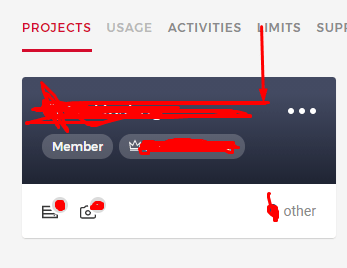
2. Go to you project
Once you created or logged in to your Hetzner account now have to go to any project that you have created in your account.
Click on the project and go to the project dashboard to create a new server.
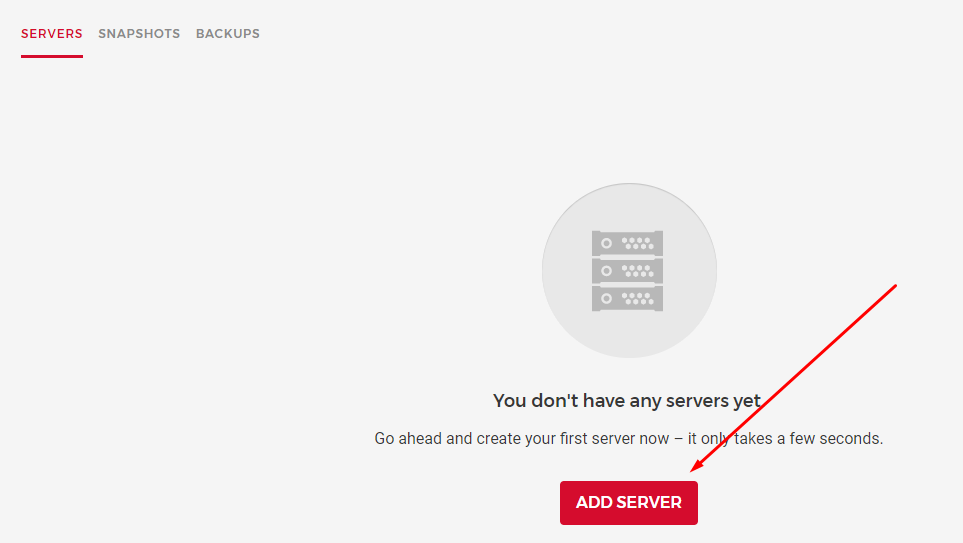
3. Create a server
once you are in the project dashboard you can see a create a server button there. Click on that.
And it will redirect to the page where you have to provide and do all setup.
Now you have to provide and select all information to create a server. This is the basic information that you need to provide while creating Hetzner dedicated server or Hetzner VPS.
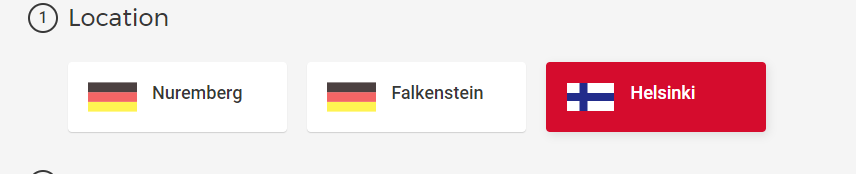
3.1 Location:
In first here you have to select the location where you want to take your server. Hetzner has only Germeny locations.
there are Nuremberg, Falkenstein, and Helsinki. You can go with any you are comfortable with.
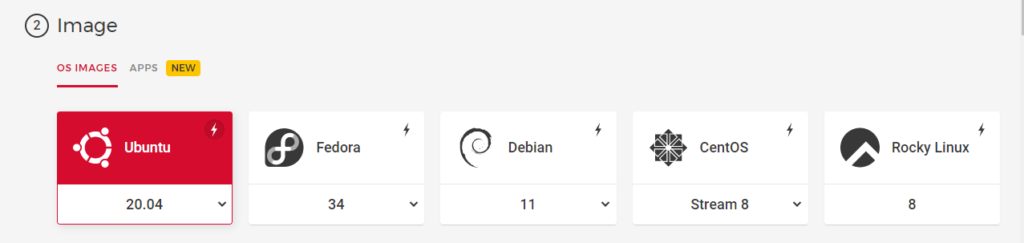
3.2 Image:
After selecting the location now select the Operating system for your server. You can select any OS on hetzner that you want to use for the server.
Hetzner Operating systems are:
Ubuntu 20.04
Fedora
Debian
CentOS
Rocky Linux etc
You can get any according to your choice.
3.3 Type:
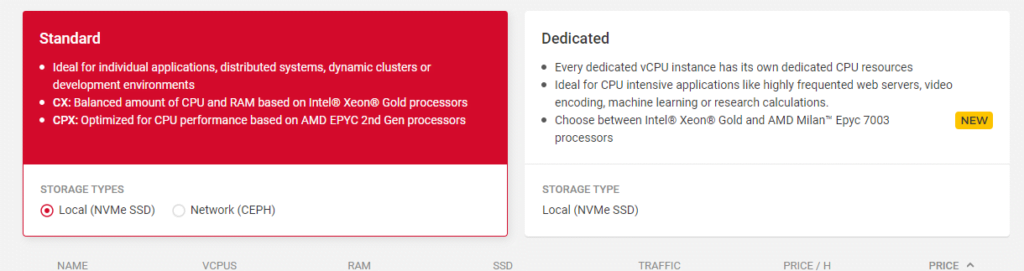
IN this step you can choose a dedicated Hetzner server or a standard Hetzner VPS. You also have to choose the specification which you want for your server. like how many CPUs, ram, etc
3.4 Volume:
if you want any extra volume you can attach it from here.
3.5 Network:
This option will allow you to create a Network do your server. DO if you want.
3.6 Firewalls- BETA:
The firewall is right now in Beta but if you want to order and use
3.7 Additional features:
Use Hetzner additional features in this option
3.8 SSH key:
Integrate the user SSH key that you want to access and use the server.
3.9 Name:
Give a name to your server and press the Create button all done to create an Hetzner server.
If you want to create a Database in CyberPanel. And do not know how to do this you are on right place read this article to know how you can create a new DataBase on CyberPanel for your Website.
Table of Contents:
Login to CyberPanel
Create New Database
Access Database
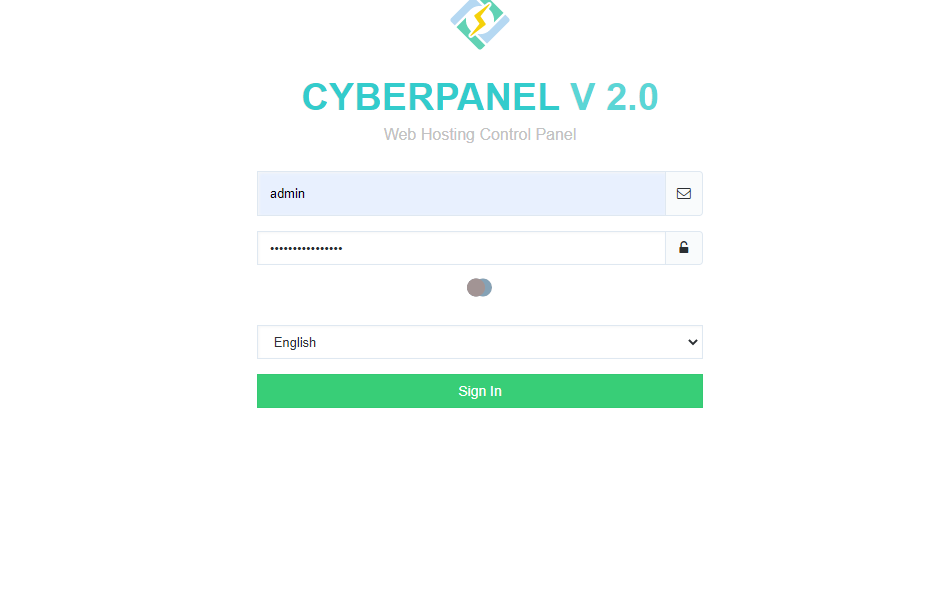
Login to CyberPanel:
First of all visi the CyberPanel login URL to login to your CyberPanel it must be with port 8090, Look like:
https://<somainname/IP>:8090
Provide username and password and login to your CyberPanel dashboard.
CyberPanel Login
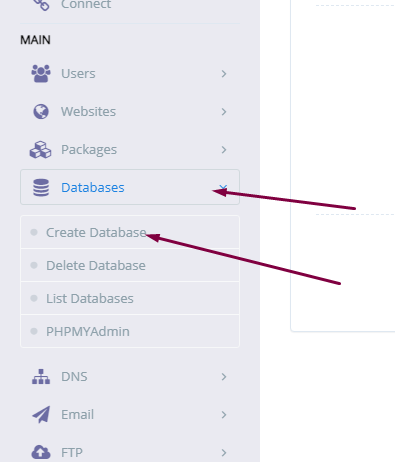
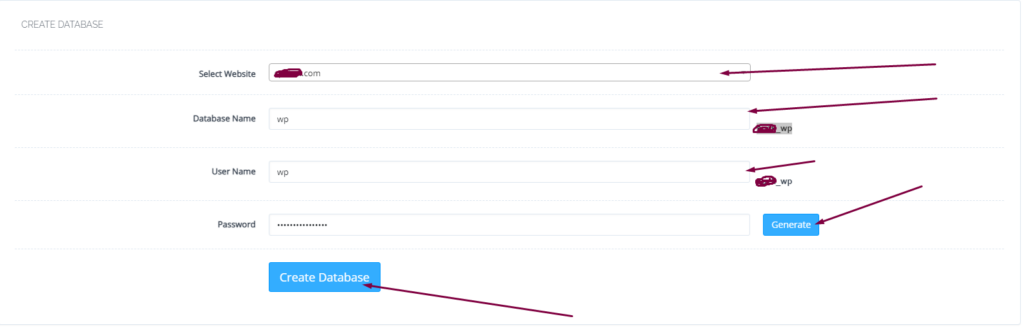
Create New Database:
Once you logged in go to the Database->Create Database: in the left menu.
Create New Database
On this create database page you have to select the domain for which you want to create a new database.
select domain
Now screen ask you to provide the details for database.
Username
Database name
Password
Provide the Details for Database
When you press Create Database button this will create a new one for you on your server.
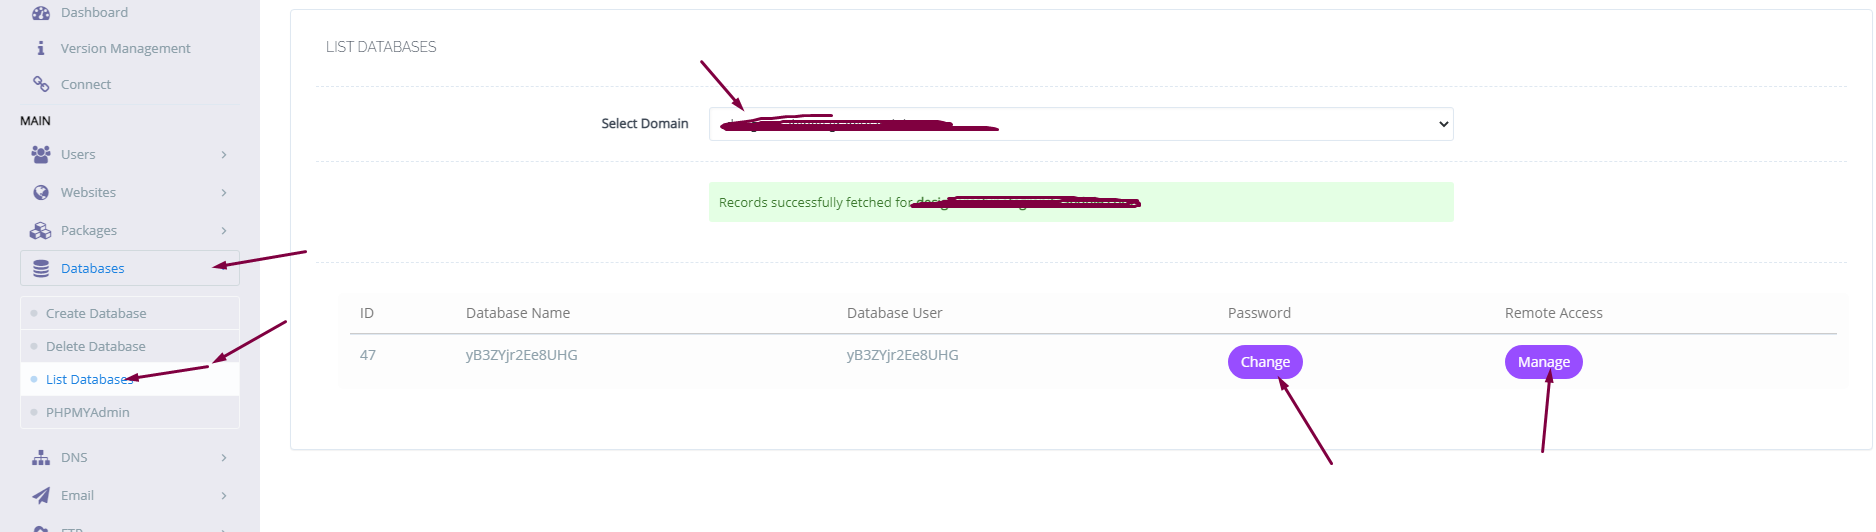
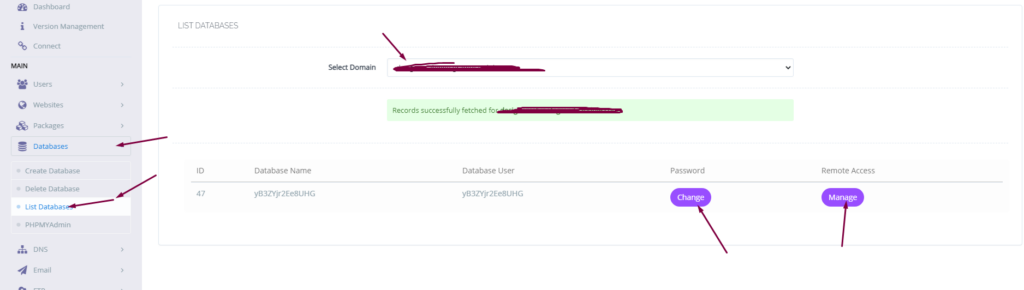
you can also list the database for any of your site on sever from Database-> List Database then select the domain and you can see the list.
list database
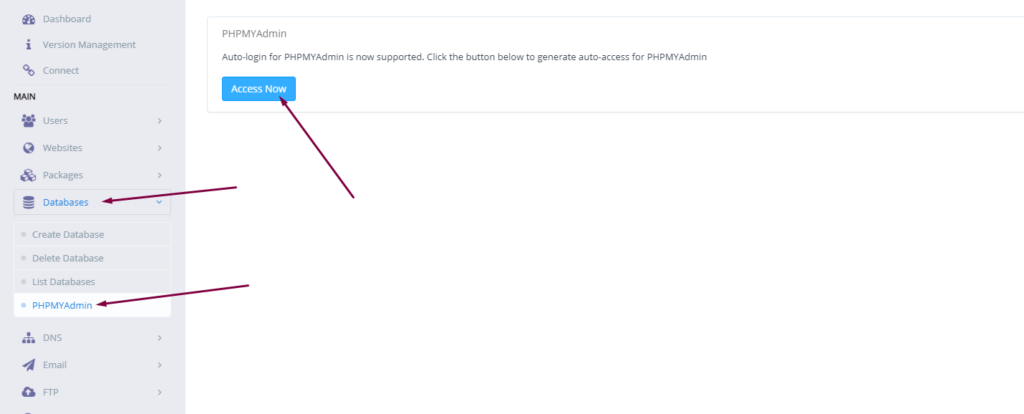
Access Database:
To access your database you created you have to go to Database-> PHPMYADMIN. Then press Access Now button.
You can see the PHPMyAdmin screen now. Where you can see all database for all domains. You can check the database your created and do any operation you want to do on this database.