Sometimes you need to reset your LiteSpeed Cache plugin settings to the default settings for some reason. There may be an issue with the cache hit or anything. Here in this article, we will learn How to reset Litespeed cache default settings?
LiteSpeed Cache plugin
LiteSpeed Cache is a WordPress plugin that helps improve the performance of your website by caching pages and posts, reducing the load on your server, and speeding up your website for visitors. It is designed to work with the LiteSpeed Web Server, but it can also be used with other web servers such as Apache. The plugin offers a range of features, including browser and server-side caching, Gzip compression, and support for content delivery networks (CDNs). It also includes options for optimizing your website’s CSS, JavaScript, and HTML, as well as image optimization and lazy loading.
Key features of the LiteSpeed Cache plugin
Some of the key features of the LiteSpeed Cache plugin include:
- Browser and server-side caching: LiteSpeed Cache can cache pages and posts on the browser and on the server, allowing for faster page load times and reduced server load.
- Gzip compression: The plugin can compress your website’s files using Gzip, which can reduce their size and improve the speed at which they are delivered to visitors.
- Support for CDNs: LiteSpeed Cache can integrate with content delivery networks (CDNs), which can help distribute your website’s content across multiple servers, improving its performance and reducing the load on your own server.
- Optimization of CSS, JavaScript, and HTML: The plugin includes options for optimizing your website’s CSS, JavaScript, and HTML files, which can reduce their size and improve their performance.
- Image optimization and lazy loading: LiteSpeed Cache can optimize your website’s images, reducing their file size and improving their loading times. It also includes lazy loading, which can improve the loading times of pages with many images by only loading images as they are needed.
Reset Litespeed cache default settings:
LS cache offers a reset to the default feature of settings. To do so follow these steps.
- Login to your website WordPress admin dashboard using your credentials.
- Go to the LiteSpeed Cache -> toolbox
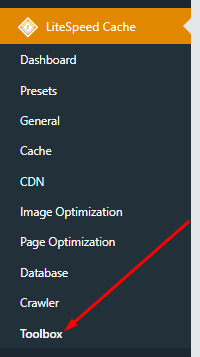
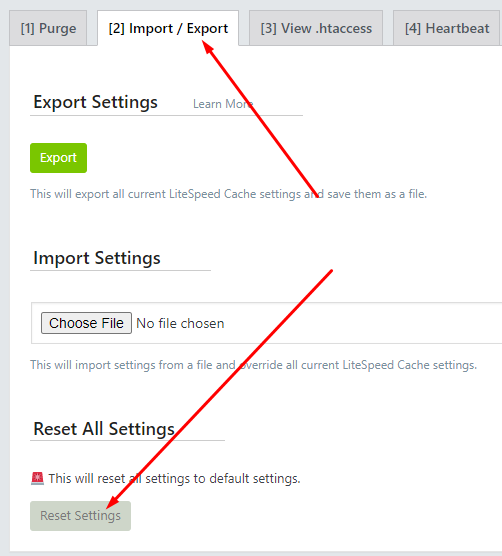
3. Now go to the Import/Export option you can see a reset button you can press that and all will be done.
Read more: How to exclude a specific page from LiteSpeed Cache?
Here you can read How to log in to the Rainloop admin dashboard?
Read More: How to Change Upload limit On CyberPanel?
How to Change Upload limit On CyberPanel?
You can follow us on Facebook too.