how to change the time in my cpanel?
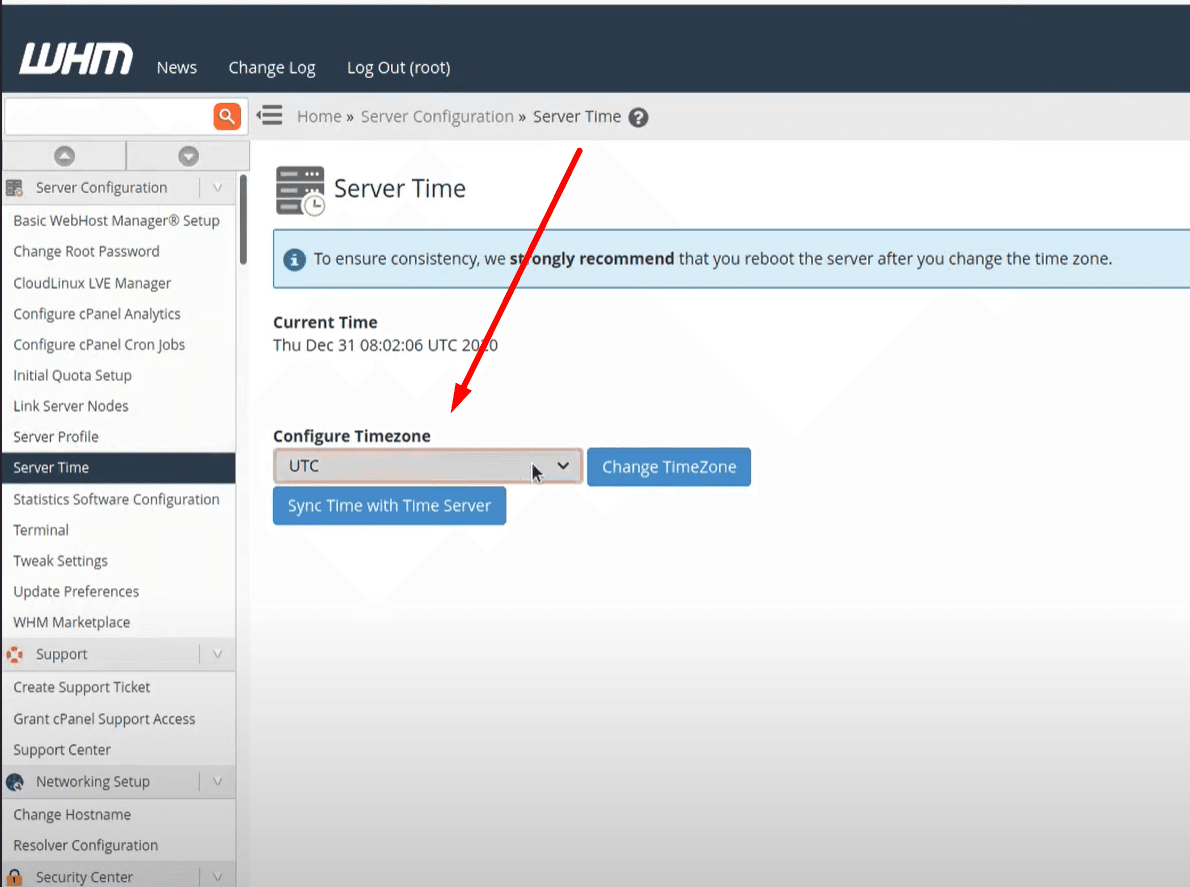
Sometimes you need to change your server time we already have an article on changing server time here. But in this, we will check how to change the time in my cpanel.Keeping the correct server time is essential for accurate logs, scheduling tasks, and ensuring smooth website functionality. If you’re using cPanel and need to