How to Create a server in Hetzner?

Creating a new server in Hetzner is a very easy process. In this article, I am going to tell you how easily you can create a server in Hetzner? You can create a server on the Hetzner cloud easily by following this article.

Hetzner is a service provider that provides you Hetzner dedicated server, Hetzner VPS server, and all. YOU just have to create an Hetzner account and log in to Hetzner and deploy any type of server.

Hetzner supports many Operating systems like ubuntu, centos, Debian, etc. the location of this service provider is only in Germany.

Now follow these steps to set up a Hetzner server for you.

1. Login to Hetzner account:

first of all, you have to log in to your Hetzner account if you already and click here and login if you don’t have then create an account and then log in.

Hetzner login

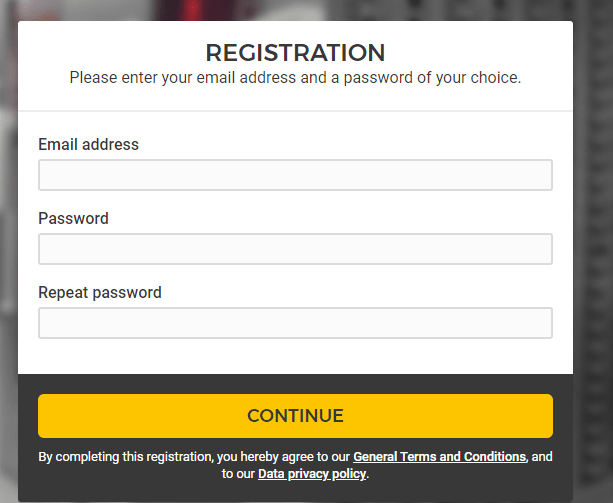
Provide all information to create an account and click the continue button to process for the creation of an account.

2. Go to you project

Once you created or logged in to your Hetzner account now have to go to any project that you have created in your account.

Hetzner project

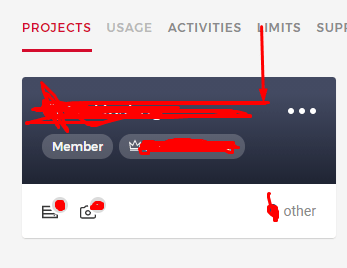
Click on the project and go to the project dashboard to create a new server.

3. Create a server

once you are in the project dashboard you can see a create a server button there. Click on that.

Create a server

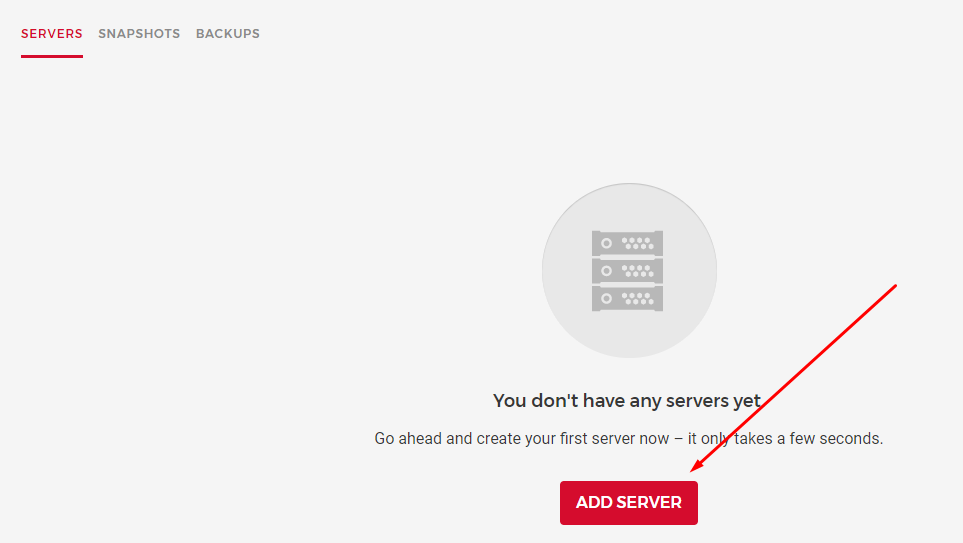
And it will redirect to the page where you have to provide and do all setup.

Now you have to provide and select all information to create a server. This is the basic information that you need to provide while creating Hetzner dedicated server or Hetzner VPS.
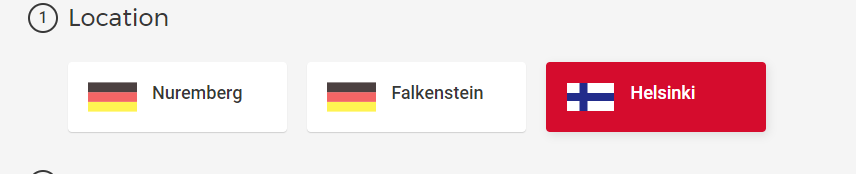
3.1 Location:

In first here you have to select the location where you want to take your server. Hetzner has only Germeny locations.

there are Nuremberg, Falkenstein, and Helsinki. You can go with any you are comfortable with.

Hetzner Locations

3.2 Image:

After selecting the location now select the Operating system for your server. You can select any OS on hetzner that you want to use for the server.

hetzner OS

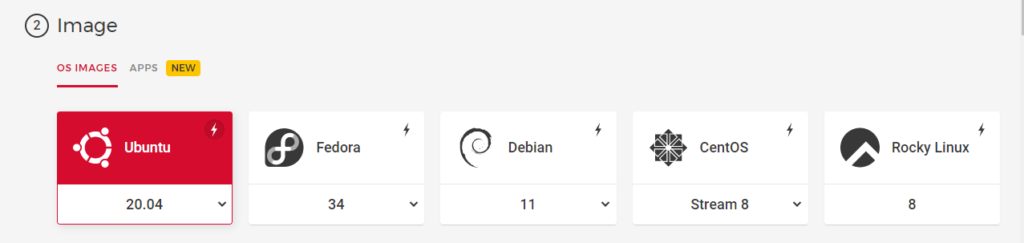
Hetzner Operating systems are:

  1. Ubuntu 20.04
  2. Fedora
  3. Debian
  4. CentOS
  5. Rocky Linux etc

You can get any according to your choice.
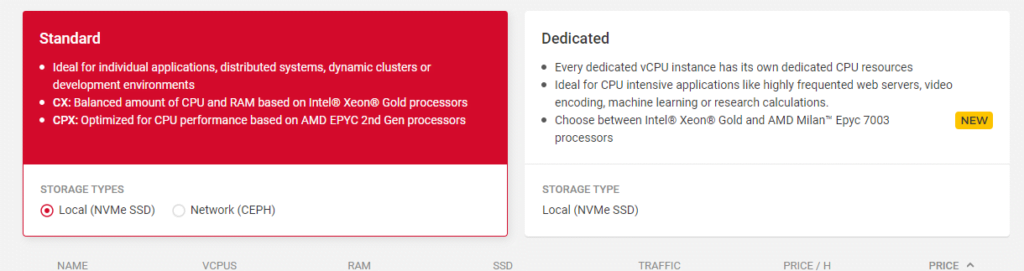
3.3 Type:

IN this step you can choose a dedicated Hetzner server or a standard Hetzner VPS. You also have to choose the specification which you want for your server. like how many CPUs, ram, etc

Hetzner type

3.4 Volume:

if you want any extra volume you can attach it from here.

hetzner volume

3.5 Network:

This option will allow you to create a Network do your server. DO if you want.

Hetzner Network

3.6 Firewalls- BETA:

The firewall is right now in Beta but if you want to order and use

Hetzner firwall

3.7 Additional features:

Use Hetzner additional features in this option

Hetzner AF

3.8 SSH key:

Integrate the user SSH key that you want to access and use the server.

Hetzner SSH

3.9 Name:

Give a name to your server and press the Create button all done to create an Hetzner server.

Hetzner name

Read more: How to create, delete and manage Child Domains in CyberPanel?

Follow US on Facebook / Twitter Instagram .

How to install OpenLiteSpeed on Centos?

Do you know how to install OpenLiteSpeed on Centos?

First of all, I would like to tell you that what is OpenLiteSpeed? I know most of you know that what is OpenLiteSpeed but it’s my habit to discuss things before going to deep. So OpenLiteSpeed is the Open Source edition of LiteSpeed Web Server Enterprise.

In this article, we will discuss step by step how to install OpenLiteSpeed on Centos.

How To Install OpenLiteSpeed:

First of all, you need to add the LiteSpeed repository to your centos. You can do it by using the following command.

rpm -ivh http://rpms.litespeedtech.com/centos/litespeed-repo-1.1-1.el7.noarch.rpm

Once you added the repository now you can install the OpenLiteSpeed on your server easily. To do so you have to run the command:

yum install openlitespeed

Now what? if you want to install any specific version of OpenLiteSpeed. In that case you can use this command:

yum install openlitespeed-x.x.x

Replace the x value with your required version. Like 1.6.5 or something. You can access the web server on:

http://your_ip:7080

Setup Administrator Password:

Now your LiteSpeed web server is installed. You have to set a password for the OpenLiteSpeed web server in order to access it. You can set the password by using this command:

/usr/local/lsws/admin/misc/admpass.sh

Use sudo if you don’t have root rights. you can also use this to change the OpenLiteSpeed web server password. When you run this command this will ask you User name [admin]: put admin here

OpenLiteSpeed web server password

And after that, it will ask for a password add a password and confirm that.

change OpenLiteSpeed web server password

Now your web server is go to go.

Some common commands for OpenLiteSpeed:

Here some common commands that you must need to know about the OpenLiteSpeed.

  1. To check the status of OpenLiteSpeed you can use this command.
Systemctl status lsws 

2. To stop the OpenLiteSpeed service use this command.

Systemctl stop lsws 

3. To start the OpenLiteSpeed service use this command

Systemctl start lsws 

4. To restart the OpenLiteSpeed service use this command

Systemctl restart lsws 

Directories and Logs for OpenLiteSpeed:

Now I think it’s very important to tell you about directories and logs of OpenLiteSpeed. Maybe you want to do some testing on it. Joke apart never try to do tests on anything you have not enough knowledge.

The default OpenLiteSpeed installation directory is: /usr/local/lsws

You can also start OLS using this command:

/usr/local/lsws/bin/lswsctrl start

You can also stop OLS using this command:

/usr/local/lsws/bin/lswsctrl stop

If you faced any error on OLS and want to find what is that then you can check the error log in /usr/local/lsws/logs/error.log.

Some more information about OpenLiteSpeed:

Well, the free version of LiteSpeed web servers. Although both OpenLiteSpeed and LiteSpeed ENT. are developed by the same developers. But there must be some difference between them. You can imagine a price thing and a paid thing must be different from each other.

OpenLiteSpeed has almost all the features that LiteSpeed Ent have. But there must be some difference. The main difference is OpenLiteSpeed requires a restart to load any new .htaccess file. While LiteSpeed Ent does this Automatically.

How to Install a WordPress Plugin?

How to Install CyberPanel On Centos?

How to install CyberPanel? I know everyone who came on this article will know that what is CyberPanel and want to know how to install CyberPanel. Some of you have basic knowledge and some are experts hehe.

But If you are totally new here then let me tell you that CyberPanel is a control panel. Basically, CyberPanel is a hosting control panel like the other the popular one c-panel.

Introduction of CyberPanel:

CyberPanel is a free and open-source next-generation hosting control panel. CyberPanel is Powered by LiteSpeed technologies. And mostly use by the LiteSpeed web servers. Basically CyberPanel is free but here is the twist. CyberPanel has two versions CyberPanel and CyberPanel Enterprise. There is not a huge difference between the CyberPanel and cyber panel Ent. CyberPanel Ent comes with LiteSpeed ent so that makes the difference. See here what the official web site of Cyberpanel said about CyberPanel ent.

Here in this article, I am going to tell you how to install CyberPanel on Centos. I will discuss about the installation on other Operating systems and flavors of Linux but in this, I will stay with centos.

Requirements for installation (Hardware and General requirements ):

CyberPanel requirements for installation are not so high and complicated. We discuss the main here:

  1. A server or machine with Centos
  2. Minimum 1 GB Ram
  3. SHH access with root
  4. 10GB Disk Space.

How to install CyberPanel?

CyberPanel Installation is very easy and its just one command installation. When you search for how to install cyberpanel you will foun a bunch of commands and different steps. But i perfer only one command to install CyberPanel and that command is:

sh <(curl https://cyberpanel.net/install.sh || wget -O - https://cyberpanel.net/install.sh)    

This will do have for you now you have to take care of some processes while installing CyberPanel. These are

Install Specific Version Of CyberPanel:

Now sometime you have to install a specific version of CyberPanel. This is a bit tricky. First of all, you have to wget (download) the specific branch of CyberPanel you want to install using this command:

wget https://raw.githubusercontent.com/usmannasir/cyberpanel/<branchname>/cyberpanel.sh

Now you have to assign it executable Permissions. Using this command:

chmod +x cyberpanel.sh

Now execute for installation:

./cyberpanel.sh  

How to Upgrade CyberPanel to the latest version?