Warning: Redis::get(): php_network_getaddresses: getaddrinfo for localhost failed: Name or service not known in /home/solveddoc.com/public_html/wp-content/plugins/litespeed-cache/src/object-cache.cls.php on line 674
Server Archives - Solveddoc

9 Reasons Why Web Hosting Complaints Arise

Launching a business in today’s digital world means having a strong online presence. With the Internet rapidly expanding globally, countless businesses are now racing to establish themselves online. However, choosing the right hosting provider can be challenging due to increasing Web Hosting Complaints, as many services fail to deliver what they promise. This makes the process of selecting the right web hosting service even more overwhelming.

When I first started, I thought choosing a company was as easy as picking the cheapest option—but I quickly realized how important the right provider is. A website should run properly, just like electricity in a house—you only notice it when something goes wrong. Most people don’t consider their hosting until problems appear.

From my experience, the real trouble begins when your webhosting doesn’t support your requirements. I’ve had hosts that lacked support, which made me rethink my choices. When sites load slowly or crash, it’s often due to poor hostingservice or hostingcompany decisions. I’ve come across companies that seemed perfect at sign-up but became a nightmare later.

It’s essential to look at options, not just settle for what looks good. Many new entrepreneurs don’t realize how much their technology, connection, and platform setup matters. Terms like electricityconnection, runningproperly, or even seldomthought often describe the nature of these issues—quiet until they break. It’s these typical issues that make peoplehosting hard to trust, and in some cases, push users to explore rethinkchoice or a new hostingright solution.

Reduced Speed and Accessibility

From my experience running multiple web projects, a slow website can ruin the user journey. If navigation is clunky or pages take too long to load, you instantly lose traffic. The performance of a site depends heavily on your hosting. A major reason many companies face web hosting complaints is due to reduced speed and poor accessibility.

When internal pages take time, search engines lower your listing, and results suffer. You must get a fast, reliable host to avoid this. From a strategic standpoint, your role is to ensure the part of tech that users don’t see—the hosting—is never the bound reason they leave.

9 Reasons Why Web Hosting Complaints Arise

From my experience, one major problem users face is reduced speed and poor accessibility. If your website takes too long to load, check if your hosting company has its data centers located nearer to your audience. High latency and delay in navigation often come from poor network setup or low-quality hardware. A good host should reduce these issues using strong support teams and proper tools.

Using a ContentDelivery Network helps serve cached versions of static content at optimized speeds across different locations, especially if people are visiting from across the world. Always check the quality, availability, and performance your provider promises. The amount of care and support they offer can make or break your site.

Lack of Website Protection

In my years working with websites, I’ve seen how ignoring security can invite hacking, identity theft, and other major issues. Many clients assume their web hosting service includes protection, but in reality, a lack of essential features like malware scans or firewalls puts their website at risk. If your site has already been hacked, it’s often a sign the service is weak or not properly providing what’s needed.

The level of protection must match today’s threats, yet I still see hosts that are outdated and don’t evolve with days like these.

A secure host must become a shield, not just a space. If it has holes, you could be exposed, even if everything seems fine with your setup. From element to case, each part plays a role—an ignored patch, a missed update, or simple user error. The need for strong layers is constant; of course, we want peace of mind, not panic.

I always tell clients: your hosting is the foundation, and if it’s unstable, the entire experience collapses. It’s why I never compromise on hosting, and neither should you—it’s more than a tool; it’s a digital lifeline.

A shared hosting plan offers the lowest level of security. If your business is growing, it’s important to think seriously about switching to VPS or dedicated hosting for better protection.

Know Your Needs

One big mistake I’ve seen people make—something I once did myself—is choosing a web hosting company without fully understanding their actual needs. When launching a project, it’s tempting to grab the first service that sounds good or offers a low price. But it’s vital to evaluate things like uptime, bandwidth, technical support, and disk space first. Your platforms might require specific software or hardware, so take the time to look closely at what’s included in the package.

I once ignored this and ended up with support channels that were barely reachable, even though I needed help urgently. A proper hosting plan should match your particular goals and be flexible enough for months ahead, even if you’re just starting. Before you select from the many hosting companies or providers, make sure to know what you want—down to every feature, no matter how small.

If your purpose is growth, you can’t afford to skip steps. A clear understanding of your true requirements leads to better decisions and avoids unnecessary complaints later. There are different types of hosting, and not all are good for every situation. Knowing your needs means you may not fall into traps that others do by taking offers that don’t suit them.

It’s not about choosing “whatever”—it’s about selecting what really fits your use case. And when things lead to problems, it’s often because the decision was made without considering the essential details.

Restricted Hosting Capabilities

In my early days of running an online business, I learned how crucial it is to avoid a fixed setup. Your needs and company constantly evolve, and without a flexible plan, you hit a wall fast. As your website begins to grow and expand, a rigid host can’t keep up. A good builder or host must let you scale easily—from shared to VPS or even dedicated plans—without bottlenecks. I once had to upgrade my service because I wasn’t getting enough data allowance despite paying more.

A smart choice is a hosting provider that offers many options tailored to usage, allowing you to use only what you need. That’s real flexibility. You should never feel boxed in—your service must adjust as your business progresses. In a nutshell, let your platform flourish without barriers. And yes, doing it easily makes a world of difference.

Heavy Traffic Impact

As someone who has managed multiple client sites, I’ve seen how high traffic—while great for business—can sometimes be too much of a good thing. When your website starts to generate more leads and the amount of traffic grows unusually, your server must be able to handle it properly. If not, it can slow your site speed, hurt its functionality, and result in a not so great experience for users.

What many forget is that when too much demand hits your site in a short period, even a “good” setup can struggle. Pages take longer to load, the whole site may go down, and the goal of a seamless experience is missed. That’s why it’s important to always be ready to scale and anticipate growth well in advance—trust me, I’ve learned this the hard way. If your host isn’t capable, you’ll face real issues, and you may end up losing traffic that once came in very eager.

To avoid complaints, invest in a setup that’s good, reliable, and can expand as needed. Functionality, after all, is just as important as visibility. So whether it’s during a campaign, sale, or viral moment—that rush shouldn’t be what breaks your platform. Keep it smooth, in control, and built for the unexpected.

Lack of Worth

From my experience, when people compare different web hosting services, they often get distracted by flashy offers from 2020-style pricing trends. It’s easy to ignore the real needs of your website and chase low prices, but that can lead to regret. I’ve seen many sign up with a company just because it was cheaper or simply marketed well, without realizing that a low price does not always translate to good value.

The real strategy is to pay only what’s necessary for reliable hosting, and nothing more, while avoiding being tempted by unrealistic deals.From my experience, many hosting companies lure customers with cheap introductory offers that seem attractive at first glance. However, when you go for renewing the plan, the price often doubles, making you pay the full amount, which feels unfair.

While looking at plans and costs, I always ensure to read the fine print to avoid surprises. Initially, this mistake cost me extra, but now I keep in mind to compare many options, have patience, and know when a deal truly benefits you.

Delays in Fixing Hosting Problems

From my own experience dealing with web projects, I’ve seen how hosting companies sometimes fail to disclose critical limitations in their packages. When unexpected issues occur, customers struggle to understand the full scope of the service they paid for. A company that doesn’t resolve site errors quickly risks long downtime, which directly impacts visibility on the Internet.

I always look for a provider that guarantees 99% uptime and stands behind the offered service without excuses.From my own experience, companies often fail to disclose critical information about how much time they take to provide solutions when a website faces issues. This situation can make clients repent their decision later if they encounter any limitation in the web hosting plans.

Before choosing a company, I always review all aspects of the plan and spend time selecting the right choice that meets my needs. It’s important to evaluate features and services carefully, as once you start subscribing, you must rely on them for support. Over time, I’ve learned to be better acquainted with these factors and make the right decisions after a thorough check

Hidden Limits in Hosting Plans

I once faced a problem when my website stopped running smoothly, and I had no option but to wait for my hosting service provider to fix it. The real issue starts when hidden restrictions suddenly occur, leaving you feeling helplessly stuck while hoping things get resolved quickly. From my experience, such moments of worry highlight how important it is to check the fine print of your plan before trusting your hosting company.

I’ve seen many people frustrated when they realize their web hosting plan has hidden restrictions. The company may not clearly explain how much support is actually available. While some companies promise 24/7 help, only a few truly deliver online assistance around the clock. From my own experience, the lack of quick help to resolve urgent queries wastes valuable time. If your support isn’t reliable, even the best features of the plan won’t save you.

From my experience, when companies only provide a contact form to register complaints, customers often wait endlessly for a solution. Even with promises of 24/7 support, the service can feel slow and lacking in quick responses during downtime. Some providers push users toward FAQ pages or forums, which rarely resolve urgent issues and only add to the problem.

This lack of reliable assistance turns a simple query into a frustrating experience, especially when every minute of waiting impacts your site and overall convenience.

Hidden Terms in Promotions

Over the years of working with different web hosting companies, I’ve noticed how some promotions with big discounts hide tricky clauses and unclear terms. Many customers expect unlimited features but later discover limits on bandwidth, storage, or support, which leads to frustration and frequent complaints.

I once guided a client who believed in “unlimited space,” only to find a limit on file counts that wasn’t mentioned in the fine print. Such hidden details make people feel misled, shake trust in the company, and push them to switch services, leaving behind negative feedback. Based on my review of various hosting packages, I now focus on reading every line before committing to avoid unpleasant surprises.

Solution of web hosting complaints

ComplaintSolution
Reduced Speed and AccessibilityUse a hosting provider with SSD storage, CDN, and caching tools to ensure faster loading and smooth accessibility.
Lack of Website ProtectionChoose hosts that provide SSL certificates, firewalls, malware scanning, and automatic backups for better security.
Know Your Needs
Evaluate your website traffic, storage, and features to pick a plan that matches your current and future requirements.
Restricted Hosting CapabilitiesOpt for hosting plans that allow add-ons, databases, and scalability; consider VPS or cloud hosting if needed.
Heavy Traffic Impact
Select providers offering scalable or cloud hosting to handle sudden traffic spikes without downtime.

Lack of Worth
Compare features vs. pricing and choose plans that deliver value with transparent policies and reliable services.
Delays in Fixing Hosting ProblemsGo for hosts with 24/7 customer support and a proven record of fast technical issue resolution.
Hidden Limits in Hosting PlansCarefully read terms and conditions to identify hidden restrictions like file or bandwidth limits.
Hidden Terms in PromotionsAlways review fine print and renewal pricing to avoid unexpected costs after the promotional period.

FAQS

1. What are the most common web hosting complaints?
The most common web hosting complaints include reduced speed, hidden limits in plans, poor customer support, and unexpected renewal costs.

2. How can I avoid web hosting complaints related to speed?
To prevent web hosting complaints about slow speed, choose providers with SSD storage, CDN, and caching tools that ensure fast website performance.

3. Why do customers file web hosting complaints about security?
Many web hosting complaints arise due to weak security measures. Always pick a host that offers SSL certificates, malware scanning, and DDoS protection.

4. How do hidden terms in promotions lead to web hosting complaints?
Hidden terms in promotional offers often cause web hosting complaints when renewal prices rise unexpectedly. Reading the fine print helps avoid such issues.

5. What is the best way to resolve web hosting complaints?
To resolve web hosting complaints, communicate with the provider’s support team, review their policies, or switch to a more transparent hosting company.

Conclusion

In my experience of dealing with different hosting companies, I have learned that many web hosting complaints arise due to small misunderstandings and ignoring the fine print in plans. Users often get attracted to flashy marketing offers but later face problems like hidden limits, unexpected downtime, or lack of proper support.

These issues usually happen when the hosting plan is chosen without understanding the key features and required services. A reliable host is not just about big promotions, but about stable performance, clear policies, and quick response during critical time. By paying attention to important points, we can save ourselves from frustration and ensure a smooth-running website.

How to get Digital Ocean login for sSH?

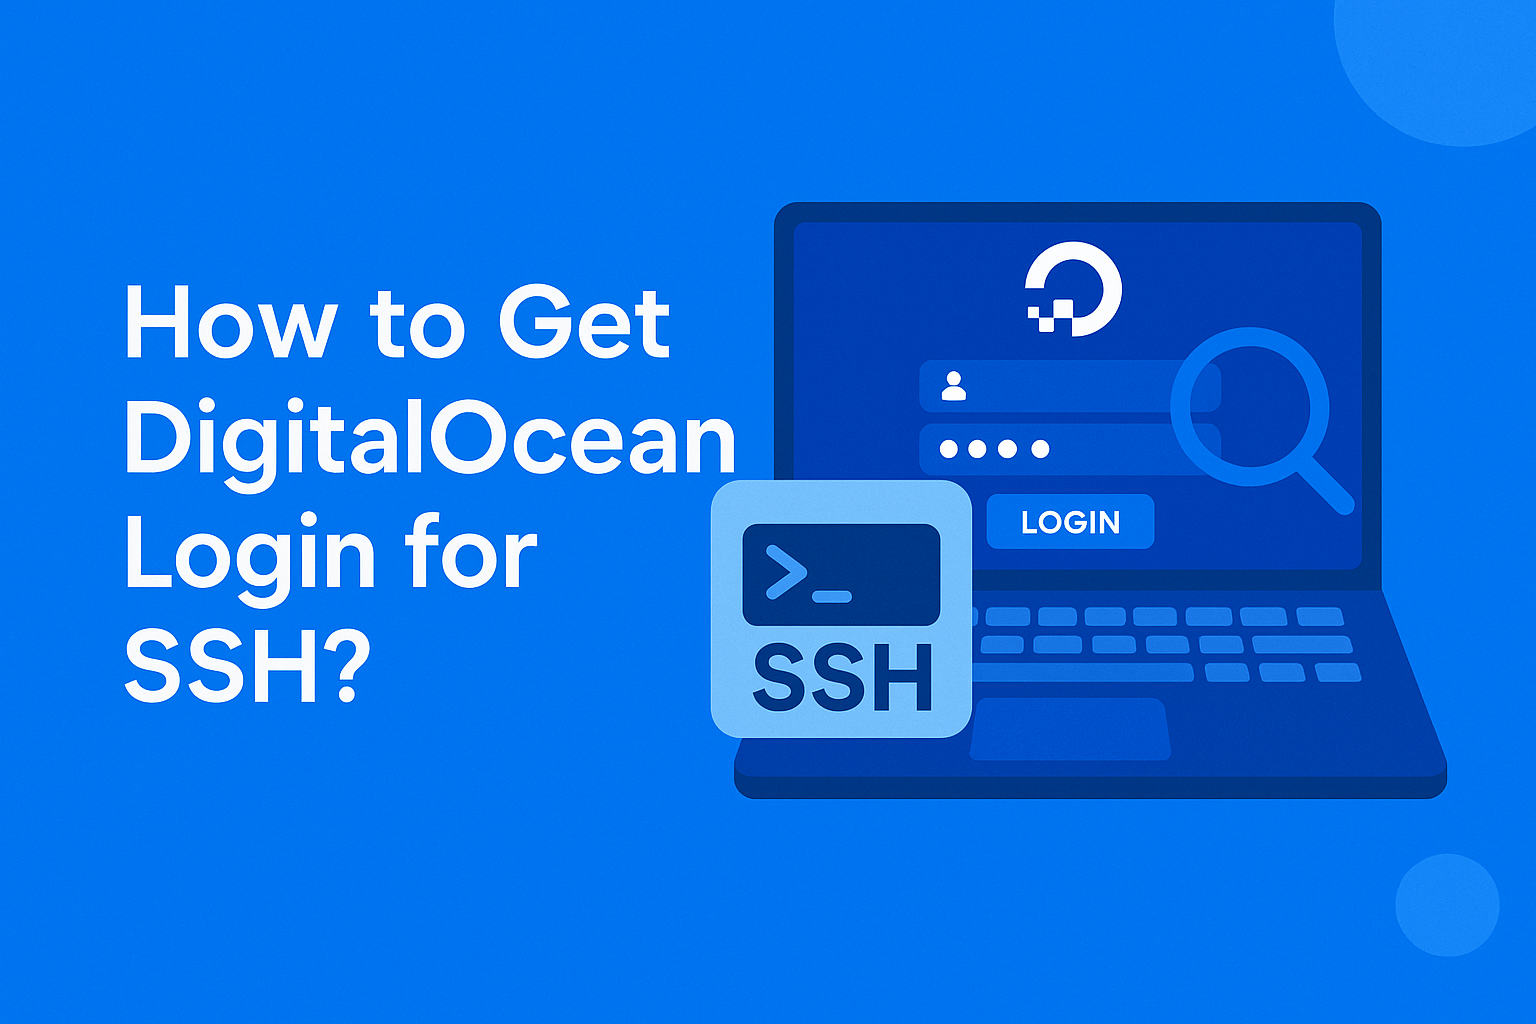
A lot of users dont know how to get the Digital Ocean Login for SSH user from their Digital Ocean account, so this will be a very quick point-to-point guide to tell you how to get SSH access for your root user from Digital Ocean.

Get Digital Ocean login for SSH:

To get Digital Ocean login for the SSH user, you just need to follow these steps:

  1. Log in to your DigitalOcean account using your credentials
Digital Ocean login

2. Once logged in, you’ll see a list of all the servers (Droplets) you’ve created.

3. Click on the Droplet you want SSH access for. This will take you to the server’s dashboard.

4. On the left sidebar, click on “Access” (second option in the menu).

You’ll see various options like Launch Recovery Console, Reset Root Password, and more.
Scroll down and click on “Reset Root Password”.

Click this button now, your password will be sent to your email as displayed here as well. Copy that and access your Digital Ocean server using SSH using these Digital Ocean login access for SSH.

Connect to Your Server Using Bitvise SSH Client

  1. Download and install Bitvise SSH Client from bitvise.com.
  2. Open Bitvise and enter the following details:
    • Host: Your server’s IP address (from DigitalOcean).
    • Port: 22 (default SSH port)
    • Username: root
    • Initial Method: Password
    • Password: The one you received via email
  3. Click “Login”.
  4. The first time you connect, you’ll be asked to accept the server’s host key. Click “Accept and Save”.
  5. Once connected, you’ll have access to your server’s terminal and file system.

Conclusion

Accessing your DigitalOcean server via SSH is straightforward, especially when using a user-friendly tool like Bitvise SSH Client. By resetting your root password through the DigitalOcean dashboard and entering it in Bitvise, you can securely and efficiently manage your server. Whether you’re a beginner or a seasoned developer, this method gives you full control of your server in just a few clicks.

Make sure to change your root password after first login for better security, and consider switching to SSH key authentication for long-term use.

Ultimate Power of DigitalOcean VPS: 5 Steps to Set Up Your VPS

DigitalOcean VPS clients need not look elsewhere when it comes to value offered for the price paid. When compared with industry competitors, DigitalOcean VPS stands our as a host with unparalleled performance, reliability, as well as flexibility.

Why Choose DigitalOcean VPS?

1. Speed

Speed and uptime are critical factors in website success. DigitalOcean VPS boasts state-of-the-art infrastructure and globally distributed data centers while other don’t, giving your website exposure to fast and efficient loading no matter where visitors are located. Do away with slow loading times and frustrated users, with Digital Ocean VPS, speed is on your side.

2. Complete Control

DigitalOcean VPS Options & Flexibility control puts you in control of your server fully. The customers are free to choose an Operating system, and configures the server to the preferred specifications. Would you like to scale resources to meet demand during peak traffic hours? Wish to install a specific software package? There is nothing in customer’s way with Digital Ocean VPS.

3. Advanced Security Features

One does not need any verification with DigitalOcean VPS, as this host keeps security as their utmost priority, offering built-in DDoS protection together, robust firewalls, and updates maintaining security for the clients’ websites.

How to Set Up a DigitalOcean VPS

Setting up a VPS on DigitalOcean is straightforward and efficient. Follow these steps to get started:

  1. Create an Account – Sign up on DigitalOcean’s website and verify your email.
  2. Create a Droplet – Choose your preferred operating system and server specifications.
  3. Access Your Server – Use SSH to connect to your VPS securely.
  4. Configure Security Settings – Set up firewalls, SSH keys, and security patches.
  5. Install Required Software – Install a web server, database, and any additional tools you need.
  6. Deploy Your Website or Application – Upload your files and configure your domain.

Who Can Benefit from DigitalOcean VPS?

Whether you’re a budding entrepreneur launching your first website or a seasoned developer in need of a reliable hosting solution, DigitalOcean VPS has everything you need to succeed. Don’t settle for mediocre hosting when you can have top-tier performance and reliability.

Make the Switch Today

In summary, DigitalOcean VPS offers the speed, control, and security necessary to take your website to the next level. Say farewell to slow load times and unreliable hosting providers—choose DigitalOcean VPS and experience the difference for yourself.

Your website deserves the best. Make the switch today and watch your online presence thrive!

Here’s a detailed article on setting up a VPS on DigitalOcean. Since I can’t include actual images here, I’ll describe what each image should contain so you can take screenshots while following the steps.


Setting up a Virtual Private Server (VPS) on DigitalOcean is a straightforward process. Whether you’re launching a website, a web application, or a personal server, DigitalOcean provides a user-friendly interface to deploy your VPS quickly. This guide will walk you through creating and configuring a VPS on DigitalOcean.


Step 1: Create a DigitalOcean Account

  1. Go to DigitalOcean and sign up.
how to setup VPS digitalocean
  1. Confirm your email address and enter your billing details.

Step 2: Create a Droplet (VPS Instance)

  1. Log in to your DigitalOcean account.

2. Select the project in which you want to deploy VPS.

DigitalOcean VPS
  1. Click on Create → Droplets in the top-right corner.

3. Choose Region:

You can choose any region that you want and also that suits you.

  1. Choose an image (OS): Ubuntu, AlmaLinux, CentOS, Debian, etc.

Choose Size:

In this section you can choose few things, Droplet Type, CPU options.

Droplet Type

CPU Options

Pricing and Specifications

PriceHourly RateRAMCPUStorageBandwidth
$7/mo$0.010/hour1 GB1 AMD CPU25 GB NVMe SSDs1000 GB transfer
$14/mo$0.021/hour2 GB1 AMD CPU50 GB NVMe SSDs2 TB transfer
$21/mo$0.031/hour2 GB2 AMD CPUs60 GB NVMe SSDs3 TB transfer
$28/mo$0.042/hour4 GB2 AMD CPUs80 GB NVMe SSDs4 TB transfer
$42/mo$0.063/hour8 GB2 AMD CPUs100 GB NVMe SSDs5 TB transfer
$56/mo$0.083/hour8 GB4 AMD CPUs160 GB NVMe SSDs5 TB transfer

Would you like help in choosing the best plan for your needs?

Additional Storage

Backups

Would you like recommendations on whether to enable backups or add storage?

Choose Authentication Method

Root Password Requirements

Important Notice:

Would you like recommendations on securing your Droplet or choosing the best authentication method?

Here are the details from this final Droplet setup screen:


Recommended Options (Optional Add-ons)

  1. Improved Metrics Monitoring and Alerting (Free)
    • Collect and graph system-level metrics
    • Track performance and set alerts instantly
  2. Worry-Free Managed Database (+$15.00)
    • Scalable database service
    • Includes:
      • Daily backups with PITR
      • Automated failover
      • End-to-end SSL

Finalize Details


Create Droplet Button

✅ Once the password is set (and meets all the criteria), the “Create Droplet” button will be enabled.


Would you like help picking a hostname or deciding on monitoring/database options?


Step 3: Connect to Your VPS

Once your droplet is created, you’ll see an assigned IP address.

  1. Using SSH (For Linux/macOS):
    Open the terminal and enter: ssh root@your_droplet_ip If using an SSH key, no password is needed. Otherwise, enter the root password.
  2. Using PuTTY (For Windows):
    • Download and open PuTTY.
    • Enter your Droplet’s IP address.
    • Click Open and log in as root.

📷 Image Suggestion: Screenshot of a terminal connected to the VPS.


Step 4: Update and Secure Your VPS

After logging in, update the system:

apt update && apt upgrade -y  # For Ubuntu/Debian
dnf update -y  # For AlmaLinux/CentOS

Set Up a New User (Optional but Recommended)

adduser yourusername  
usermod -aG sudo yourusername  # For Ubuntu/Debian
usermod -aG wheel yourusername  # For AlmaLinux/CentOS

Set Up a Firewall (Recommended for Security)

ufw allow OpenSSH  
ufw enable  

📷 Image Suggestion: Screenshot of a successful SSH login and system update in progress.


Step 5: Install a Web Server (Optional)

If you’re hosting a website, install a web server like Apache or Nginx.

Install Apache

apt install apache2 -y  # Ubuntu/Debian  
dnf install httpd -y  # AlmaLinux/CentOS  
systemctl enable --now apache2  # Ubuntu/Debian  
systemctl enable --now httpd  # AlmaLinux/CentOS  

Install Nginx

apt install nginx -y  # Ubuntu/Debian  
dnf install nginx -y  # AlmaLinux/CentOS  
systemctl enable --now nginx  

📷 Image Suggestion: Screenshot of the Apache or Nginx welcome page when accessed via the VPS IP address.


Conclusion

Your DigitalOcean VPS is now set up and ready to use! From here, you can configure databases, deploy applications, or set up a control panel like cPanel.

Would you like a downloadable version of this guide with images? Let me know! 🚀

How to setup hetzner dedicated server?

Hetzner is one of the known server providers. In this article, we will check how you can set up Hetzner Dedicated Server.

About Hetzner:

Hetzner is one of the most known companies for providing different types of web hosting servers like VPS and dedicated. Hetzner is a Germany-based web hosting company known for dedicated servers, cloud hosting, colocation & VPS registration services. Well, they provide high-performance servers at reasonable prices.

Key Features of Hetzner:

Dynamic Discount Cloud Services: Scalable cloud instances with flexible pricing.

Colocation — Take space in a data center to house your own server hardware Statusworte Meers, SALE!

Networking & Security: Includes DDoS protection, private networking, and both IPv4/IPv6 support.

Data Centers: Germany (Nuremberg, Falkenstein) and Finland (Helsinki).

Why Choose Hetzner?

Affordable price: Economical server plans compared to other providers.

Stable Infrastructure: New high-performance data centers.

Green: Energy-efficient hosting options.

Customizable Hardware: Tailor-made server configurations.

Type of servers Hetzner offers:

Hetzner has different types of servers to suit different needs. Here are the main types:

Hetzner Dedicated Servers

Standard Dedicated Servers – High-throughput bare metal servers.

Server auction – Older dedicated servers at a discount.

AMD & Intel Servers – best for different workloads.

Hetzner Cloud Servers

General Purpose — Optimizes both performance and cost.

Dedicated vCPU – Allocated CPU resources for demanding workloads.

Storage Instances — Well-suited for storage of large amounts of data.

Load Balancers – Efficiently distribute traffic.

Hetzner VPS (Virtual Private Servers)

This is what we call a Virtual Private Server (VPS), which provides private resources at a lower price.

Hetzner Colocation Services

Let you put your own hardware into Hetzner’s data centers.

Hetzner Storage Solutions

Storage Boxes – A cloud storage that is both secure and scalable.

Backup Storage — Remote backup for data protection.

Hetzner Web Hosting (Starting from €1.76/month)

Hetzner Managed Servers (Starting from €34.00/month)

Hetzner Servers location:

There are currently four network zones and six locations:

eu-centralus-eastus-westap-southeast
DE Falkenstein fsn1US Ashburn, VA ashUS Hillsboro, OR hilSG Singapore sin
DE Nuremberg nbg1
FI Helsinki hel1

How to Setup Hetzner dedicated server?

Hetzner’s Dedicated Server section, where they offer different types of Hetzner dedicated server. Here’s a breakdown of the various server categories shown in the image:

How to setup hetzner dedicated server?

1. Server Auction (from €31.00)

2. Server Finder (from €37.30)

3. EX Server (from €39.00)

4. AX-Line (from €37.30)

5. RX-Line (from €169.00)

6. SX-Line (from €104.00)

7. GPU Server (from €184.00)

8. Brands (from €209.00)

Now you can see all types of dedicated servers that Hetzner is providing you have to select the dedicated server type that you want to deploy. Different types of servers have different deployment time frames. For this, I will select the auction one.

Select your Hetzner dedicated server:

The first thing is to select which type of dedicated server you want to deploy with the hetzner. Like for now from all the above I am going to select the hetzner auction dedicated server.

Now you can see below on the auction page all of the servers that are available in the Hetzner auction can be seen. Like right now for me I can see 1342 servers are available in the list.

Now here hetzner provides a very cool filter to get the server of exact your choice. Using this filter you filter the server according to your needs like CPU, RAM, location, etc as explained below.

This is the filter panel for searching and selecting Hetzner dedicated servers (especially in the Server Auction section). Here’s what each option means:

1. Search Terms

2. Price Range

3. Status

4. Location

5. CPU

6. RAM

7. Drives

8. Additional Hardware

How to Use It?

  1. Set your budget with the price slider.
  2. Choose the CPU and RAM based on your needs.
  3. Pick storage type (SSD/NVMe for speed, HDD for large capacity).
  4. Select a server location for better latency.
  5. Use additional filters for GPUs, network cards, etc.
  6. Click Search to find the best matching server.

Would you like help picking the best Hetzner server for your needs? 🚀

Buy Your Hetzner dedicated server Now:

Just select your server and click on the cart button

Once you click on cart button your server is select and you need to pay now.

Now click on the Save button now and move on next button. Now one important thing you have to take care you should select password or public key on this screen.

All done to get a dedicated server just click on the checkout button now.

Here if you are already logged in that will be great otherwise you will be redirected to https://accounts.hetzner.com/login here provide your logins and log in or you have to create a new account from here https://accounts.hetzner.com/signUp

Just click on order confirmation now and all will be done.

How to start a VPS hosting company?

We have already made an article on How To Make A VPS Hosting Company. This is another article just like the old one. In this we will discuss How to start a VPS hosting company?

We will make this very simple and a words article so everything will be easy to understand.

How to start a VPS hosting company

How to Start a VPS Hosting Company A Step-by-Step Guide

Starting a VPS (Virtual Private Server) hosting company can be a lucrative venture if done right. However, it requires careful planning, an understanding of the technical aspects, and a clear business strategy. Below is a detailed guide to help you navigate through the process of setting up your VPS hosting company. Steps for How to Start a VPS Hosting Company.

1. Understand the VPS Market

Before diving into the business, research the VPS hosting market. Understand the target audience (developers, businesses, startups), the competitors, and the pricing strategies. Identify what features or services can make your offering stand out, such as better performance, enhanced security, or excellent customer support.

2. Choose the Right Business Model

There are several business models you can follow:

3. Set Up Your Infrastructure

Infrastructure is the backbone of your VPS hosting company. You need to decide whether you will own physical servers or rent them from data centers.

4. Choose the Right Software

You’ll need several layers of software to manage your VPS hosting company:

5. Build a Professional Website

Your website is the face of your VPS hosting company. Ensure it is professionally designed, easy to navigate, and clearly communicates your services, pricing, and support options.

Key sections your website should include:

6. Establish Pricing and Packages

Set your pricing structure based on market research and your costs. Consider offering multiple packages with varying resources (CPU, RAM, storage, bandwidth) to appeal to different customers.

You can also add optional add-ons like:

7. Develop a Marketing Strategy

Marketing is key to attracting customers. Use a mix of the following strategies:

8. Provide Stellar Customer Support

Hosting customers expect quick and reliable support. Ensure you have a dedicated support team available 24/7 to resolve technical issues and answer customer inquiries.

9. Legal and Financial Setup

Set up the necessary legal and financial infrastructure for your business:

10. Scale Your Business

As your customer base grows, you’ll need to scale your infrastructure to meet demand. This could involve adding more servers, upgrading network capacity, or expanding to multiple data center locations.

Regularly monitor your systems to ensure optimal performance and plan for capacity increases in advance.

Conclusion

This is a short but somehow basic guide for How to start a VPS hosting company? Starting a VPS hosting company is a significant investment in both time and money, but with the right approach, it can be a profitable venture. Focus on providing reliable service, excellent customer support, and competitive pricing, and you’ll build a loyal customer base over time.

Success will depend on continuous innovation, marketing, and adapting to the evolving needs of your clients.

Read More: How to Change Upload limit On CyberPanel?

How to Change Upload limit On CyberPanel?

You can follow us on Facebook too.

How to add your SSH key in CyberPanel?

In some cases, you need to change the SSH port and create and use an SSH key. Securing SSH is one of the most important tasks of a system administrator. CyberPanel allows you to change SSH ports, disable root login, and save your SSH keys. In his article, we learn about how to add your SSH key to the server using CyberPanel

Step 1: Login to the CyberPanel dashboard

Step 2: On the left side menu scroll down Click on the Security

Step 3: Go to the Security->Secure SSH

Now this page will be open. Here you can see the SSH port,permit root login

Step 4: Click on the SSh keys-> Add key

Step 5: After Clicking on the Add key you can paste your key and Click on save

Step 6: You can delete your key By clicking on the ‘X’ button Listed here

Step 7: You can also change your port and enable or disable the permit root login after changing these Click on Save changes

You can follow us on Facebook too.

We have an other article on this as well check here. For old version CyberPanel official guide is here.

Best CyberPanel Hosting you should consider.

If you are going to buy a new CyberPanel hosting for your business you should have to consider few providers I am going to list in this article.

In this article, I am not just going to add few hosting option and ask you to buy. I will give you brief details about how to choose hosting, what you have to take care of while choosing a hosting, which stack is good for your site, and all.

Before going into the discussion of the hosting option those who provide the How to Choose a hosting provider smartly?

Once you read this article let’s move toward the options we have in CyberPanel.

CyberPanel base Hosting options:

There are a few top-level options for this which are managed and unmanaged let’s discuss them one by one.

1. CyberHosting:

CyberHosting is a managed hosting solution that provides you with hosting solutions in different locations and different providers. The CyberHosting has a large range of servers with Hetzner, Vultr, Upcloud, and their own cyberhosting dedicated VPS solution.

Webiste: https://www.cyberhosting.cloud

Pricing: https://cyberhosting.cloud/pricing/

Trial: Cyberhosting offers 3 days free trial

Locations: CyberHosting offers a large range of locations

2. Hostinger:

Hostinger is also an option that provides you the CyberPanel hosting. They provide mostly unmanaged hosting and mostly they work on their hardware.

Webiste: https://www.hostinger.com/

Pricing: https://www.hostinger.com/cyberpanel-vps-hosting

Trial: They don’t have a trial

Locations: they offer four locations

3. Vultr Hosting:

Vultr is one of the well-known hosting providers and they are very popular for their VPS. Especially the high-frequency VPS. They offer unmanaged VPS solutions and you will find the Cyberpanel in their market place and you can use that.

Website: https://www.vultr.com/

Pricing: https://www.vultr.com/pricing/

Trial: They don’t have a trial

Locations: they have a large range of locations

MarketPlace: https://www.vultr.com/marketplace/apps/cyberpanel/

4. AWS Hosting:

Like Vultr AWS also has the cyberpanel in their marketplace. Amazon Web Services (AWS) is a cloud computing platform offered by Amazon that provides a wide range of cloud services, including hosting solutions for websites, applications, and various workloads. AWS offers a flexible and scalable infrastructure that allows businesses and developers to host their applications and data in the cloud.

Website: https://aws.amazon.com/

Pricing: https://aws.amazon.com/pricing/

Trial: They offer free tire

Locations: they have a large range of locations

MarketPlace: https://aws.amazon.com/marketplace/pp/prodview-afkzr2wjcxhr6

5. Digital Ocean

DigitalOcean is a cloud infrastructure provider that offers cloud computing services to developers and businesses. While it’s not as comprehensive as Amazon Web Services (AWS) in terms of the number of services offered, DigitalOcean is known for its simplicity, developer-friendly approach, and competitive pricing.

Website: https://www.digitalocean.com/

Pricing: https://www.digitalocean.com/try/cloud-hosting

Trial: They don’t offer free trail but offer some bounes.

Locations: they have a large range of locations

MarketPlace: https://marketplace.digitalocean.com/apps/cyberpanel

Last Words:

There are many other small and large hosting solutions that provide cyberpanel. There are also managed and unmanaged hosting solutions that are cyberpanel-based. But these are some top solutions that I added to my list.

My recommendation is cyberhosting.cloud.

How to Access CyberPanel?

This will be a very easy and short article. In this, I will just tell you how you can access CyberPanel once it’s installed on your server.

Before going to explain and tell how you can access your panel that is installed on top of your server you must know how you can install CyberPanel on your server.

Before installing CyberPanel on your server your server you must know about the support OS on which you can install CYberPanel click here.

To install CyberPanel on your server just follow their official guide here.

Access CyberPanel Via server IP:

Basically, when you install CyberPanel on your server it will only allow you to log in via IP address in start. You can access using the IP and the port 8090,

https://<IP>:8090

This will not have SSL to access.

Just click on the advance button on this page and then process to the unsafe.

After this login screen will appear and you can provide the username and password to access this.

Access CyberPanel via Hostname:

To login CyberPanel via hostname just issue the hostname SSL using this article here.

Once you issued a hostname SSL to a valid domain name just use the link like domain with port 8090.

htts://domainname:8090

Last Words:

This will be a very easy and short article. In this, I will just tell you how you can access CyberPanel once it’s installed on your server.

Before going to explain and tell how you can log in to your panel that is installed on top of your server you must know how you can install CyberPanel on your server.

You can follow us on Facebook too.

Also ReadOperating System for CyberPanel Installation | Best OS for CyberPanel Installation.

How to Change CyberPanel Port?

Changing the port of CyberPanel is also a security measure but a lot of users don’t know how to change the CyberPanel port. So in this article straight away we will discuss how you can change the 8090 port of cyberpanel to any other port.

Change CyberPanel Port Complete steps:

there are two parts to this task first to enable the required port in the firewall and then change the port from CyberPanel.

Part 1: Enable Port in Firewall

  1. Login to your CyberPanel using your login credentials.
CyberPanel login

2. From the left bar menu go to the Security -> Firewall. Here you can see the CyberPanel port list

cyberpanel

3. Now add the required port that needs some information as I have given below.

How to Change CyberPanel Port?

Part 2: Update the new port and change the old one:

1. From the left bar menu go to the server status -> change port.

How to Change CyberPanel Port?

2. In this screen you can see your CyberPanel default port will be 8090. Change that port to your required port like I will do for 1122.

How to Change CyberPanel Port?

These are steps to do it from the CyberPanel UI that is simple but you can also change CyberPanel port ssh

Counculion|:

Changing the default port (8090) of CyberPanel is a crucial security measure that often goes overlooked. In this article, we’ll guide you through the process of changing CyberPanel’s port to enhance the security of your server. By doing so, you can reduce the risk of common cyberattacks targeting well-known ports and strengthen your server’s defenses. We’ll provide clear instructions, prerequisites, and considerations for selecting a new port, ensuring that even users with limited server management experience can follow along. Don’t leave your CyberPanel vulnerable; follow these steps to safeguard your server effectively.

There are a lot of questions that users ask about CyberPanel port:

  1. What is the admin port for CyberPanel?

So the default CYberPanel port is 8090

2. How do I remove port 8090 from CyberPanel?

method is given above in this article

3. How do I change port 8090 from CyberPanel?

That is also will be done in this article

4. How do I open a port in CyberPanel?

Follow this article part 1.

Operating System for CyberPanel Installation | Best OS for CyberPanel Installation

CyberPanel stands out as a popular hosting control panel among its peers. You can install CyberPanel with different Operating systems. Here in this article, we will discuss the best os for Cyberpanel installation as there are a lot of operating system where you can install CyberPanel and use it. But we will discuss all and get an answer about this.

Supported Operating Systems for CyberPanel installation:

Here is the list of operating systems that support cyberpanel installation:

  1. Ubuntu 20.04
  2. Ubuntu 22.04
  3. Centos 7
  4. Centos 8
  5. Almalinux 8
  6. Rocky Linux

These are some top supported OS by CyberPanel. Centos is no longer recommended.

In the realm of operating systems supported by CyberPanel, there are several noteworthy choices. While it’s important to mention some of the top-supported OS options, it’s also crucial to note that CentOS is no longer recommended. CyberPanel, a popular hosting control panel, offers compatibility with various operating systems, including Ubuntu, Debian, and even CentOS. Supported operating systems are chosen for their robustness and compatibility with CyberPanel’s features, ensuring users have a reliable and efficient hosting experience.

However, it’s worth noting that CentOS, which was previously a favored choice among users, has seen a shift in recommendations. The change is due to CentOS’s altered versioning strategy, moving from CentOS Linux to CentOS Stream, which brought uncertainty regarding long-term support and stability. As a result, CyberPanel users are now encouraged to explore alternative options like Ubuntu or Debian for their hosting needs to ensure they have access to a dependable and well-maintained operating system that aligns with CyberPanel’s performance goals.

Best OS for CyberPanel installation:

So the decision of best depends upon the usability and your attachment to that OS. In the past, most users like Centos 7 to use with cyberpanel but as now Centos is going to stop updating so people are shifting toward Alama Linux and Rocky.

But one of the best operating systems is Ubuntu 22.94 update and smooth. i personally like this to use with CyberPanel be a lot of users do not agree with this.

Read about: CyberPanel logs details

We also have a complete guide to Cyberpanel that can help you understand each and every feature of Cyberpanel. Also how to use that feature is also written there. So here is the guide.

You can follow us on Facebook too.