You always need a secure URL for your website. Secure means your website will be accessible with SSL(Secure Sockets Layer). It’s very important to access your site on HTTPS instant of HTTP. Today I will tell you how you can add ZeroSSL to your website. ZeroSSL is totally free for your website.
ZeroSSL allows the free start of three domains. You can add free-of-cost SSL to your first three sites after those you have to buy if you want to issue SSL for more sites.
Create ZeroSSL account:
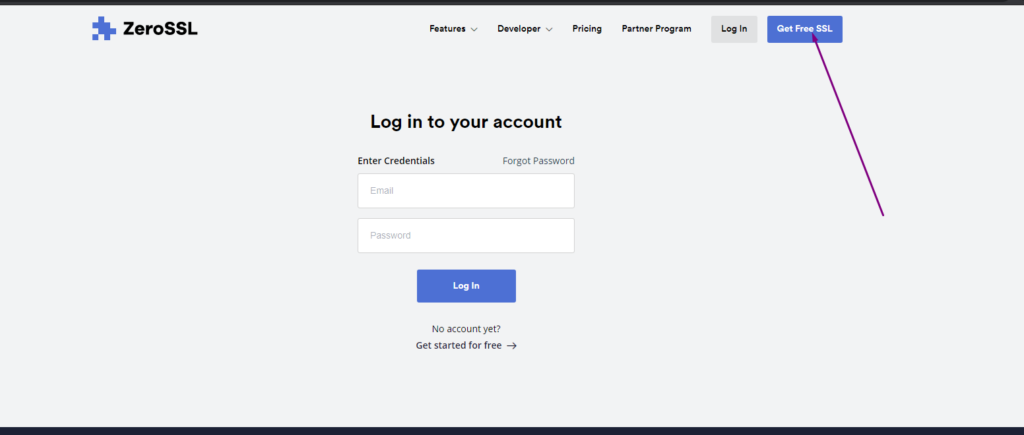
In first step you have to create an account on ZeroSSL website. For this go Here.
Here on this page you can see the Get Free SSL button click on that and visit to registration button.
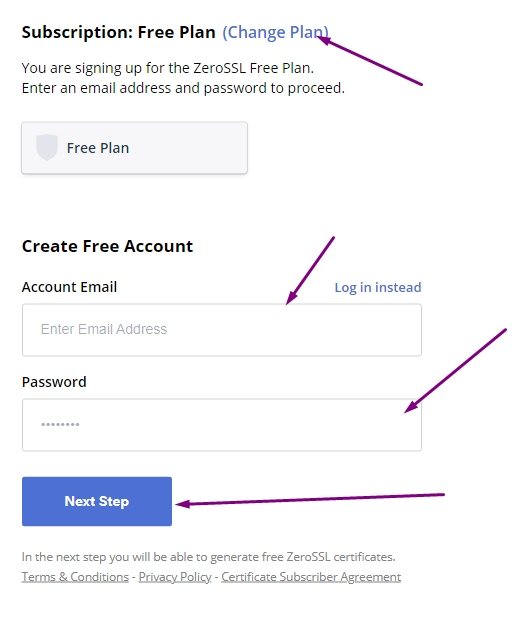
On this page you have to provide some information to signup.
- Subscription Plan
- Email Account
- Password
After providing these all press to the Next Step button.
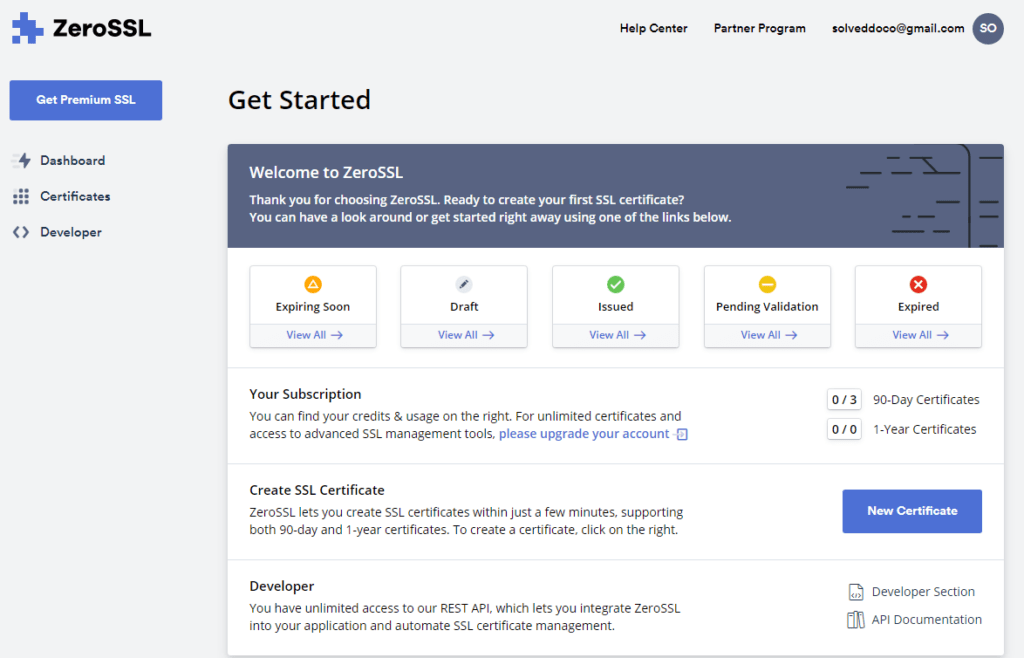
Once you press this button you can see the ZeroSSL dashboard.
Create New SSL Certificate:
Here on Dashboard you can see New Certificate button press this button present in the above image.
On the next page you have to provide following information:
- Enter Domain (Enter your domain name for which you want to issue SSL)
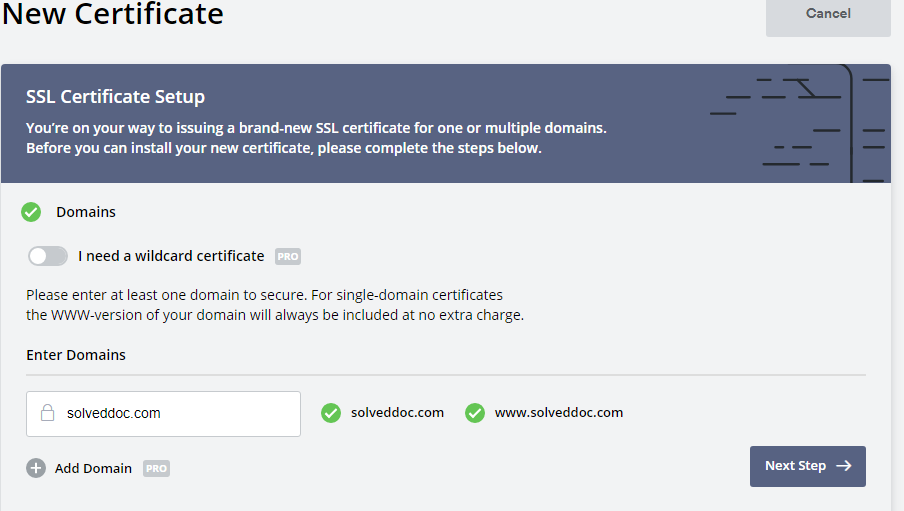
You will see this Green ticks for a valid domain name.
2. Validity (For how many time this ssl is valid )
Usually for 90 days its free and if you want for 1 year you have to buy.
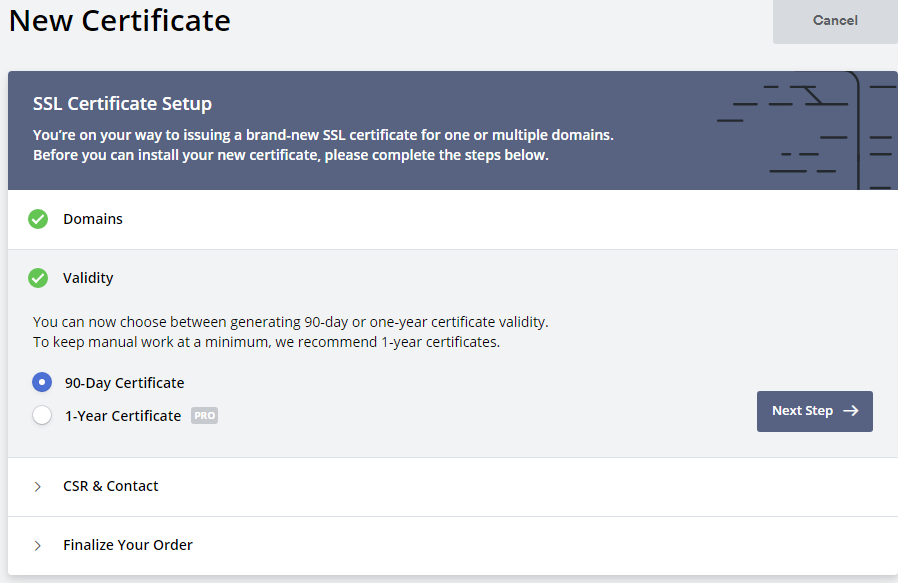
3. CSR & Contact
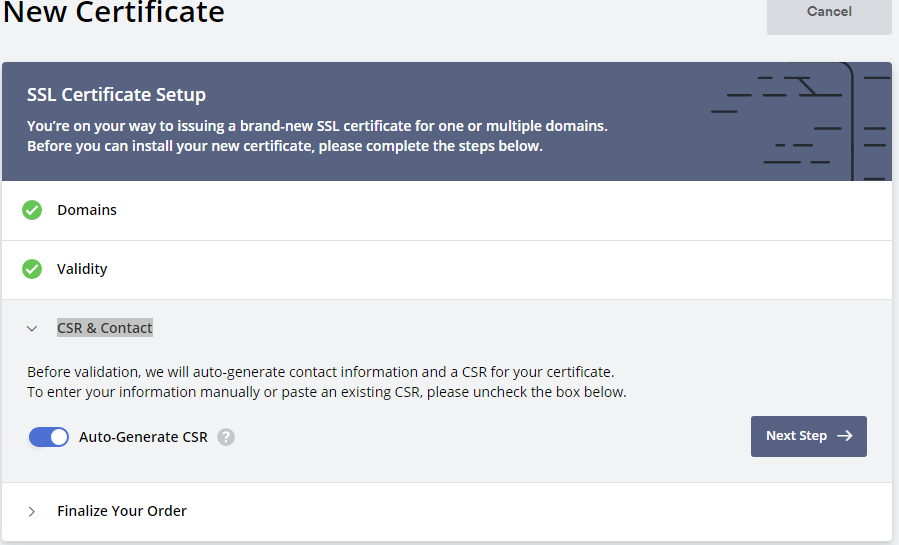
Finalize Your Order (you have to select )
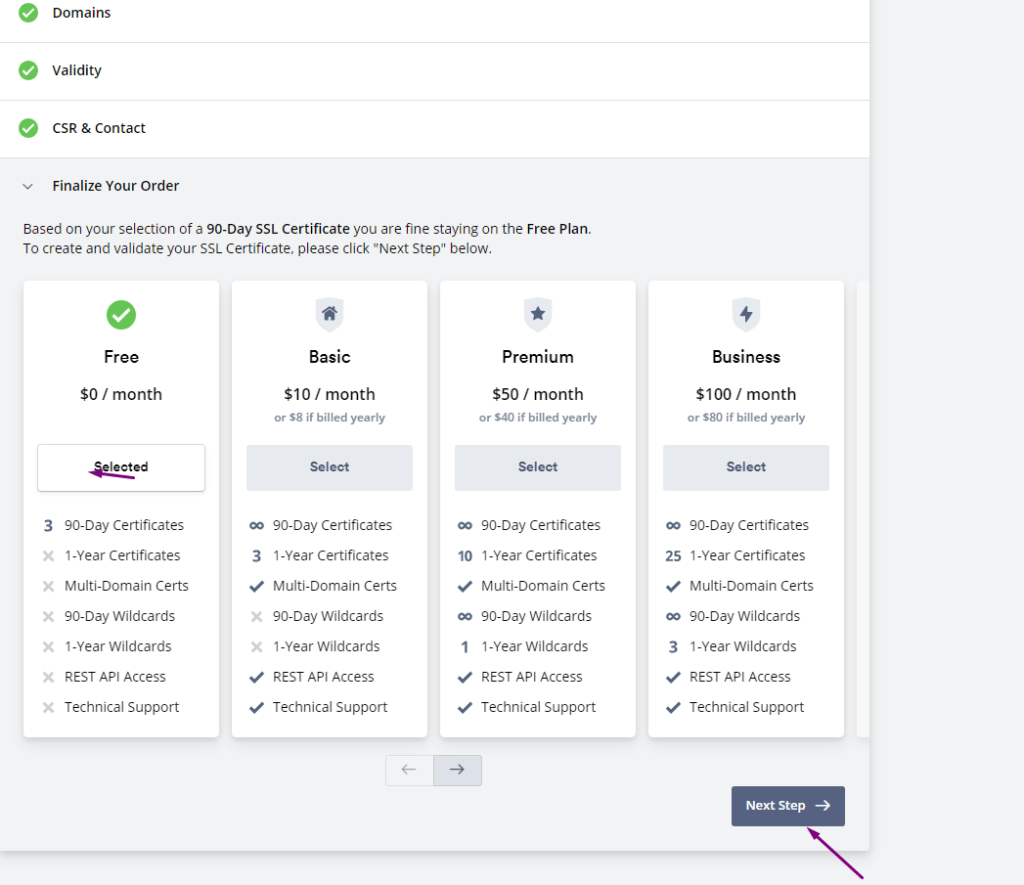
You have limit to issue three free ssl to your domain. Once the process of plan selection done now you have to verify your domain.
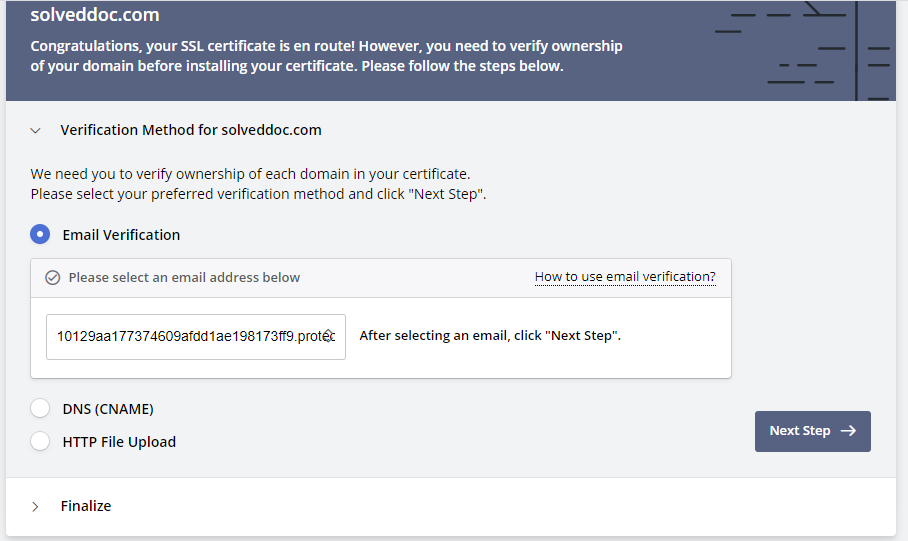
Verification Method:
ZeroSSL allow three types of verification:
- Email Verification
- DNS (CNAME) HTTP
- File Upload
You can chose any one you are comfortable with. If you have this email then use it, or update DNS records according to the second or upload the file to dns.
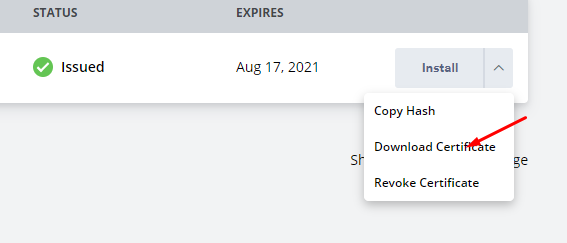
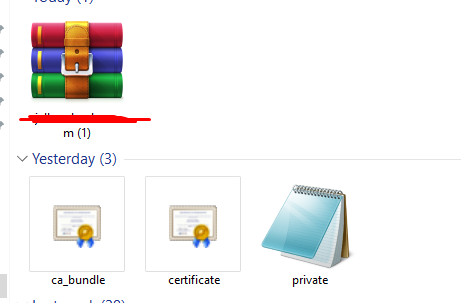
After this you will get a option to download SSL. you can download crteficate.
Add ZeroSSL to your Website?
When you got your SSL file there must be three files after extracting. ca_budle, certificate, private key
Add these files values according to the require mint on your site.
Read More: How to Change Upload limit On CyberPanel?